Selenium Maven
Maven is the latest build testing tool. It has several new features as compare to Ant, like dependency, etc.
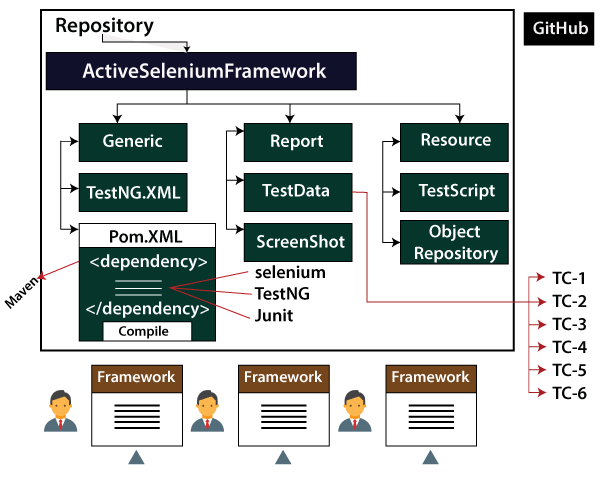
Maven is a project build or project management tool. It is used to check the compilation issues between framework components whenever multiple test engineer integrates their files into the same framework.
It always maintained the monitor, framework components, or build, and it provides build status modification, whenever modification happens in the framework.
It provides 'build success' message if no compilation issues in the framework or else provide 'build failure' message.
Maven has new features like dependency, which is used to download the dependency jar from the internet before the test execution.
With the help of Maven, we can execute the test scripts in the command line without an eclipse. And it always provides the framework folder structure.
For more information about Maven, refers to the below link:
https://www.javatpoint.com/maven-tutorial
There are two software available in Maven:
- Maven Eclipse Plug-in
- Maven command line plug-in
Maven Eclipse plug-in
It is a default plug-in for the latest Eclipse versions like Mars, Luna, oxygen, which is used to create a Maven project through Eclipse.
Installing Maven plug-in for Eclipse and use it with Selenium TestNG
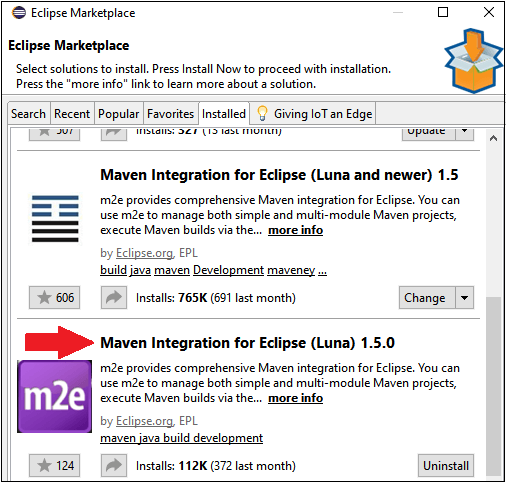
Most of the time, Maven plug-in is automatically installed in the Eclipse, but if it is not present, we will go to the Eclipse Market Place and search for Maven and download the M2E integrated version from there.
Steps to create Maven project
To create a Maven project, follow the below steps:
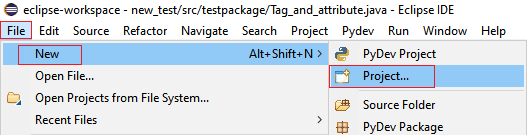
- Go to the File → New → Project
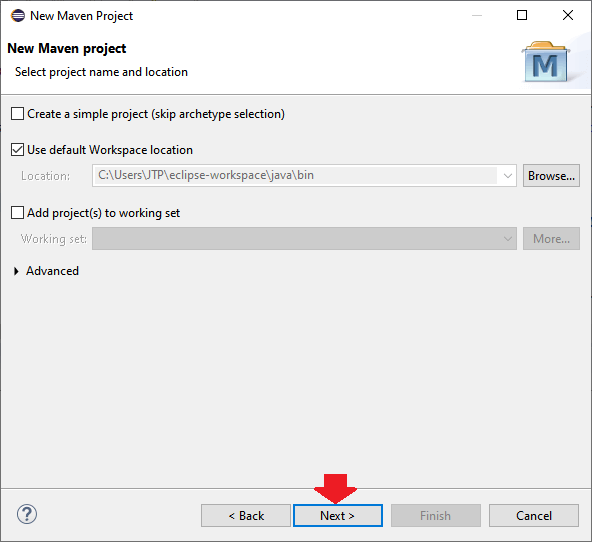
- Then, expand the Maven folder and select the Maven Project options, and click on the Next
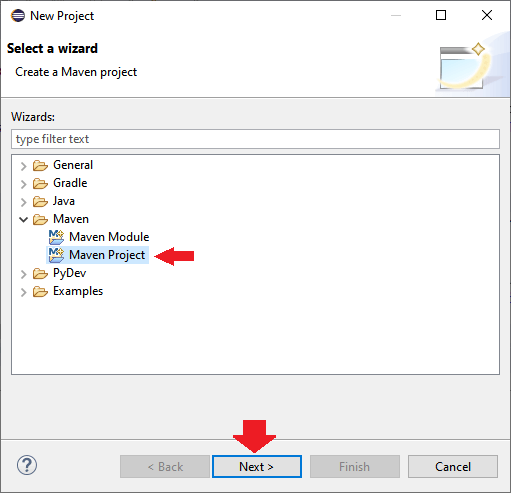
- Again click on the Next button for the further process.
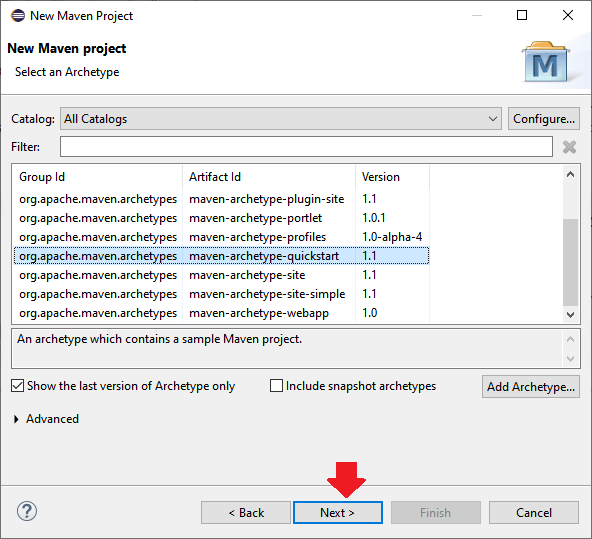
- Click on the Next button without doing anything.
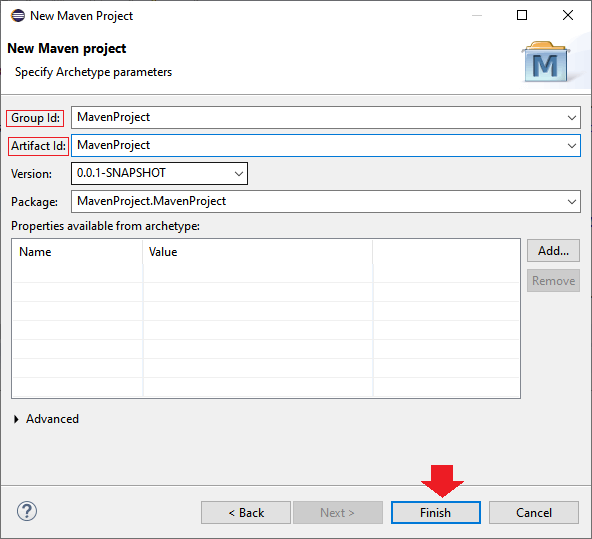
- After click on the Next button, we will provide the Group ID and Artifact ID in our case, and we will give the Group id as MavenProject and Artifact ID as MavenProject, and click on the Finish button as we can see in the below screenshot:
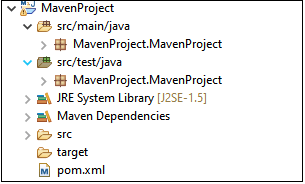
- Once we are done with creating the Maven project, our Maven folder structure will look like this:
Maven command line plug-in
It is used to execute the Selenium test script in the command prompt without an Eclipse, and this software should be installed explicitly.
Installation steps for Maven command line Plug-in
To install the Maven command line plug-in, follow the below steps:
Note: Before we will start the installation process of Maven, we will make sure that Java is installed and the environment variable is also set.
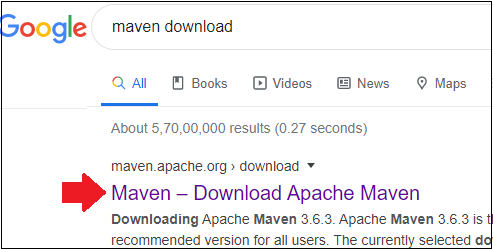
Step1: Download Apache Maven
- First, go to Google search for Maven download and click on the First link, as we can see in the below screenshot:
- Once we click on the link, it will navigate to the Maven community. And besides the Binary zip archive, click on the given link, as we can see in the below screenshot:
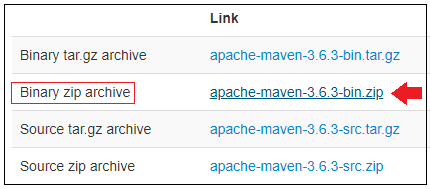
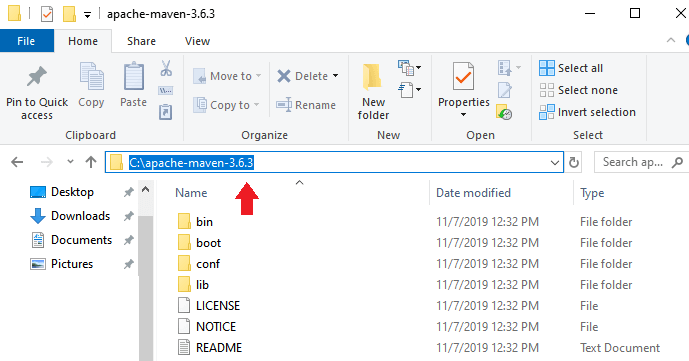
- Download the zip folder, and after that, unzip the folder and place it to the C drive, and copy the location of the folder.
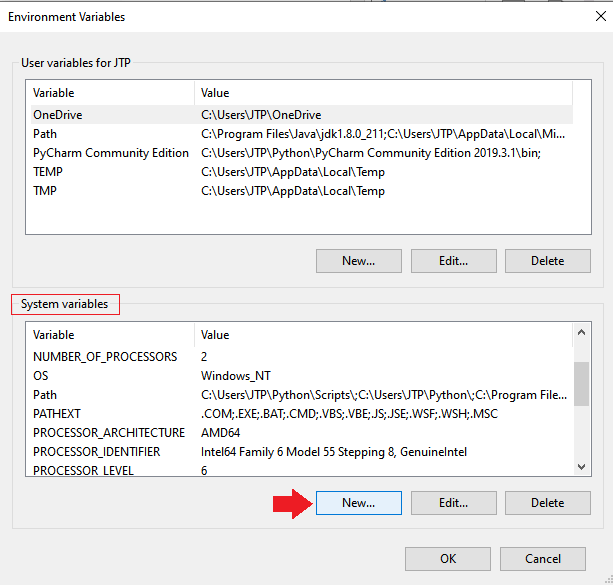
Step2: Add M2_Home in the System Variable
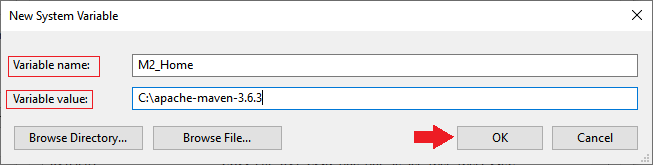
- Once we copy the location, we will go to the Environment Variables window and click on the New button on the System variable section, as we can see in the below image:
- After that, we will provide the Variable name and Variable value, and click on the OK
Step3: Add %M2_Home%\bin to the path
- Once we create the M2_Home system variable, we will find the Path variable, and click on the Edit button, as we can see in the below screenshot:
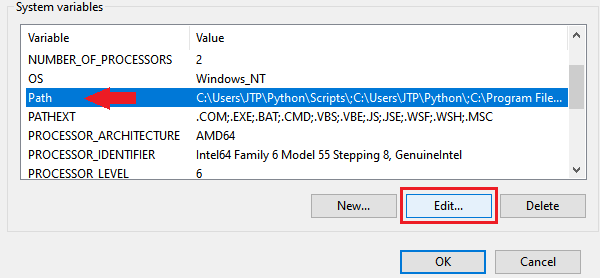
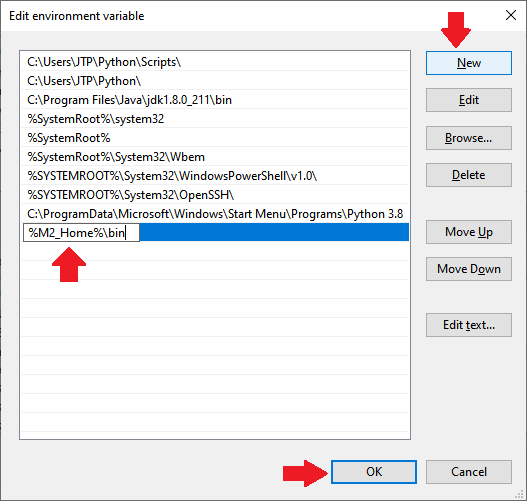
- The Edit variable window will appear on the screen, then we will click on the New button and %M2_Home%\bin value, and click on the OK
Step4: Verify
- After setting up the environment variables, we will check whether the Maven is installed successfully or not.
- For this, we will open the command prompt and type the below command:
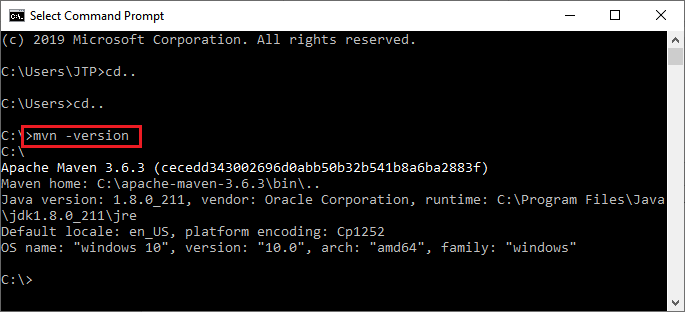
- And we can see in the above screenshot the Apache Maven is successfully installed.
How to handle or download dependency Jar using Maven
Before we start writing a Maven code, we need to add the general dependencies like TestNG and Selenium in the pom.xml file.
So for this, we will follow the below process:
- Automatically we get the Pom.xml file within the same project.
- To download the dependency jar for TestNG and Selenium, we should write a dependency code for all the tools in the Pom.xml file.
- To get the dependency code, go to the Google search and type "TestNG Maven dependency", and click on the given link.
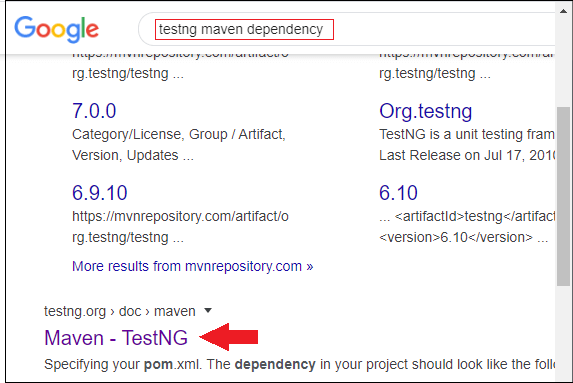
- And copy the dependency code of TestNG and paste in the pom.xml file.
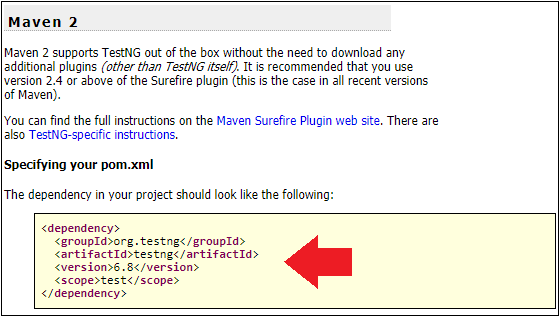
- In the scope section, change the value from test to compile and final dependency code will look like this:
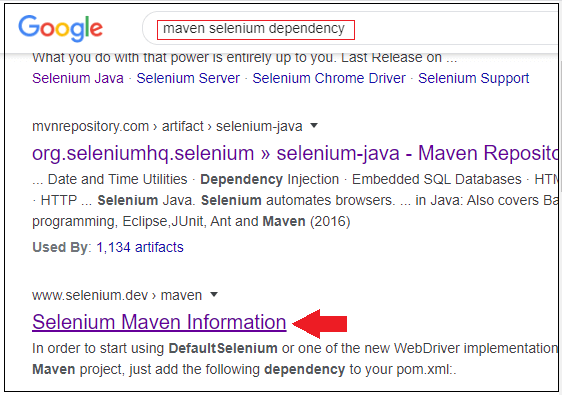
Then, we will add the Maven dependency for Selenium, so for this, we will follow the same process as before:
- Go to the Google and search for "Maven selenium dependency" and click on the given link as we can see in the below screenshot:
- And copy the dependency code from the link and paste inside the xml file.
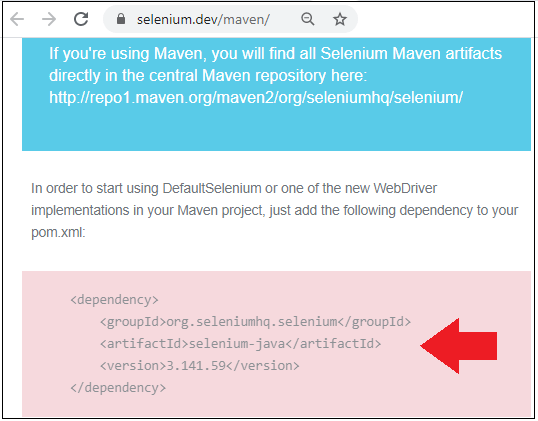
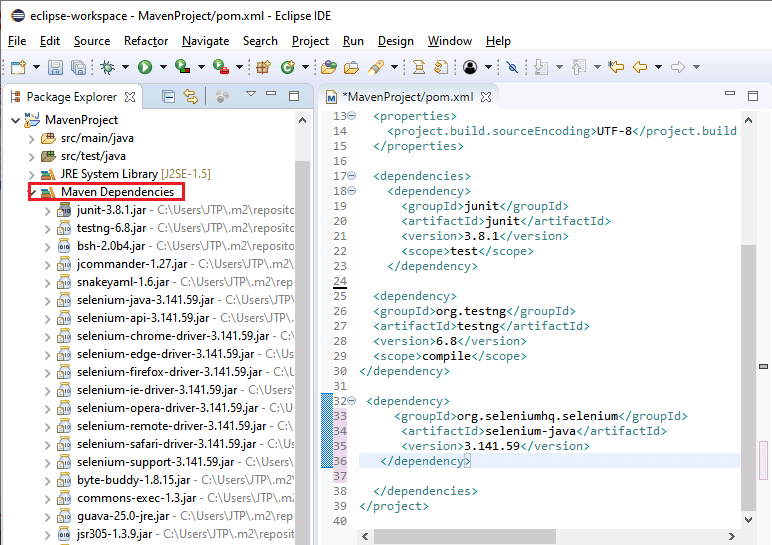
- After adding the Dependency code for TestNG and Selenium, the Pom.xml file will look like this:
- Then press ctrl+s to save the pom.xml file.
- Once we are done adding with the dependencies, we can see that all the jars file added in the Maven Dependencies folder under the MavenProject.
Execute Selenium code through Maven and TestNG
- We will write one sample test case, with the help of @Test, @BeforeTest, and @AfterTest TestNG annotations.
- First, we will launch the Google Chrome
- Then, navigate to the javatpoint website.
- And get the current page URL and title of the website with the help of getTitle(), getCurrentURL()
Note
getTitle(): This method is used to capture the title of the page.
getCurrentURL(): It is used to capture the current URL of the page.
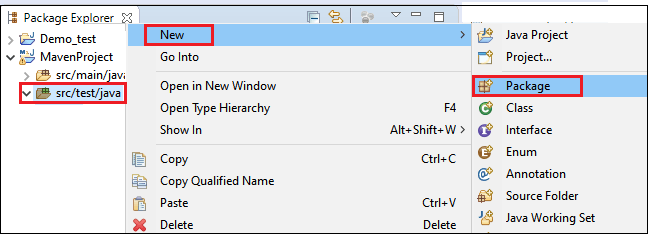
For executing the above test script, we will create one package in the MavenProject.
- To create a package in the MavenProject, we will right-click on the src/test/java → New → Package
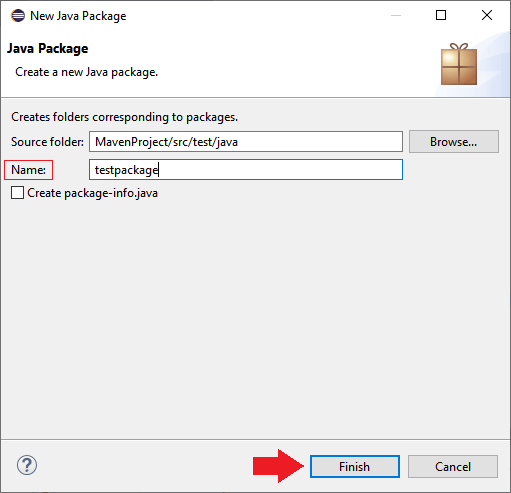
- After that, we will provide the name of the package as "testpackage", and click on the Finish button as we can see in the below screenshot:
- After creating a package, we will create one class.
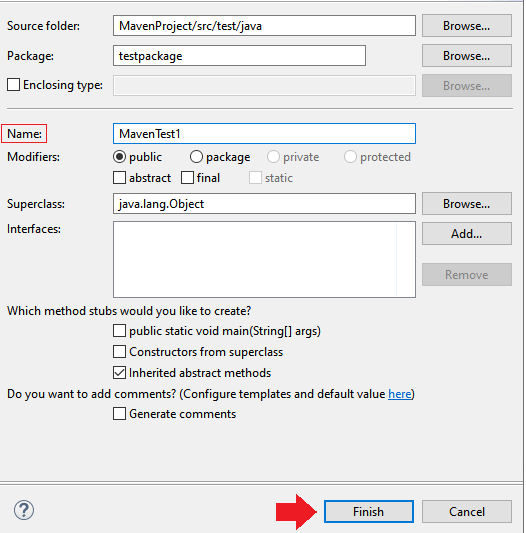
To create a class in MavenProject, follow the below process:
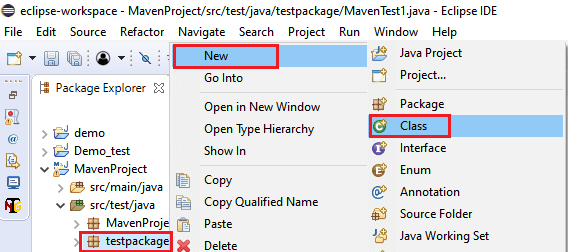
- Right-click on the newly created package, and select New then select Class from the given list as we can see in the below screenshot:
testpackage → New → Class
- And, provide the name of the class as "MavenTest1" and click on the Finish
After creating the package and class, we will start writing the code.
According to our code requirement, we will be adding multiple dependencies.
After adding the dependencies, our pom.xml file look like this:
And, here the sample code:
Execute the code
We can run above code in multiple ways:
- Run through TestNG
- Run through Maven
- Run through Command Line
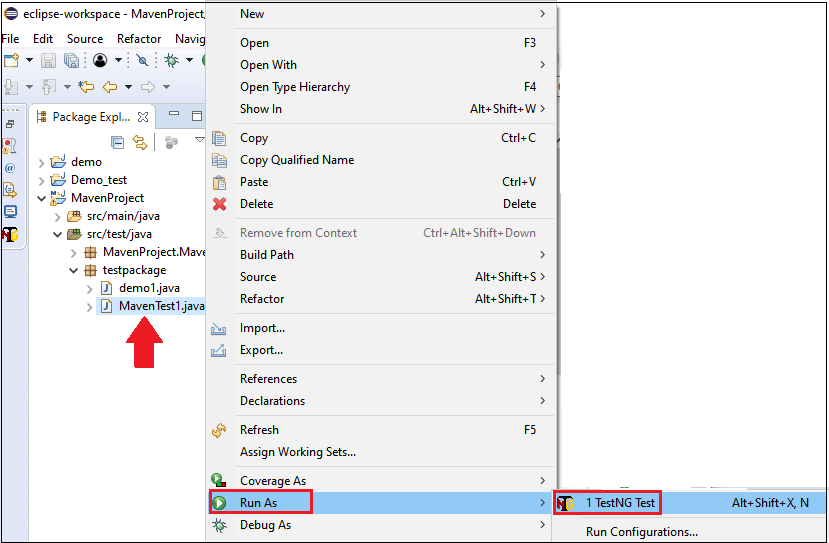
Run through TestNG
If we run the above code with the TestNG, we will follow the below process:
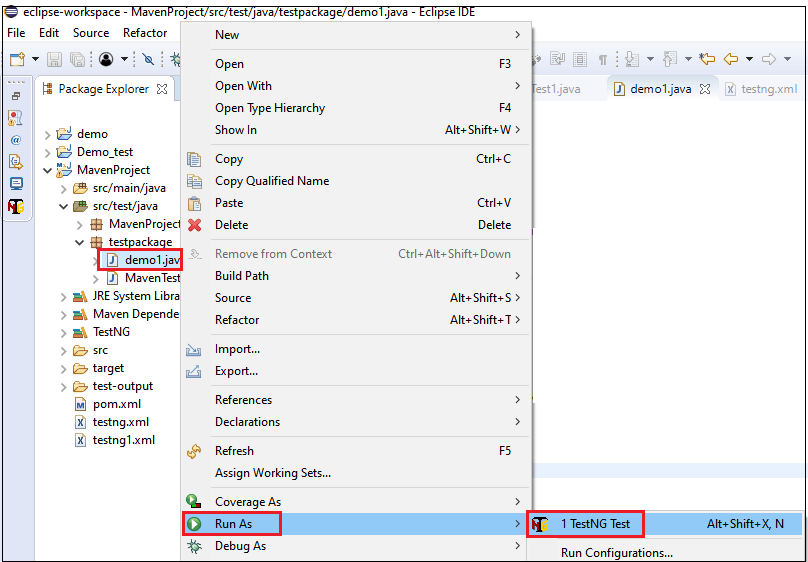
- Right-click on the java file, and select Run As → 1 TestNG Test as we can see in the below image:
- After running the code successfully, it will give the below output:
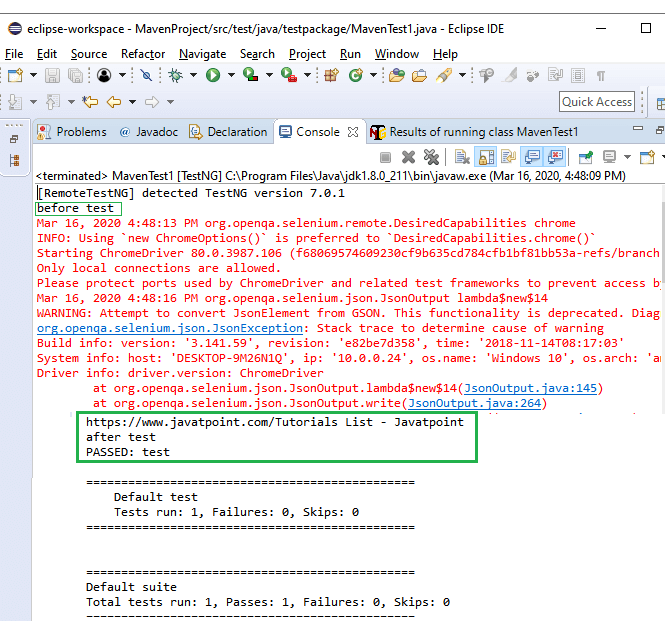
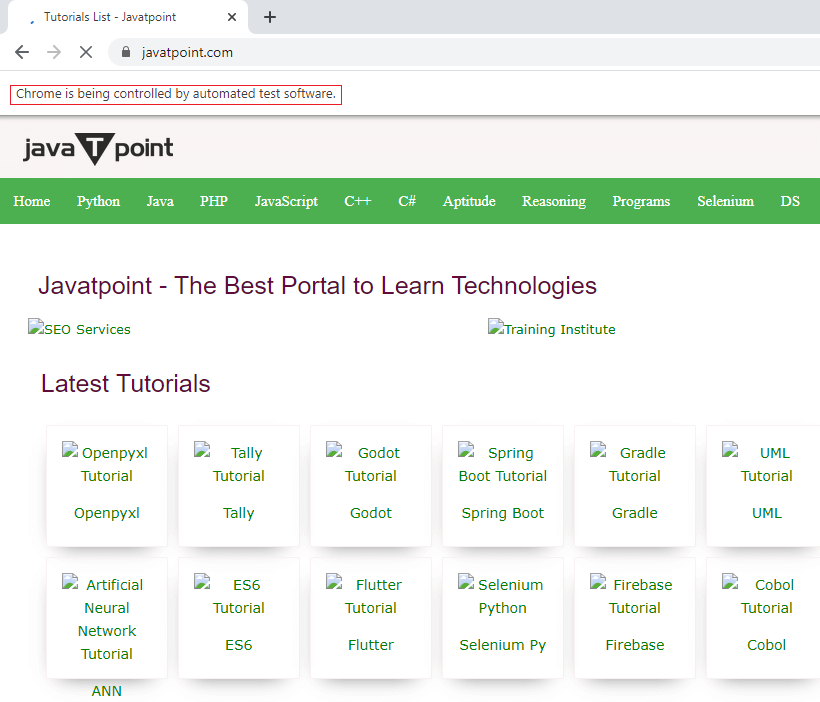
- And it will launch the browser in the console window as we can see in the below screenshot:
Run Through Maven
To run the same code through Maven, follow the below steps:
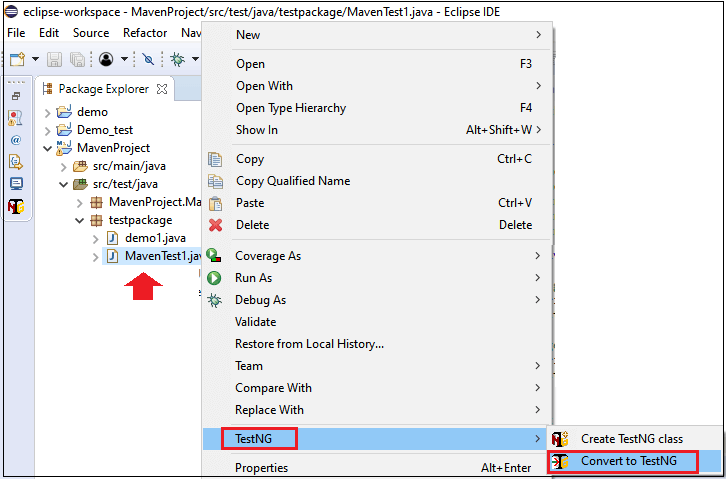
First, we need to convert the MavenTest1.java file into the TestNG File, for this follow the below process:
- Right-click on the java file and select TestNG and then select Convert to TestNG options in the given list.
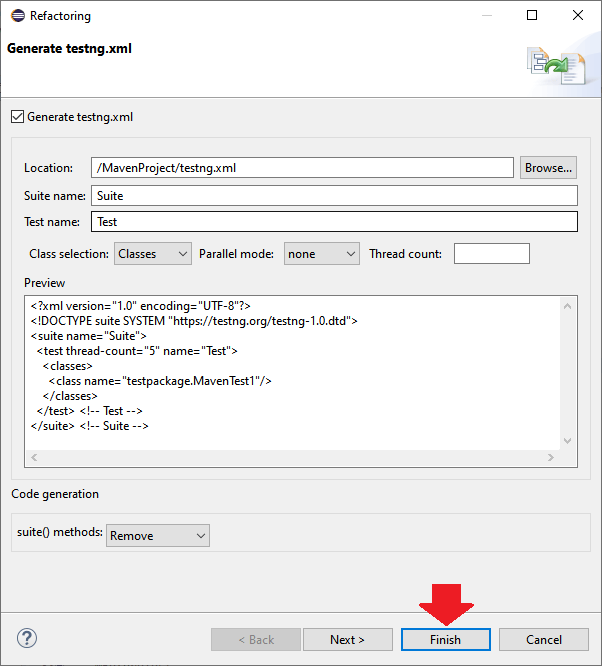
- Once we select the Convert to TestNG options, it will open the below window, and after that, we will click on the Finish
- And, the converted TestNG file will look like this:

After that, we will run the testng.xml file, so for this, we need to add the Maven Plugins in the pom.xml files.
So, we will add the three different plugins, which are as follows:
- Maven compiler plugin
- Maven surefire plugin
- Maven source plugin
Note:
The Maven compiler plugin is used to compile the source code of a Maven project. Maven test command will connect to the internet and download all the dependency jar into the .M2 folder local repository and then compile the entire selenium source code as we can see in the below image:

The Maven surefire plugin is used when we have to run the unit tests of the application.
The Maven source plugin is used to build the jars files that were having the .java source files.
After adding all the plugins, our pom.xml look like this:
- Save the pom.xml file and execute the code.
- For executing the above code, right-click on the MavenProject → Run As → Maven Test as we can see in the below image:

- When all the test cases are passed and Build successfully runs, it will give the below output:
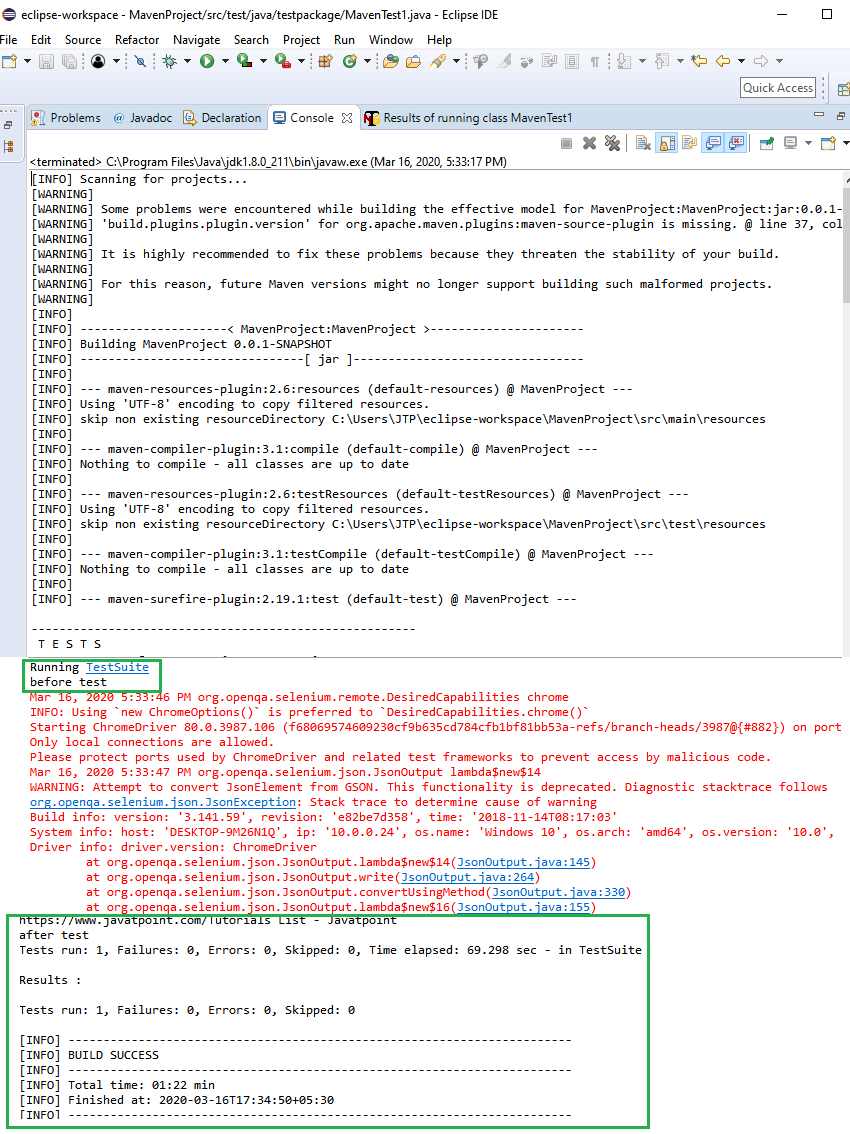
- And it will launch the browser in the console window as we can see in the below screenshot:

Run through Command Line
If we are using some remote machine with the help of Maven commands, then we need to go to the command prompt.
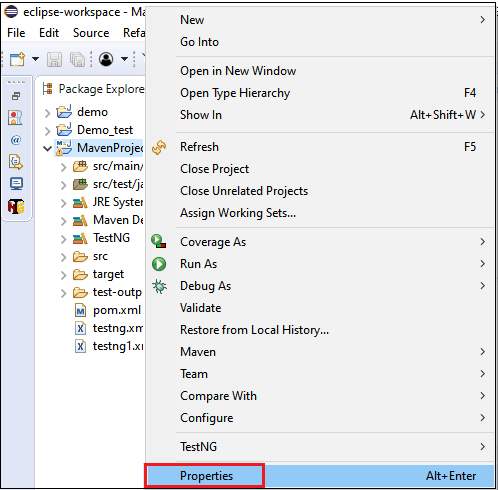
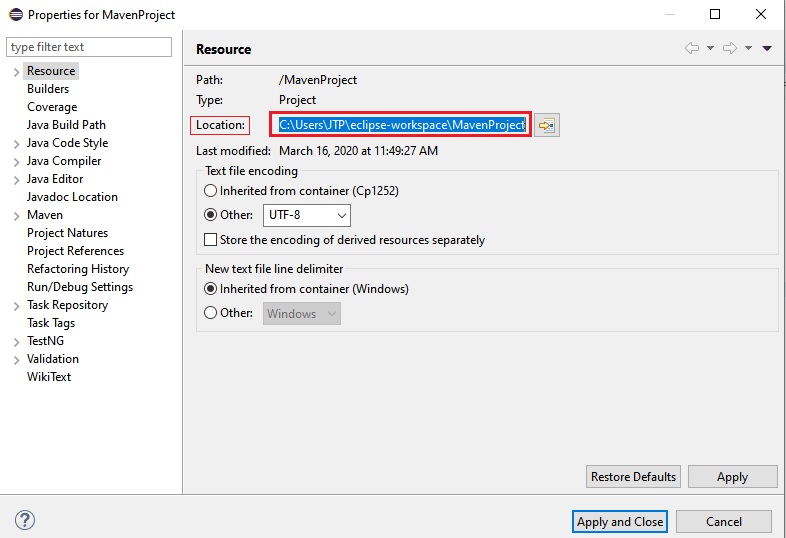
For this, we will go to that particular directory of the Maven project, so for that right-click on the MavenProject and select the Properties options from the given pop-up menu.
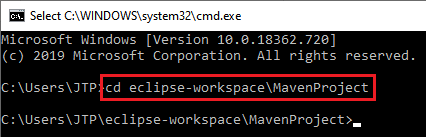
- And, then copy the location of the MavenProject and paste in the command prompt to reach the correct location of the file.
- And, then type the below command in the command prompt:
Once we are in the MavenProject, we will use some of the common commands of Maven, which are as follows:
| Maven commands |
Description |
| mvn clean install |
This command is used to generate, compile, and execute the jars files. |
| mvn test |
We will use this command when we have to execute the tests against the compiled source code with the help of an appropriate unit testing framework. |
| mvn compile |
It is used to compile the source code of the Maven project. |
| mvn package |
It will pack the executed code in a different format like Jar. |
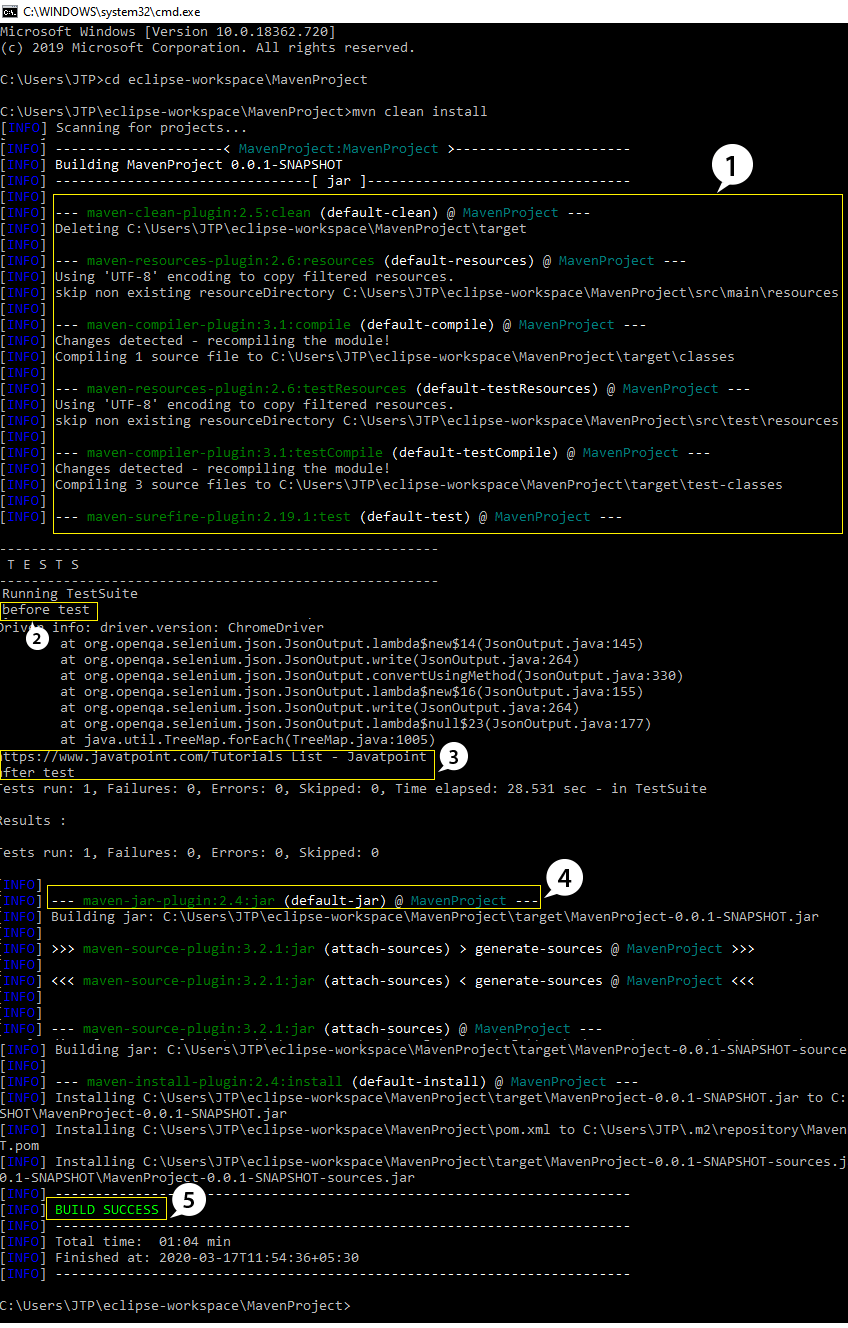
- Here, we will execute the mvn clean install
- And, this command will execute all the four life cycles of Maven, then execute the test case, and it will create the jar files. On successful execution, browser will be launched and build also got successful as we can see in the below screenshot:
Example 2: In this example, we simply create two unit test cases where we will be adding and subtracting the two variables (p and q) and running the code through TestNG and Maven.
Here the sample code:
Execute the code in TestNG
To run the code with the help of TestNG, follow the below process:
- Right-click on the java file, and select Run As → 1 TestNG Test as we can see in the below image:
- After running the code successfully, it will give the below output:
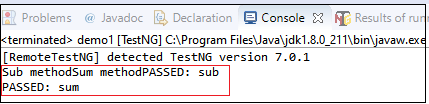
Execute the code through Maven
To run the same code with the help of Maven, follow the below steps:
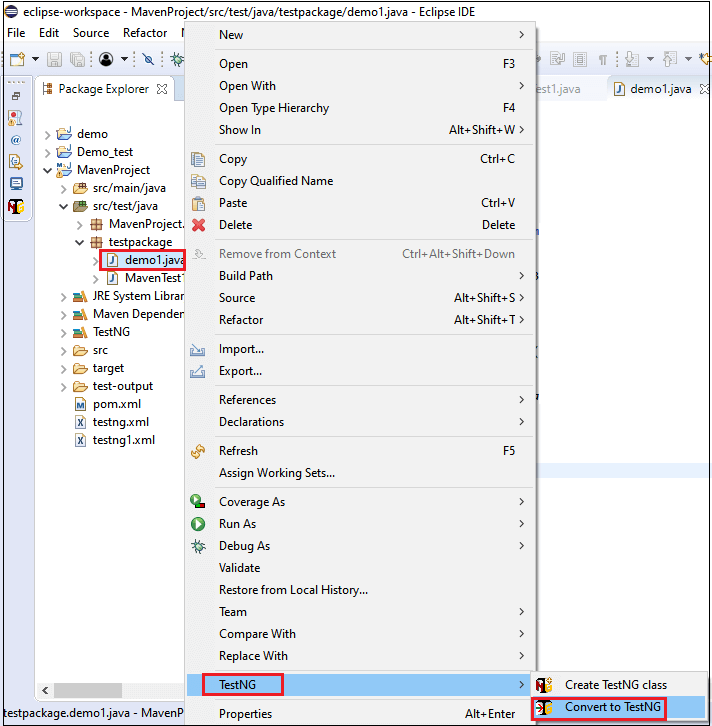
- First, we need to convert the Demo1.java file into the TestNG File, for this
- Right-click on the java file and select TestNG and then select Convert to TestNG in the given popup-menu.
- And, we can also change the name of the file according to our needs and click on the Finish

- After that, we will provide the path of the xml file to the pom.xml file through the plugins like we did it in the above example :
- After adding the Maven-surefire-plugin in the pom.xml file, we will save the file by pressing ctrl+s.
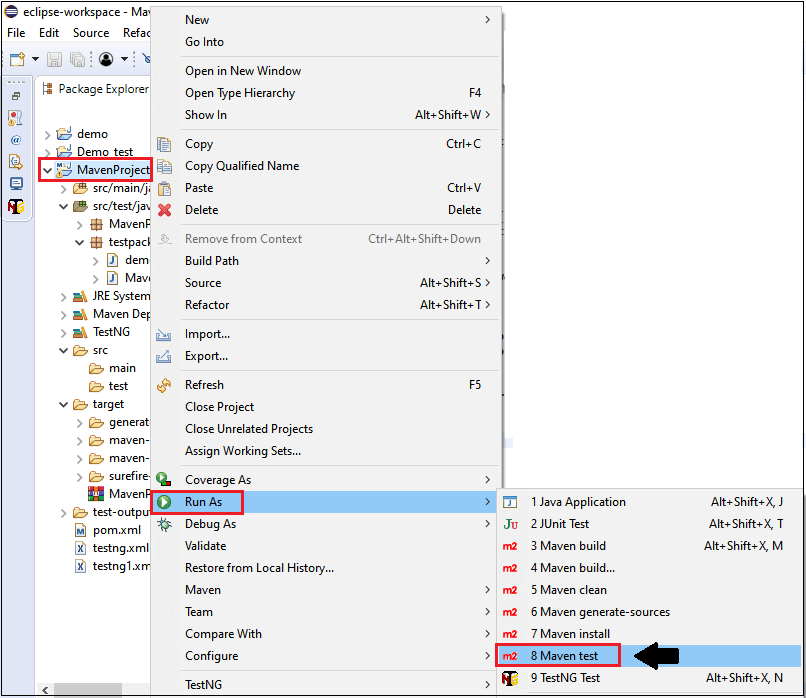
- And then, right-click on the MavenProject → Run As → Maven Test as we can see in the below image:
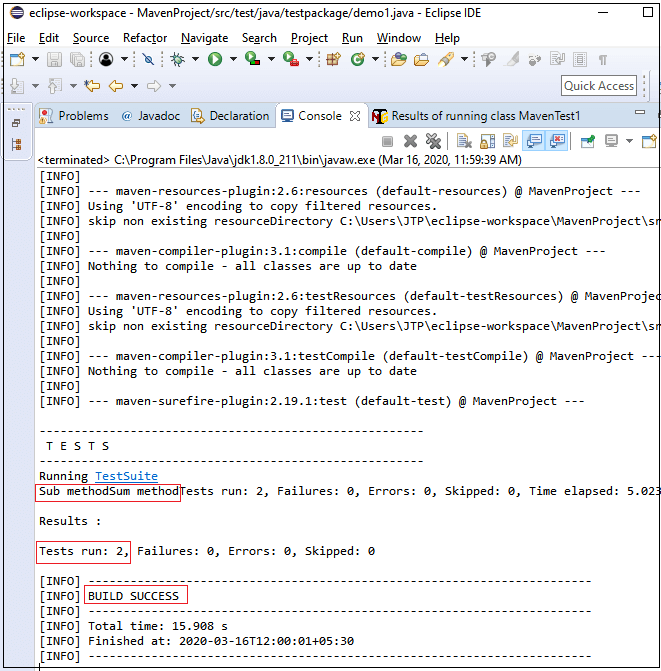
- When all the test cases are passed and Build successfully runs, it will give the below output:
|

 For Videos Join Our Youtube Channel: Join Now


