| |

How to set up the tax rules, tax rates, and tax zones in Magento 2?Magento 2 allows us to set up different tax classes and tax rates and carrying them together into the tax rules. We can also define the tax classes and assign them to products. Setting up the Tax Rules for the Magento 2 store is an essential configuration, so we need to apply them to each order on a specific website. The tax rule is the great association of product tax class, customer tax class, shipping address, tax rates, and amount of purchase. Based on the customer assigned to the customer tax class, the product belonging to other product class as well as the proposed tax rate, Magento 2 system will automatically calculate the tax for each order in your store. In this section, we will illustrate how to set up tax rates, or add tax rates for a Magento 2 store. Magento 2 offers a special offer of configuring the tax rates and alone that can be associated with various products in tax classes. Below are the steps to describe how to add and manage the tax rates and tax rules in Magento 2. Setup the Tax Zone and RatesTax rates are generally applied to transactions that take place within a specific geographical area. We add the tax rates for different zones means for different countries and states. The Tax Zones and Rates tool enables us to specify the tax rate for each geographical area from which we collect and remit the taxes because each tax zone and rate has a unique identifier. Store tax is calculated according to the store's address. The actual customer tax calculates after the customer completes the order information. To set up the new tax rate, follow the below steps: Step 1: To create the new Tax Rate, login to the Magento 2 Admin Panel. Step 2: On the left sidebar of Admin panel, Navigate to STORE >> Taxes >> Tax Zones and Rates. Tax Zones and Rates screen will open in front of you. 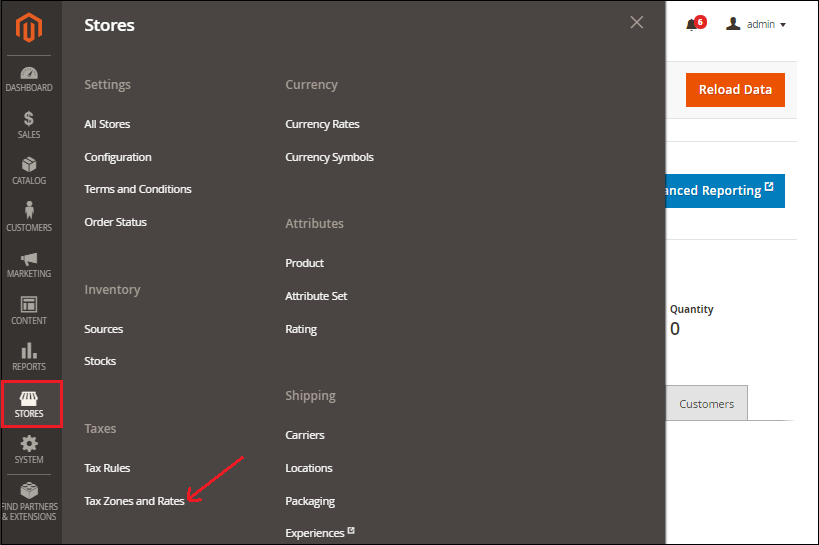
Step 3: In order to add a new Tax Zones and rates, click on the Add New Tax Rate button at the top-right corner. 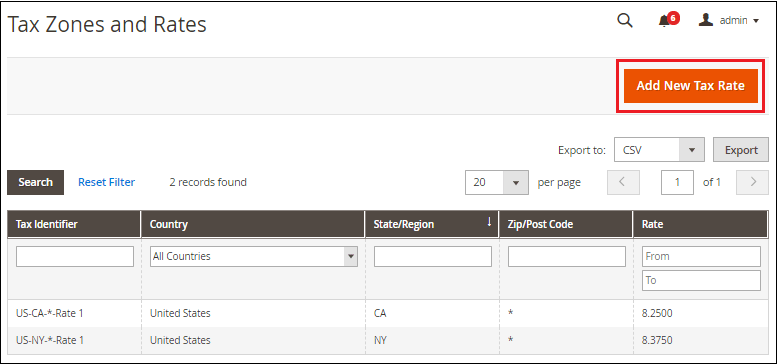
Step 4: Now, we are able to configure the tax rate. Fill the required information in the given fields. 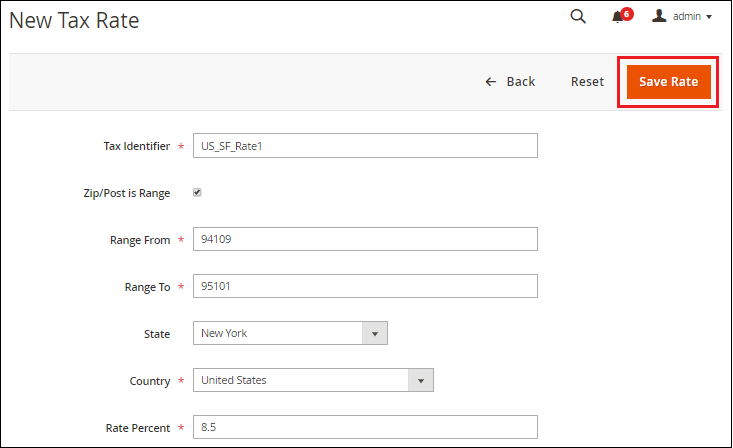
To set up the new tax rate: Tax identifier: Tax identifier is a required field, which defines the title of the newly created tax rate. It is used to name your tax rate with which we can identify our tax rate easily. The Name rate is separated by the hyphens or underscore. Zip/Post is Range: Mark this field to apply the tax rate in the particular Range of Zip/Post Code for the state. For example,
Zip/Post Code: Provide the zip code to which you want to apply the tax rate. If you set asterisk (*) sign to this field, then the Tax Rate will apply to all zip codes of the selected state. State: The state on which you want to impose the Tax Rate. If the country does not have States, this option will be grayed out. If we set asterisk (*) sign to the State field, then Tax Rate will apply to all states. Country: Select the country on which you wish to impose the Tax Rate. Rate Percent: The customer will need to pay the Tax Rate percentage. This field determines the actual percent of the tax rate which we need to apply for the specified Step 4: When all the information is filled successfully, click on the Save Rate button to save the Tax Rate. 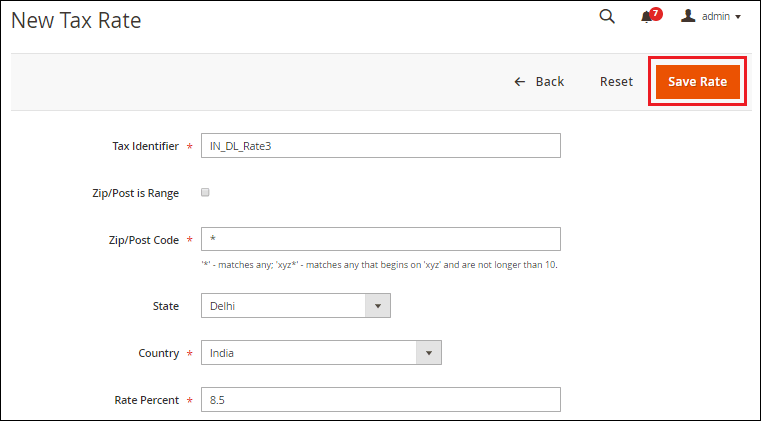
To apply the tax rate, we need to create tax rules. To create the tax rules, see the below in the section. Setup the Tax RulesThe Tax Rule is a combination of customer tax class, product tax class, and tax rate. Each customer is assigned to a customer class, and each product is assigned to a product class. Magento analyzes each customer's shopping cart and calculates the tax according to the product, customer classes, and region. To create the tax rule, follow the below steps: Step 1: Login to the Magento 2 Admin Panel. Step 2: On the left sidebar of the Admin panel, Go to STORE >> Taxes >> Tax Rules. A Tax Rules screen will open in front of you, which will have the list of existing tax rules. 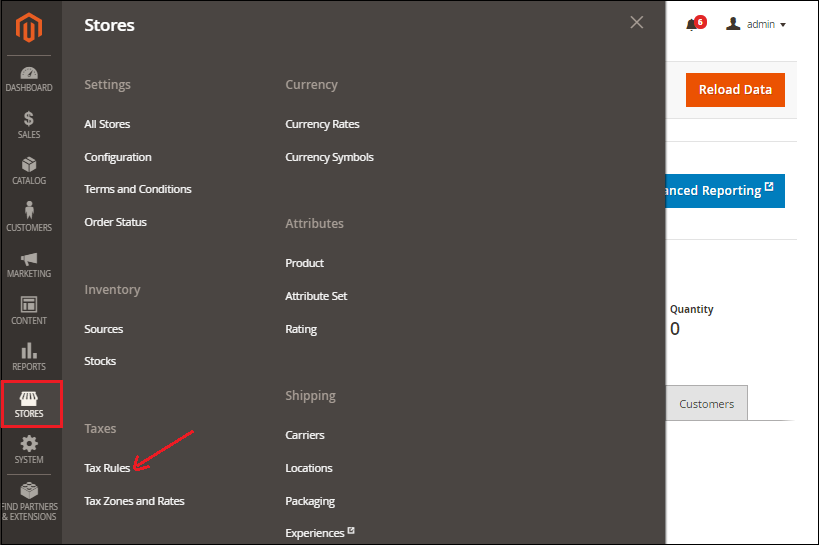
Step 3: In order to add a new tax rule, we need to click on the Add New Tax Rule button on at the top-right corner. 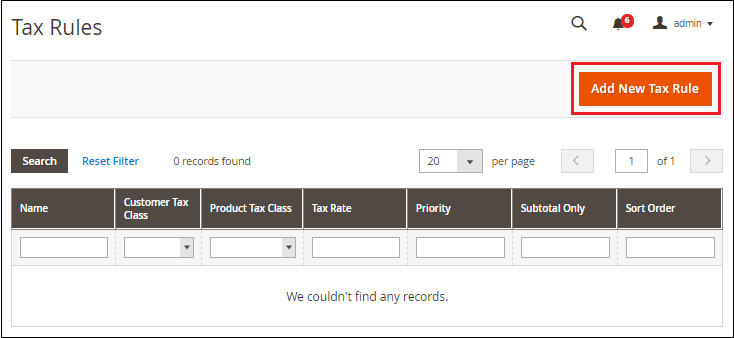
Step 4: Fill the required information in the given fields. 1. Complete the Tax Rule Information 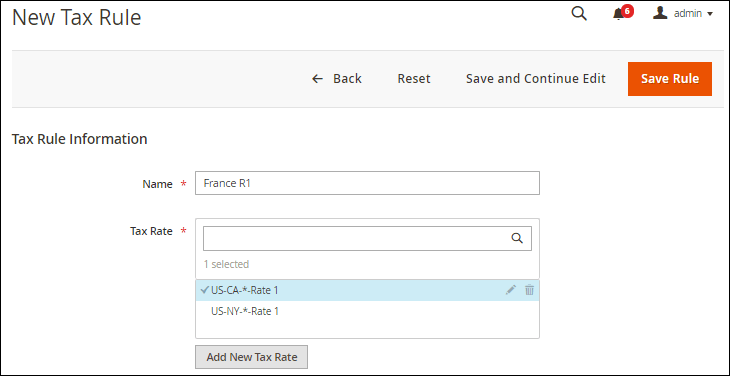
Name: Provide the name of tax rule in the Name field, which is recommended to be named as an easy remembrance of what the rule contains. Tax Rates: The Tax Rates field contains the collection of the tax rates, which are existing on our Magento 2 store. We can select one or more tax rates according to our needs. We can edit or delete the existing tax rate by clicking on the Edit or Delete icon corresponding to the tax rate. We can also define new tax rates by clicking on Add new Tax Rate button. 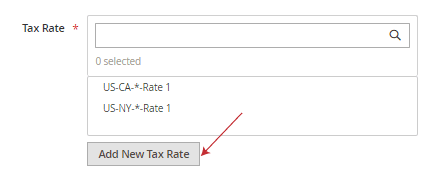
2. Complete the Additional Settings Expand the Additional Settings section. 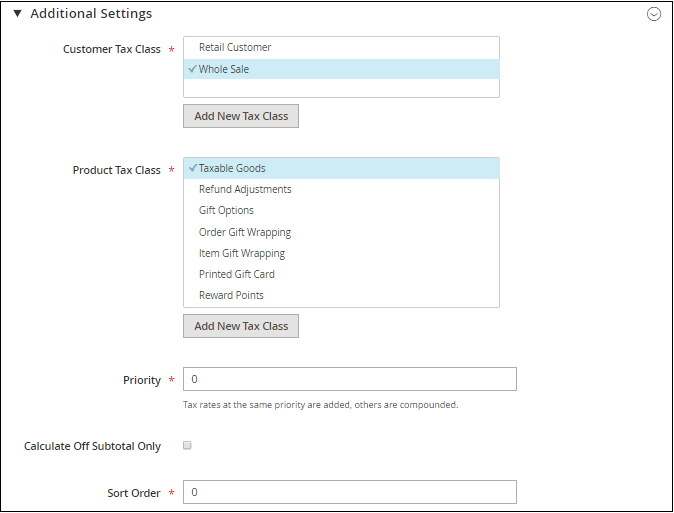
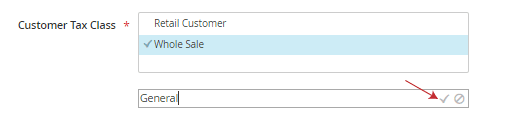
Customer Tax Class - Select one or more customer tax class if you want to apply the tax rule for multiple customers. We can edit an existing customer tax class by clicking on the Edit icon and even create a new tax class from the Add New Tax Class button.
Here you can see how the tax rules are applying for the customer group. Go to CUSTOMERS >> Customer Groups. 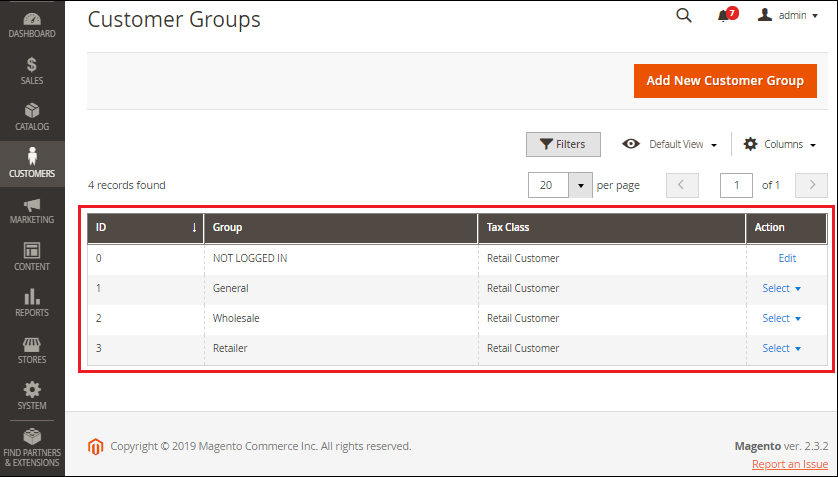
Product Tax Class - It is the tax class that is associated with the product. Select one or more product tax classes to which the rule applies with the Ctrl key. We can also modify an existing product tax class by clicking on the Edit icon and even create a new tax class from the Add New Tax Class button. Priority: Set the priority to determine this tax to be applied first when more than one tax is enabled. This will prioritize your tax rules with other existing tax rules anyhow shares the same conditions. Calculate off Subtotal Only: Mark this field to calculate the tax according to the order subtotal. This means if you want to apply the tax on the subtotal, then mark this field. Sort Order: It will determine the sequence in which we need to apply tax rules. In this field, enter a number to indicate the order of this tax rule when listed with others. For completing the structure of tax rule, we have the import and export the tax rates. We can easily import or export our files from anywhere. 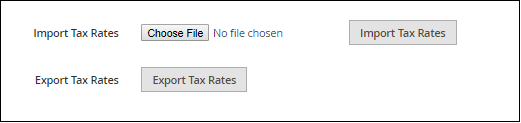
Note: Select the Import Tax Rates if you have several tax rates that need to set up but do not want to edit them manually.Step 4: Click on Save Rule when completed. We can see the newly made tax rules on the main screen. 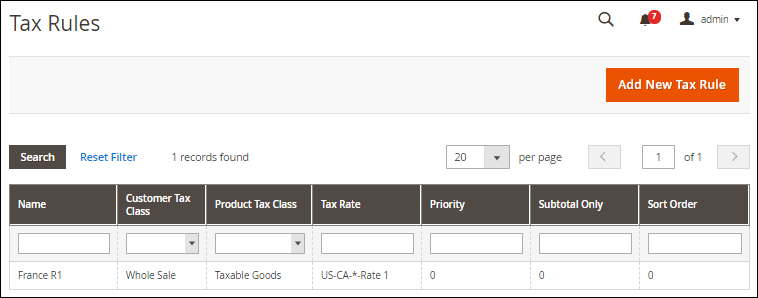
For additional settings regarding the Taxes calculation of your store, you need to visit the STORES >> Configuration section at backend and then access the Sales >> Tax.
Next TopicSetup shipping methods in Magento 2
|
 For Videos Join Our Youtube Channel: Join Now
Feedback
- Send your Feedback to [email protected]
Help Others, Please Share


