Magento - Setup NewsletterNewsletter creation is a part of the communication process with the buyers or customers. Customers can subscribe to the newsletter using Magento. Customers can also sign up for the newsletter while creating a new customer account that contains the checkbox for sign up. To create newsletters, you need to enable the newsletter option to make sure that the customers have confirmed to receive the newsletter. The newsletter is an essential document used to inform the clients of your store's activities like promotions, discounts, or loyalty programs. To enable and configure the newsletters, follow the below steps - Step 1: Log in to Magento Admin Panel. Step 2: On the left sidebar, Go to Stores >> Configuration. 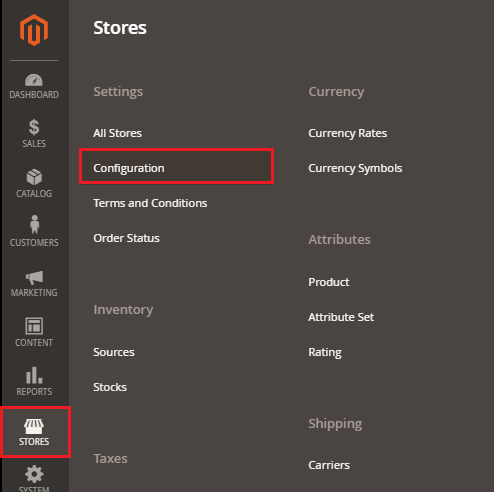
Step 3: On the left navigation bar, expand the Customer section, and click on Newsletter. 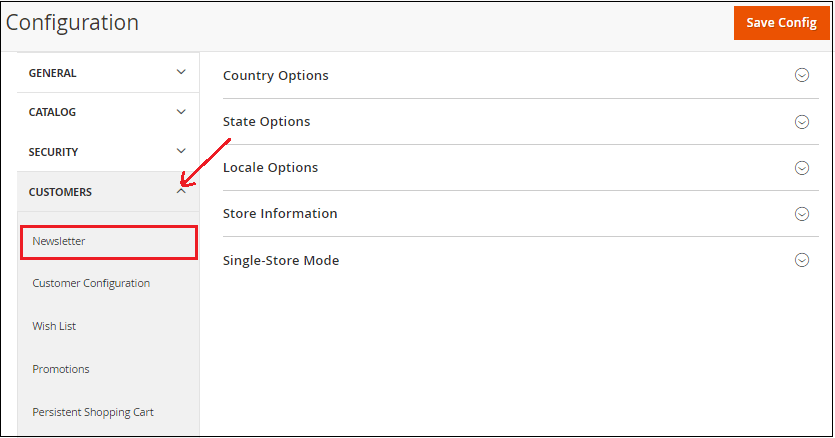
Step 4: Expand the General Options section and select Yes Enabled field to enable the newsletter. 
Newsletter is enabled. Now you can create newsletters. Step 5: Expand the Subscription Options section. Clear the Use System Value corresponding to Need to Confirm field and set Yes in it. Click on the Save Config button to save the changes. 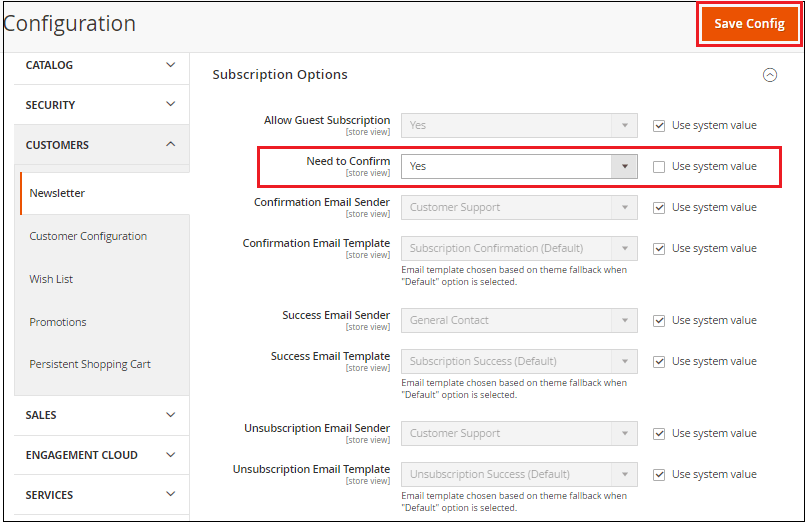
Note: Yes, option specifies that customers want to subscribe to the newsletter.Creating Newsletter TemplateYou need to create a newsletter template before sending a newsletter to the customer. To create the newsletter template, follow the below steps - Step 1: Log in to Magento Admin Panel. Step 2: On the left sidebar, Go to Marketing >> Newsletter Template. 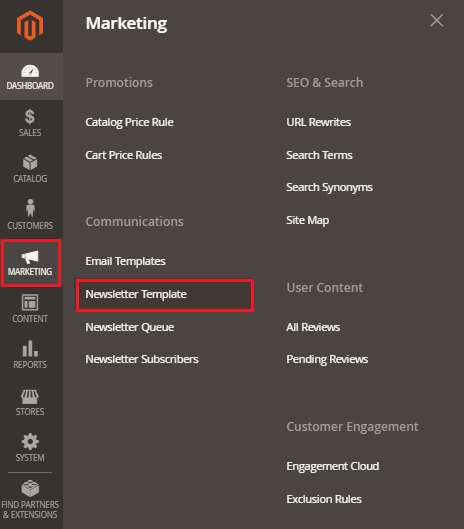
Step 3: Click on the Add New Template button. 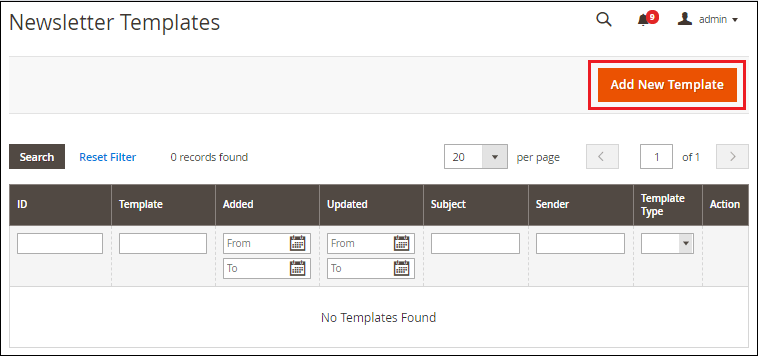
Step 4: It will show some settings related to the newsletter template. Fill up all the required fields and click on the Save Template button, as shown in the below screenshot. 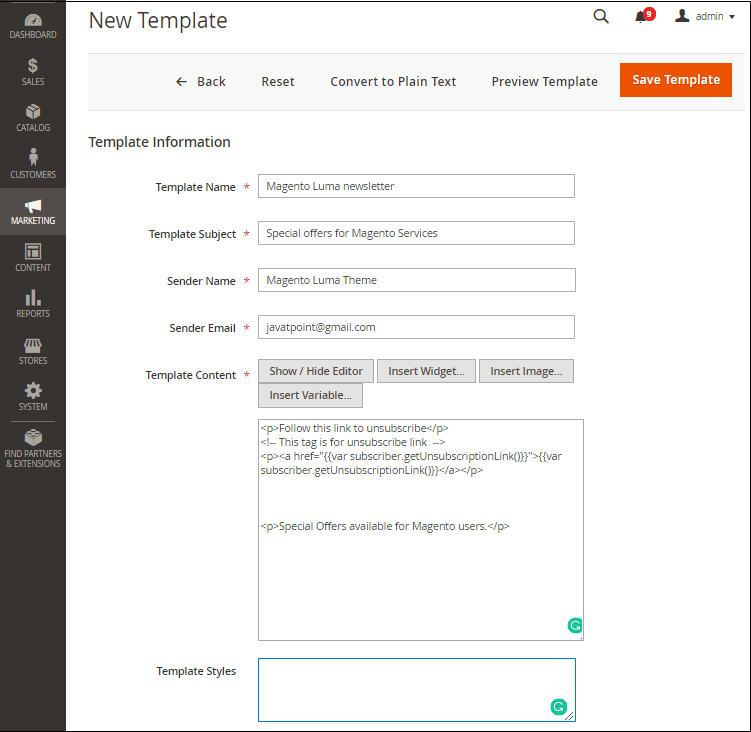
Template Name - Provide the name of your template for internal reference. Template Subject - Specify the reason or the purpose for sending the newsletter to customers. Sender Name - Specify the name of the sender. By default, CustomerSupport is mentioned. We need to provide our details here. Sender Email - Enter the email of the sender, which is to be sent to the customer. Template Content - It provides a text editor to which you can add the HTML code of the body of the email. Note that you are not allowed to erase the unsubscription link. You can also insert the image, widget, or variable here by clicking on respective their insert button. 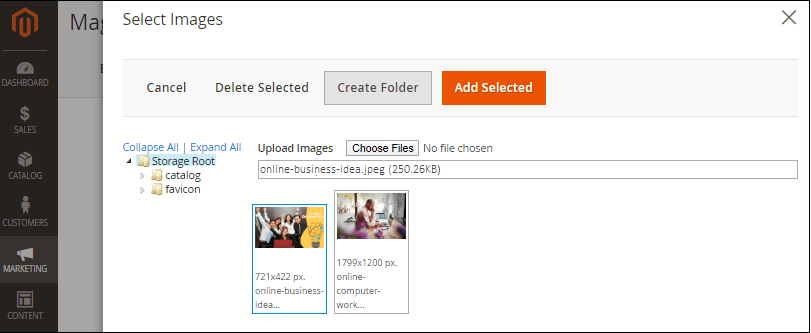
Template Styles - This is for formatting your newsletter content. Template styles are done by the CSS experts because some sort of CSS code is applied here. Step 5: Click on the Preview Template button on the top right corner near the Save Template to preview the newsletter. Then you can easily do the required improvisations if you need to. 
See the below screenshot. The template will look like this. 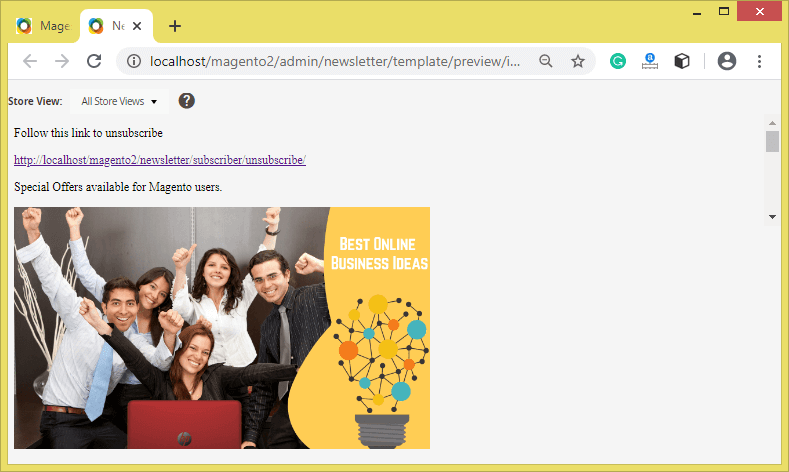
Step 6: Click on the Save Config button. Newsletter Template is created successfully. Now, it is ready to be sent to your customers or subscribers. 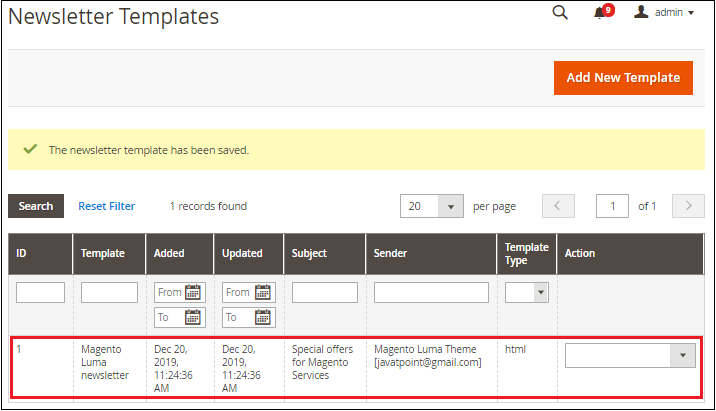
Send NewsletterNow, you can send the newsletter to your subscribers. To send, follow the below steps: Step 7: On the Newsletter Template page, select the action Queue Newsletter from the drop-down list with respect to the newsletter template created by you. 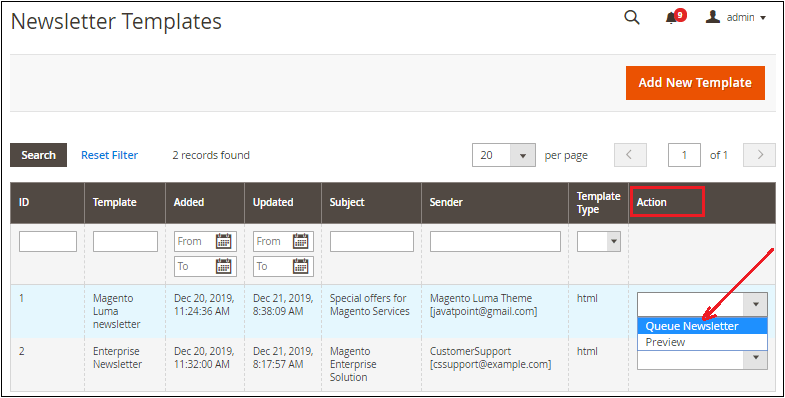
Step 8: A page will pop up that will provide some settings, as shown in the following screenshot. Fill up the fields and click on the Save Newsletter button to send the newsletter to subscribers. 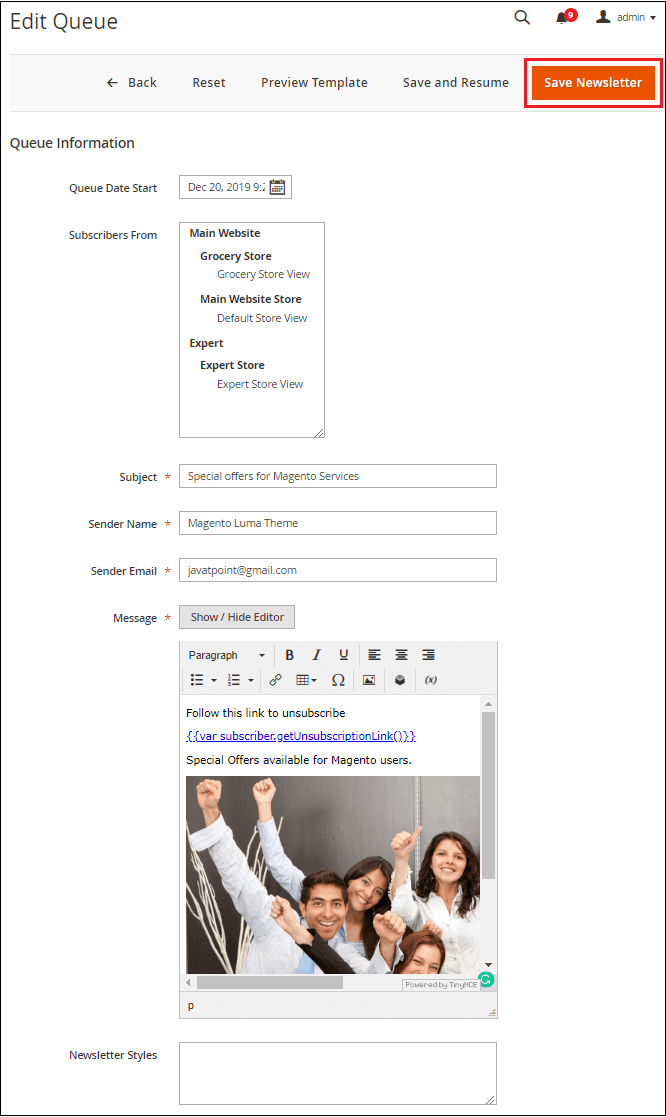
Queue Date Start - Select the date when you are going to start sending your newsletter. Subscriber From - It shows both current and former subscriber list. Subject - The subject field specifies the subject of the email. Sender Name - It specifies the name of the sender that is to be sent to the customer. Sender Email - It specifies the email of the sender that is to be sent to the customer. Message - It provides the text editor that allows entering a message of the email.
Next Topic#
|
 For Videos Join Our Youtube Channel: Join Now
Feedback
- Send your Feedback to [email protected]
Help Others, Please Share


