| |

Shade command in Solid WorksShows a model view that is darkened. A full face is illuminated when you choose a face on a model in shaded view. 
You can control:
The sketch plane appears as a transparent plane in shaded view. The Display plane when darkened option regulates this action. Choose Sketch under Tools > Options > System Options. Putting a Model on Display in Shaded View Choose one of the following actions to display a model in shaded view:
Drawing's shading To shade the entities in the current drawing's view, use the Shade command. The drawing model appears as a wireframe with flat shading (equivalent to the Shade View command with the options Flat and Flat with Edges). The model's light sources are not considered in the shading process. Shading the illustration:
The Shade View Mode settingChange the look of 3D models by using the Shade View command. The shade mode is set by:
How to Remove Hidden Lines Use the Hide View command to show the drawing's current view without the concealed lines. Hidden lines are only removed from the active view tile when the drawing has several tiled views open. Getting rid of hidden lines Choose one of these:
Revealing concealed lines:
Drawing ProductionTo render your 3D drawing as it will look after construction, use the ARender command. Rendering will add realism by:
Making the drawing:
Using SOLIDWORKS' Shaded Sketch Contours We'll go through the fundamentals of the Shaded Sketch Contours tool. That is important to note because not everyone uses this function to its full potential. Closed sketch contours and sub-contours can be shown as shaded entities by using the Shaded Sketch Contours option. Just the closed sketch forms are tinted when the Shaded Sketch Contours setting is used. Let's look more closely. We'll begin in SOLIDWORKS using a previously made drawing to get things moving. Initially, we need to confirm that the functionality is activated. Go to the Command Manager for Sketches to accomplish this. The ability to turn on and off the Shaded Sketch Contours is included here. All of the sketch's contours are darkened once it is turned on. The shading becomes darker when one contour is inside of another. 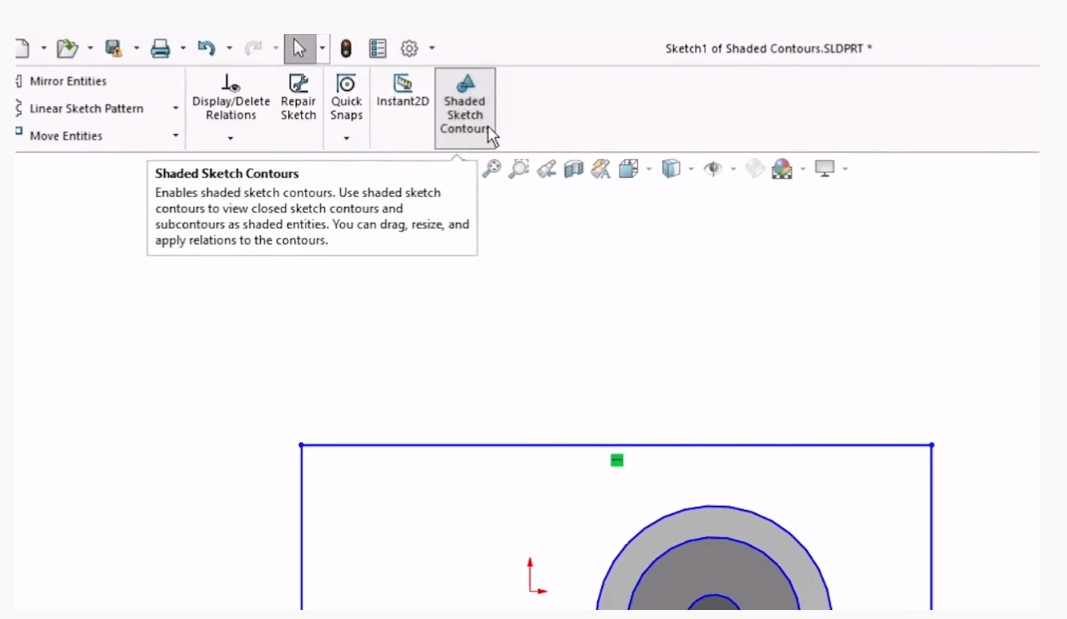
The main benefit of this feature is that it may be used as a gauge to determine whether your contours are closed. These minute, unnoticeable gaps can occasionally be unintentionally left in our designs. This function makes it simple to examine your work twice. You'll see that nothing is shaded in the rectangle that encloses everything in the example below. This serves as a notice that the contour is available to us. 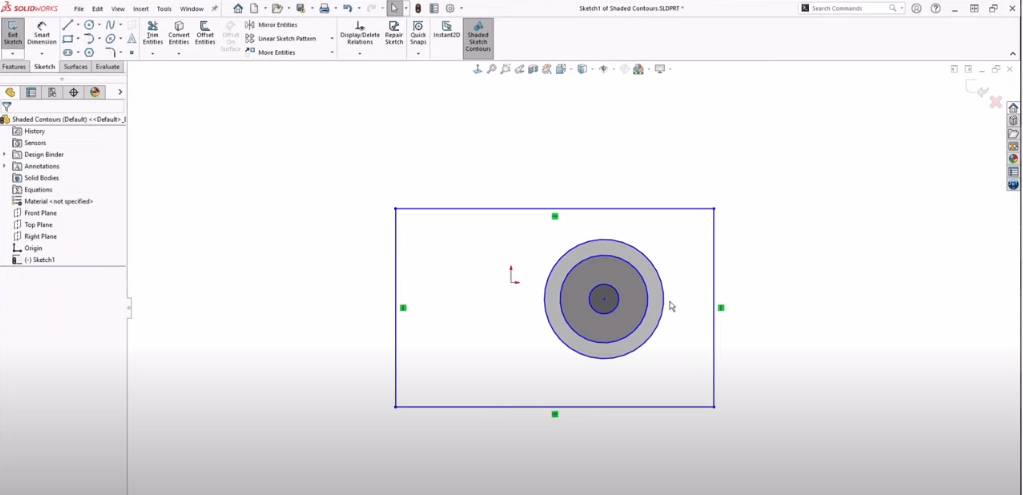
You'll see that nothing is shaded in the rectangle that encloses everything in the example below. This serves as a notice that the contour is available to us. To get things going, we'll start in SOLIDWORKS using a previously created drawing. We must first make sure the functionality is turned on. To do this, go to the Command Manager for Sketches. The Shaded Sketch Contours feature is available here and may be turned on and off. When it is on, the sketch's outlines are all darker. When two contours are inside of one another, the shading gets darker. This feature's major advantage is that it may be used to test whether your contours are closed. To quickly close it up, we may just drag the line in. The rectangle is now darkened, as seen in the image below. 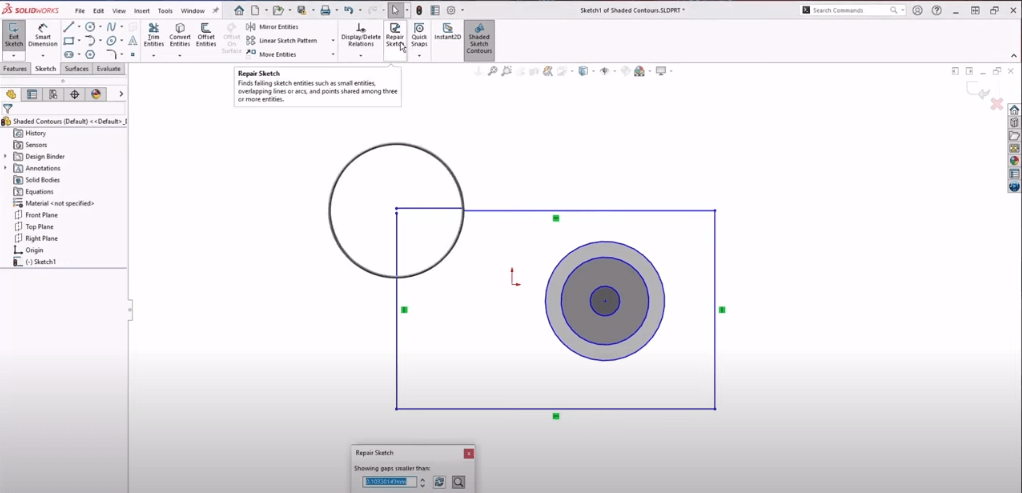
We can reposition the drawings now that we have the contours. By capturing the darkened region, we may do this. We are no longer required to grab a certain object. We can only drag it by specified endpoints or the sketch geometry when sketch contours are not enabled. We are constrained and must use the Move Entities command if we want to relocate it but don't want to modify the size. 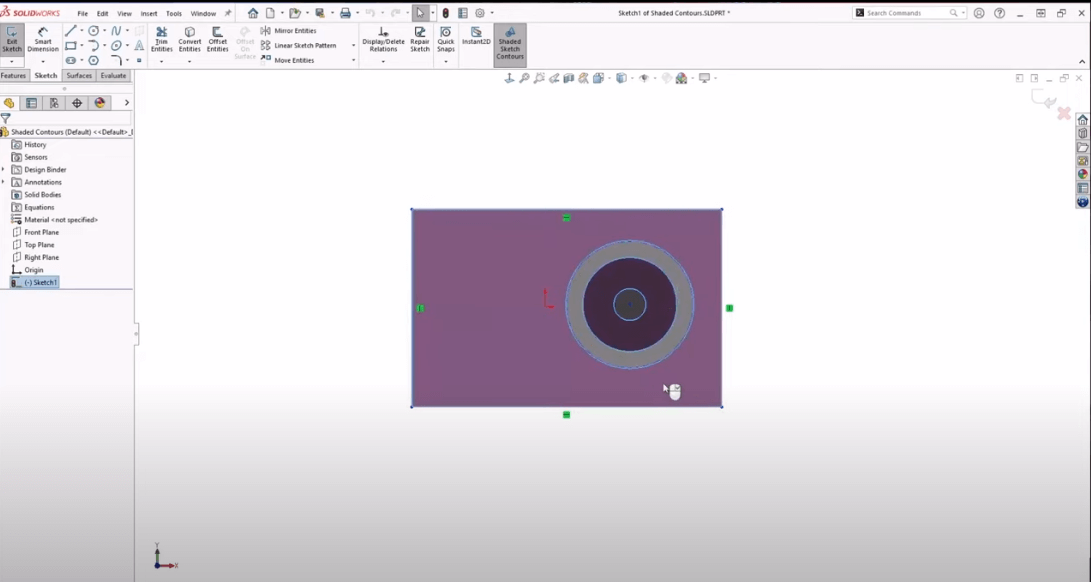
Sketch contours also have the advantage of allowing us to pick them in advance from inside the sketch. We can see several distinct curves in this sketch. By pressing and holding the ALT key, we may pre-select ones to utilize for an extrusion. By emphasizing the boundaries, we may choose between contour areas and contours themselves. In the figure below, if we choose Boss-Extrude, we can see that the contours have already been chosen. 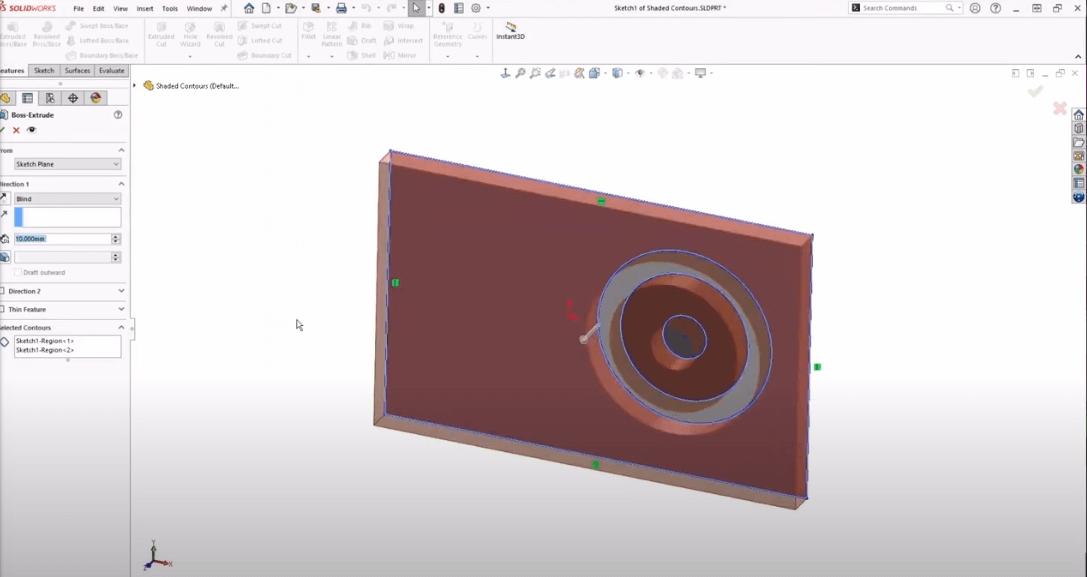
Next TopicHow to Trim in SolidWorks
|
 For Videos Join Our Youtube Channel: Join Now
Feedback
- Send your Feedback to [email protected]
Help Others, Please Share


