| |

Shapes in PhotoshopPhotoshop allows us to draw vector shapes with ease. We can also convert them into raster or pixel-based shapes. It facilitates with different shape tools like rectangle tool, rounded rectangle tool, ellipse tool, polygon tool, and line tool. We can create shapes using the shape tools and customize them by filling the color, stroking the selection, and adding other effects. By adding effects, we can customize the appearance of the stroke and shape. We can also edit the shapes by customizing them. Photoshop allows us to easily customize the shape layer. Most people think Photoshop is only a raster-based image editor when it comes to the vector-based task; they think that it will be done by using Adobe Illustrator. But, this is not true; we can do several vector-based tasks using Photoshop. In this section, we will discuss the Photoshop shapes tools and how to use them; further, we will draw some shapes using these tools. Photoshop Shape ToolsPhotoshop supports five shape tools, which are as follows: 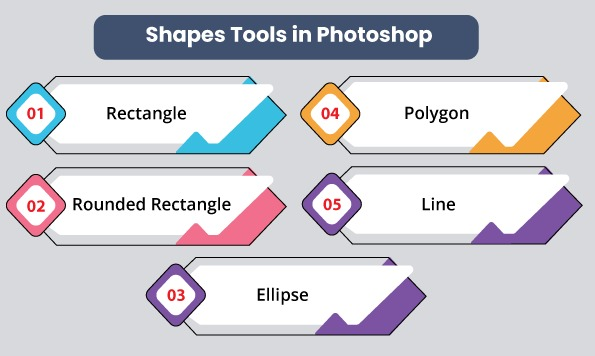
It also provides an additional option in shape tools, the custom shape tool, which is used to create custom shapes. As these tool names suggest, they create the shapes accordingly. For example, when we select the rectangle tool and draw any art on our image canvas, it will start drawing in the shape of a rectangle. Let's discuss these tools in detail: Rectangle ToolFirst, create a new blank diagram to draw different shapes. To create a new blank diagram, press the Ctrl + N keys or select the New Option from the file menu. When we select a rectangle tool and start drawing something on the image canvas, it will draw the art in a rectangular shape. To draw a shape, pick from a start point and drag it to the endpoint. 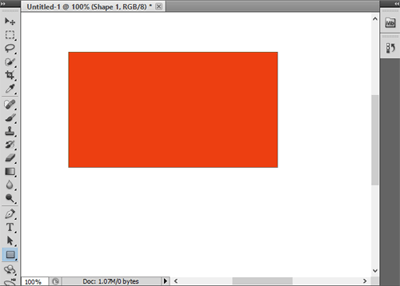
The Red color is set to the default background color, so the red color will automatically fill the shape. Rounded Rectangle ToolThe Rounded Rectangle Tool is used to draw a rounded rectangle. Basically, it is a rectangle having rounded corners. 
We can set the radius of the rectangle from the upper menu to make the edges more rounded. It is mostly used to create a button in web designing. Ellipse ToolThe ellipse tool is used to create an elliptical shape or circle. We can easily create a circle or ellipse using the ellipse tool. To create a circle, pick a center point and draw a circle or ellipse by dragging the cursor. 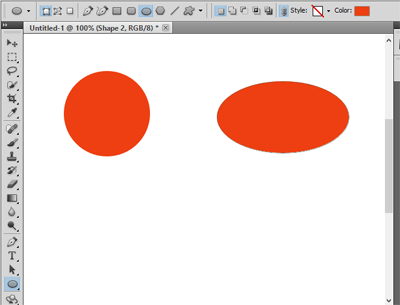
Polygon ToolThe polygon tool is used to create a polygon shape. We can set the sides of the polygon as much as we needed in the polygon chain. 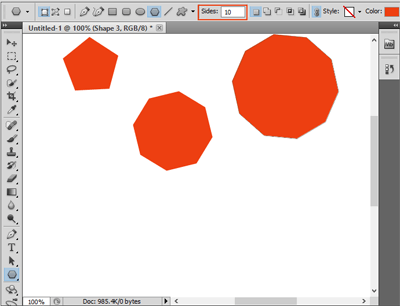
To set the slides of the polygon, enter the number of sides in the sides field in the top toolbar. Line ToolThe Line tool is used to draw a line. To draw a line, pick a starting point and drag the mouse cursor to an endpoint. To draw a horizontal or vertical line, hold the shift key while stretching the line. How to Draw a Shape in PhotoshopShapes are essential for any artwork. Photoshop allows several tools to draw a shape flexibly; all we need to select a proper tool to draw a shape. Follow the below steps to draw a shape in Photoshop:
Shape Tool OptionsThe Shape tool options bar can be found at the top of the image canvas: 
The following options can be found in the options bar:
Useful Keys & Techniques for Drawing a ShapeSome keys are very useful while drawing a shape. These keys let us draw a shape properly. Let's discuss them: Shift key: The Shift key is a very useful key while drawing a shape. It has several different uses; for example, to draw a straight line, hold the shift key. Basically, it maintains the width to height ratio. The following are some uses of the shift key:
Alt (Windows) key or Option (Mac) key: The Alt/Option key is used to create an object-centered at the selected point. If we don't select the Alt/Option key, the object will be created in the dragging direction. Shift and Option/Alt key: By pressing the Shift and Alt/ Option keys together is used to create a proportionally constrained object centered on the point at which you click. Click the shape tool: After selecting a shape tool, if we just click on the image canvas instead of dragging it, it will open a small dialog box that allows us to specify the precise dimension of the shape. Click Ok to create the shape; it will create the shape in the lower right of the selected point. Spacebar: By holding the spacebar, we can position our space. All we need is to press the spacebar while dragging the shape. It will work while dragging to the bottom. Continue to hold the button until you position your shape. Once it is done, leave the spacebar key. Options bar: The options bar is the menu available just at the top of the work area. When we select a tool, the options bar will be dynamically changed. It will display the options that you will require for the selected shape tool. For example, if we select the rounded rectangle tool, we can find several options such as color, radius, etc., in the options bar. Similarly, the Polygon tool offers the option to define the number of slides for a polygon shape. And the line tool provides the option to define the thickness of the line. Also, there is an arrowhead option to add to the line. Change the layer content: We can customize the shape by changing the layer's content. Select the shape layer in the layer panel, and apply the layers style and effects. We can also edit or remove the effects. Further, we can stroke or fill the shape. Edit the vector path: The Direct selection tool allows us to change the course of the path. Thus, we can customize the appearance of the shape. Create work paths or pixel-filled shapes: The options bar provides an option to create few other shapes and work paths or add pixel in the currently active shape. The temporary paths are useful for making the selections or masks. Fill and Stroke the ShapeTo fill or stroke a shape, follow the below steps:
Solid Color: The Solid color option fills the solid colors. It fills the shape with the current foreground color. We can also use the color picker or color preset options to select a different color. Gradient: The Gradient option allows us to fill the gradient colors. The gradient colors are the mixture of the colors. When we choose this option, it will display a gradient editor dialog, set the gradient from this dialog box. We can also set the following additional gradient options:
Pattern: This option allows us to choose the pattern from a pop-up menu and apply the additional options, such as:
|
 For Videos Join Our Youtube Channel: Join Now
Feedback
- Send your Feedback to [email protected]
Help Others, Please Share


