| |

SoapUI Mock ServiceA Mock service is an important feature of the SoapUI testing tool. It creates a dummy or virtual web service that simulates a response to a web service request. The mocking service creates a virtual environment to test the web service that works similarly to real service. It can be test offline web resources while developing and reviewing web service. The mock service can be used with both SOAP and REST web projects. Advantages of the Mocking ServiceThe following are the various advantage of the mock service in a SoapUI.
Now we will learn how we can create, edit and invoke the mock services for the Soap and REST project in a SoapUI testing tool. SOAP Mock Service: We can simulate a SOAP web service request message by creating a mock service from our soap response message. For creating the SOAP mock service, we have to follows the given below steps, as shown. Step 1: Firstly, choose the existing Soap project and then select the SOAP service from Navigator. After that, Right-click on the service that allows us to select or click the "Generate SOAP Mock Service", as shown below. 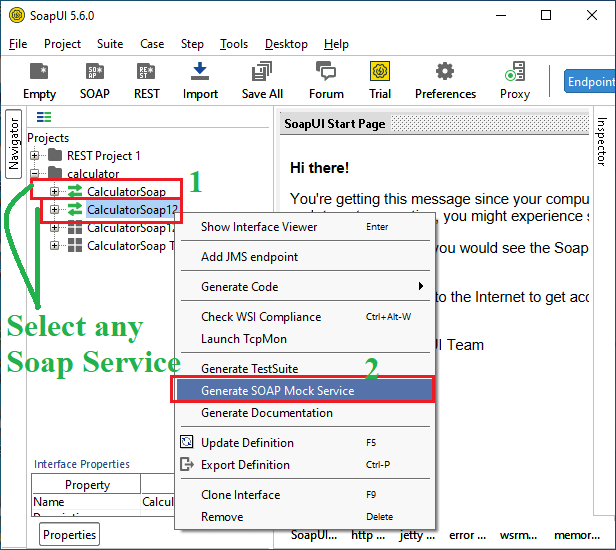
Step 2: Upon clicking the Soap Mock Service, it shows a pop-up dialog box to generate a mock service window, as shown in the image below. 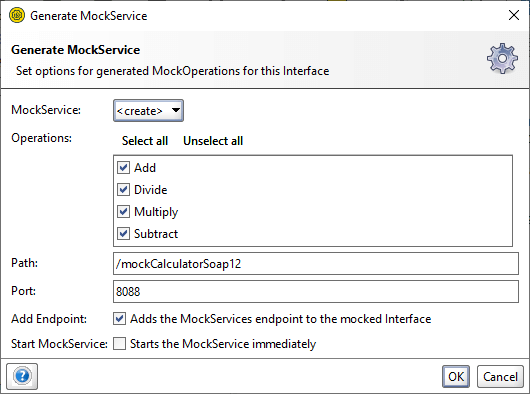
In the above screenshot, it asks to include the various mock details such as Operations, path, Port, Add Endpoint and one checkbox to immediately start the mock service of the Soap. After that, click the OK button to proceed further in a Mock service. Step 3: As the OK button is clicked, it shows a pop-up dialog box to specify the name of Mock Service or leave it defaults, as shown below. 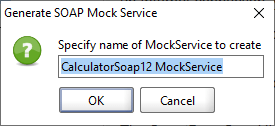
Step 4: Once the OK button is clicked, it creates a Soap Mock Service that can be accessed from the left pane of the Soap project, as shown below. 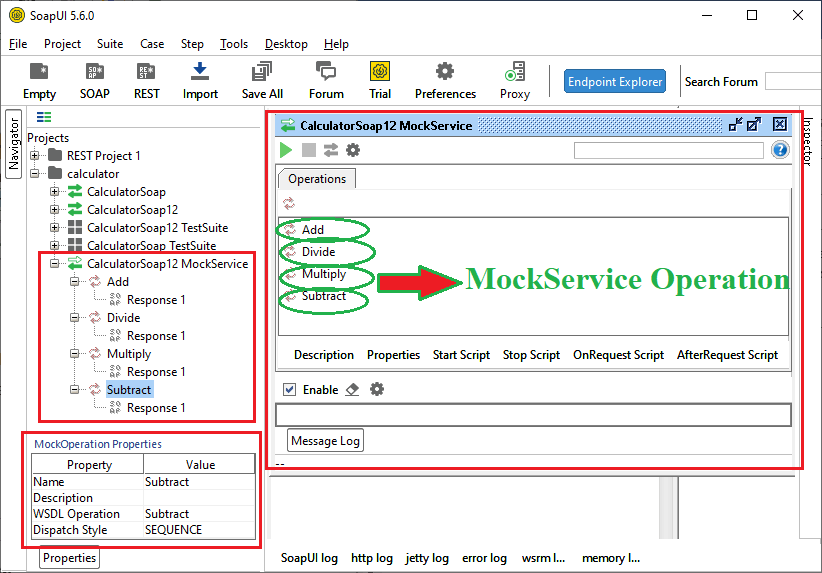
From the left pane, the mock service can be accessed, and it also displays the various operations of the mock service window of the right pane in the image above. Step 5: When we double click on the Add operation, it displays a pop-up window for Add response present in the Soap Mock Service. 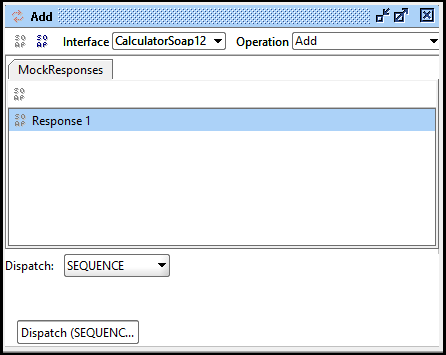
Step 6: Double-click the "Response 1" of the MockResponses to open the XML-based response editor, which is identical to the usual SoapUI request editor, as seen below. 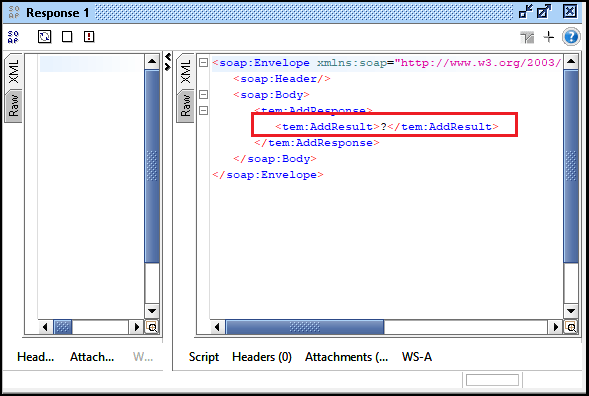
Step 7: Now, we edit the response editor by replacing a new value in place of "?" shown in the above image. Here, we will replace '?' with "two zero", as shown below. 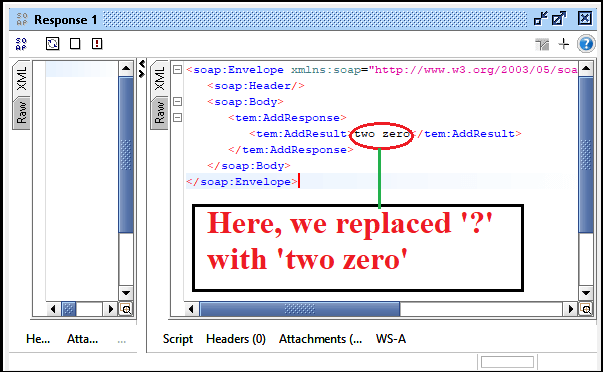
Invoke and execute the Soap Mock serviceStep 8: Now, we check whether the mock service is working properly or not. We have to go back to the Mock service editor and then click the run button for executing the service. It will start the execution of the mock service, as shown below. 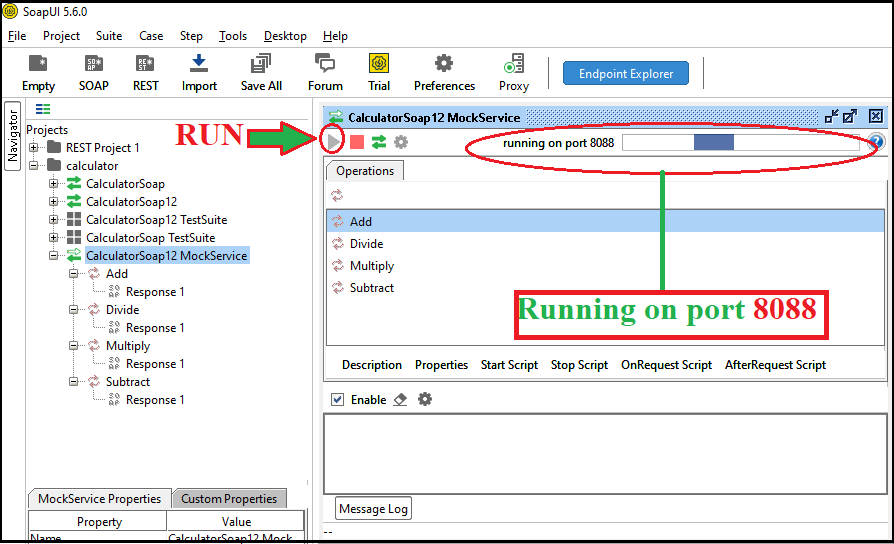
The Mock Service runs on port 8088 after a click on the green arrow button. If we want to stop the service, click on the red button at any time. Create a SOAP RequestStep 9: Now click on the "Create Soap Request" of the Add operation, which creates a request sent to the mock service, as shown below. 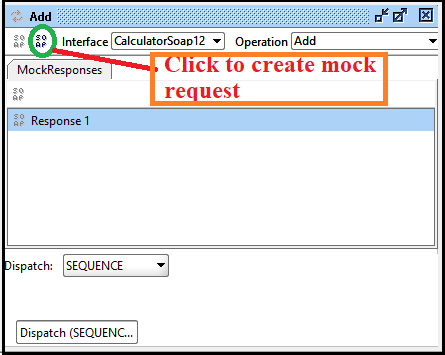
Step 10: After clicking on the Create Soap Request, it opens a pop-up dialog box to select the default request or create a new request, as shown below. 
Step 11: Once the OK button is pressed, it displays the request window for Add mock service that is similar to the normal web service request, as shown below. 
Mock Response service Step 12: Now we click on the Run icon (triangle in green color) to execute the mock service that will return the web response that we have previously configured in the mock, as shown below. 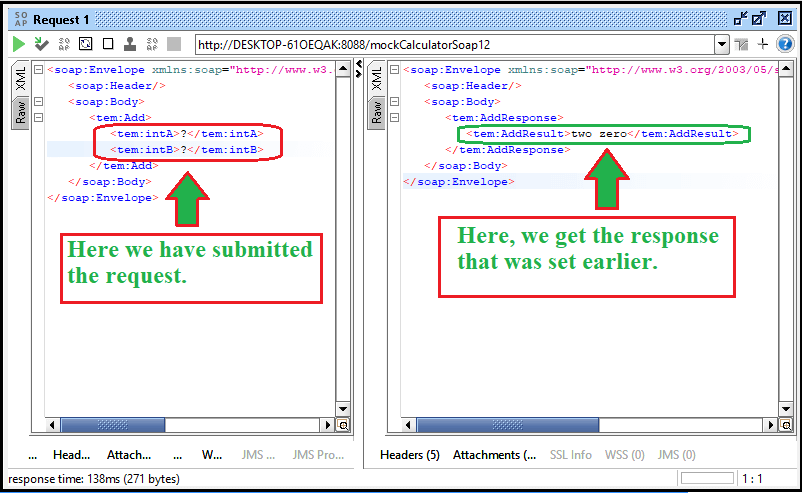
Hence, we have successfully created our first soap mock service, and it is ready for use. REST Mock ServiceUsing the Mock feature in a SoapUI, we can simulate the RESTful web service request message by creating a mock service from its REST response messages that could be a format like JSON, HTML, XML and Plain Text. For creating the REST mock service, we have to follows the given below steps, as shown. Step 1: Firstly, choose the existing REST project and select the REST "https://restcountries.eu" service from the project. After that, Right-click on the service that allows to select or click the "Generate REST Mock Service", as shown in the below image. 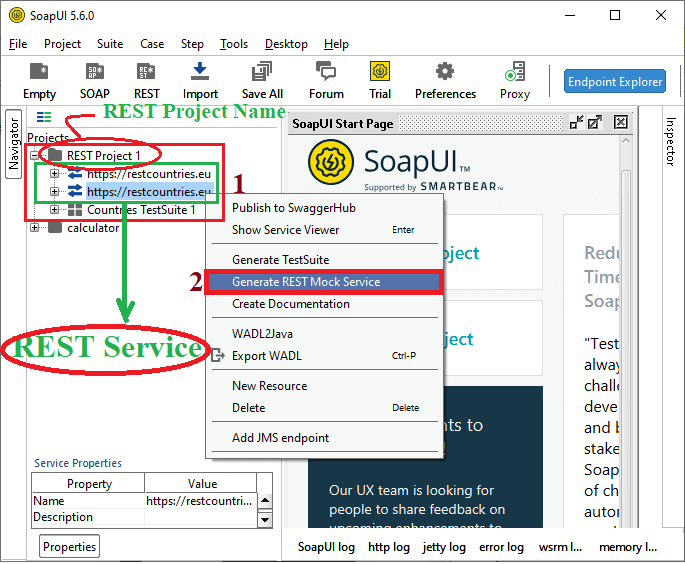
Step 2: Upon clicking the 'REST Mock Service', it shows a pop-up dialog box to generate a mock service window, as shown in the image below. 
Step 3: Specify the Mock Service Name, and then click the OK button to create 'REST Mock service 1', as shown below. 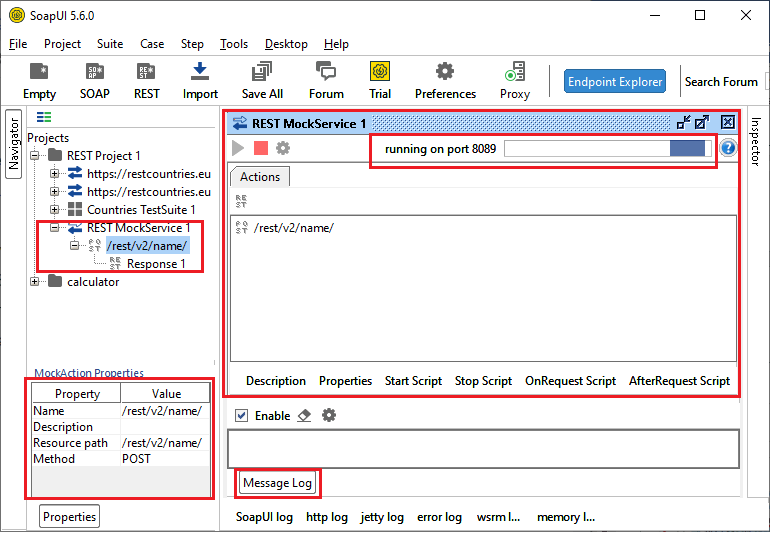
As we click the OK button, it starts executing the "REST MockService 1", as shown in the above image. Step 4: After double-clicking on the "/rest/v2/name" action, it displays the mock response window, as shown below. 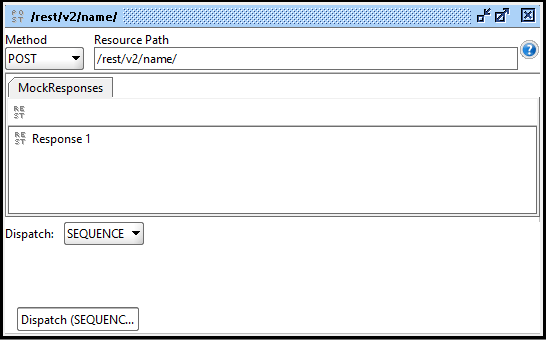
Step 5: Double click on the 'Response 1' to open the REST Response 1, as shown below. 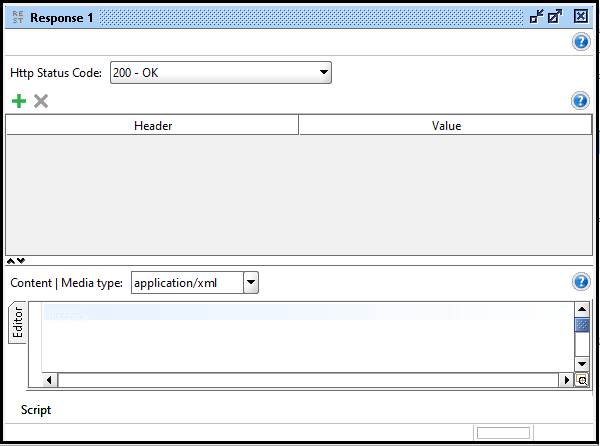
The HTTP Status Code 200 represents a successful response. It will appear with the editor in the above image. After selecting a particular service or media type from the drop-down menu, we can change the customer's request-response. Hence, we have created a REST mock service and are ready for use.
Next TopicSoapUI JDBC
|
 For Videos Join Our Youtube Channel: Join Now
Feedback
- Send your Feedback to [email protected]
Help Others, Please Share


