| |

SoapUI Property TransferSometimes we need to get some specific content or information from the response message and then add it to the successive request. These cases required some specific mechanism to retrieve and transfer the value to the other elements of the SoapUI project. So, we are required to use the SoapUI Property Transfer TestStep. Adding Property TransferFor using the property transfer in a SoapUI, we have to follow the steps given below. Step 1: Click the Soap icon to create a new Soap Project and then enter the Initial WSDL URL, as shown below. 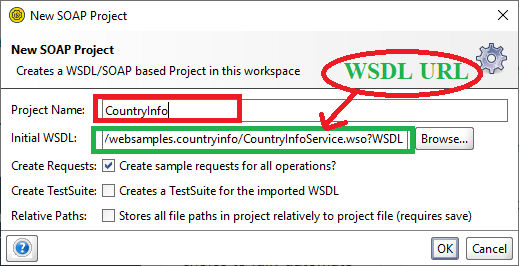
Step 2: Once the OK button is clicked, it processes the Soap project and its associated services, as shown below. 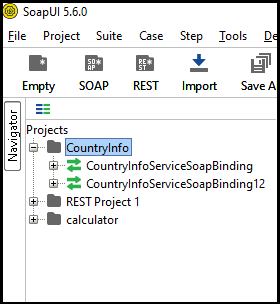
Step 3: Right-click on the 'CountryInfoServiceSoapBinding 12' to open the generate Test Suite, as shown below. 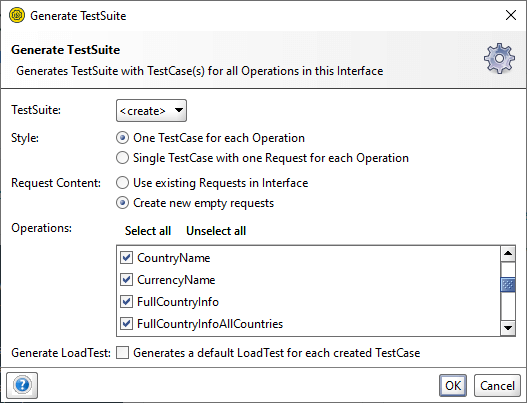
Step 4: As the OK button is clicked, it shows a dialog box to specify the Test Suite name, as shown below. 
Step 5: Once the OK button is clicked, it displays the default test case inside the test suite, as shown below. 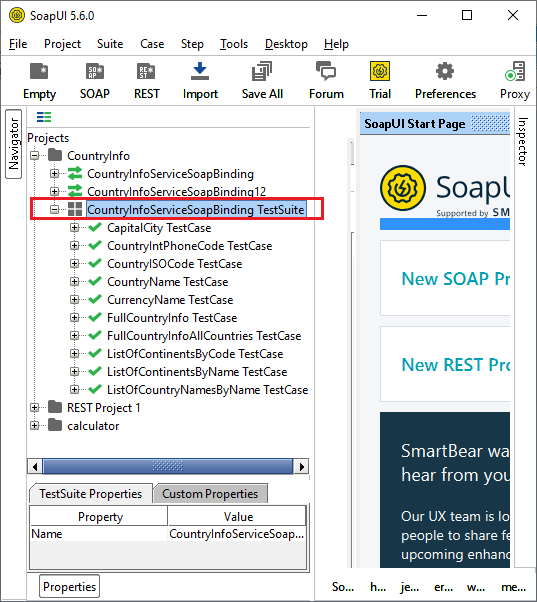
Creating the Clone for Property TransferStep 6: Right-click on the CountryInforServiceSoapBinding TestSuite to create a new test case for the Property transfer, as shown below. 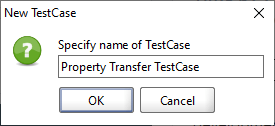
Here, we specified the test case's name as the Property Transfer TestCase and then click on the OK button. Step 7: After that, it creates the Property Transfer TestCase inside the CountryInforServiceSoapBinding TestSuite and displays the TestCase window, as shown below. 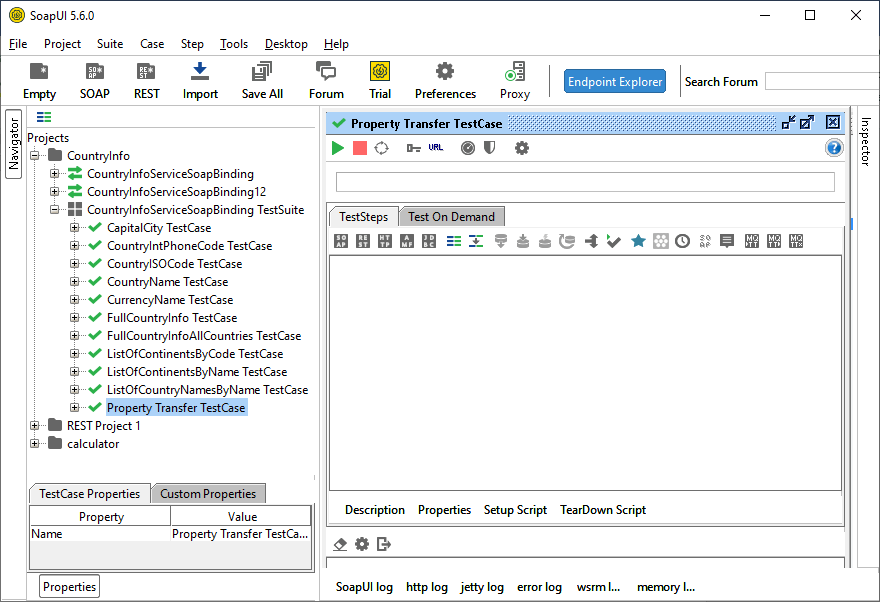
Step 8: Now, we transfer or clone the two testcases requests: CountryISOCode TestCase request and the CapitalCity TestCase request inside the Property Transfer testcase' test step, as shown below. Cloning the CountryISOCode TestCase: Click on the (+) of the CountryISOCode TestCase and then right on the CountryISOCode request, as shown below. 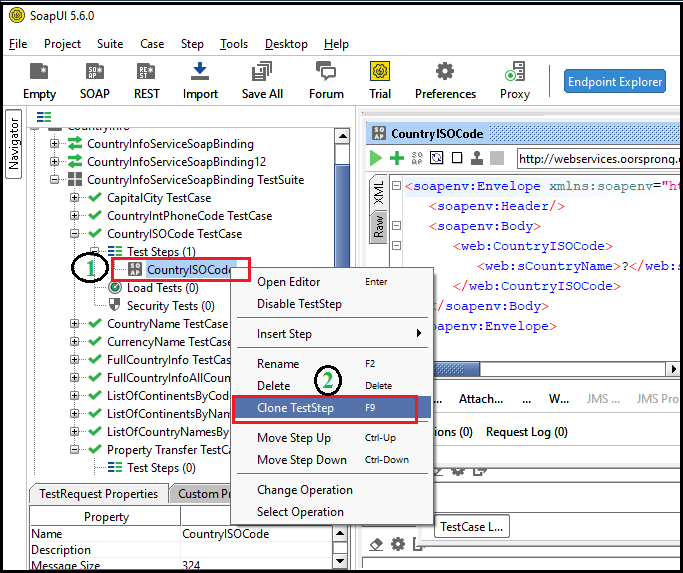
Click the Clone TestStep to open the 'Clone TestStep window' for defining the Target TestCase. Here, we specified the Target 'CountryISOCode request' for the property transfer testcase, as shown below. 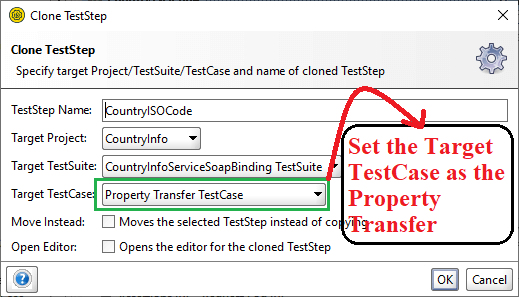
Step 9: After clicking the OK button, it transfers the CountryISOCode request to the Property Transfer TestCase and displays the XML request to the right pane, as shown below. 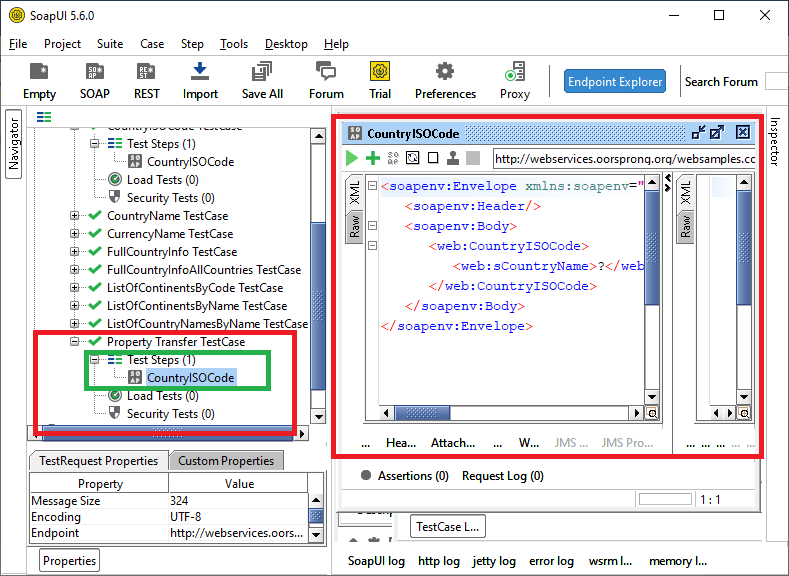
Step 10: Similarly, we will transfer the request of the CapitalCity TestCase to the Property Transfer TestCase, as shown below. 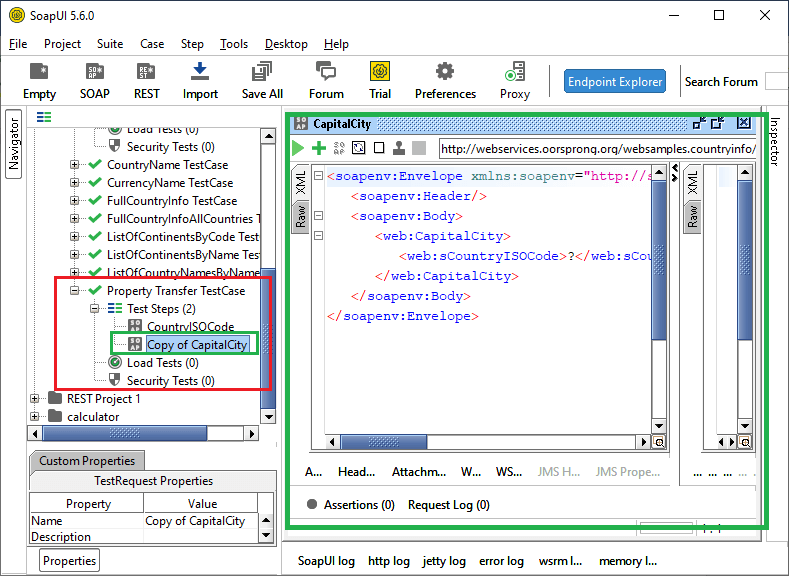
Step 11: Now, double click the property Transfer test Case to view the available testcase, as shown below. 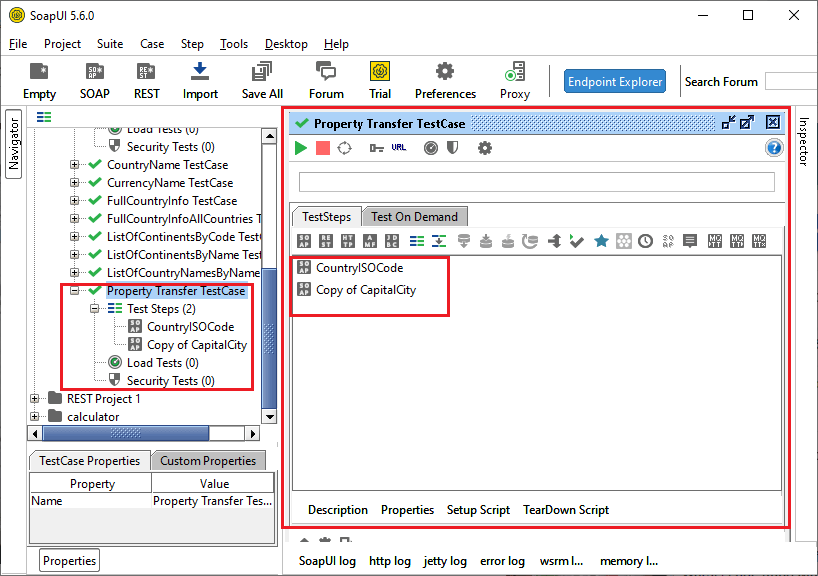
Add Property transferStep 12: Right-click on the CountryISOCode request of the TestStep and then select the Property Transfer service, as shown below. 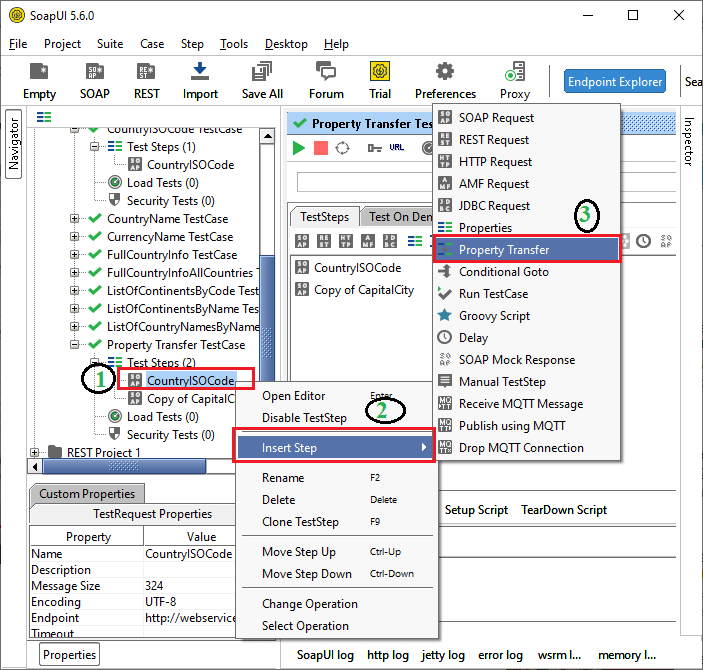
Step 13: As we clicked on the Property Transfer, it shows a pop-up dialog box that specifies the name for the new step of a property transfer. 
Step 14: Once the OK button is clicked, it adds a Property Transfer to a Property Transfer TestCase and then displays a new Property Transfer window to add the property, as shown below. 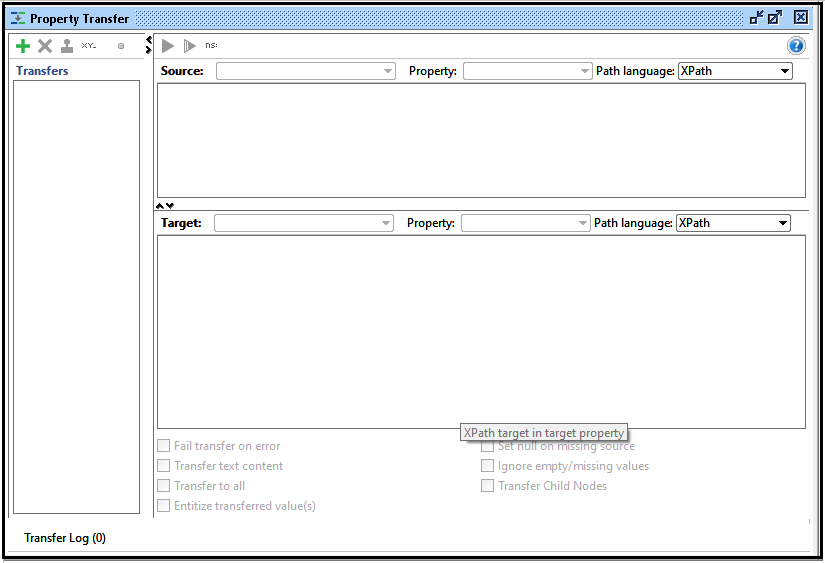
Step 15: For adding the property, click the (+) icon at the top left corner in a Property Transfer window. After that, it displays a pop-up dialog box to specify the name for transferring the value in a property transfer. Enter the Name CountryISO and click OK. 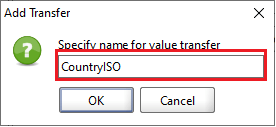
Step 16: After that, it displays the CountryISO value in a Property Transfer window, as shown below. 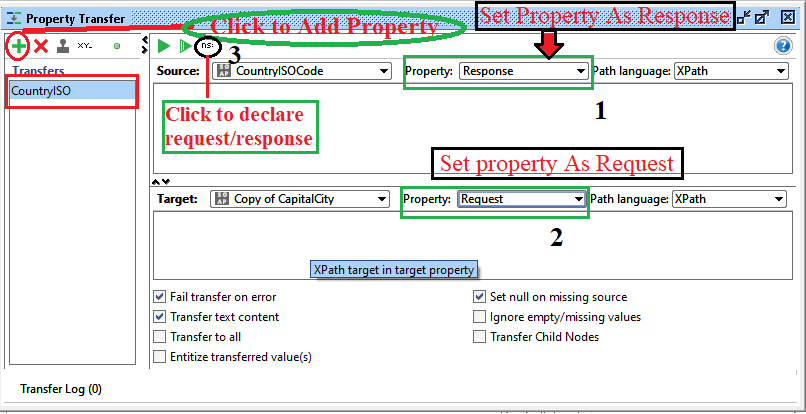
Here, CountryISO value is added to the CountryISOCode for transferring a value into the Copy of CapitalCity request. After that, set the CountryISOCode property as Response and then Set the Copy of CapitalCity property as Request, as shown above. Step 17: Now, click the request /response button (3) to declare the namespace for source and the Target expression, as shown below. 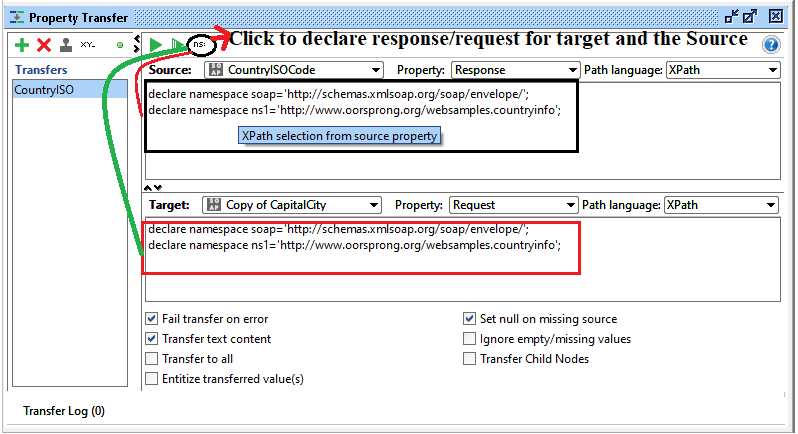
Step 18: Double click on the CountryISOCode to display the XML request file, as shown. 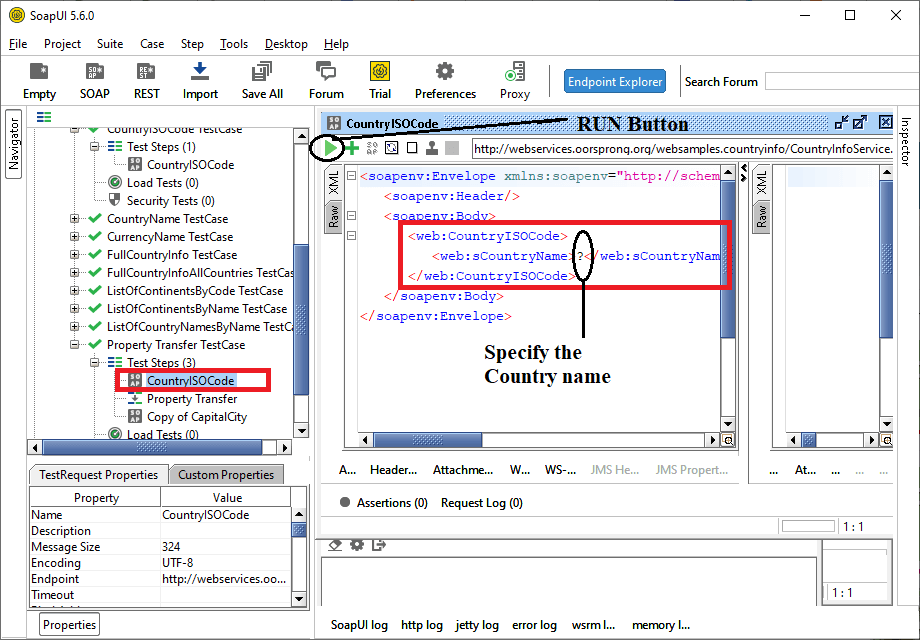
Step 19: After Specifying the country name as United State, click the green color run button to execute the query, as shown below. 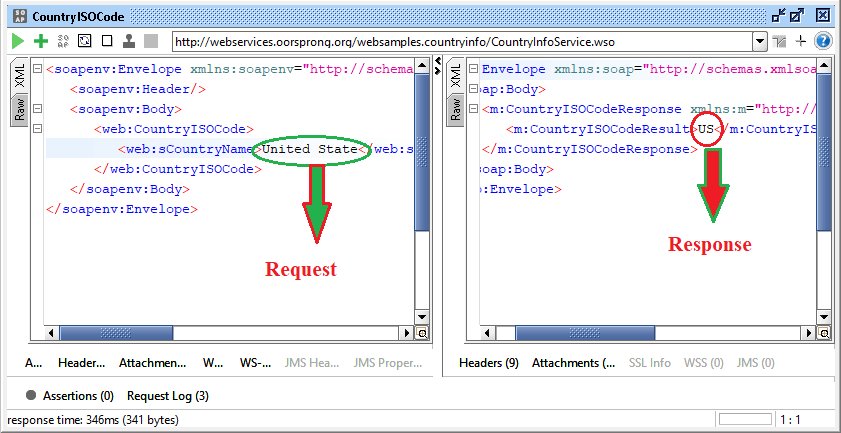
The following code snippet shows the Request CountryISOCode in XML format. The following code snippet shows the Response CountryISOCode in XML format. Step 20: Now, we have to specify //m:CountryISOCodeResult from CountryISOCode Response XML at the source to get the ISO code value. 
Step 21: Double click on Copy of CapitalCity request and then specify the request namespace for target Copy of CapitalCity, as shown below. 
Here is the Request Copy of CapitalCity XML Step 22: Similarly, we have to specify //web:sCountryISOCode from CapitalCity Request XML at the target to get the Capital name of the specified country. 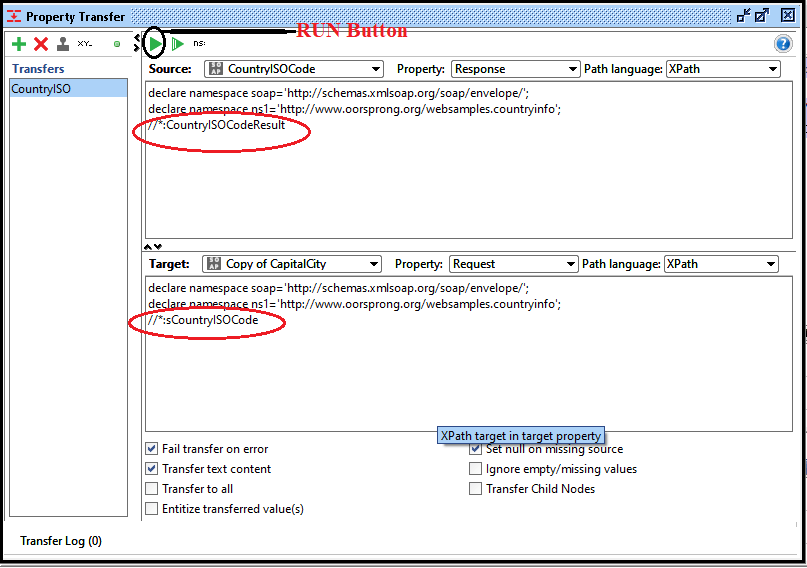
Step 23: Click on the green color run button to execute the property transfer and get the Country ISO code, as shown below. 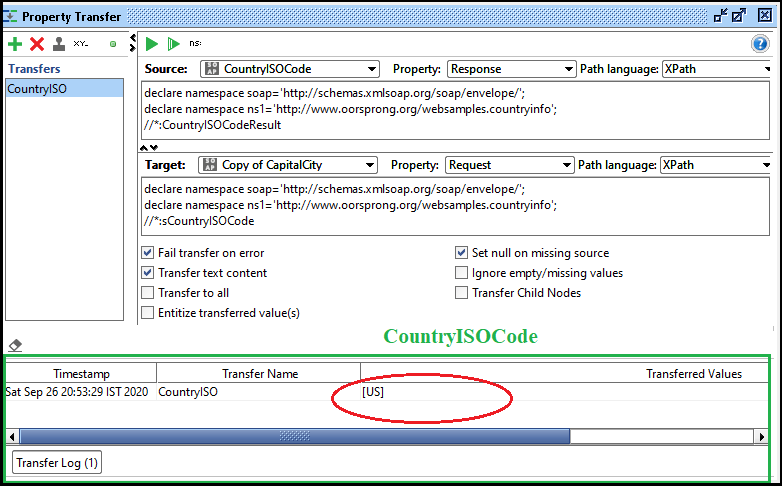
Step 24: After that, we have to double click on the 'Popery Transfer TestCase' to execute all available test steps, as shown below. 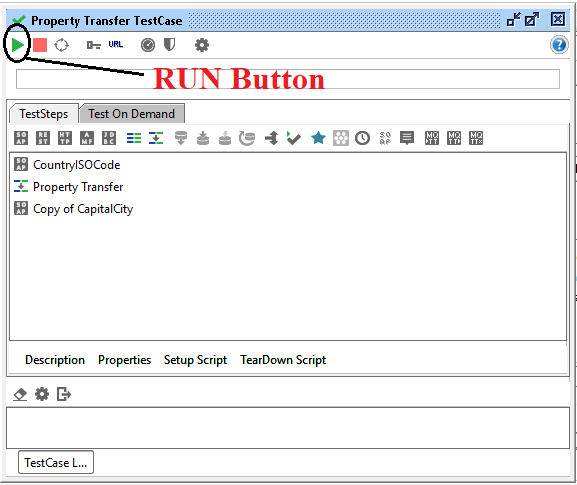
As we clicked on the run button, all the test steps are executed inside the Property Transfer TestCase. 
Step 25: Now, select the 'Copy of CapitalCity' request from the property transfer and then run the XML file to generate the request and the response, as shown below. 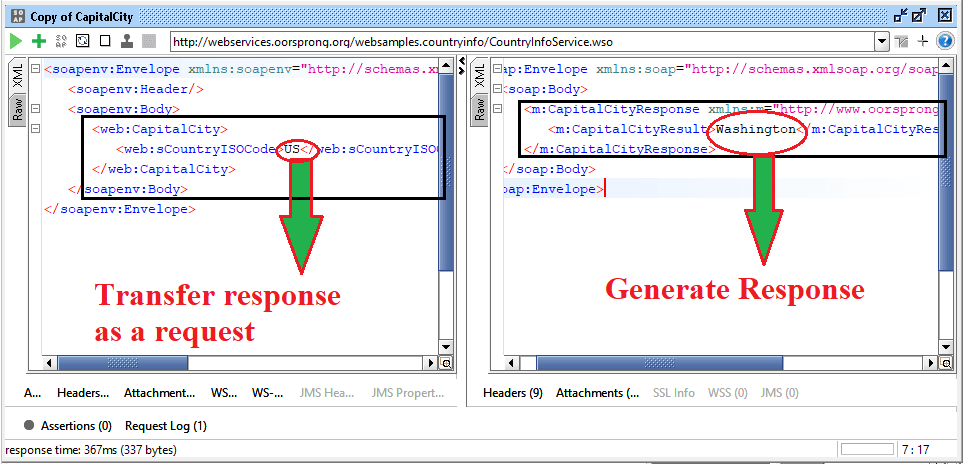
The following code snippet shows the Request Copy of CapitalCity in XML format. The following code snippet shows the Response Copy of CapitalCity in XML format. So, in this way, we use the property transfer service in a SoapUI project.
Next Topic#
|
 For Videos Join Our Youtube Channel: Join Now
Feedback
- Send your Feedback to [email protected]
Help Others, Please Share


