| |

Spring Boot Auto-configurationSpring Boot auto-configuration automatically configures the Spring application based on the jar dependencies that we have added. For example, if the H2 database Jar is present in the classpath and we have not configured any beans related to the database manually, the Spring Boot's auto-configuration feature automatically configures it in the project. We can enable the auto-configuration feature by using the annotation @EnableAutoConfiguration. But this annotation does not use because it is wrapped inside the @SpringBootApplication annotation. The annotation @SpringBootApplication is the combination of three annotations: @ComponentScan, @EnableAutoConfiguration, and @Configuration. However, we use @SpringBootApplication annotation instead of using @EnableAutoConfiguration. @SpringBootApplication=@ComponentScan+@EnableAutoConfiguration+@Configuration When we add the spring-boot-starter-web dependency in the project, Spring Boot auto-configuration looks for the Spring MVC is on the classpath. It auto-configures dispatcherServlet, a default error page, and web jars. Similarly, when we add the spring-boot-starter-data-jpa dependency, we see that Spring Boot Auto-configuration, auto-configures a datasource and an Entity Manager. All auto-configuration logic is implemented in spring-boot-autoconfigure.jar, as shown in the following figure. 
Need of auto-configurationSpring-based application requires a lot of configuration. When we use Spring MVC, we need to configure dispatcher servlet, view resolver, web jars among other things. The following code shows typical configuration of a dispatcher servlet in a web application: Similarly, when we use Hibernate/ JPA, we need to configure datasource, a transaction manager, an entity manager factory among a host of other things. Configuring datasource Configuring entity manager factory Configuring transaction manager Disable Auto-configuration ClassesWe can also disable the specific auto-configuration classes, if we do not want to be applied. We use the exclude attribute of the annotation @EnableAutoConfiguration to disable the auto-configuration classes. For example: We can use the attribute excludeName of the annotation @EnableAutoConfiguration and specify the qualified name of the class, if the class is not on the class path. We can exclude any number of auto-configuration classes by using the property spring.autoconfigure.exclude. Spring Boot Auto-configuration ExampleIn the following example, we will see how Spring Boot's auto-configuration features work. Step 1: Open spring Initializr https://start.spring.io/. Step 2: Provide the Group name. We have provided com.javatpoint. Step 3: Provide the Artifact Id. We have provided spring-boot-autoconfiguration-example. Step 4: Add the dependencies: Spring Web, Spring Data JPA, an H2 Database. Step 5: Click on the Generate button. When we click on the Generate button, it wraps the project in Jar file and downloads it to the local system. 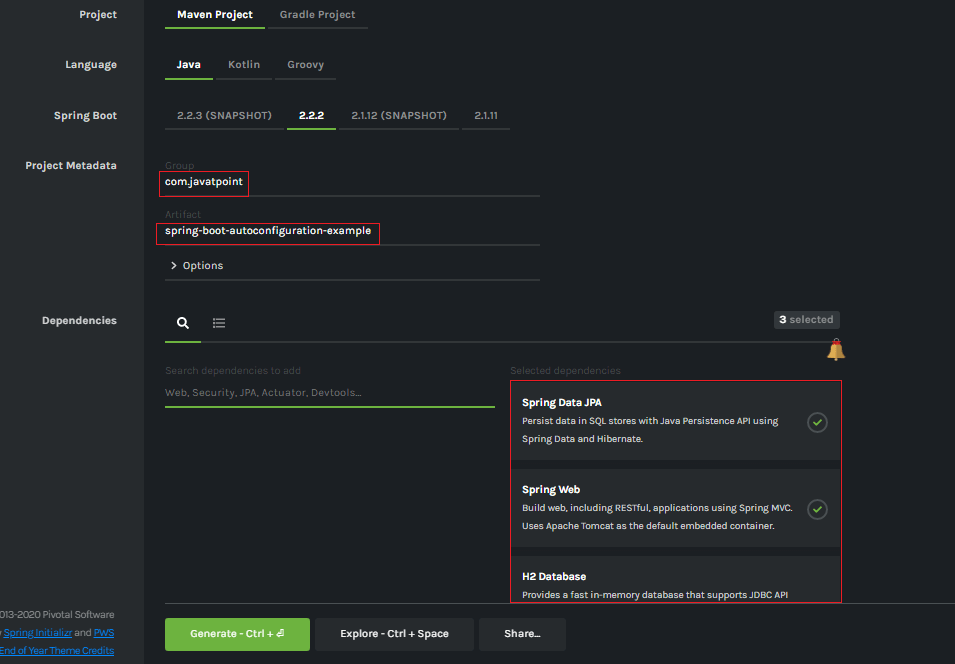
Step 6: Extract the Jar file and paste it into the STS workspace. Step 7: Import the project folder into STS. File -> Import -> Existing Maven Projects -> Browse -> Select the folder spring-boot-autoconfiguration-example -> Finish It takes some time to import. Step 8: Create a package with the name com.javatpoint.controller in the folder src/main/java. Step 9: Create a Controller class with the name ControllerDemo in the package com.javatpoint.controller. ControllerDemo.java Step 10: Create another package with the name com.javatpoint.model in the folder src/main/java. Step 11: Create a class with the name User in the package com.javatpoint.model. User.java Now we need to Configure the H2 database. Step 12: Open the application.properties file and configure the following things: port, enable the H2 console, datasource, and URL. application.properties Step 13: Create a SQL file in the folder src/main/resources. Right-click on the folder src/main/resources -> New -> File -> Provide the File name -> Finish We have provided the file name data.sql and insert the following data into it. data.sql Step 14: Create a folder with the name webapp in the src folder. Step 15: Create a JSP file with the name that we have returned in the ControllerDemo. In the ControllerDemo.java, we have returned home.jsp. home.jsp Step 16: Run the SpringBootAutoconfigurationExampleApplication.java file. We can see in the console that our application is successfully running on port 8085. 
Step 17: Open the browser and invoke the URL http://localhost:8085/h2-console/. It shows the Driver Class, JDBC URL that we have configured in the application.properties file, and the default User Name sa. 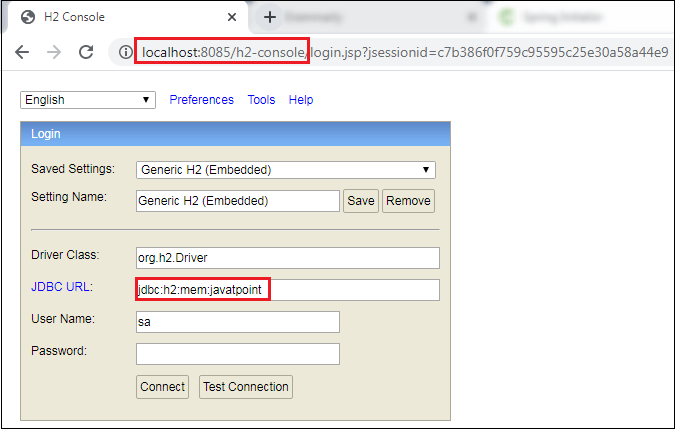
We can also test the connection by clicking on the Test Connection button. If the connection is successful, it shows a message Test Successful. Step 18: Click on the Connect button. It shows the structure of the table userdata that we have defined in the User.java file. 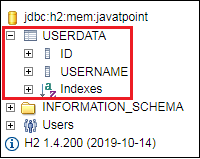
Step 19: Execute the following query to see the data that we have inserted in the data.sql file. 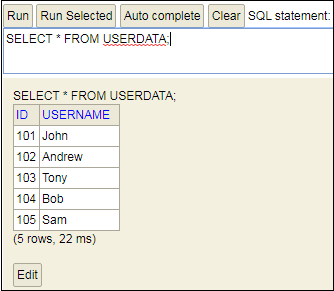
Let's have a close look at the console. We see that TransactionManagement, DispatcherServlet, EntityManagerFactory, and DataSource automatically configures, as shown in the following figure. 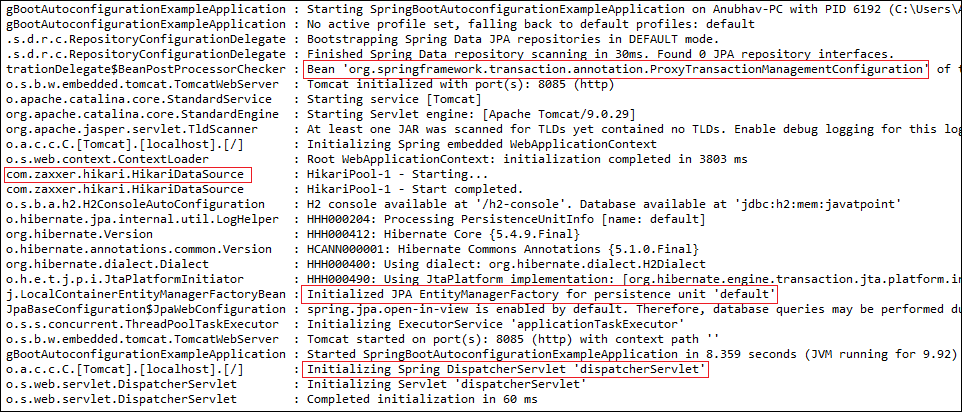
Debugging Auto-configurationWe can find more information about auto-configuration by using the following two ways:
Turning on debug logging We can debug logging by adding a property in the application.properties file. Let's implement the debug logging in the above example. Open the application.properties file and add the following property: Now restart the application. We see that an auto-configuration report printed in the log. The report includes all the classes that are auto-configured. It is divided into two parts: positive matches annegative matches, as shown in the following figure. Positive matches 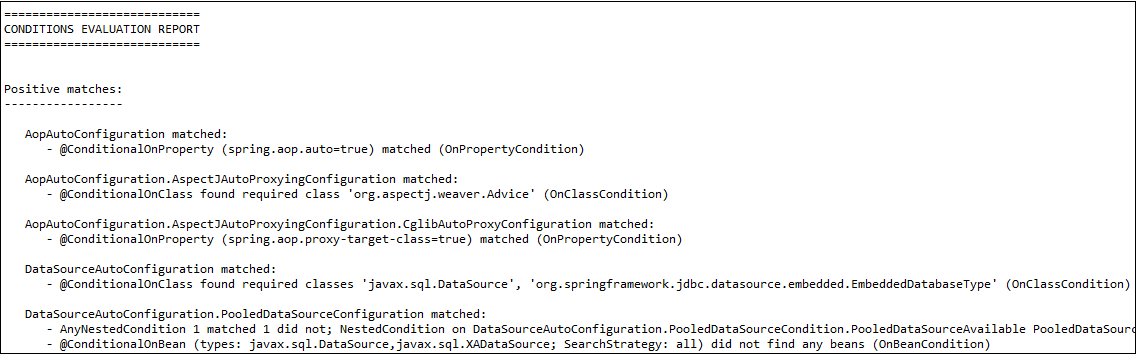
Negative matches 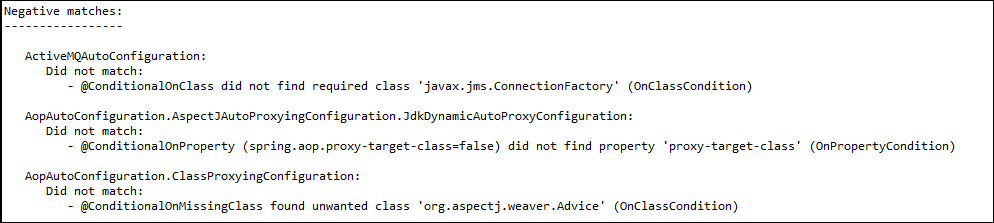
Spring Boot Actuator We can also debug auto-configuration by using Actuator in the project. We will also add in HAL Browser to make things easy. It shows the details of all the beans that are auto-configured, and those are not. Let's create an example of Spring Boot Actuator. Step 1: Open Spring Initializr http://start.spring.io. Step 2: Provide the Group name. We have provided com.javatpoint. Step 3: Provide the Artifact Id. We have provided actuator-autoconfiguration-example. Step 4: Add the dependencies: Spring Web and Spring Boot Actuator. Step 5: Click on the Generate button. It binds all the specification related to project into a jar file and downloads it in our local system. Step 6: Extract the downloaded jar file. Step 7: Import the project folder by using the following steps: File -> Import -> Existing Maven Project -> Next -> Browse -> Select the Project folder -> Finish After importing the project, we can see the following directory structure in the Package Explorer section of the IDE. 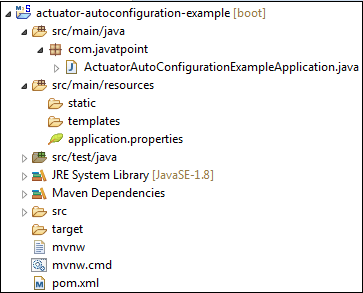
Step 8: Create a Controller class in the package com.javatpoint. We have created a controller class with the name DemoRestController. In the Controller, we have defined a method named hello() that returns a string. DemoRestController.java Step 9: Run the ActuatorAutoConfigurationExampleApplication.java file. Step 10: Open the browser and invoke the URL http://localhost:8080/hello. It returns a string that we have specified in the controller. 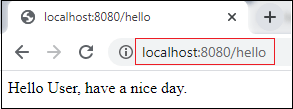
Now invoke the actuator URL http://localhost:8080/actuator. It launches the actuator that shows the three URLs: self, health, and info, as shown below. Step 11: Open the pom.xml file and add the HAL Browser dependency. Step 12: Again, run the ActuatorAutoConfigurationExampleApplication.java file. To access the HAL browser, type http://localhost:8080 in the browser and hit the enter key. 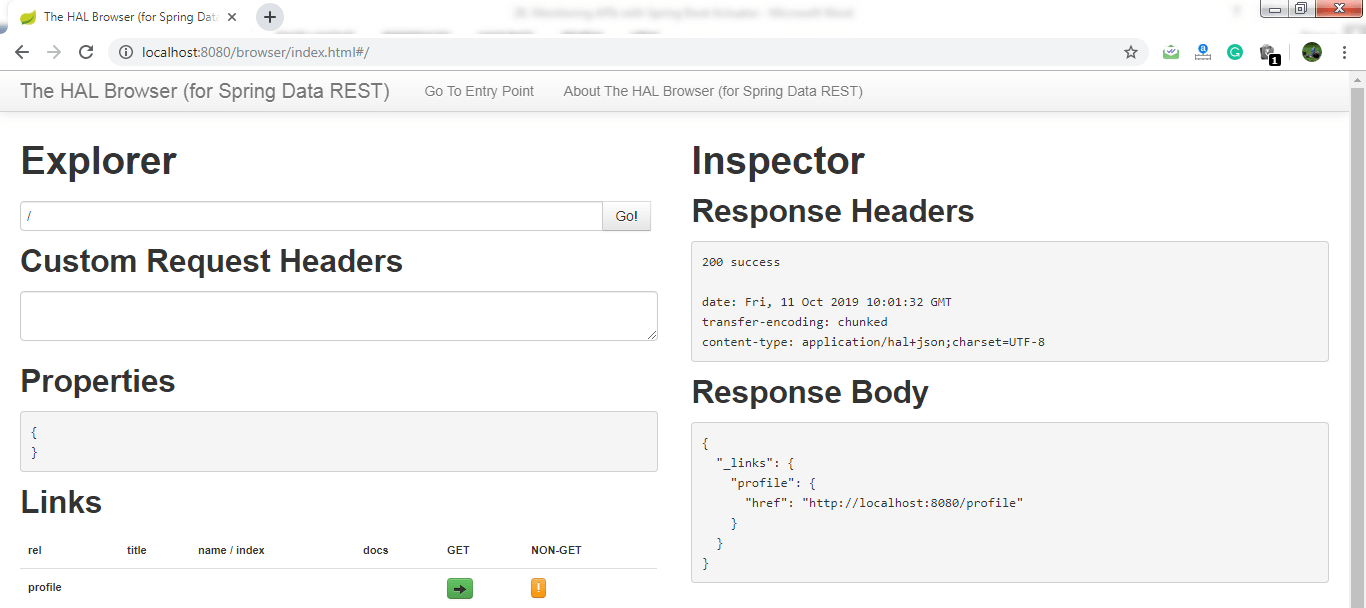
Now we can access the actuator through the HAL browser. Type /actuator in the Explorer's text box and click on the Go button. 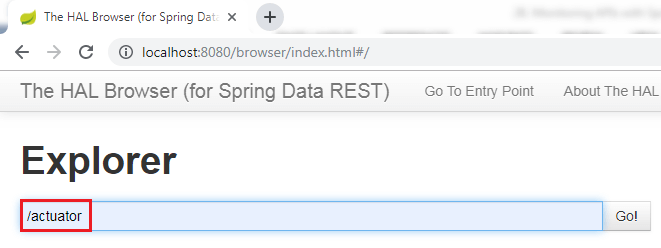
It shows all the things related to the actuator. The most important thing in the actuator is beans. 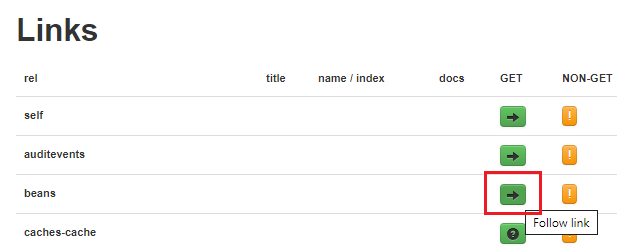
When we click on the bean's arrow, it shows all the beans configured in the Spring Boot project. 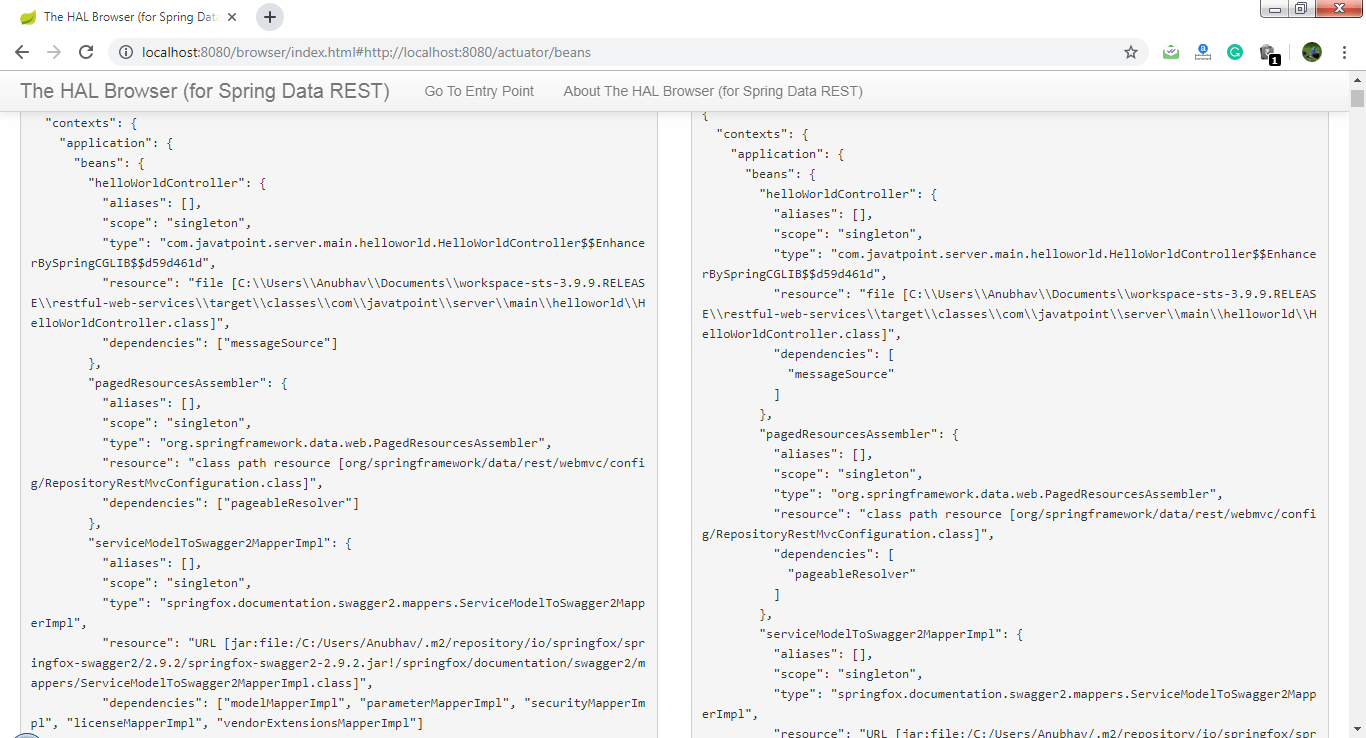
The above image shows the details of all the beans that are auto-configured and that are not.
Next TopicSpring Boot Hello World Example
|
 For Videos Join Our Youtube Channel: Join Now
Feedback
- Send your Feedback to [email protected]
Help Others, Please Share


