| |

Text Tool in XDAdobe XD supports text tool to add text in our designs. Using the text tool, we can add text to the design components and style them with the style options. It is useful for adding titles, button text, and other text-related utilities. The text tool is straightforward to use. To add the text to the design, activate the text tool and click anywhere on the canvas to begin the text. Now, type the text and press the ESC key to add the text or return to a new line. When we activate the text tool and pick a point to start the text, we will get a horizontal line that will be expanded as the text is added. The text line will be expanded; it will not break work. If you want to add new lines, it is recommended to add a new text instead of wrapping the existing line so that it will be easy to customize the line spacing and other styles. Each line of the text is independent of other lines. If we customize a line, it will not affect the other lines. Entering the text using this way will be useful for adding new style text. To exit from the text mode, press the ESC key or select any other tool. It will exit you from the type mode and let you select other tools and options. The typed text will be laid out in a new line and layer. Using the text tool precisely, we can easily add short pieces of text to our design. In this section, we will discuss the following text customization options:
How to Add Text in Adobe XD?To add the text to the artboard or on any object, select the text tool by clicking on the below icon: 
Alternatively, we can hit the T key as a shortcut to activate the text tool. Once the text tool is activated, click anywhere on the image canvas. The mouse pointer will be converted into a blinking vertical line text icon. Now, we can start typing the text: 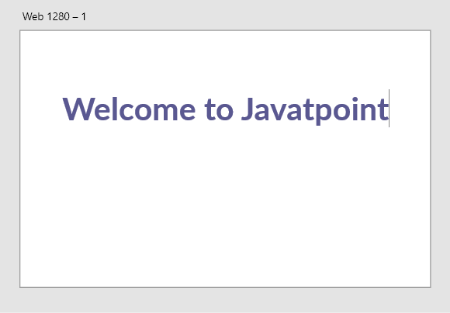
After typing the text, we can style the text. We can increase the font size, update color, change font family, and customize other text properties. The text style options can be found under the text panel in the property inspector area. 
There are different text styles available in the text section. To customize the text style select the text using the select tool and choose the appropriate option as per our need. We can also update the font family using the first dropdown option. It will automatically list the installed font family in our system. We can customize the following text properties:
We can also easily modify the text size of the object straight from the object by stretching the handles available at the bottom of the text object. All we need to do is select and drag this handle. Specifying Text AreaThe text tool allows us to define the text area for a specific text length. It will automatically break the text when it exceeds the specified text length. If we do not specify the text area, it will not break the text length; instead, it will exceed the length and overflow the text out of the box, even the artboard. It will be useful to add lengthy paragraphs which need to fit in the specified layout. To specify the text area, activate the text tool instead of clicking on the canvas, drag the canvas and specify a box size. Once the text area is defined, start typing the text within the text area. It will automatically break the text when the text box limit is exceeded to fit perfectly within the defined area. 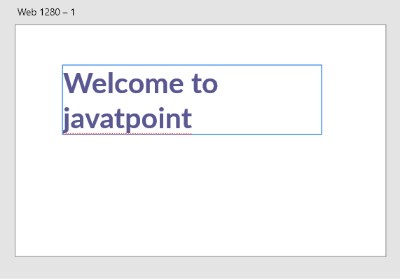
We can also resize the text area after the text is added. To resize the text area, once you are done with adding the text, click on the outside text box. You will notice the handles on the sides of the text box; drag these handles to the respective directions to increase or decrease their size. Enabling Spell CheckWe can also enable the spell check for the text to avoid spelling mistakes in words. The spell check highlights the misspelled words by a red underline and auto-correct them. The auto-corrected words will be highlighted with a blue underline. The spell check also suggests grammatical mistakes; they will be highlighted with a green underline. The misspelled words leave a bad impression of your design and may misguide the user about your application. So it is essential to type the correct spellings for the used words in your application. To enable the spell checker in Adobe XD, navigate to the Edit menu and select the Turn Spellcheck On option. Below is the direction to use the spell-check tool: The misspelled words will be highlighted by an underline according to the type of mistake. To correct them, follow the below steps:
Importing Text from Text FilesThe functional stack of the Adobe XD is limitless for each of its features. Adobe XD allows us to import the text from text files to easily include the pre-written text to our artboard. It provides different methods to easily add text to our design. Adobe XD also supports several external plugins to import data from the CSV and Excel files. We will discuss these plugins in the Adobe XD plugin sections. For now, let's understand the methods to import text from simple text files. We can easily include pre-written text to our artboard using one of the following methods: Drag a text file onto the artboard We can easily add the pre-written text to our artboard by simply dragging a text file on our artboard. It will create a text area on the artboard with the text file content. It is one of the easiest ways to add text from a simple text file. Drag a text file onto a repeating grid There is another way of adding the text from a text file. We can also add the text by dragging the text file onto a text component in a repeating grid. When we drag the text file on a text component, all of the text elements will be populated with the file text. It is useful to add the text in a repeating grid. Copy and paste the text onto the artboard We can also add the text in a text component by following the traditional copy and paste method. This method works globally for copying the text from anywhere. We can copy the text from anywhere, whether it is a text file or a web resource, and paste it onto the artboard. It will quickly add the text to the design with the pre-used text styles. After adding the text, we can easily move and edit the text element anywhere on the artboard. Formatting Text (Typography, Letter Spacing, and Line Spacing)We can easily set the format for our text using the text format options. There are different text format options for typography and spacing available in the next section. 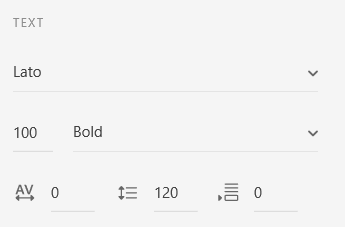
Font Family: To change the font family select the first dropdown option. It will list all the installed and built-in font families in the Adobe XD. We can select any of the options from the available list. It will update the font family based on the selection. Font Size: We can define the font size of the text by entering the specific value or selecting from the dropdown options. It will update the font size based on the selection. Font Weight: We can also set the font weight of the text to meet our requirements. We can set the font-weight by specifying it in the font-weight dropdown menu. It provides different options from normal to Bold based on the supported fonts. Character Spacing: We can customize the character spacing of the text by defining it in the character spacing section (AV icon). To set a specific character spacing, click the text object and specify the character spacing by entering a specific value in the character spacing section. It will update the character spacing accordingly. Line Spacing: Line spacing is also one of the useful aspects of the text format. It enhances the readability of the text. To set a specific line spacing, select the text that you want to customize, and specify the line spacing by entering the value in the respected field. We can also reset the line height to the default; to do so, enter the value 0 in the line spacing field. Paragraph Spacing: Adobe XD also supports the paragraph spacing, just like Photoshop and InDesign. It allows us to define the space before and after the paragraphs within the same text element. It is also very useful for multi-paragraph text sections. To customize the paragraph spacing, select a paragraph and click the paragraph spacing icon in the text section. Enter the spacing value according to the requirement. It will update the paragraph spacing based on the entered value. Resizing textThe Adobe XD provides three different options to resize the text means these options will automatically set the height and width of the content based on the selected option. There are three different options to resize the text, which are auto width, auto height, and fixed size. These tools can be found in the text section of the property inspector area. 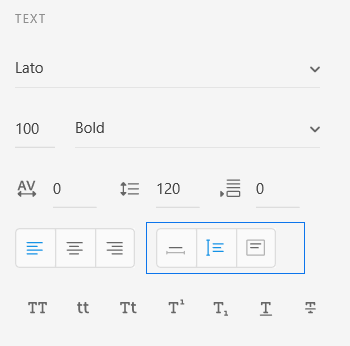
These selections will dynamically adjust the height and width of the text area. However, we can adjust the size of the text area by expanding the height and width using the handlers available on the sides of the text box. We can use these tools to precisely define the height and width of the text area based on our design needs. Aligning TextWe can easily align the text using Adobe XD. It provides three different options to align the text, which are left align, center align, and right align. By selecting just an option, all the text will be automatically aligned based on the selection. These options can be found under the text section in the property inspector area. 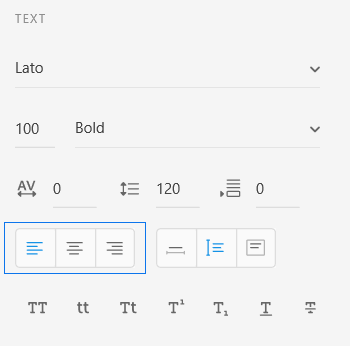
To apply these options, select the text box and click on any of the available options. It will align the text based on the selection. The align options work as follows:
Transforming TextAdobe XD provides different options for transforming the text in multiple formats. It works like the CSS text transformation properties; we can transform the text from lowercase to uppercase by clicking on a single option. It provides the following transform options:
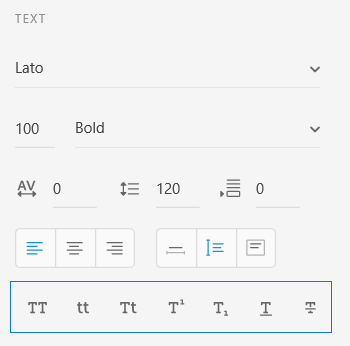
To apply any of the above transformation options, select the text and click on any of the given options. It will apply the transformation based on the selection. These options can be found under the text section in the property inspector area. Summary: Here, we have discussed text tools with different text customization options. We can easily add and customize the text and align it with our requirements. The text tool is useful for adding text to the design components and styling them with the style options. Adobe XD has several text tool options to customize the text and meet our requirements.
Next TopicFonts in Adobe XD
|
 For Videos Join Our Youtube Channel: Join Now
Feedback
- Send your Feedback to [email protected]
Help Others, Please Share


