| |

Ubuntu Bootable USBIntroduction to Bootable USBThe USB driver has been famous for its portability and ease of use. While most users find themselves applying them for general tasks such as data transfer, backup, or storage between systems. But, only some people realize the complete flash drive's potential. This article will explain some ways for unlocking that potential and detect new uses we may not have known were possible. Flash drives are used for several other things than only hold our photos through ultra-secure banking to self-contained Oses entirely. These types of uses each have a single basic function among them that is bootability. Hence, the bootable flash drive will permit us for booting the system through a file system over a flash drive instead of our hard drive. Our system contains a boot sector that includes details about its use on the hard drive. A volume boot record would include instructions on how we can run an OS or any other program. A flash drive should have a volume boot record, master boot record, and include a program or an OS that could be run for booting to a flash drive. Primarily, we will get two advantages of using a bootable USB drive. These are mentioned below: Data and System RecoveryA bootable flash drive can be used for recovering a failed system if the operating system doesn't load on an internal storage drive. Examples of Bootable USB DriveA few best bootable flash drive examples include running an OS installer such as OSX, Windows, or even a few Linux forms. Probably, it is one of the most basic uses of any bootable USB drive. This feature was restricted to DVDs and CDs not several years ago, but it became feasible for placing these OS installers on our USB drive entirely as the memory technology of flash drives improved. If our system is a new build, or if our system becomes unusable through a compromised or corrupted OS, then we can make use of a bootable USB drive for installing the operating system. We can restart and use our system as normal after all files will be copied to our system. Sometimes, if an operating system such as OSX or Windows becomes compromised, then we can use a bootable install USB for rebuilding only the broken or missing elements without doing a complete system reinstall. Note: The procedure of creating this operating system installer somewhat varies from the operating system to the operating system.
Alternative OSesBoth of the uses we've discussed so far think that our system is in a disrepair state. In this situation, we can install the LiveCD release of anyone of the 305 plus distributions of Linux available today. As we all know that Linux OS is an open-source OSes family designed for replacing privately-owned OSes and wanted to be publicly maintained and licensed. On the flash drive, a LiveCD of Linux will permit us for experiencing an OS while keeping our current setup. It is the best way for discovering if a specific distribution of Linux is a nice choice for us or our enterprise. We can breathe life into previous hardware via installing a Linux build, gaining a completely functional operating system with every tool we use now with every flavor of Linux available. Why we select Ubuntu?We know about Windows that is practically one of the most popular operating systems across the world, paralleled by the MacOS only. Hence, a question comes here, why should we select Ubuntu OS and not a well-known and famous version? Firstly, having a windows OS doesn't stop us from having Ubuntu also. We can give the dual-boot installation or instead have both over the PC. It permits us to make a selection all time we turn over the device. Then, over time we may select to delete the one we find less usable and it is a good solution for those users who still have doubts about making a bootable USB of Ubuntu operating system for their system. Although, there are many reasons that cause to prefer Ubuntu OS. Some of these reasons are listed and explained below: 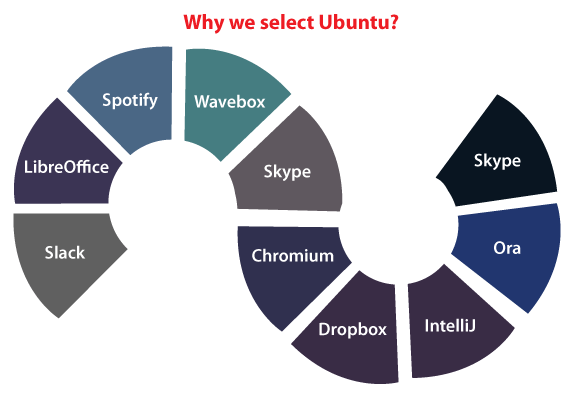
Why establish an Ubuntu Bootable USB?Making it an unusual selection is a benefit definitely since the operating system installation would not affect the main disk's partitions that we find in the system in any way. The operating system usually already installed is saved in them. We could occupy outer space and have high performance in this way. Installation of Ubuntu USB on Mac SystemsAs we have discussed that the Ubuntu OS can be installed and used on any kind of system even those generated by Apple. So, here is every step we need to remember for creating a bootable USB of Ubuntu for a Mac system. Requirements:Before detecting the steps for creating a bootable USB of Ubuntu we need to understand the essential requirements to get the action done with a working software perfectly.
A computer or PC with 3.0 or 2.0 USB ports. Note: If we have any Mac after 2017 or 2018 see if it includes the T2 chip. It would not be possible if present for booting Ubuntu through USB and we can't install Ubuntu OS in other partitions.See if we have a Mac using T2Since 2017 or 2018, Apple has begun using a T2 chip. This chip enhances the security of the system according to them. It is not possible to use an OS other than a Mac OSX. Preparing our USB for installing LinuxIf we are doing a task on an Apple system then for ensuring maximum capability we would initially need to format a USB stick. For doing it, we can make use of a unique tool which is given by Apple known as "Disk Utility". Although, if we wish to use a drive as common hardware we could skip this process.
EtcherIt is an open-source and free application that permits us to specify the ISO file, which we will notice we need for installing Linux later on USB. This procedure is straightforward through the official website we can download the app and execute it. If we wish we can also put it inside the folder of the app on our PC or leave it where it is exactly. Note: Also, Whale Etcher is available for Linux and Windows.To ignore being blocked via the Mac OS we could turn on an option, i.e., "App Store and identified developers" from the control panel. After that, we need to select the "Security and privacy" option which we will find inside the System preferences. We need to choose the "Open anyway" option when a warning occurs. We will now need to deal with the configuration. It will specify to our USB device within three distinct steps that we will need to choose when it is time for doing so:
We will be asked for the password of Etcher to type to continue. The writing of our device will begin at this point and we can always monitor and check it. After the process of writing, there will be a phase of validation of many contents in our USB. Etcher will disclose that the process is successfully completed after this process. We will have made our Ubuntu bootable USB to use on our Mac after this process. In case we wish to use our USB stick on the Apple Mac, then we will need to turn on or restart the system keeping that USB stick put while pressing the alt/Option. It will start the Startup Manager and our USB flash drive will represent the EFI Boot name, once chosen the menu would boot along with Ubuntu. We can now boot (start) our system with the operating system we installed over the USB. The second option for Ubuntu bootable USBFirst of all, we should note that we need to fix the boot mode through the USB stick for booting the operating system using a pen drive inside the PC bios. We used DVDs and CDs in previous time but now USB drives are long-lasting. They have more memory and are smaller. We will download the following software for installing Linux Ubuntu operating system on USB:
The initial step is to begin the UNetbootIN software and then click on YES to proceed to the home page. On this page, we need to choose the Disk Image option and select ISO from a drop-down menu. We will see a button along with 3 dots on the right-hand side. Press the button to choose the ISO file that we should have shortly before downloaded from the website of Linux Ubuntu. Go ahead once selected and choose USB Drive through the Type menu. Then, we need to insert our flash drive into the USB port on our system. After that, locate the system and click OK to begin. We just need to wait at this point for the process to be completed. Now, we will need to reboot the system along with the USB drive inserted to begin Ubuntu. Note that Ubuntu OS will not start if we haven't set the USB in the bios as the main boot. If we haven't already implemented so, we must reboot the system, authenticate the bios, and choose USB as the main boot in the section corresponding to the operating system. How to establish a Ubuntu flash drive for Windows OS and other OSesIf we wish to establish a Ubuntu bootable USB and we have a Windows OS system, then the process will be quite similar as the programs we described above are existed for Windows as well. It is the proper process for implementing if we wish to establish a Ubuntu bootable USB, for use on many devices that make use of the Windows OS. The first stepAs in this type of case, verification is the first step to take that we have all the essential requirements for creating a Ubuntu bootable USB. Hence, let's proceed to:
We can now dive into establishing a Ubuntu bootable USB when we have already verified these above steps. The procedureAs we have seen corresponding Mac PCs and even Windows PCs don't need several steps. Practically, it is identical and the procedure is simple. Hence, the initial step is to input our USB drive into a USB port on the PC. Now, we are going to check for Ubuntu official website once it is done by using a search engine. Also, we are going to choose the Ubuntu USB version that we wish to download inside the Download section. For choosing it, all we need do is press a button, i.e., Download. We will be reached on a fresh page at this point where we can do a donation for the entire team or proceed with the download. Move the ISO file to the USB driveA file is known as an ISO file that would be downloaded along with a copy of Ubuntu. All we need to do is transfer the file to our USB key at this point. We can pursue the steps for Whale Etcher which are mentioned above for this operation. However, we need to be careful because the files on the USB drive would be removed. So, we need to ensure to do keep the backup before going to begin the installation process. The final procedureAll we need to do is eject our USB flash drive and see that everything is saved and present when the installation process is completed. We will need to jump on the final procedure if everything is going well which is to restart the operating system. Now, let's input the USB drive into our PC and then start the computer. We need to repeatedly click on the F12 key on the logo screen, choose our key, and begin the process. The key might be different in different computers. If the F12 key is not working, we can Google which key to use of our computer model. We will be prompted if we wish to install Ubuntu OS on our device. If we wish to keep the OS just on the USB we need to choose the "Try Ubuntu" option, which means we can give a try to Ubuntu OS without the need to install it. Now, we are officially using our new Ubuntu OS on USB.
Next TopicUbuntu Desktop
|
 For Videos Join Our Youtube Channel: Join Now
Feedback
- Send your Feedback to [email protected]
Help Others, Please Share


