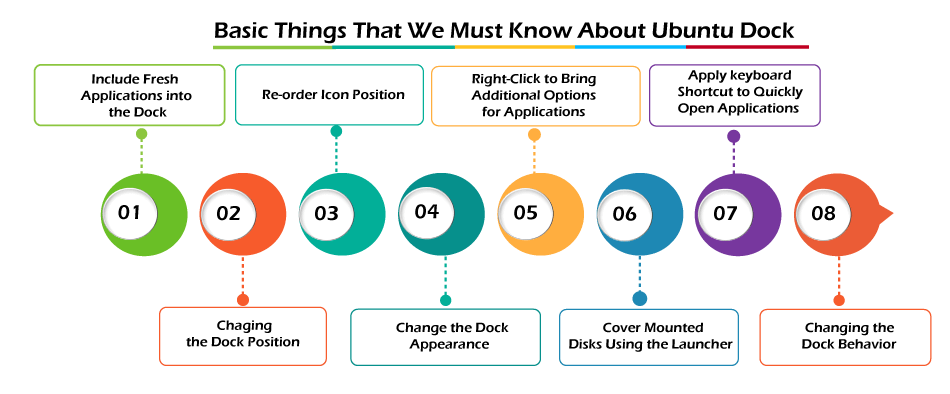
Ubuntu DockWhen we log into the Ubuntu system, we will find the dock on the left-hand side with a few application icons. This dock (also called panel or sometimes launcher) permits us to quickly launch our most used programs. Basic things that we must know about Ubuntu DockIf we are unfamiliar with Ubuntu, we should know some things about the dock. Eventually, we will find these dock aspects, which are listed and explained below: 
Include fresh applications into the dock (or delete them)The steps are easy. We need to find the application using the menu and execute it. The active application occurs inside the dock, below every other icon. We need to right-click on it and choose the option, i.e., "Add to Favorites". It will grip the icon to the dock. Deleting an application icon through the dock is even simpler. We do not need to execute the application. We need to simply press it and choose the "Remove From Favorites" option. Re-order icon positionThe icons of new applications are added after every other icon in the dock by default. We do not need to tolerate it as it is. We just have to drag and drop to another position of our choice to modify the icon's order. We do not have to "lock it" or make any extra effort. It will stay in that specific location until we make any modifications again. Right-click to bring additional options for applications
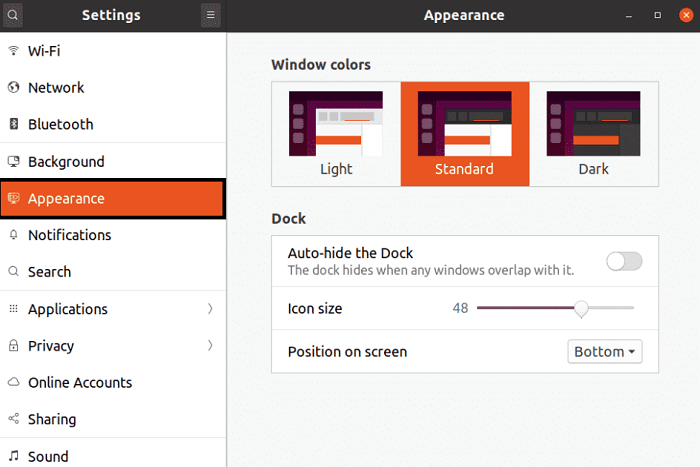
Apply keyboard shortcut to quickly open applicationsThe dock permits us to open an application with one mouse click. What if we want? We can save the mouse click using a keyboard shortcut. A number key and the Window/Super key will open the application in that specific position. If the app is running already, it's brought to focus, i.e., it occurs in front of every other active application window. We should ensure that we do not re-order the icons each time because it's position-based. We can activate or deactivate the dock on the extra screen. Changing the dock positionThe dock is, by default, located on the left-hand side of our screen. A few users like the launcher in a more classical way, at the bottom side. Ubuntu permits us to modify the dock position. We can move it to the right side or bottom side. We need to visit Settings -> Appearance to modify the dock position. We should find a few options in the dock section. We need to modify the settings, i.e., "Position on screen" here. Dock position in more than one monitor setupIf we have more than one screen attached to our system, we can select whether to show the dock on every screen or one of the selected screens. Change the dock appearanceLet's see a few more dock customization options on Ubuntu. Suppose we added several applications to the dock or also have several applications open. It will cover up the space, and we will need to scroll to the bottom and top to visit the applications at endpoints. What we can do here is modify the size of the icon, and the dock will accommodate many icons. We need to visit Settings ->Appearance to do so and modify it by changing the slider upon icon size. By default, 48 pixel is the icon size. Cover mounted disks using the launcherAn SD card or USB disk is mounted to the system if we plug-in it, and an icon immediately occurs in the launcher. It is useful because we can right-click on it and choose the option, i.e., safely remove drive. Somehow, if you find it troublesome, we can turn this aspect off. But we can still use the mounted drives with the file manager. Changing the dock behaviorLet's customize the behavior (default) of the dock and make it more compatible with our requirements. Enable minimize in click If we click on the icon of any running application, the window will be got to focus, and that's fine. Although, if we click over it, nothing will happen. Clicking on a similar icon would not minimize the application by default. Auto-hide dock and bring more space If you want to use the maximum space of the screen, we can activate the option, i.e., auto-hide for the dock on Ubuntu. It will hide the dock, and we will get the whole screen. Still, the dock is accessible. We can move our cursor to the dock location where it is utilized to be, and it will again appear. When the dock re-occurs, it's overlaid on the active application window. And that's a great thing; otherwise, several elements will start moving over the screen. The option, i.e., auto-hide, is available within Settings -> Appearance and in the Dock section. We need to toggle it. If we do not like this behavior, we can again activate it in a similar way. Deactivate Ubuntu dock The option, i.e., auto-hide, is good enough for various people, but a few users simply do not like the dock. If we are one of them, we can also entirely deactivate the Ubuntu dock. Starting with the 20.04 version of Ubuntu, we have the Extensions application present to manage GNOME Extensions. We can easily re-enable or disable the dock using this Extensions application. Replace Ubuntu dock There are many dock applications of a third-party present for Ubuntu and other distributions of Linux. We can install any dock of our choice and utilize it. In this case, deactivating the Ubuntu dock will be a better idea. It would not be wise to use more than one dock at a time. Some most famous Ubuntu and derivative docksUsing the dock on our system integrates the way we can execute our applications with shortcuts in a faster way. These can be developed in a great way for the desktop environment. Hence, we can accept them and provide our desktop with a better look using the dock. We will discuss a few of the most famous docks that we can use in our system. 
Cairo DockCairo Dock gives a way to load applications using launchers and panels at the screen's bottom. The dock contains a menu and several other helpful icons, like the ability to link to wireless networks and enjoy audio tracks. PlankThis dock is a lightweight app launcher because it doesn't need a large memory amount. It permits us to easily customize the settings; among its features, we can find:
Advance Window NavigatorIt is a dock which is situated at our desktop bottom that serves as any window list, contains applets, launches applications, and much more. We can install this dock very easily, and it is also simple to administer because it consumes fewer resources. It supports third-party applications, to do lists, and launchers. DockyIt is a launcher acquired from GNOME DO that permits to manage the most utilized applications in Ubuntu in a distinct way. Also, it has several add-ons known as helpers and docklates that permit us to collaborate with applications, like Transmission or Liferea, Rhythmbox, and Tomboy, or functions, like inspecting CPU consumption, seeing the time, and reviewing other data in our system. Gnome DashboardEast is an element that's a segment of GnomeFlashback and offers default applets and panels for the Gnome desktop environment. Panels are utilized to add applets, like a menu bar to launch applications, indicator applets, and a clock. They offer access to setup system functions, like current keyboard layout or network sound. There is an open application list inside the lower panel. DockBarXIt is a lightweight panel and taskbar replacement for Linux, which operates as a standalone dock. DockBarX brings all features of the Windows 7 taskbar to our distribution. The taskbar provided by DockBarX is completely functional and an ideal Windows 7 taskbar copy, copying thumbnail screen previews that we have launched in the session. We can find the below features in its primary functionality:
Viewing and Changing Advance Settings of the Ubuntu DockUbuntu shifted to the "GNOME Shell" desktop environment a few years back. This shell is slightly themed and customized to mimic the old "Unity" desktop environment. The GNOME Shell dock (default) is substituted by a "Dash-to-dock" GNOME Shell extension, merely renamed as "Ubuntu Dock". Dash-to-dock provides a plethora of options for customizing the dock. Although, Ubuntu developers opted for keeping things minimal and simple by disclosing only some useful options. However, various customization options are still available. In this article, we will discuss how to modify these advanced hidden settings in the Ubuntu dock. Ubuntu Dock Settings (Default)The settings of the Ubuntu dock can be accessed from the icon, i.e., "Settings" inside the application launcher. We will find some settings for customizing the dock inside the "Appearance" tab. Apart from these, other customization options are, by default, not present for users. 
DConf EditorIt is a centralized configuration utility that saves app and shell settings in the key-value pairs. Most third-party and default GNOME3 applications apply DConf for storing options. This editor can be defined as a graphical tool to handle the settings that are usually invisible to users. Directly modifying settings using the DConf Editor is depressed by developers as a misarrangement can break our system. However, if we are careful and have a backup before modifying settings, DConf Editor can be used for tweaking advanced settings.
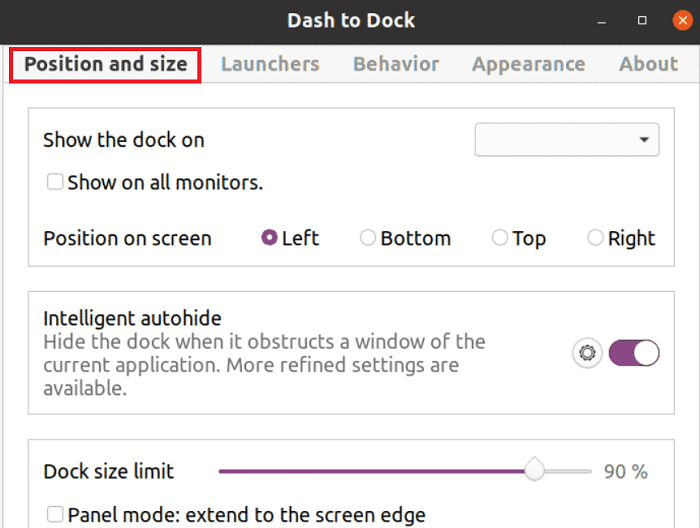
Now that we know how to get a backup, restore, and reset DConf Settings, we can try modifying the Ubuntu dock advanced settings. We need to open the app, i.e., "DConf Editor", using the application launcher. Find "dash-to-dock" for accessing the dock settings. Also, we can manually operate to the path, i.e., "org > gnome > shell > extension > dash-to-dock" for accessing the settings. Every setting coming under the entry, i.e., "dash-to-dock", is self-explanatory, and information is given where required. Mostly, these settings are composed of radio buttons, checkboxes, and toggles. We need to just modify them according to our needs. All settings can be restored individually to their default value through the GUI. Dash-to-dock GNOME Shell Extension SettingsWe can entirely skip with DConf Editor and get a Dash-to-dock extension for changing the Ubuntu dock settings. Any modifications made to dash-to-dock will use in the Ubuntu dock as well, even if we delete dash-to-dock later. We can execute the below command to install dash-to-dock and its essential dependencies on Ubuntu: We can bring a dash-to-dock GNOME Shell extension after installing the above package. We will need to use the link in any Chromium-based or Chrome browser for installing the extension. We need to right-click over the application grid icon in the dash-to-dock panel to use the settings when we have successfully installed the extension. 
We can modify the settings as per our requirements with the GUI configuration utility. First, we need to delete the dash-to-dock extension and use the command, i.e., Dconf reset, for resetting the Ubuntu Dock to its default settings. Below is the command we need to execute for resetting the Ubuntu Dock after deleting the dash-to-dock using the download link: If we can find both dash-to-dock and Ubuntu Dock after pursuing the above steps, we need to log out and log in again to fix the problem. Also, we can fix this problem by refreshing the GNOME shell by clicking <ALT+F2> and "r" within the popup box.
Next TopicUbuntu EPUB Reader
|
 For Videos Join Our Youtube Channel: Join Now
Feedback
- Send your Feedback to [email protected]
Help Others, Please Share


