| |

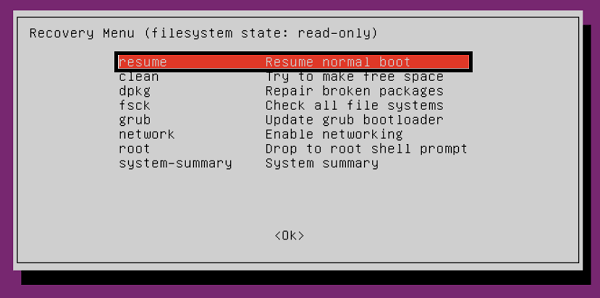
Ubuntu Recovery ModeIf our computer fails to boot for any reason, it might be helpful for booting it into recovery mode. This mode loads a few common services and drops us into the command line mode. Then, we are logged in as the superuser (root) and can repair our system with the help of the command line tools. We can still use our installation CD if the 'booting into recovery mode' option doesn't work. Ubuntu Core is robust inherently. But if data corruption problems occur, even on data partitions or boot, it can still use a recovery mode to aid reinstall, restore, or repair a damaged device. The recovery modes can be used in three manners:
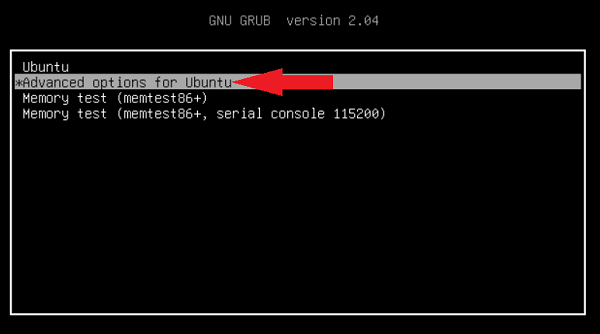
Note: On Ubuntu Linux, we must be using the Grub boot-loader for accessing the recovery mode. If we are using any other bootloader, there is a chance that this aspect will not be available for us.Ubuntu Boot into Recovery ModeAll devices provide the Recovery Mode aspect which includes the capability to implement several operations. These operations contain junk data cleaning, update installations, device reset, backup, and data restoration. Similarly, we have the accessibility of the aspect, i.e., Recovery Mode as well in Linux distributions. It permits the user to restart the system and bring it with a fresh setup. We may require the recovery mode aspect in the system at any time. There can be several possibilities, i.e., if we see any glitch, it fails to begin for any reason, or when the system slows down, it means that our system requires recovery. Also, we can recover some broken files and inspect when the memory is correctly working or not.
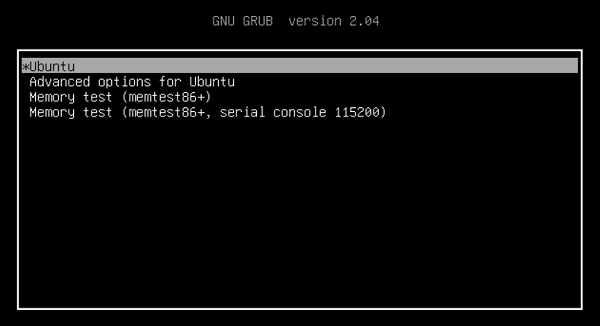
Let's explain all options that might aid us to choose:
The below booting modes are available on boot: 
Benefits of Recovery Mode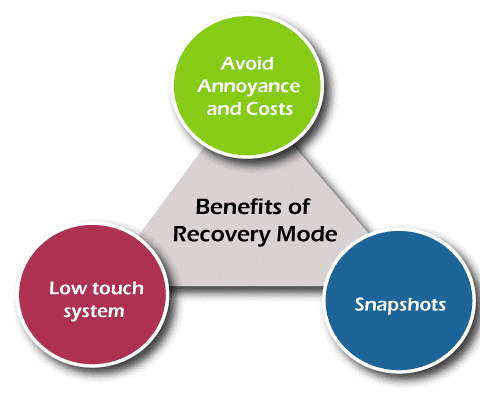
Avoid Annoyance and CostsIn the field, having to repair manually an IoT device often can increase the device cost itself. Dispatching any operator to a remote location for performing maintenance or intervention may illustrate some significant costs, relying on the device's accessibility and distance to the site. The final downtime may illustrate some extra losses, even more so when the device is mission-critical. A liable device recovery system is necessary to add ignore these annoyances and costs. Low touch system maintenanceIn the field, device recovery must be low touch. The IoT devices might be expanded at a very big scale with several devices. The maintenance operations turn into a significant cost driver at this scale. Remote and automation access is essential for low touch maintenance. Repetitive and basic maintenance tasks can be autonomously performed by the operating system. It frees up the operators of the device from implementing easy maintenance actions repeatedly on many devices which saves time. Only complicated maintenance tasks need to be mounted on the device operators while doing it. Allowing device operators along with remove access to implement complicated software-related actions of maintenance, ignored substantial costs and permits every device within the field to be centrally maintained- decreasing the risks. SnapshotsMore than one snapshot for a similar device could be backed up inside the recovery system. The snapshots reflect both snap collection and configuration settings installed in the system. The device operators can save, name, and create such snapshots within the recovery system. It enables the desired system state swift recovery when required. Recovery can manually happen from a dedicated UI or by an API call remotely. Reinstalling Ubuntu while keeping Programs and FilesWe can still boot up an Ubuntu USB drive or live CD if there is an issue with our installed Ubuntu system. We need to boot to live media and begin installing the Ubuntu system. Ubuntu should search our previous installation and provide us an option, i.e., "Reinstall Ubuntu".
It is always a better idea for having backups if we are worried about losing our files. We can use the option, i.e., "Try Ubuntu" on the Ubuntu installation media for accessing a graphical desktop. We need to start the file manager and authenticate the files saved on our Ubuntu system drive from here. Connect a few sorts of external storage like an external hard drive or USB flash drive to the system and utilize the graphical file manager for baking up our files. In the sidebar, we will see the Ubuntu drive upon Devices. We will see our personal files in our /home/NAME directory. Ensure to remember our hidden configuration files if we also wish to back those up.
Next TopicWoeUSB Ubuntu
|
 For Videos Join Our Youtube Channel: Join Now
Feedback
- Send your Feedback to [email protected]
Help Others, Please Share


