| |

Vue.js InstanceTo start a Vue application, you have to create a new Vue instance by using the Vue function. Whenever we create a new Vue project, the Vue instance gets activated by default in the main.js file. It is also called a root Vue Instance. Syntax:Vue's application design is inspired by the MVVM pattern. As a convention, we have to use the variable vm (short for ViewModel) to refer to our Vue instance. When you create a Vue instance, you have to pass in an options object. In this article, you will learn how you can use these options to create your desired behavior. A Vue application contains a root Vue instance created with a new Vue. It is organized into a tree of nested and reusable components. For example, if you create a todo app, then its component tree might look like the following image: 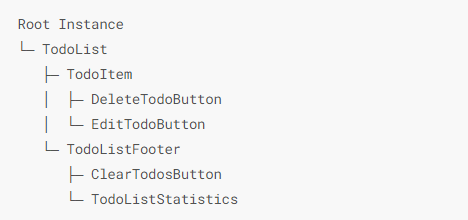
Note: All the Vue components are also the Vue instances.Let's take an example to see what needs to be part of the Vue constructor. Index.html file: Index.js file: Let's use a simple CSS file to make the output more attractive. Index.css file: After the execution of the program, you will see the following output: Output: Firstname : Albert Lastname : Pinto I am Albert Pinto from Las Vegas 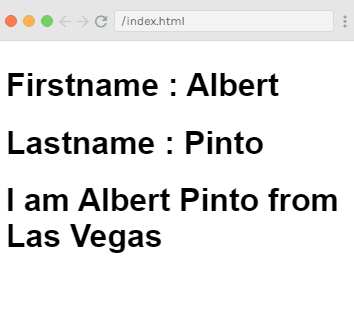
Example explanationIn the above example, you can see that we have used a parameter called el. This "el" parameter is used to carry the id of the DOM element. In the above example, we have the id #app. It is the id of the div element presented in the Index.html file. Now, our above program's logic will affect only the div element and nothing outside it. After defining the id, we have defined the data object. In the data object, we have defined some values such as firstname, and lastname. This is also defined inside the <div> element. For example, Here, the Firstname : {{firstname}} value specifies the first name of the stored data in data object. When you execute the program, it will be replaced inside the interpolation, i.e. {{}} with the value assigned in the data object, i.e. Albert. Same in the case of the last name as the Lastname: {{lastname}} value specifies the last name of the stored data in the data object. When you execute the program, it will be replaced inside the interpolation, i.e., {{}} with the value assigned in the data object, i.e., Pinto. After defining the data object, we have methods where we have defined a function named "mydetails" and returning value. It is also defined inside the <div> element as Hence, you can see that the function mydetails is called inside {{} }. You can see that the value returned in the Vue instance is printed inside {{}}. Vue Instance Lifecycle HooksEvery Vue instance goes through a series of initialization steps. When you create an instance, it needs to set up data observation, compile the template, mount the instance to the DOM, and update the DOM when data changes. This process is known as the lifecycle of a Vue instance. Lifecycle Diagram of the Vue Instance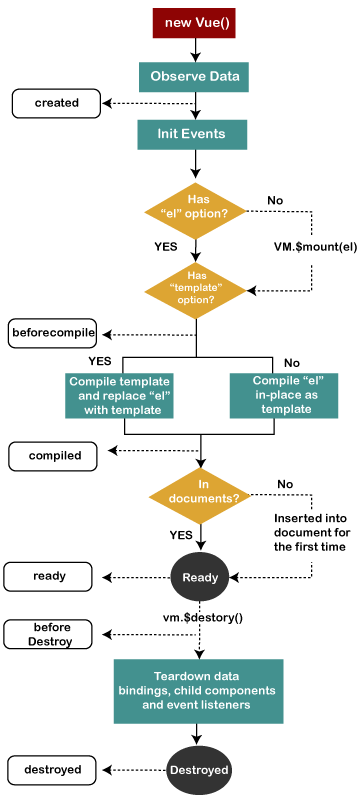
Explanation of Vue Instance Lifecycle HooksFollowing is the list of all events or hooks a Vue instance goes through. There are eight lifecycle events/methods or hooks for Vue.js Instance Lifecycle:
beforeCreate() hook: The beforeCreate() hook is the first event or hook that occurs in the creation process. It facilitates developers to perform actions even before the component has been added to the DOM. We cannot access the DOM inside of this event. In this hook, the data is still not reactive and events that occur during the component's lifecycle have not been set up yet. created() hook: The created() hook is used to run the code after creating the instance. It facilitates you to access the reactive data, but the mounting or rendering of templates and Virtual DOM is not completed yet. In this hook, events are active and access to reactive data is enabled though templates have not yet been mounted or rendered. beforeMount() hook: The beforeMount() hook is used to execute just before the initial render happens and after the template or render functions have been compiled. It is invoked after the template has been compiled and the virtual DOM updated by Vue. This is the rarely used event, and in most cases, you don't need to use this event. mounted() hook: The mounted() hook is the most frequently used event or hook. This hook provides you full access to the reactive component, templates, and rendered DOM In this hook; you have full access to the reactive component, templates, and rendered DOM. beforeUpdate() hook: The beforeUpdate() hook is executed just before the data changes on the component and the update cycle's start. It runs right before the DOM is patched and re-rendered. updated() hook: The updated() hook is used to execute after the data changes on the component and the DOM re-renders. If you want to access the DOM after a property change, it is the best place to complete this action. beforeDestroy() hook: The beforeDestroy() hook is used to execute just before tearing down the instance. This is the second last step of the Vue Instance life process and is the right place to clean up events or reactive subscriptions if you have to do this. destroyed() hook: The destroyed() hook is the last step of the Vue.js Instance life process and used to do any last minute clean up.
Next TopicVue.js Template
|
 For Videos Join Our Youtube Channel: Join Now
Feedback
- Send your Feedback to [email protected]
Help Others, Please Share


