| |

WooCommerceWooCommerce is the most popular e-commerce solution for WordPress. It increases over 4 million active installs, a 4.6 user rating on WordPress.org, and a collection of happy, loyal digital store owners. Sales in E-commerce are increasing, so if you're looking to open a shop on your WordPress-powered website, then choosing WooCommerce is one of the best decisions you could make. How can you get WooCommerce up and running up your website? To answer this, we've put together an extensive WordPress WooCommerce brief tutorial. Let's get in! How to Install and Set up WooCommerceStep 1: Install the Plugin The first thing you'll need to do is to install WooCommerce on your website. You can download it for free from the WordPress repository, then upload it to your site. Also, you can install it right through your WordPress dashboard. 
To do this, login to your WordPress site and navigate to Plugins à Add New. Use the search bar to locate "woo-commerce," and click on Install Now when you find the required plugin. Mark the plugin author as Automattic: 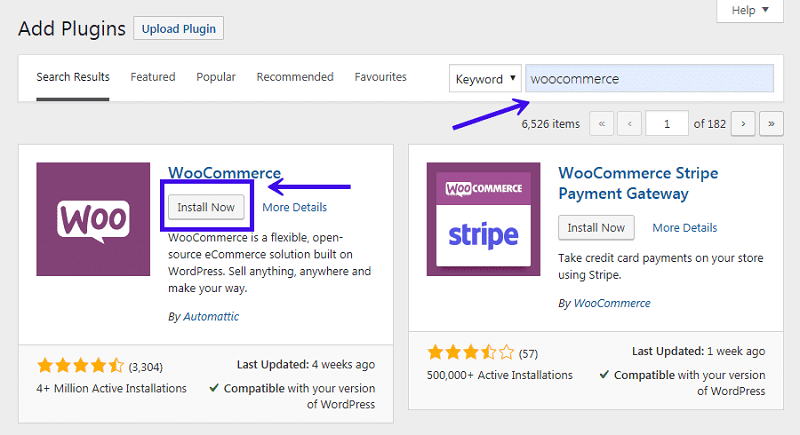
Wait a moment till the plugin is installing. Then, click on the Activate button: 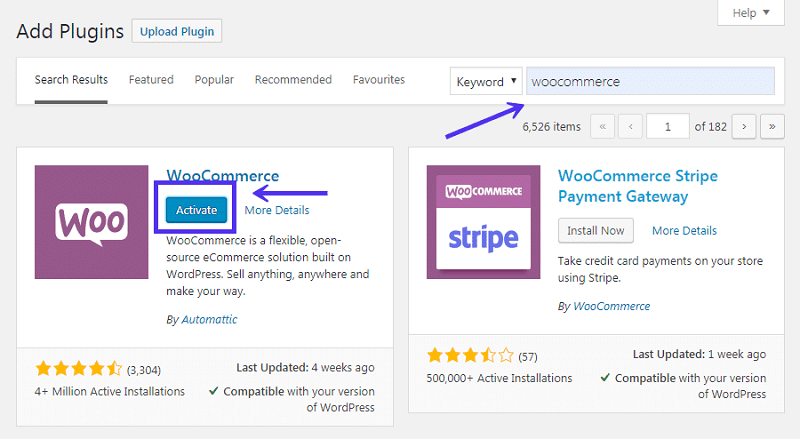
Step 2: Access the Setup Wizard After the complete installation of WooCommerce, you'll be prompted to walk through a setup wizard. It is optional, you can skip it, but we recommend going through it to configure some key settings. The first page of the WooCommerce setup wizard should look as follows: 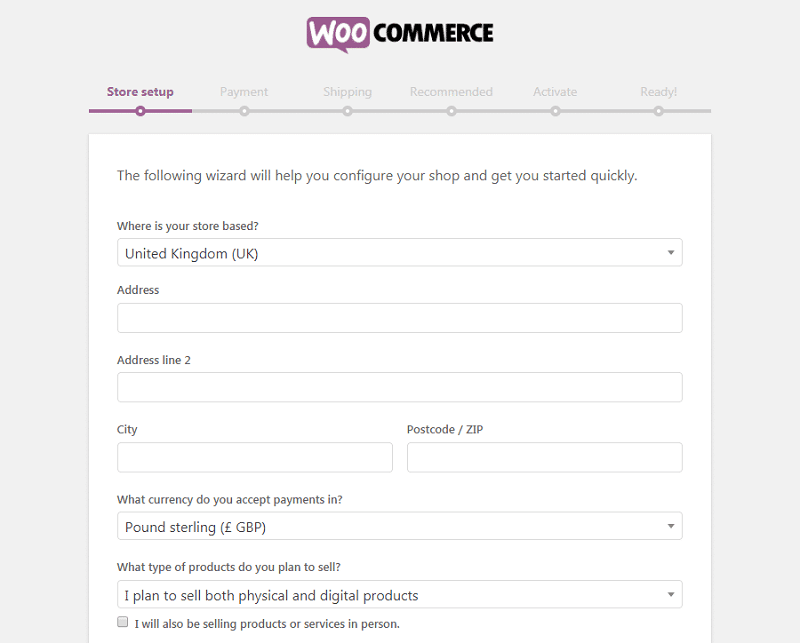
Here, WooCommerce is prompting you to enter some basic information about your store. It includes its address, what currency you'd like to use, and whether you plan to sell digital or physical products (or both). Keep in mind that anything you set here (or throughout the rest of the setup wizard) can be changed later on in your WooCommerce settings if necessary. For now, the next step in our WooCommerce tutorial 2019 is to select Let's Go. Step 3: Choose Your Payment Processors On the next page, you can decide what payments you'll enable for your online store. By default, you can use Stripe and PayPal, along with offline payments such as checks and cash: 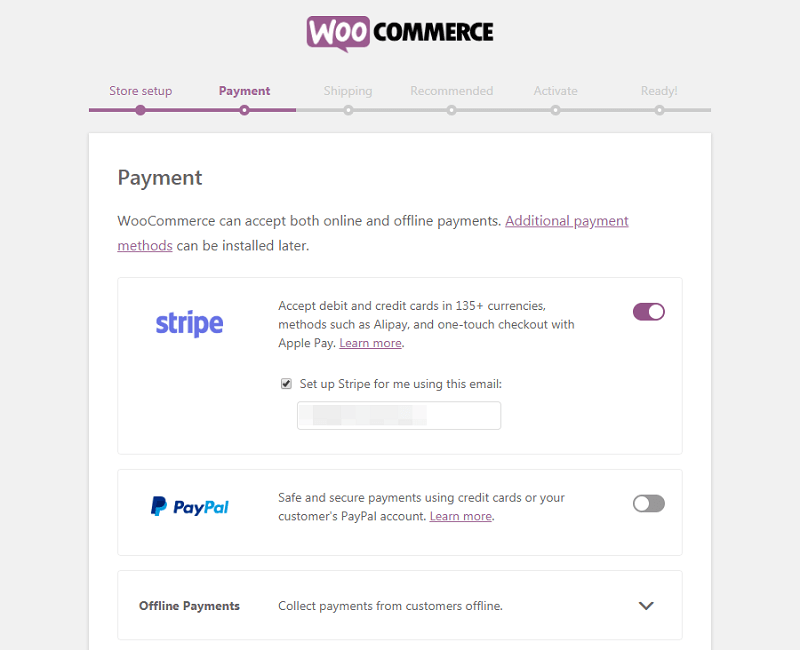
Please select the options you'd like to use, and WooCommerce will set them up. You can also use extensions to add more payment processors to your store. Step 4: Configure Your Shipping Options Next, you'll find the Shipping screen: 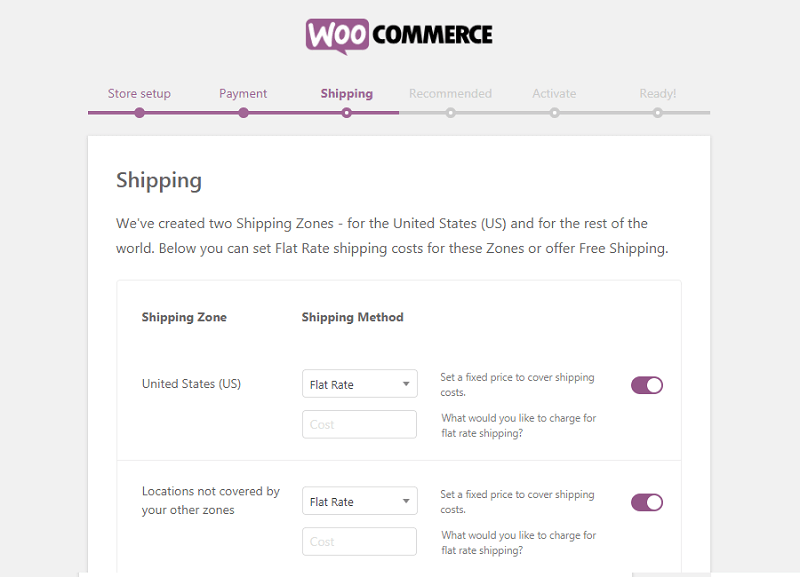
Here, you can decide how much customers will be charged for shipping. You can set one rate for your preferred zone and another for customers who are in other locations. If you like, you can also offer free shipping to one or both groups. Step 5: Review Optional Add-Ons At this point, you've configured all the basics for your online WooCommerce store. The next page of the setup wizard presents you with a few optional add-ons: 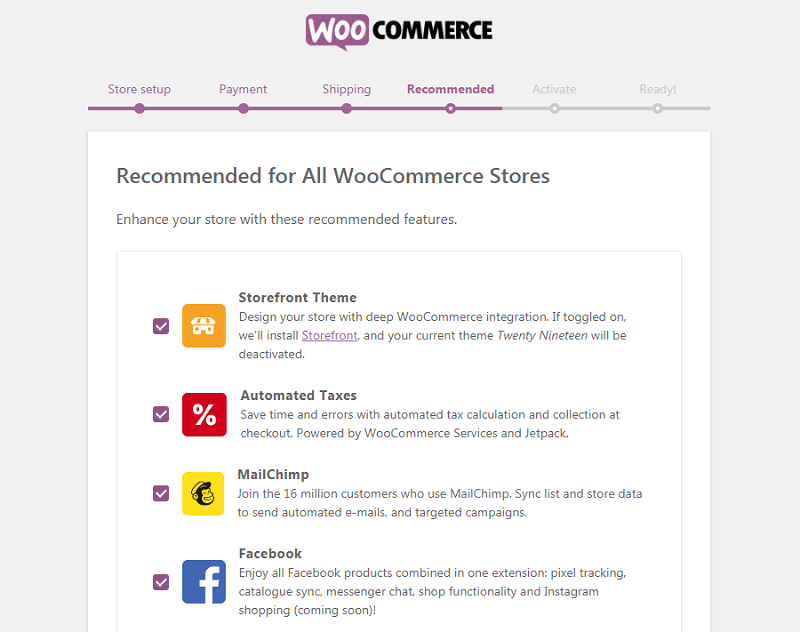
All of these tools can come in handy, although none of them are required to run your online store. We do suggest at least checking out Storefront. This WordPress theme is designed specifically for WooCommerce and can make setting up your store quicker and easier. Step 6: Installing the Jetpack Plugin The following screen also offers an optional add-on: 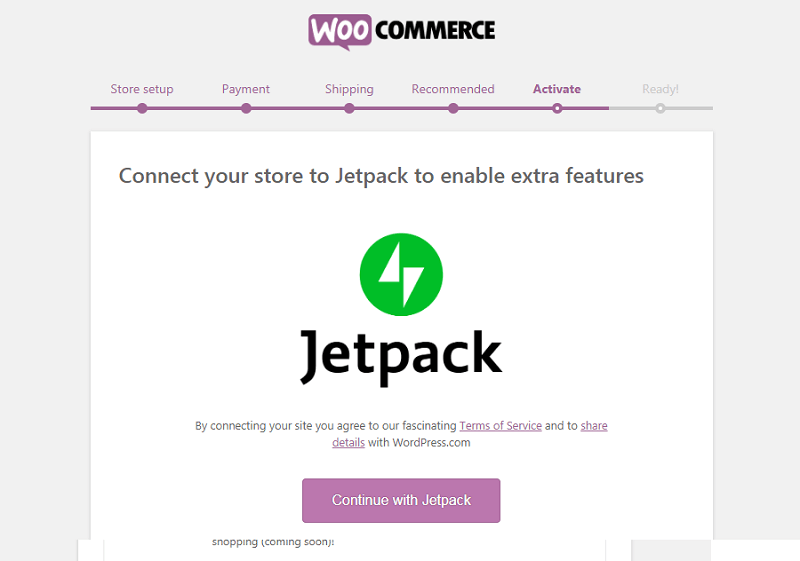
Jetpack is a handy WordPress plugin that offers a wide range of features. It includes security functionality, various analytics, and more. It can be a valuable addition to your WooCommerce store but isn't required - so it's up to you whether you'd like to install it or not. Step 7: Complete the Setup Process Your WooCommerce store is now ready to rock and roll: 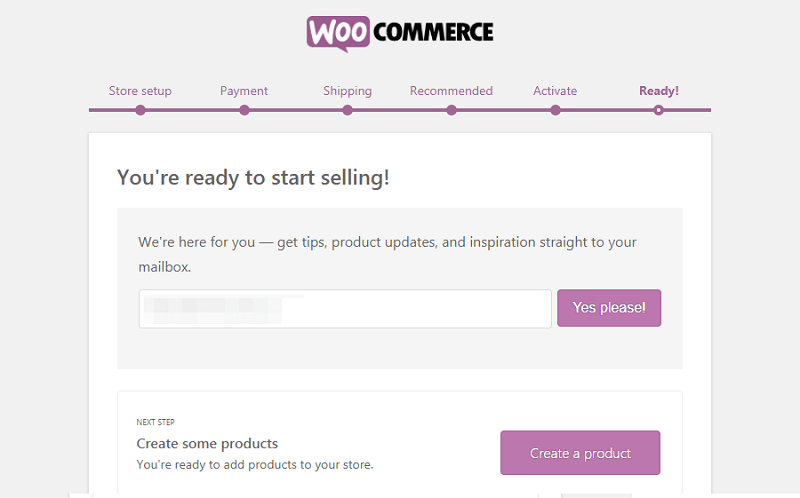
You'll find several helpful links here. You can import products to your store, return them to your WordPress dashboard, or edit the settings you just configured. Most likely, however, what you'll want to do now is start adding products. To keep following our WordPress WooCommerce tutorial, go ahead and select Create a Product now. How to add and manage a new product in WooCommerceAfter installing WooCommerce, you'll find two new tabs on your dashboard's side menu. These are called WooCommerce (your general settings area) and Products (your products settings area). To start setting up your online store, you can either follow the link at the end of the setup wizard or go to Products > Add New. Either way, this will enable you to add your first product using the familiar WordPress editor: 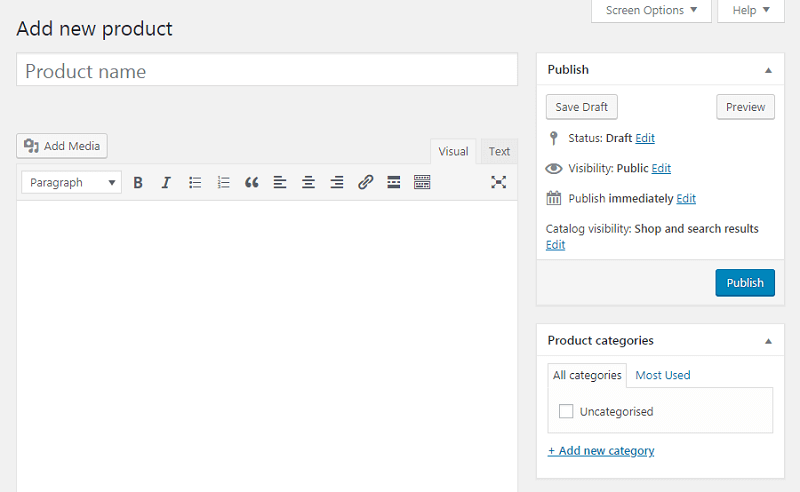
Firstly you'll want to do is to create a title and a description of the product. Here's what just a title and description looks like in a live preview: 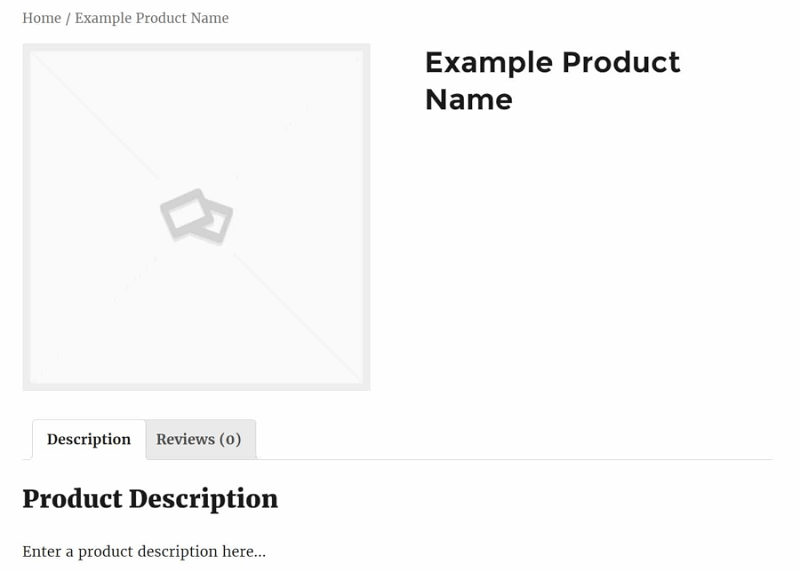
With this done, you'll also want to add information about your new product to WordPress. In the following few sections, we'll look at how to do so. Adding Key Details to Your Product If you scroll down below the post editor, you'll see two new widgets not found on regular posts or pages. The first is the Product data section: 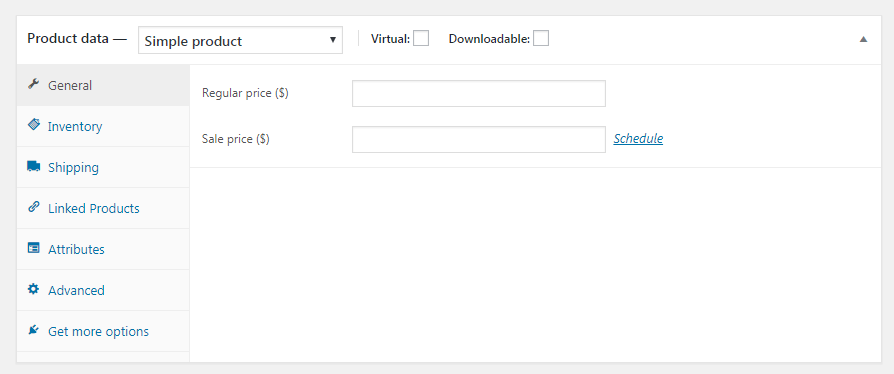
Here, you can add all kinds of details about your product. At the very top, you can select whether or not the product is virtual (which removes the Shipping tab) and if it is downloadable. Then, in the General tab, you can enter the regular and sale prices (sales can be time-sensitive). If you're selling digital products, you'll also have to upload the file to be purchased, customize the download limit (leave it blank to mark it as unlimited), and set the download expiry: 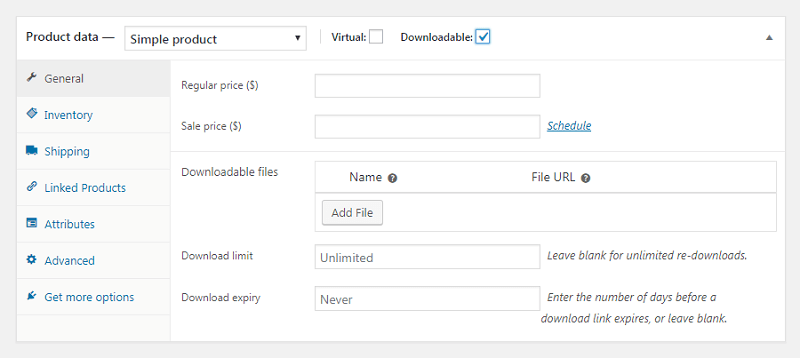
Next, in the Inventory tab, you can manage your stock by entering in the quantity of the product, stock status (in/out of stock), and if you'd like to allow backorders: 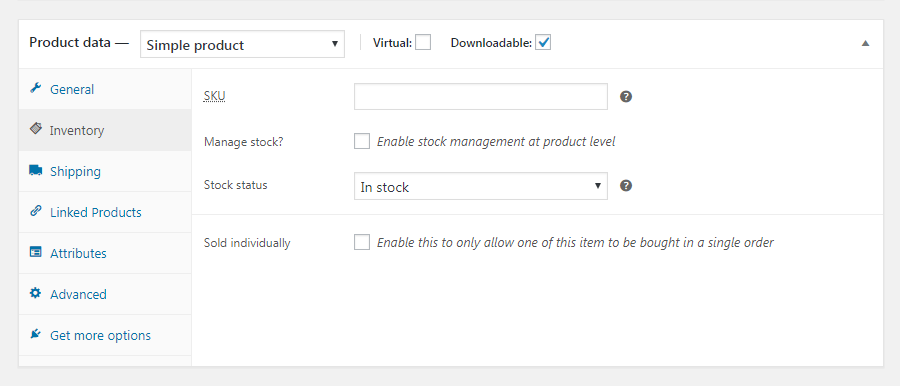
Additionally, you can mark the product as individually sold, meaning the only one can be bought in a single order. It is also where you can enter the product's SKU (identification number) if you have one. There are several other valuable tabs here as well. The Shipping section will enable you to enter the item's weight, dimensions, and shipping class. In the Linked Products tab, you can add and cross-sells, while Attributes enables you to describe the product's characteristics. Finally, in the advanced tab, you can enter custom purchase notes, give the product a set position in your menu, and enable or disable reviews. If you like, you can also view recommended extensions under the Get more options screen. Creating Attributes and Variable Products As you can see, there are plenty of options for adding details to your WooCommerce products and customizing them fully. Let's take a closer look at two of the most valuable options in the Product data section - attributes and variable products. Attributes are critical descriptors for your product, and they tell potential customers important information about it. It might include the item's color, the material it's made out of, its size or type, and more. If you add these details to your product in the Attributes tab, they'll appear on the product page: 
No matter what type of products you're selling, attributes help concisely communicate vital characteristics. However, what if you also sell items that come in multiple options? For that, you can select the Variable product option: 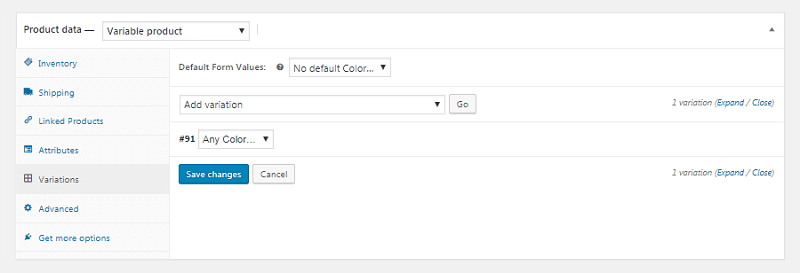
It will give you access to a new Variations tab, where you can create multiple versions of your product using the attributes you already assigned. So, for example, let's say you offer a red, green, and purple shirt. You can add a variation for each color, then give each a unique description, price, and so on. Your customers will be able to see all available variations on the product page: 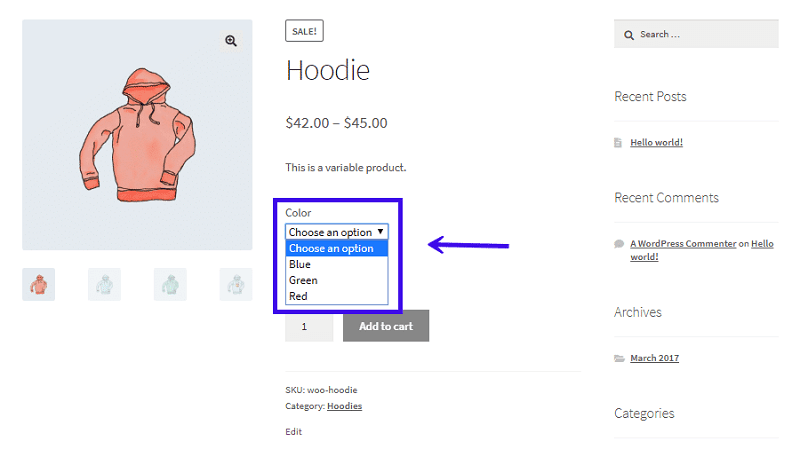
It makes it easy for visitors to view everything you have to offer at a glance. Plus, it means you don't have to create separate product pages for slight variations on the same item. Customizing Your Product Short DescriptionUnderneath the Product data widget, you'll also find a section labeled Product short description: 
Here, you can create a concise tagline that will appear underneath the product's title. You can use this description to highlight the item's primary benefits and incorporate one or more keywords to help customers locate it in searches. After customizing your product's data and description, don't forget to check out the other options on the product page as well. You can add tags to your product, place it in a category, and include a featured image or even an entire image gallery. Here's what your final product might look like on the front end: 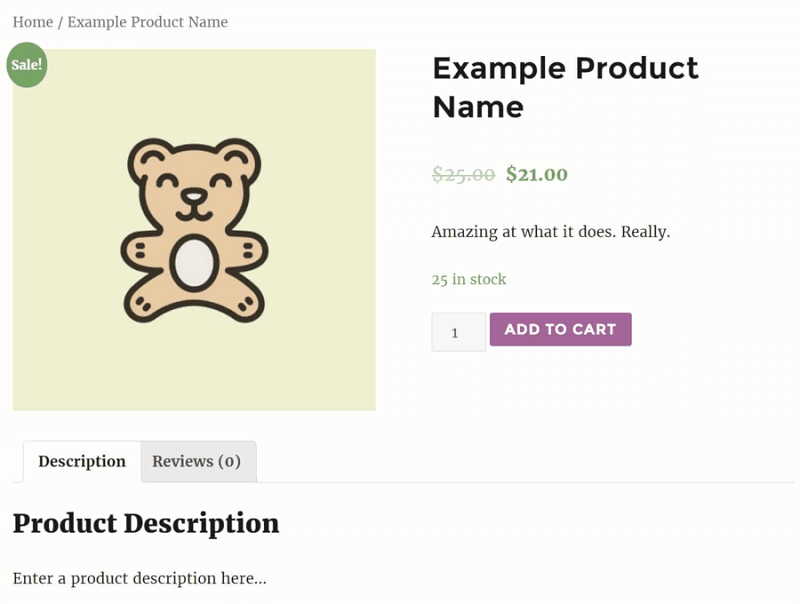
Once your product is ready, hit Publish to make it live on your site. Then, you can repeat this process to create additional products as needed. Managing Your WooCommerce ProductsYou'll probably include several items in your WooCommerce store, which means you'll need an easy way to manage them. Fortunately, you can do this through the Products tab in your dashboard. For example, you can select All Products to see every item currently listed in your store. You can add, edit, and delete products here as needed: 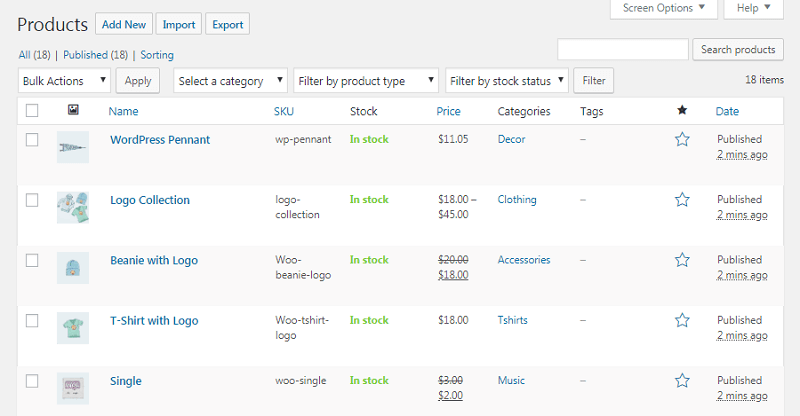
In the other pages under the Products section, you can view your product categories, tags, and attributes. Each of these pages looks like the standard WordPress Posts > Categories page and can help you keep your entire inventory organized. How to Customize Your WooCommerce StoreEarlier in our WooCommerce tutorial, you configured a few basic settings for your online store. However, there are many more options to play with, which you can find in the new WooCommerce tab. It's here you can view orders, coupons, and reports, as well as customize settings and add new extensions. Let's walk through each screen one by one. Orders First up, the Orders page displays a list of recent purchases on your store: 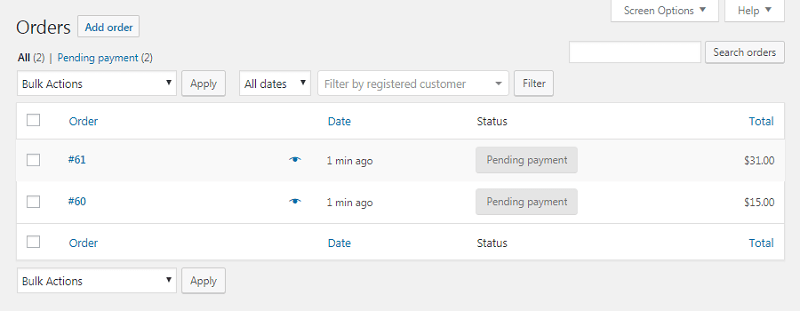
If you sell digital products, there's not much to do here other than view what has been bought lately. However, if you sell physical goods, you can find out what products you need to ship and the status of your orders. Coupons WooCommerce has several useful options for adding new coupons to your e-commerce store. In the Coupon tab, you can select Create your first coupon to access the editing screen: 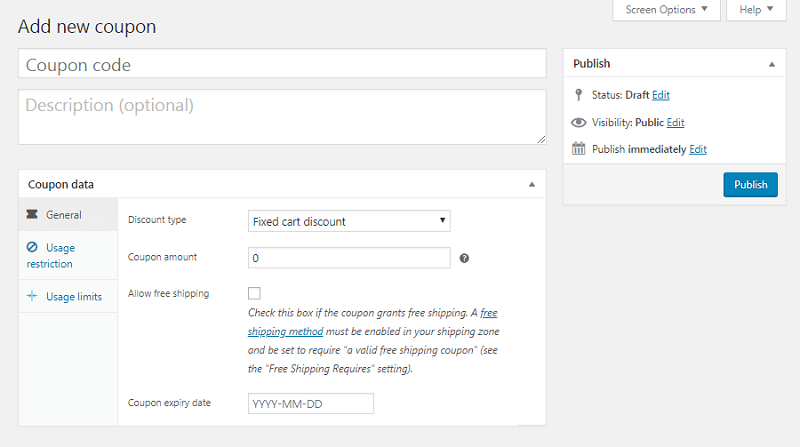
You can add a coupon code and description here. Then, the General tab enables you to edit its basic information: the type of coupon (percentage discount, fixed cart discount, or fixed product discount), its value, free shipping options, and its expiry date: 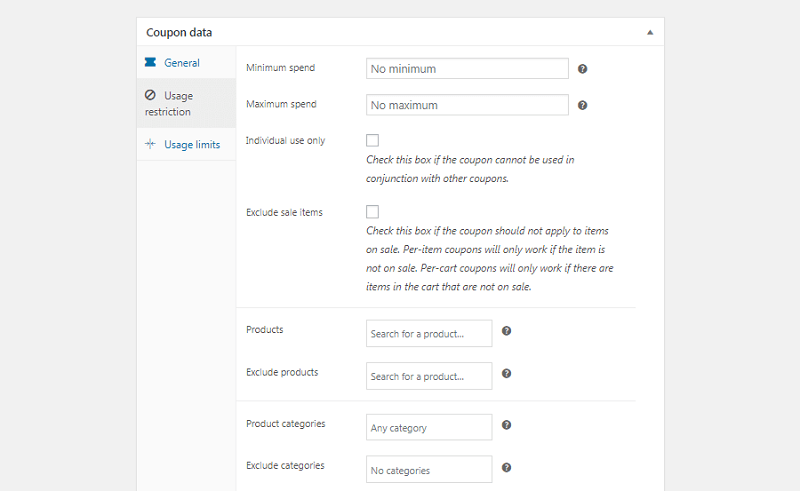
Under Usage Restrictions, you can set a minimum spend the customer has to make to validate the coupon. You can also check the box for Individual use only if you don't want customers to use the coupon in conjunction with other offers. You can set if the coupon should apply only to non-sale items and select the products and product categories the coupon applies to. Finally, you can even ban specific email addresses from coupon usage. Usage Limits' final tab enables you to determine how many times the coupon can be used, both overall and per customer. Then, publish your coupon to make it active and let your customers know about the code they'll need. Reports WooCommerce also offers powerful built-in tracking functionality. In the Reports tab, you can view charts and graphs of your sales, orders, and shipping costs over different periods: 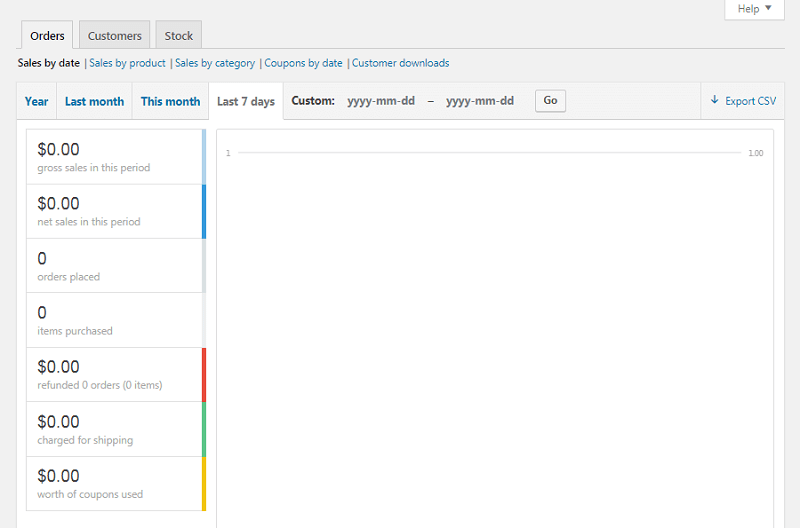
Each graph can be limited to the sales of a particular product, category, or coupon. In the Customers sub-tab, you can also view your customer acquisition over the same periods. Last but not least, you'll be able to review your low in stock, out of stock, and most stocked products in the Stock sub-tab. All of this data can be exported as a CSV sheet if needed. Settings This is where WooCommerce gets impressive. In the Settings screen, you can customize just about every aspect of your e-commerce store. Elements such as the placement of your 'thousands' separator, the entire checkout process, email options, and much more can be tailored to meet your needs. Within this section, the General tab covers your store's basic information, including its currency, selling locations, and display options: 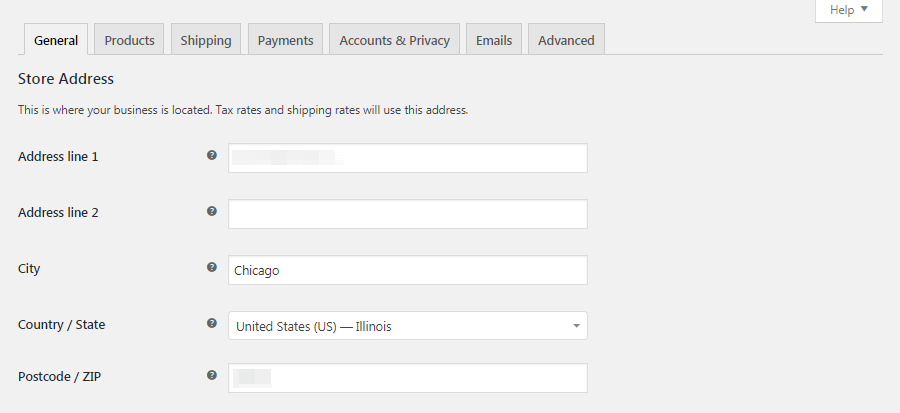
Another notable option here is to enable tax rates and calculations. If you check this box, you'll gain access to a previously hidden Tax tab: 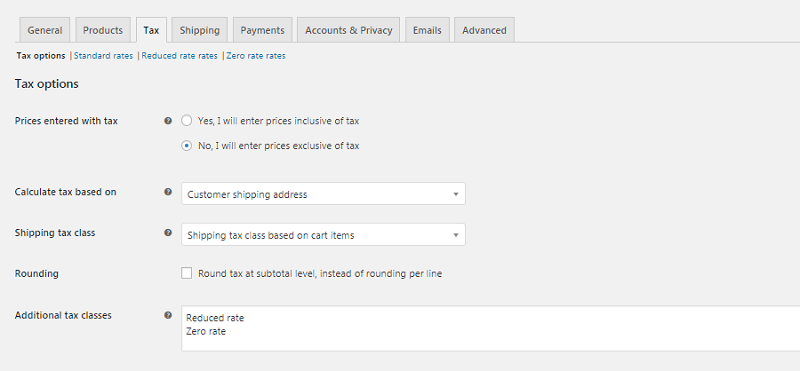
Here, you can let the platform know if the prices you enter for your products will include taxes or not. In the latter case, you can have WooCommerce calculate tax rates for you based on your store's address, the customer's shipping address, or the customer's billing address. You'll also be able to configure how taxes will apply to shipping costs and even determine whether they'll be rounded. Then you can customize the way prices and taxes are displayed on the front end and during the checkout process. Your product data, including measurements, reviews, stock details, download methods, and even add-to-cart buttons, can be customized in the Products tab: 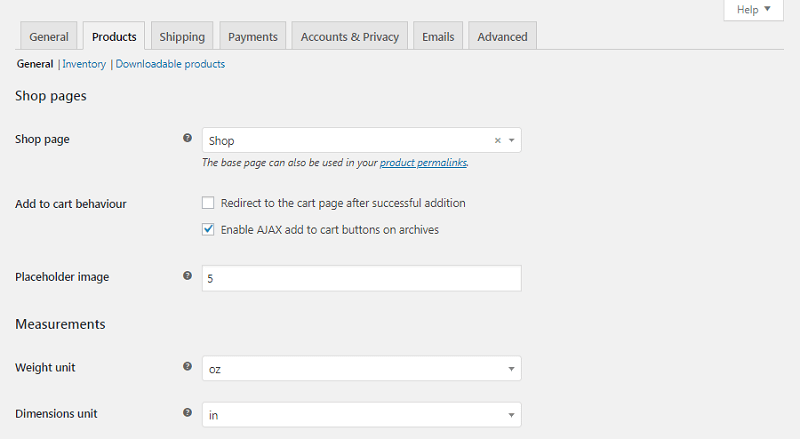
Shipping is where you can configure your shipping zones and pricing: 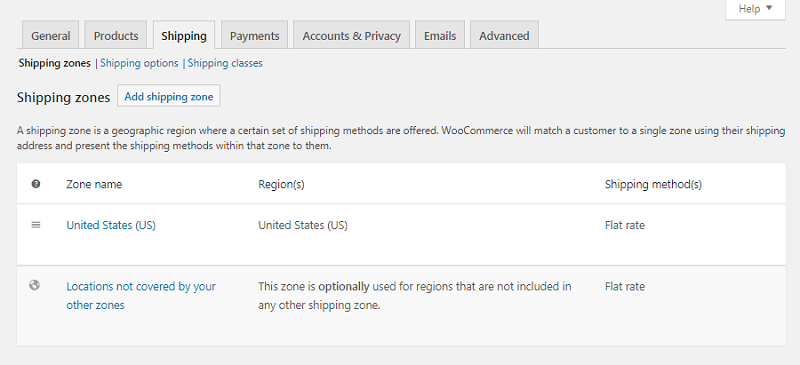
You can also customize how shipping is calculated and choose what the default shipping destination will be. Restricting your store availability only to specific countries is also possible. The Payments tab shows you what payment processors are available and active on your store: 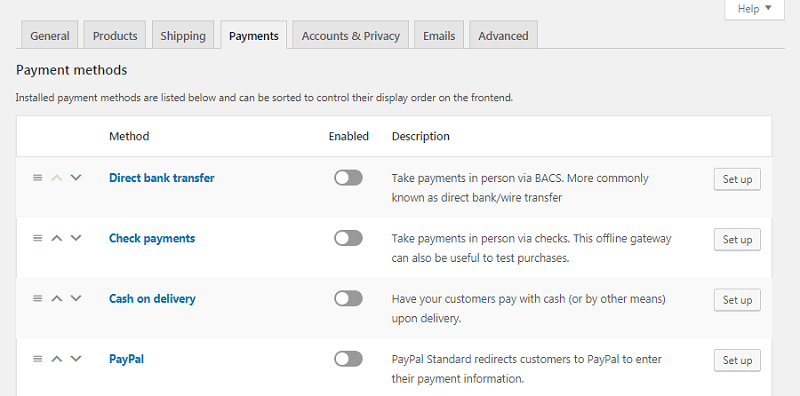
Here you can enable and disable whatever payment options you like. Plus, you'll find handy links for customizing the settings for specific processors. Next up, Accounts & Privacy control various aspects of your customers' experience: 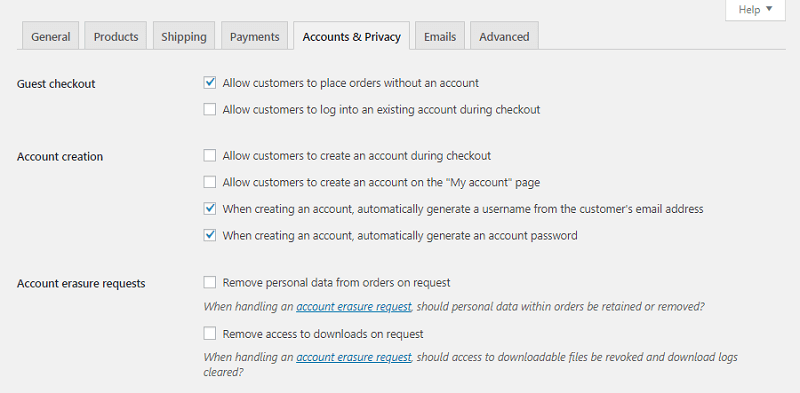
You can set up a privacy and checkout policy, configure how customer data will be stored and retained, and more. In addition, you have various options for how customer checkouts will be handled. Under the Guest checkout and Account creation sections, you can determine whether visitors will be able to place orders as guests (i.e., without logging into an account). Then, you can decide if they'll have the option to log into and create a new account during the checkout process. You're even able to provide them with automatically-generated usernames and passwords to speed up the registration process. In the Emails tab, you can customize all things, customer, and support: 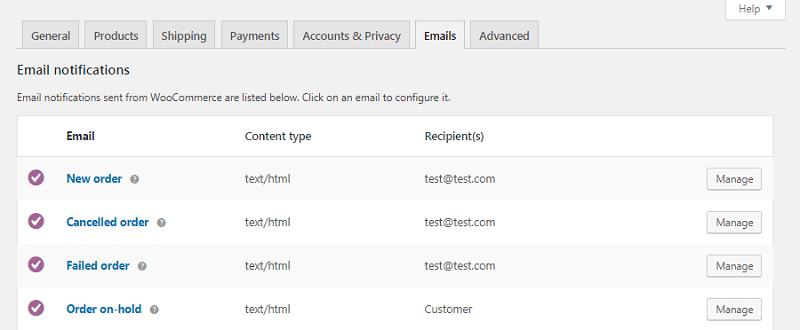
At the top of this screen, you'll find a list of email notifications that are sent through WooCommerce in response to specific triggers (such as an order being placed or canceled). You can click on any of these emails to enable/disable them, as well as to customize their contents: 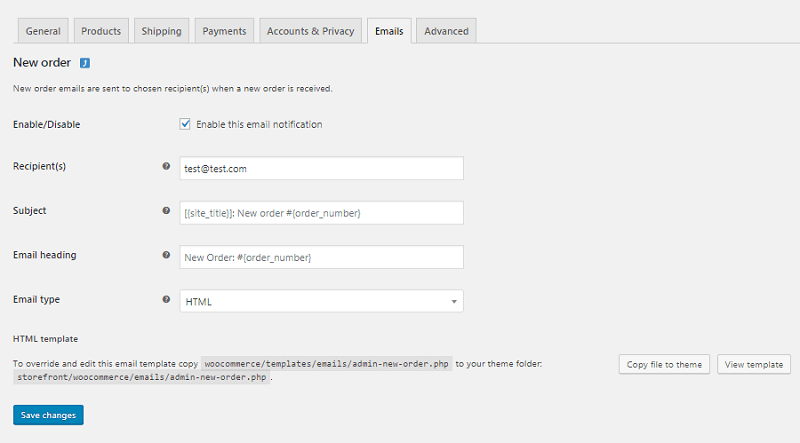
You'll even find instructions here for editing the email templates if you're comfortable using HTML. You can copy the email's file to your theme folder, then make whatever changes you like. Alternatively, you can create your custom email templates. Below that, you can configure a few global settings for all the emails sent from your WooCommerce store. It includes the 'from' name and address, footer text, and even colors and backgrounds. Finally, in the advanced tab, you can enable the REST API, configure keys, apps, and webhooks, and perform other lower-level tasks: 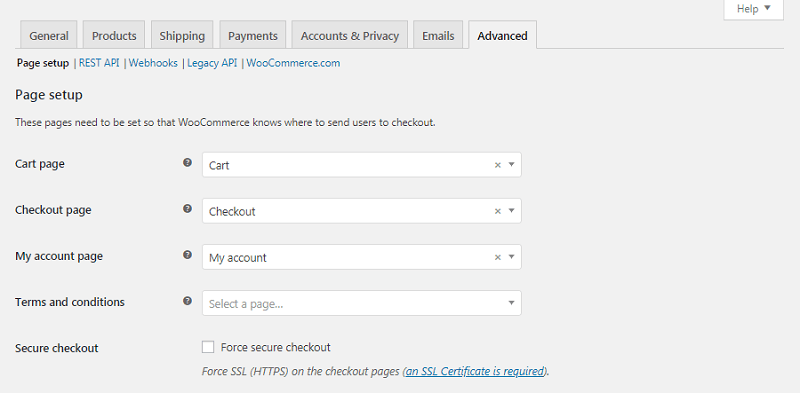
Status Next, let's briefly check out the Status tab: 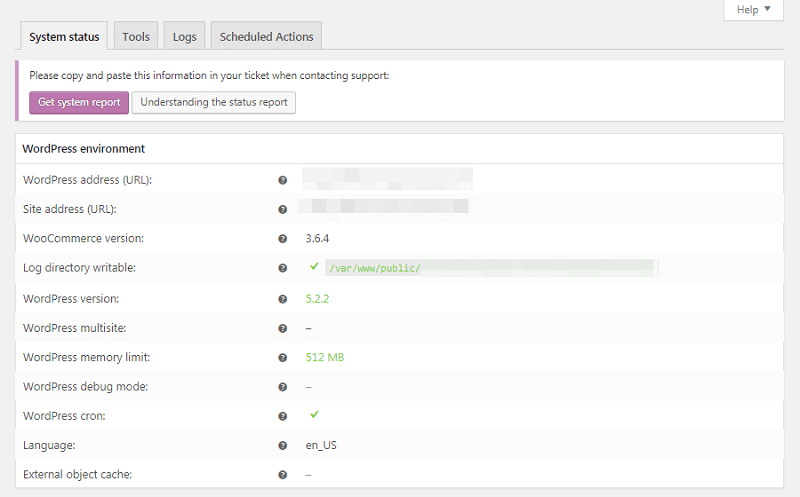
All of your back-end information can be found here, such as your WooCommerce/PHP/MySQL/etc. Version, size limits, logging, and more. In the Tools sub-tab on the same page, you can clear your website's caches for multiple variables, clear out old data, and even revert your store's settings to their defaults. Extensions One of the attributes that make WordPress the most popular Content Management System (CMS) on the planet is the community behind it. There are thousands of themes and tens of thousands of plugins you can use to customize your website. What's more, nearly 100% of them are user-contributed. It also applies to WooCommerce, although on a smaller scale. You can find lots of tools for expanding your store, adding new options and features, and customizing its look in the Extensions tab and elsewhere: 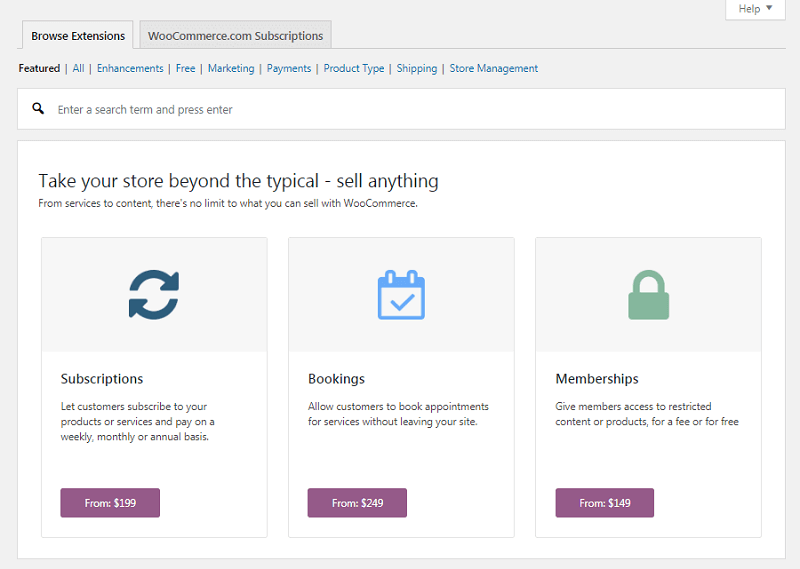
For instance, while you can use WooCommerce with any theme, it can help pick one designed for the plugin. Storefront is a great place to start, but there are plenty of other options in directories such as ThemeForest: 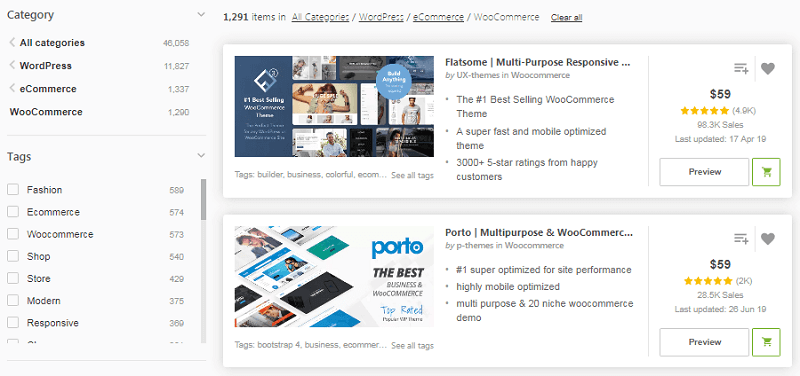
You can also check out the WooCommerce extension store, which includes both developer-created and third-party options: 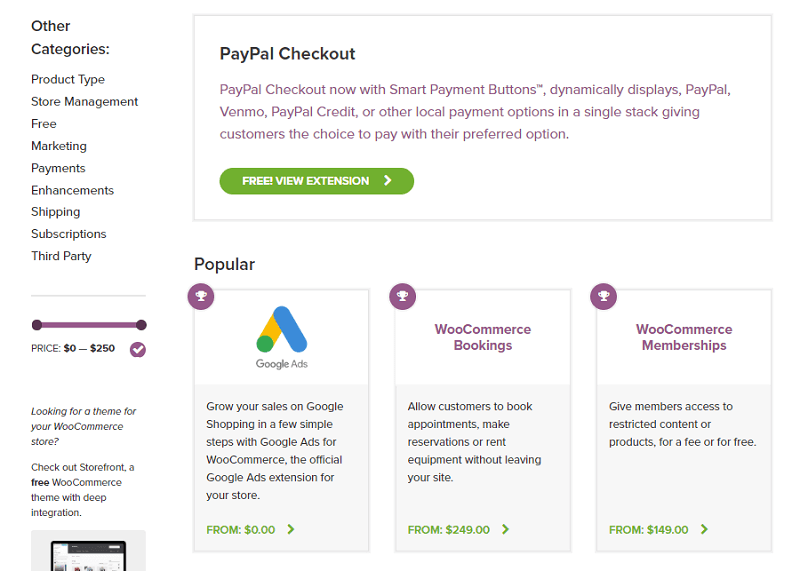
There are extensions for adding new shipping options to your store, enabling subscriptions, customizing the checkout process, integrating email and social media marketing, and much more. You can also find free and paid extensions that let you offer additional payment processors to your customers, such as Square and Amazon Pay. Finally, you'll also find plenty of plugins designed to extend Woocommerce in a variety of ways. To give one example, the Braintree For WooCommerce plugin enables you to accept all kinds of payments on your store: 
Editing WooCommerce TemplatesBetween WooCommerce's built-in settings and the many extensions and plugins available for it, you have a lot of flexibility over how your shop works. However, if you're a more advanced user and want to perform your customizations, an excellent place to start is editing WooCommerce's template files. It will enable you to tweak how key features work, such as the customer carts and checkout process. Please note that this is a risky process, especially if you're new to working with theme and plugin files directly. Before getting started, you'll want to back up your site just in case of any accidental changes. Here's how to safely delete a theme. Then, you'll need to access your site using a Secure File Transfer Protocol (SFTP) client such as FileZilla. Locate your site's root folder (often either called public_html or named after your domain), and navigate to wp_content/plugins/woocommerce: 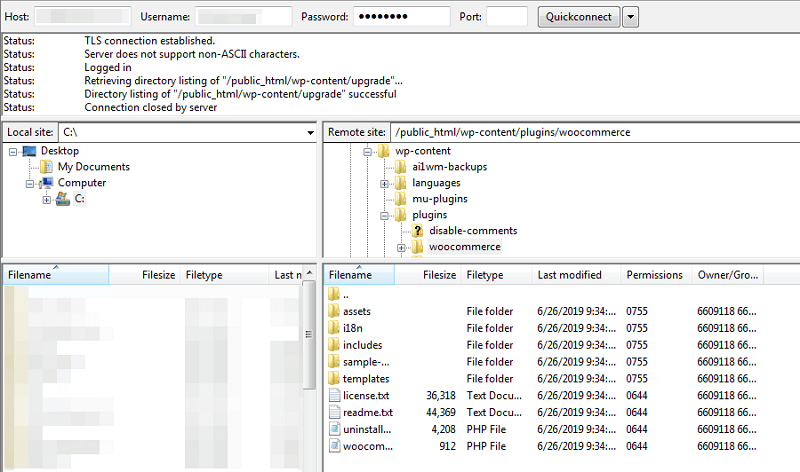
In this directory, you'll find a folder called templates. Open it up, and you'll see a list of all the templates that are currently active for your store: 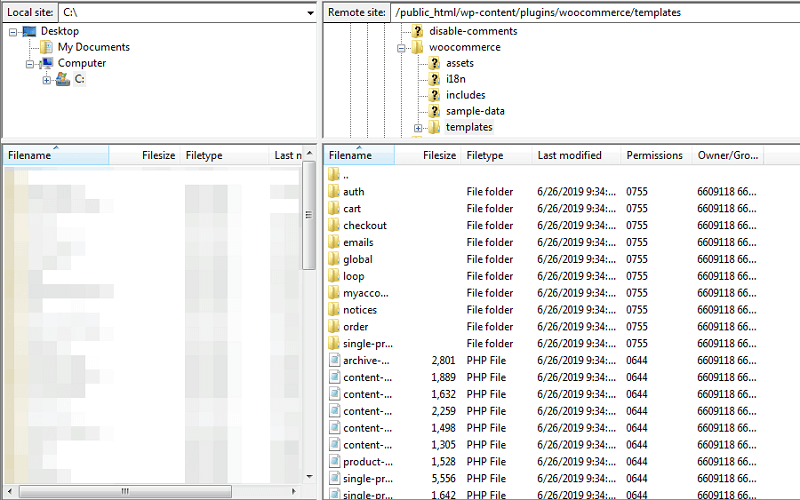
At this point, you can open up any template you like and start making changes. For instance, if you want to alter the 'Thank You page that appears after a customer has placed an order, you can open up the checkout folder and locate the thankyou.php file. Then you can download it, edit or add elements as you see fit, and reupload it to your server
Next TopicHow to Make a PDF
|
 For Videos Join Our Youtube Channel: Join Now
Feedback
- Send your Feedback to [email protected]
Help Others, Please Share


