| |

WPF Dialog BoxThe standalone application contains the main window where they will show the data of the application. Standalone application will acquire the functionality of the process which will show the data through the user interface mechanism like menu bars, toolbars, and status bars. The non-trivial application can also display the additional windows to do the below tasks:
All these windows which we used for the different purpose are known as a dialog box. There are two types of dialog boxes.
Now we will explain both the dialog box.
With the help of the WPF, we can create different types of the dialog boxes which include the message boxes, dialog boxes, and the custom dialog boxes. Now we will explain different types of dialog boxes.Message Boxes: A message box is a dialog box that we can use to show the textual information and allow the users to make the decisions with the help of the buttons. We can create the Message Box by using the Message Box class. The below figure shows us the message box, which shows the textual information, asks the question from us, and provides three buttons to answer with the help of the buttons. 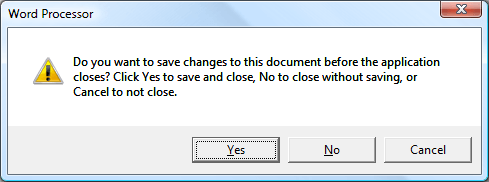
2. Common Dialog Boxes: Windows implements the different types of reusable dialog boxes. These common dialog boxes are common to all the applications. When we want to open a file, this will show us the dialog box, when we try to save the file and wants to print then the common dialog box will appear. Now the common dialog box will expose the dialog box in the form of the managed class and we can also use those classes in the standalone applications. To open the file dialog box, we use the file opening functionality to retrieve the name of the file which we want to open like as shown in the below screenshot: 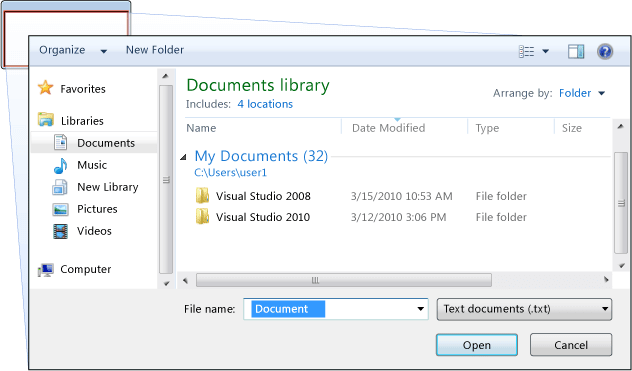
To open the common file dialog box, we used the OpenFileDialog class and located in the Microsoft.Win32 namespace. Custom Dialog BoxesCustom Dialog boxes are very useful and we can use these dialog box when they are needed. Custom Dialog Boxes doesn't support the domain-specific dialog boxes. In this case, we will create our dialog box. Now we will create the custom Dialog box.To understand the concept of the dialog box, in the first we will create a new WPF project whose name is WPFDialogBox. Now we will take one text box and one button. When we click on the button, this will open another dialog box that contains the Yes, No, and Cancel button. When we click on any button, this will show us a new message. When we click on any button, that button shows us a message and close itself. The button shows us information when we click on them. To add the textbox and a button on the page we will write the below XAML code:MainWindow.XAMLNow we will write the C# code on the generated event after clicking on the button. MainWindow.XAML.CSThe output of the above code will look like as shown in the below screenshot: Output 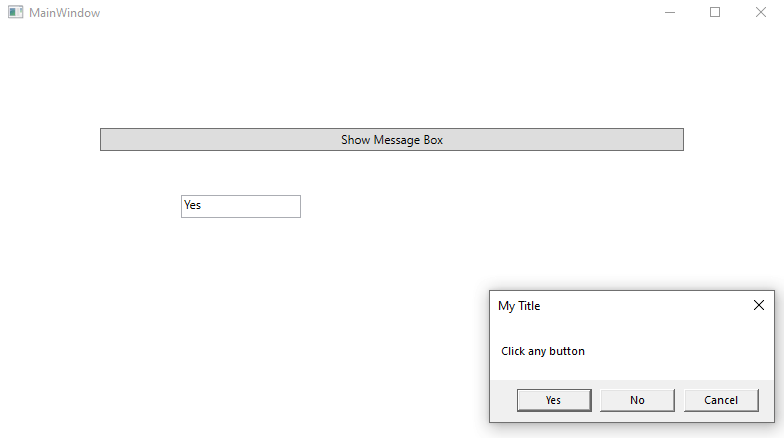
In the above screenshot, when we click on the "Yes" button, this shows the content in the above textbox.
Next TopicWPF Context Menu
|
 For Videos Join Our Youtube Channel: Join Now
Feedback
- Send your Feedback to [email protected]
Help Others, Please Share


