| |

Xamarin.AndroidXamarin.Android is a part of the Xamarin family to build the native android app using C# and Xamarin. Xamarin.Android provides the same UI controls as we have in Android with Java. Before proceeding further, we will focus on Android architecture and development tools with Java. Android developmentAndroid is an open-source operating system which is based on Linux Kernel. Android was initially developed by Android incorporation and purchased by Google. Android provides the rich application framework that allows us to build innovative apps and games for mobile devices in the Java Environment. The native Android apps can be developed using Android Studio or Eclipse using Java as a programming language. 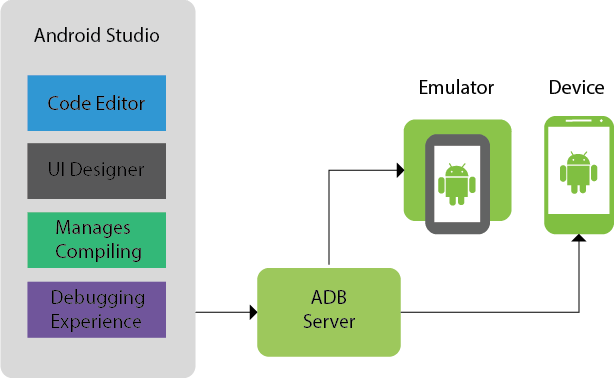
Android Platform ArchitectureThe android operating system is a Linux-based stack of software components which can be divided into five sections, as shown in the below diagram. 
Linux KernelLinux kernel provides the multitasking execution environment, which allows the multiple processes to execute concurrently. The Android Runtime (ART) depends on the Linux Kernel for all the functionalities such as low-level memory management and threading. Hardware Abstraction Layer (HAL)The hardware abstraction layer (HAL) helps the Android/Application framework to communicate with the hardware-specific device drivers with the higher-level of java API. The Android HAL contains the multiple library modules for a specific type of hardware components, such as the camera and the Bluetooth module. So, when we make a call to access the hardware device using the Java API, Android system load the library module for the component of hardware. Android RuntimeEach Android app is based on Android version 5.0 or higher, runs in its process and with its instance of the Android Runtime (ART). ART has been written to run the multiple VMS (virtual machines) on low memory devices. The code of the app must be transformed from standard Java class files to the Dalvik executable (.dex) format to execute within the ART. The data is optimized for minimal memory (consume 50% less memory) than java bytecode. Build toolchains, such as compile the sources of Java into DEX bytecode, that can run on the Android platform. ART had two main features when we compared to Dalvik.
Native C/C++ LibrariesC/C++ libraries provide the wider range of functions including 2D and 3D graphics drawing, Secure Socket Layer (SSL) communication, SQLite database management, media management like audio and video playback, display subsystem, and graphic layer management and implementation of the C systems Library (libs). Android apps can access these libraries through the Java-based Android core Library APIs. Also, we can access these Native C/C++ libraries using the Android Native Development Kit (NDK) within the Java Code using the Java Native Interface (JNI). Java API frameworkAPI framework of JAVA is a set of rich, extensible APIs to access the entire feature-set of the Android OS using Java Language. These APIs are helpful to interact with the Native C/C++ libraries and build rich UI for various task management like Activity management, notification management, resource management, etc. System Apps and Third-party appsThe android operating system comes with a set of system apps for emails, phone calls, messages, calendars, internet browsing, contacts, and many more. Apart from system apps, we can also install third-party emails, messages like outlook, chats, twitter, facebook, etc. Xamarin.Android ArchitectureXamarin.Android apps run in the Mono execution environment. Mono runtime is written in C language and runs side by side in the Android Runtime (ART) virtual machine. Both the runtime environment run on top of the Linux kernel and expose various APIs to access the android system. 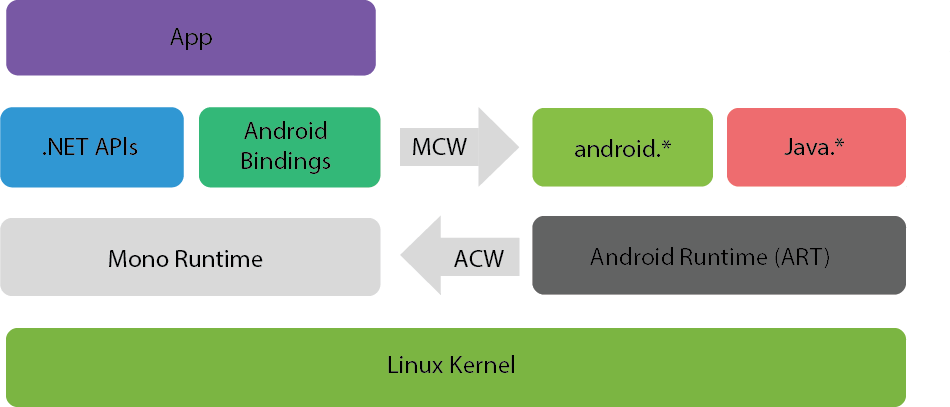
Xamarin.Android apps can access the various-low level features of the Android operating system, either by calling the .Net APIs or by using the classes exposed in the Android namespaces, which provide a bridge to the Java APIs. These are presented by the Android runtime. Managed Callable Wrappers (MCW)The Android operating system facilities like Audio, Graphics, OpenGL, and telephony are not available directly for native apps. They are exposed only through the Android Runtime Java APIs available in the Android.*namespaces or Java.*namespaces. So to access these APIs in Xamarin.Android, a managed callable wrapper is required that acts as a JNI (Java Native Interface) bridge to invoke the Android code and provide the support for overriding virtual methods and implementing the Java Interface. Android Callable Wrappers (ACW)Android Callable Wrappers are a JNI bridge used to invoke the managed code when we need Android runtime. When the Android Callable Wrapper (ACW) is created from Java, the ACW constructor invoked the corresponding C# constructor. Xamarin.Android DevelopmentXamarin.Android allows us to build the native Android application using C#. A Xamarin.Android project is based on the standard structure of the Android project as we create with Android Studio or Eclipse. We can do Xamarin.Android development by using the IDEs - Xamarin Studio or Visual Studio for Mac and Visual Studio for Windows. 
Setup and InstallationHere, we will define how to install and configure the Xamarin.Android to work on Windows and macOS with Visual Studio. How to use the Android SDK manager to download and install Android SDK tools and components which are required for building and testing the app, and how to connect the physical Android device to our development computer for debugging and the testing of our app. InstallationXamarin can be installed as a part of the new Visual Studio 2017. For that, we have to follow these steps:
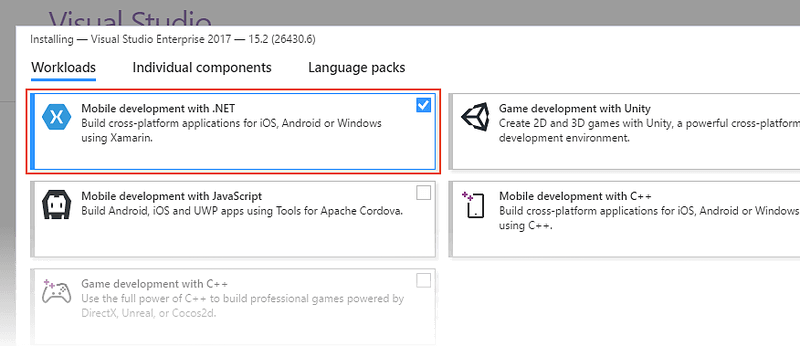
4. When Mobile development with .NET is selected, here, we can choose the option of mobile development that we want to install. 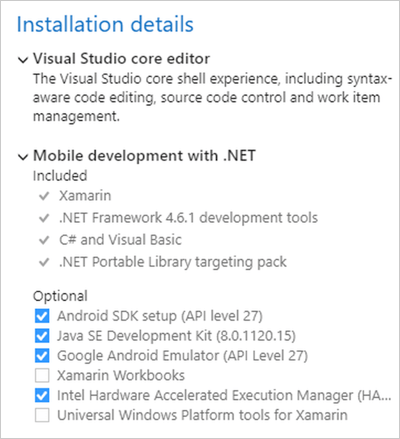
5. When Visual Studio 2017 installation begins, click the button in the lower right-hand corner for installation: 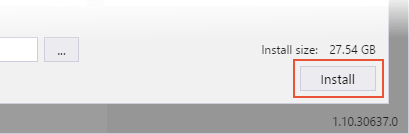
It depends on which edition of Visual Studio 2017 is installing, and the installation process can take a long time to complete. We can use the progress bar to monitor the installation. 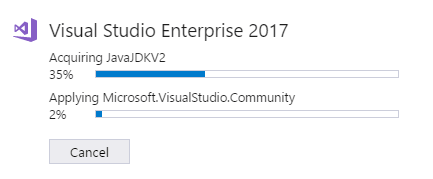
6. When Visual Studio 2017 installation has completed, click the Launch button to start Visual Studio: 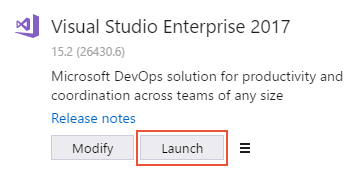
Setting up the Android SDK for Xamarin.AndroidVisual Studio includes an Android SDK Manager with which we download Android SDK tools and other components that we need for developing the Xamarin.Android apps. The Xamarin. Android SDK Manager helps us to download the latest Android components with which we can develop our Xamarin.Android app. It replaces Google's standalone SDK manager, which has been deprecated. SDK ManagerFor starting the SDK Manager in Visual Studio, click Tools-> Android-> Android SDK Manager. 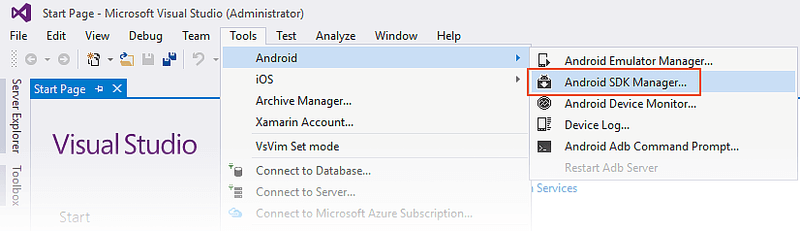
Android SDK Manager shows in the Android SDKs in the screen Tools. The screen has two tabs - Tools and Platforms. 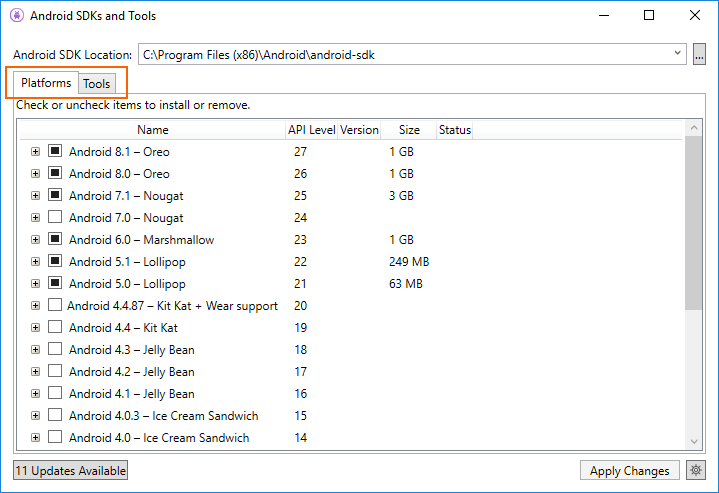
Android SDKs LocationThe location of Android SDKs is found at the top of the Android SDKs and Tools screen, which shows in the screenshot. Here is a need to set the location of the Android SDK for the following reasons:
To set the Android SDK location, click the ellipsis (...) button to the right of Android SDK location. This opens the Browse for folder dialogue use for navigation to the location of Android SDK. The screenshot shows that the Android SDK under Program Files (x86)\Android is being selected: 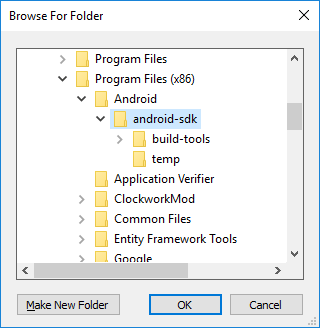
When we click on OK, the SDK Manager manages the SDK of Android which is installed at the location. Tools tabThe Tools tab shows the list of tools and extras. We use this tab to install the Android SDK tools, platform-tools, and build tools. Also, we can install the Android Emulator, HAXM acceleration, the low-level debugger (LLDB), NDK, and Google Play libraries. For example: To download the Google's Android Emulator package, click the checkmark to the Emulator of Android and click the Apply (changes) button: 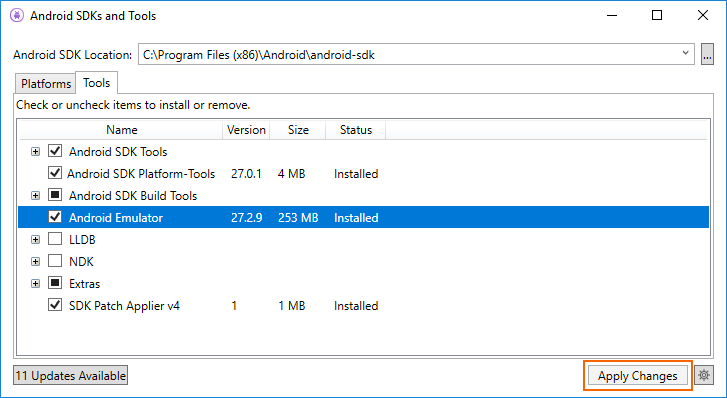
A dialog will show with the message following package requires that we accept its license terms before installing: 
Click Accept if we agree with the Terms and Conditions. At the bottom of the window, a progress bar indicates the progress of download and installation. When the installation completes, the Tools tab shows that the selected tools and extras were installed. Platforms tabThe Platforms tab shows a list of SDK versions along with other resources (like system images) for each platform: 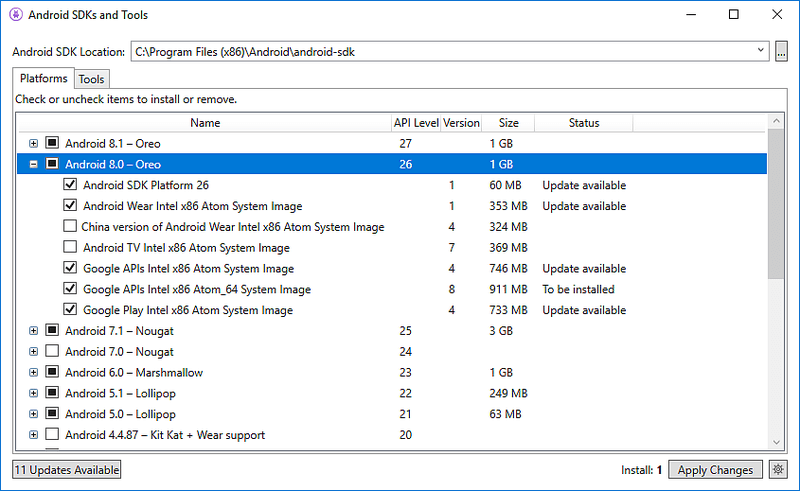
This screen, shows the version of Android (such as Android 8.0), the code name (Oreo), the API level (such as 26), and the sizes of the components for that platform (such as 1 GB). We use the Platforms tab to install components for the Android API level, which we want to target. When all the components of a platform are installed, a checkmark appears next to the platform name. If all components of a platform are not installed, the box for that platform is filled. We can expand the platform to see its components (and which components are installed) by clicking the + box to the left of the platform. Click - to close the component listing for a platform. To add another platform to the SDK, click the box which is next of the platform until the checkmark appears to install all of its components, then click Apply Changes: 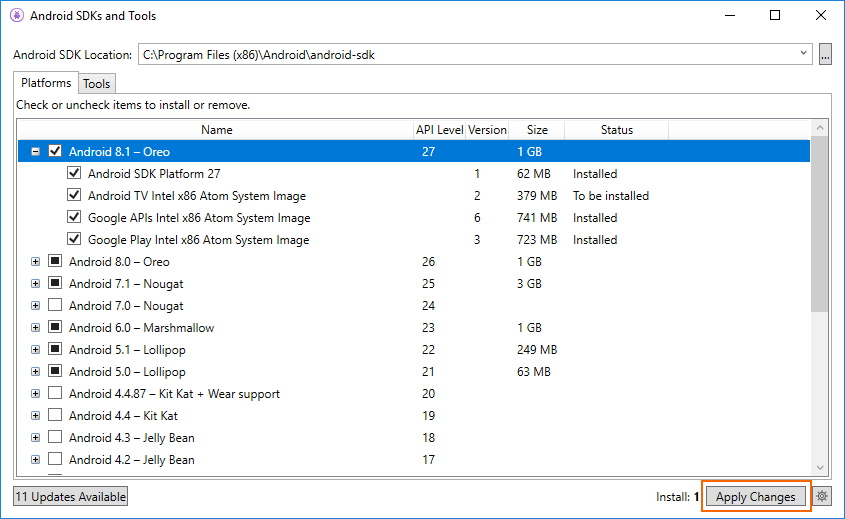
To install only specific components, click the box next to the platform. We can then select any individual components that we need: 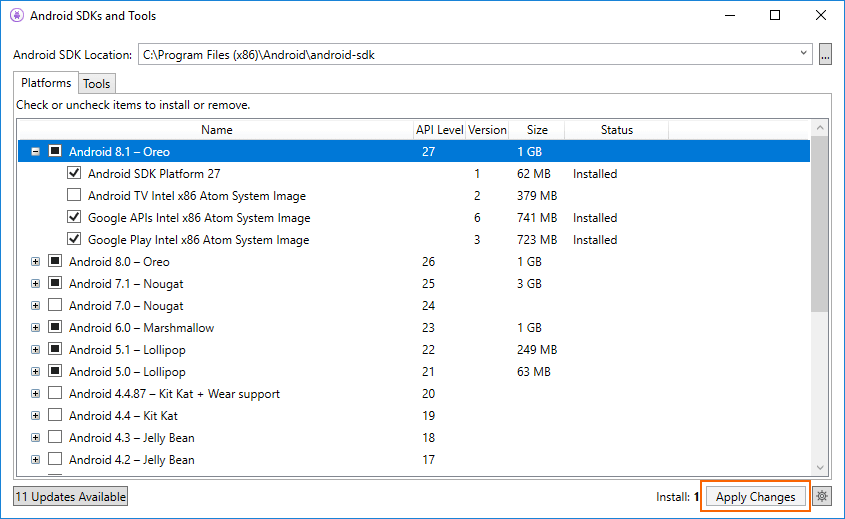
Notice: Number of components to install appears next to the Apply Changes button. After clicking the Apply Changes button, we will see the License Acceptance screen, as shown earlier. Click Accept if we accept the Terms and Conditions. We see this dialog more than one time when there are multiple components to install. At the bottom, a progress bar will indicate the progress of download and installation. When the process of download and installation is completed (this can take many minutes, depends on how many components need to be downloaded). The added components are marked with a checkmark and shows as Installed. Repository selectionBy default, the Android SDK Manager downloads the platform components and tools from a Microsoft-managed repository. If there is a need to access the alpha/beta platforms and tools that are not available in the Microsoft repository. We can switch the SDK Manager to use Google's repository. To make this switch, click the gear icon in the lower right-hand corner and select Repository > Google (Unsupported): 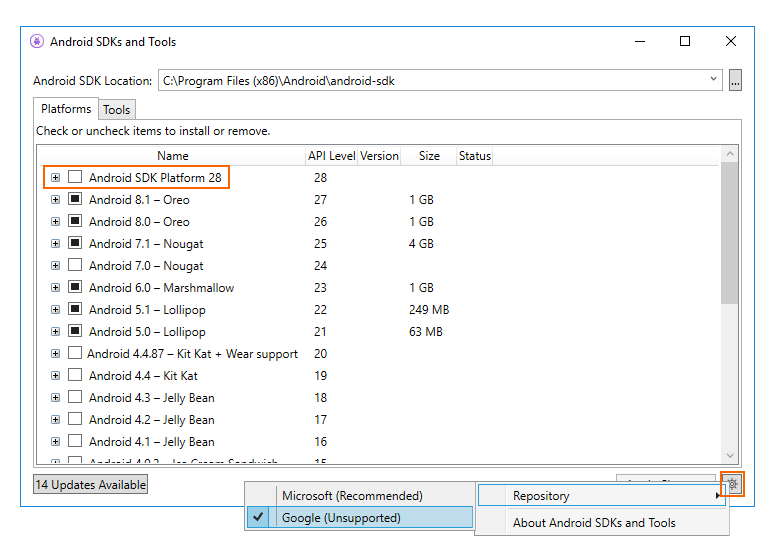
When we select the Google repository, additional packages may appear in the Platforms tab that was not available in the previous. Here, we have to be aware that the use of the Google repository is unsupported and not recommended for everyday development. To move back to the supported repository of platforms and tools, we will click Microsoft (Recommended). This restores the list of packages and tools to the default selection. Android Emulator SetupHere, we will explain how to prepare the Android Emulator for testing the app. Android Emulator can be run in a variety of configurations to simulate the different devices. Each configuration is called a virtual device. When we deploy and test our app in the emulator, we will select a pre-configured or custom virtual device that simulates a physical Android device such as the Nexus or Pixel phone. Hardware acceleration for Emulator performance (Hyper V & HAXM) Here, we will learn how to use our computer's hardware acceleration features to maximize the performance of the Android Emulator. Visual Studio is easy for developers to test and debug the Xamarin.Android applications with the Android Emulator in the situation where the Android device is unavailable. However, if hardware acceleration is not available on a computer, the Android Emulator runs slowly. We can improve the performance of Android Emulator by using the particular x86 virtual device images in conjunction with the virtualization features of our computer. Accelerating Android emulator on windows Here, is the Virtualization technology available to accelerate the Android Emulator.
On windows, we use HAXM to accelerate the Android Emulator. If HAXM is not available on our computer, then Windows Hypervisor Platform (WHPX) can be used. Android Emulator will automatically use the hardware acceleration if the following criteria met:
Accelerating with Hyper-V Hyper-V is the choice for accelerating the Android emulator. Before enabling Hyper-V, firstly, we have to verify that the system met the criteria to support the Windows Hypervisor Platform. Verifying support for Hyper-V Hyper-V runs on the Windows Hypervisor Platform. To use the Android emulator with Hyper-V, the computer must meet the following criteria to support the Windows Hypervisor Platform:
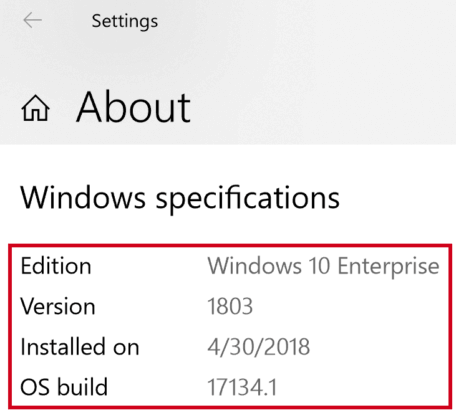
To verify that our computer hardware and software is compatible with Hyper-V, open a command prompt, and type the following command: If all the listed Hyper-V requirements have a value of Yes, then the computer can support Hyper-V. For example: 
Enabling Hyper-V acceleration If the computer meets the above criteria, we will use the following steps to activate the emulator of Android with Hyper-V: 1. Enter the Windows features in the search box and select the Windows features on or off in the search results. In the Windows Features dialogue, enable both Hyper-V and Windows Hypervisor Platform: 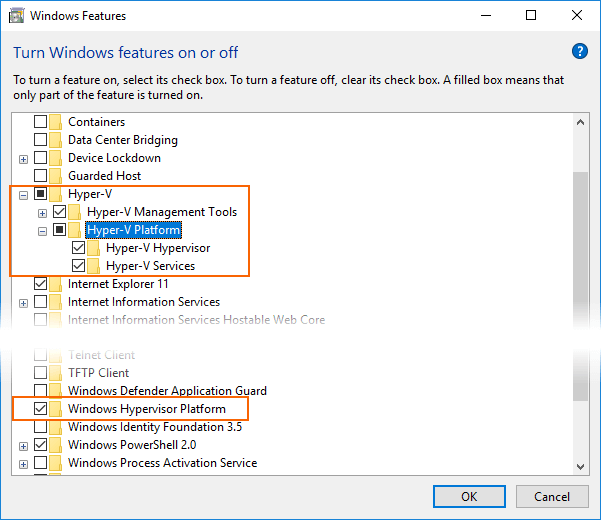
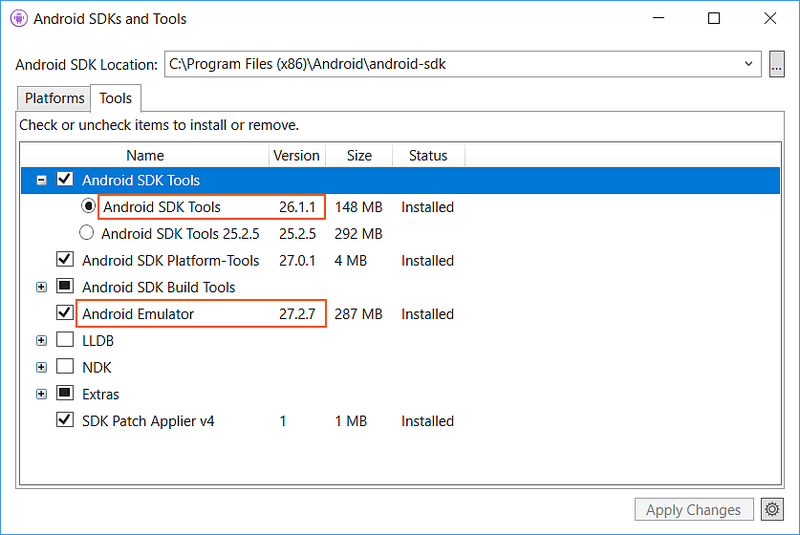
When we create a virtual device (see Managing Virtual Devices with the Android Device Manager), be sure to select an x86-based system image. If we use an ARM-based system image, the virtual device will not be accelerated and will run slowly. Accelerating with HAXM To determine if our hardware supports HAXM, we have to follow the steps: Does My Processor Support Intel Virtualization Technology?. If the device supports HAXM, we can check if HAXM is installed already by using the following commands: 1. Open command prompt window and enter the following command: 2. We will examine the output to see if the HAXM process is running. If it is, we should see the output listing intelhaxm state as RUNNING. For example: 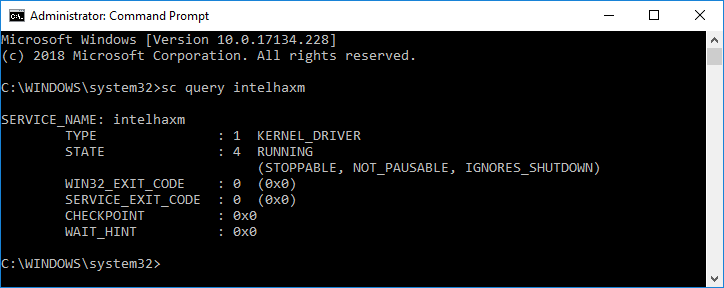
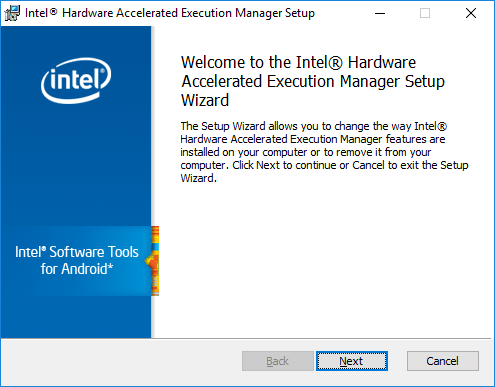
1. If the STATE is not set to RUNNING, then HAXM is not installed. If the computer supports HAXM, but HAXM is not installed, we will use these steps in the next section to install HAXM. Installing HAXM HAXM install the packages for Windows which are available from the Intel Hardware Accelerated Execution Manager page. To download and install HAXM, we use the following steps:
When we create a virtual, be sure to select an x86-based system image. If we use an ARM-based system image, the virtual device will not be accelerated and will run slowly. Managing Virtual Devices with the Android Device ManagerHere, we will describe how to use the Android Device Manager to create and configure the Android Virtual Devices. We can use these Virtual Devices to run and test our app without depending on the physical device. When the hardware acceleration is enabled, the next step is to use the Android Device Manager to create the virtual devices which we can use to test and debug the app. Android Device Manager on WindowsHere, we will explain how to use the Android Device Manager to create, customize, and launch the Android Virtual Device. 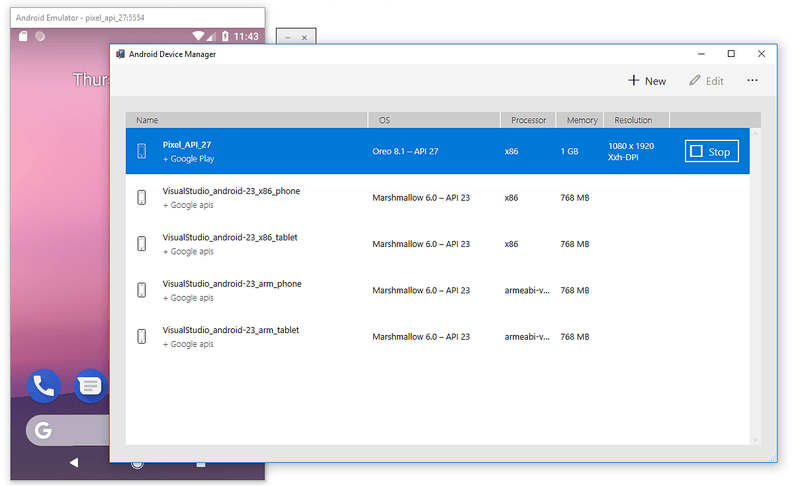
We use the Android Device Manager to create and configure the Android Virtual Devices (AVDs) which run in the Android Emulator. Each AVD is the configuration of the Emulator which simulates the physical Android devices. RequirementsTo use the Android Device Manager, we need the following items:
The following package must be installed (ByAndroid SDK Manager)
These packages should be displayed with the Installed status as seen in the following screenshot: 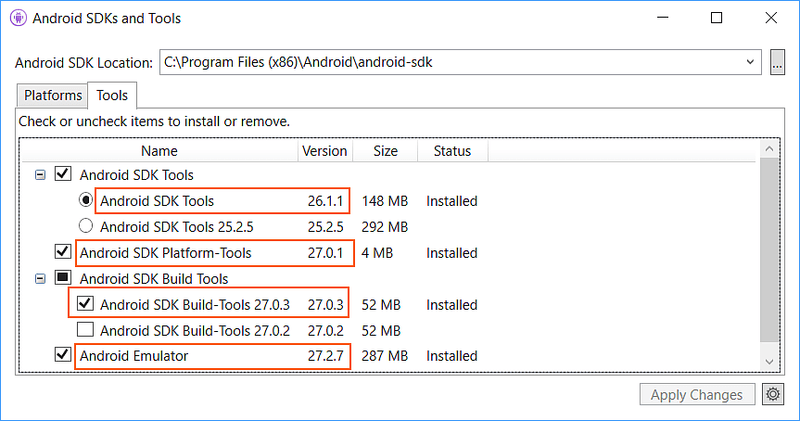
Launching the Device ManagerWe will launch the Android Device Manager from the Tools by clicking the Tools-> Android-> Android Device Manager. 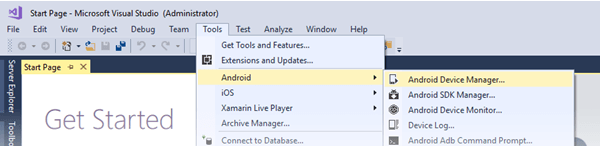
Main ScreenWhen we launch the Android Device Manager, it shows the screen that displays all the configure-virtual devices. For each virtual device, OS (Android Version), the Name, Memory size, Processor, and Screen Resolution are displayed. 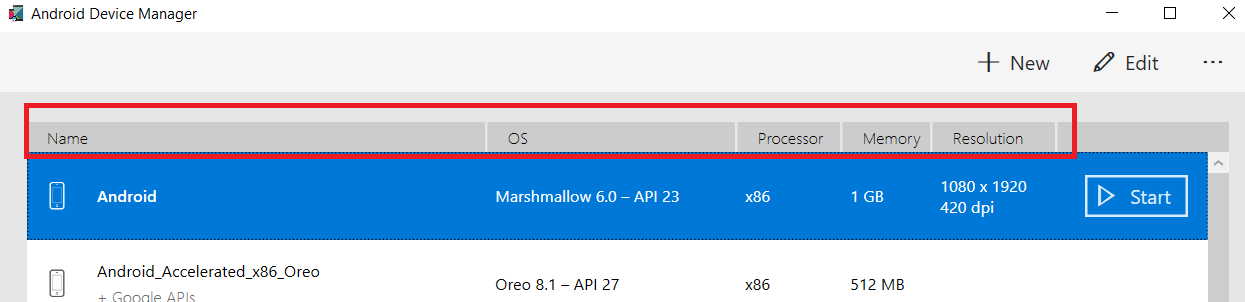
When we select a device in the list, the Start button appears on the right. We can click the Start button to launch the emulator with this virtual device: 
When the Emulator starts with the selected virtual device, Start button changes to Stop, which we can use to stop the emulator. New DeviceTo create the new device, click on New button 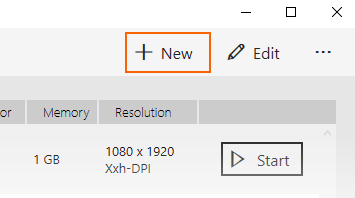
Click New to launch the New Device screen. 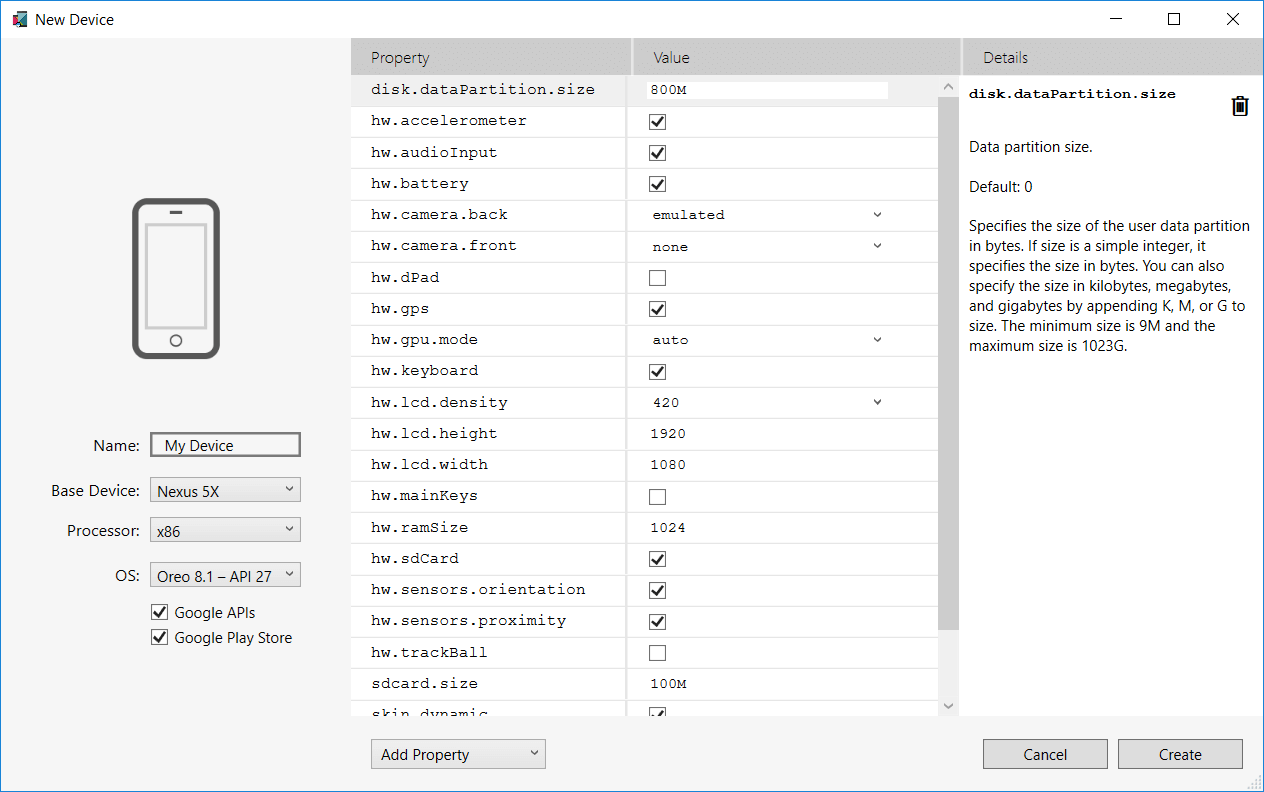
To arrange a new device in the New Device screen, use the following steps: 1. Here we have to give a name to the device. In this example, a new device is create named Android1. 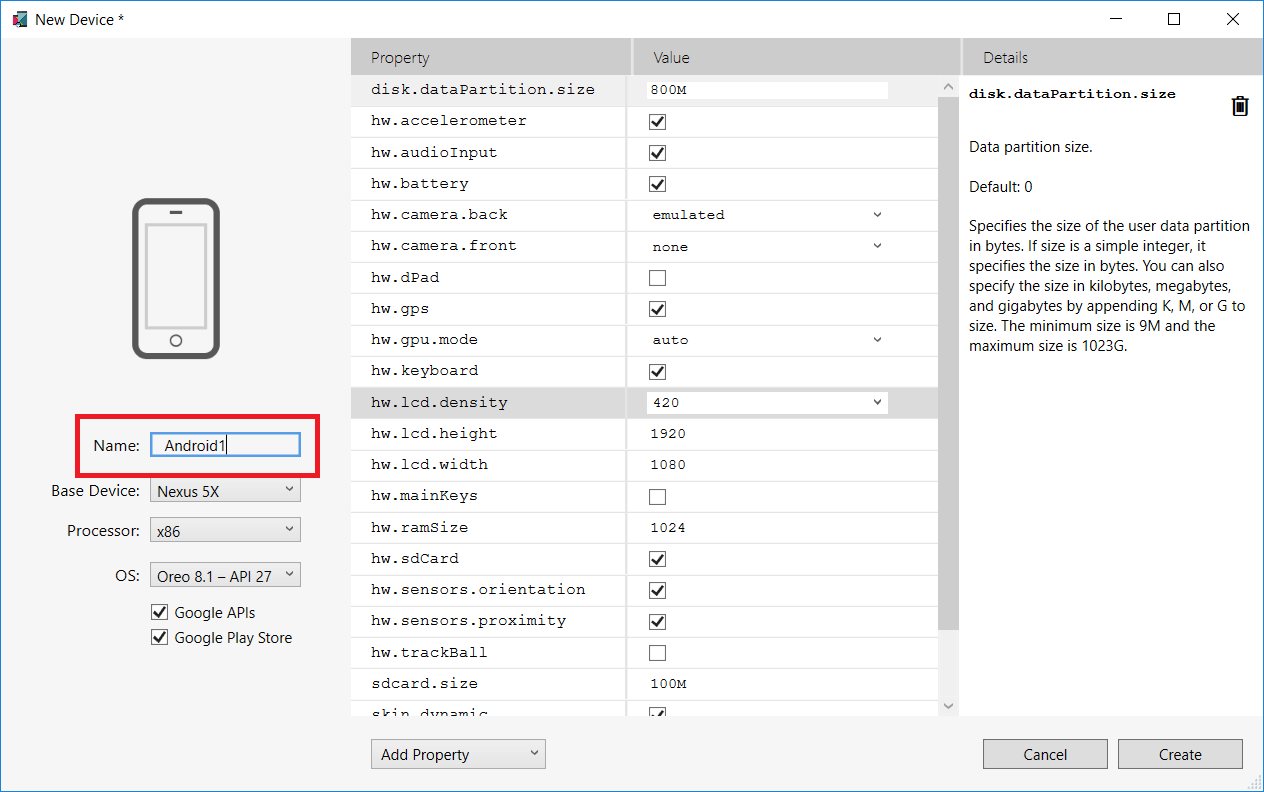
2. Select the physical device to emulate by clicking the Base Device and then click on the Menu. 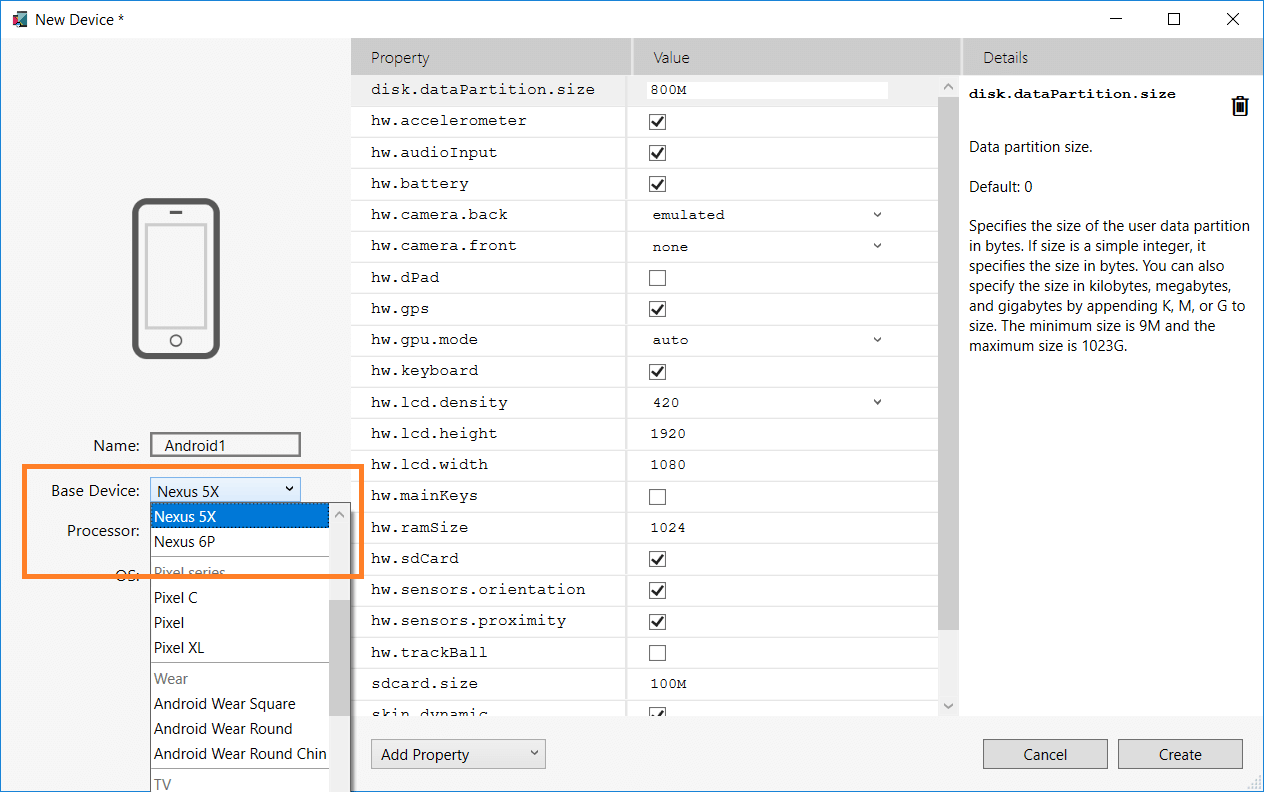
3. Now we will select the type of processor for the virtual devices by clicking the menu of the processor. Now we select the x86 which provide the best performance because it enables the hardware acceleration. The x86_64 option also makes use of the hardware acceleration, but it runs slightly slower than x86. 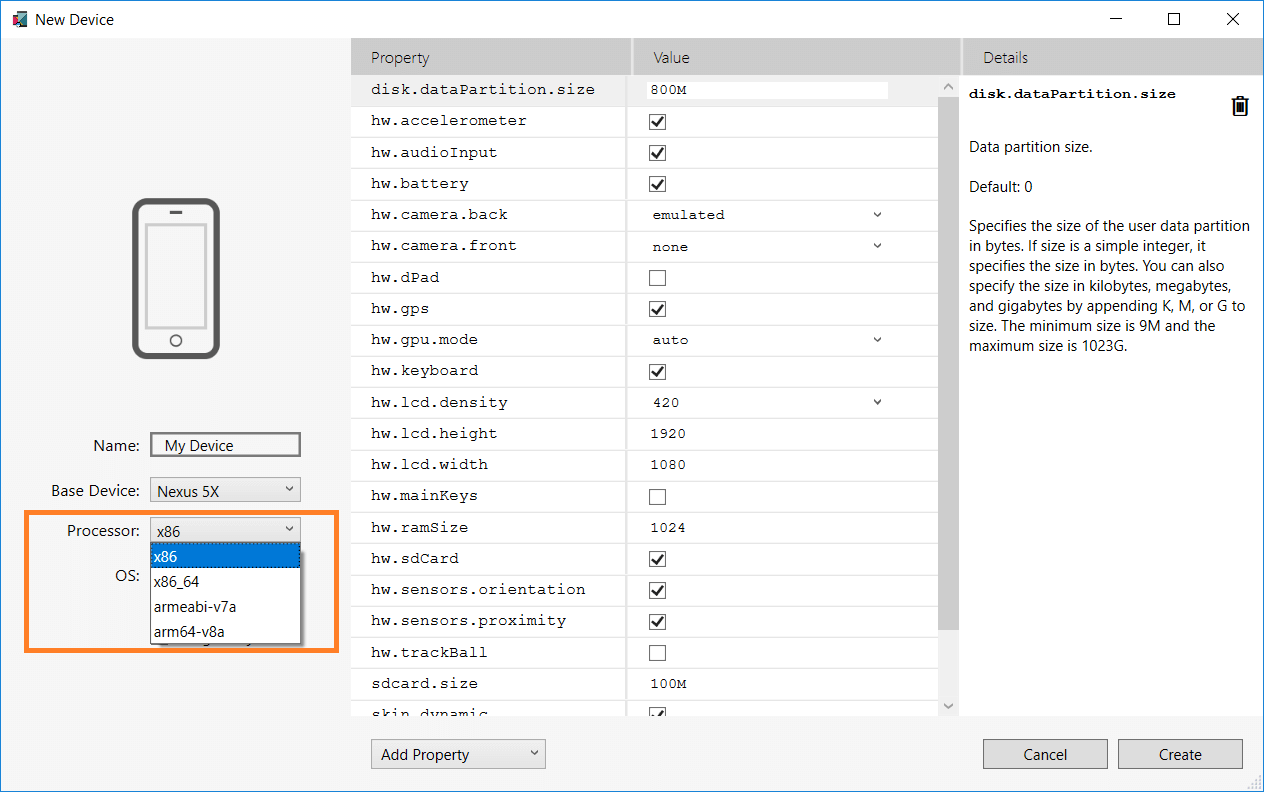
4. Select the version of Android by clicking the OS from the menu. For example, select the Oreo 8.1 - API 27 to create a virtual device for API level 27: 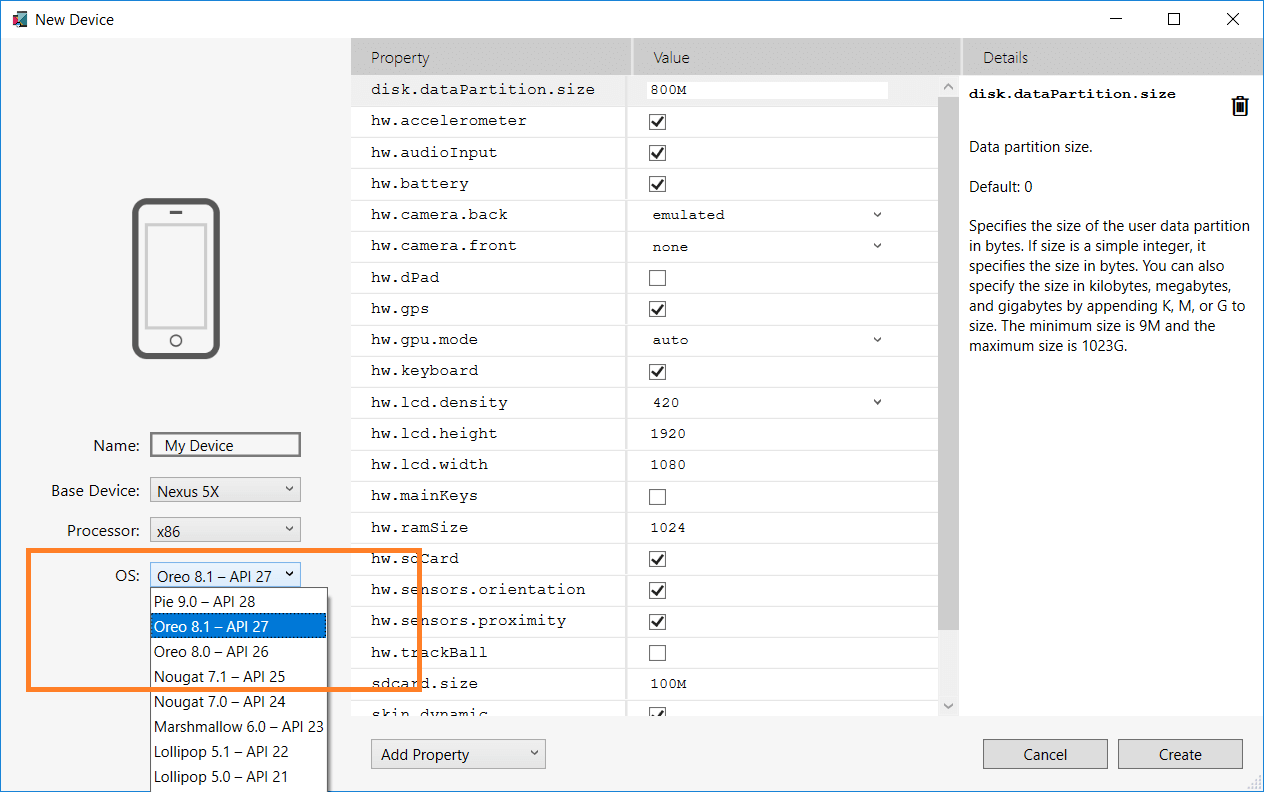
If we select the level of Android API that has not yet been installed, the Device Manager will display the message at the bottom of the screen. A new device will be downloaded - it will download and install the necessary files as it creates the new virtual device: 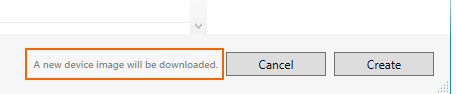
If we want to include Google Play Service APIs in our virtual device, enable the Google APIs option. To include the Google Play Store app, we will enable the Google Play Store option: 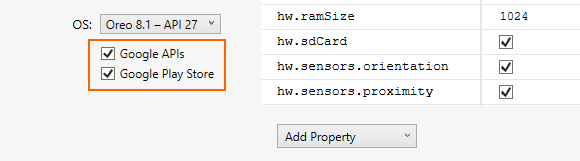
Note that the images of the Google Play Store are available only for some base device types such as Pixel, Pixel 2, Nexus 5, and Nexus 5X. 6. Edit any properties that we need to modify. 7. Add any additional properties that we need to set explicitly. The New Device screen shows only the most commonly-modified properties, but we can click on the Add Property dropdown menu (at the bottom) to add additional properties: 
We can also define a custom property by selecting the custom option at the top of the property list. 8. Click the create button to create a new device. 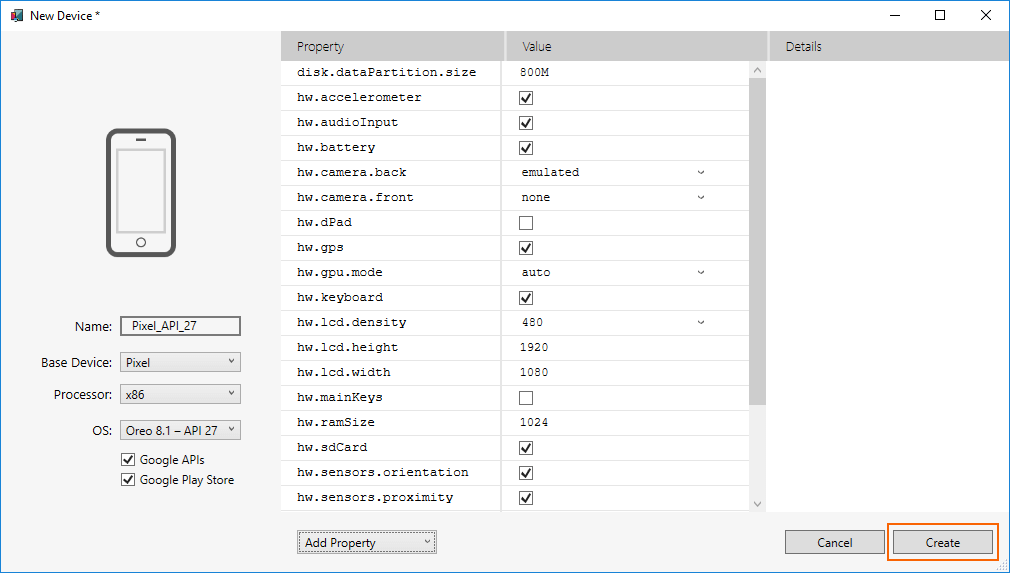
9. We might get a screen of License Acceptance. Click Accept. 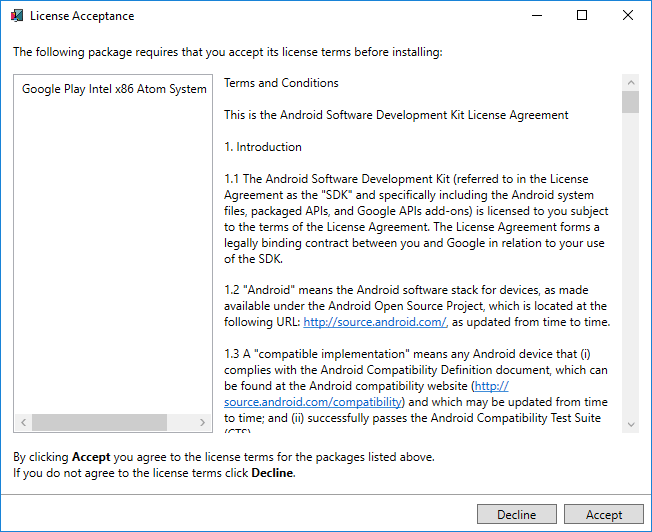
10. The Android Device Manager adds a new device to the list of installed virtual devices while displaying a Creating progress indicator during device creation: 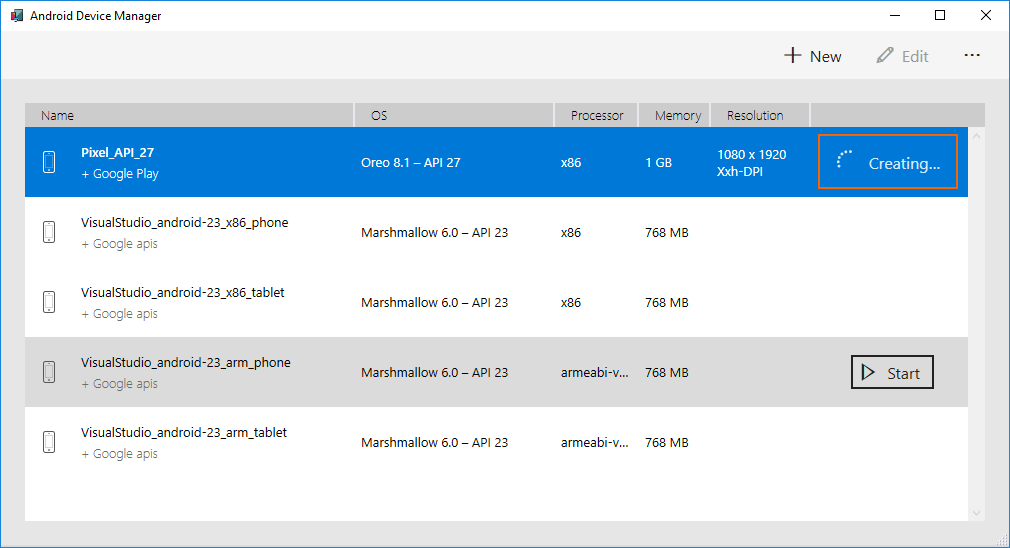
11. When the process of creation is completed, a new device is shown in the list of installed virtual devices with a Start button. 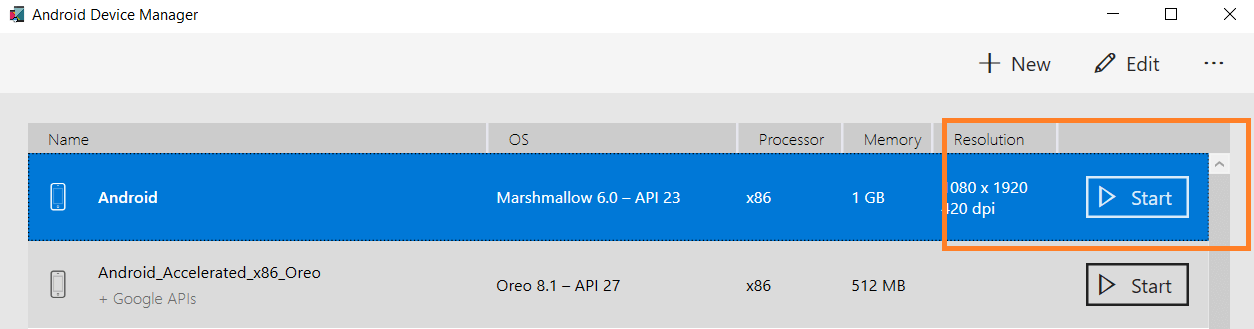
Next TopicXamarin.Android Activity LifeCycle
|
 For Videos Join Our Youtube Channel: Join Now
Feedback
- Send your Feedback to [email protected]
Help Others, Please Share


