Yuki Chan-Automated Penetration Testing and Auditing Tool in Kali LinuxYuki Chan is a free and open-source tool available on GitHub. Yuki Chan is an Automated Penetration Testing tool. For security researchers, this tool is very helpful. We used this tool for information gathering and testing the security of websites and web servers. Yuki chain is one of the most user-friendly and effective penetration testing tools available. It offers a variety of integrated tools to perform penetration testing on the target system. Yuki Chan atomizes the penetration testing tasks. It is a free intelligence tool that anyone can use. We used this tool to examine the vulnerabilities of a Content Management System (CMS). Similar to the Kali Linux recon -ng tool. Yuki Chan has various modules such as metagoofil, spaghetti, xss scanner, wafninja, dnsrecon, who-is. For penetration testing, Yuki Chan has a number of modules available. When any of the modules in Yuki Chan scan the target, they all start executing automatically. Yuki Chan is a penetration testing tool that comes with over 15 modules. Features of Yuki Chan ToolThe following are the features of the Yuki Chan Tool:
Uses of Yuki Chan ToolThe following are the uses of the Yuki Chan Tool:
How to Install Yuki Chan in Kali LinuxThe following steps are used to install Yuki Chain in Kali Linux: Step 1: In order to install Yuki Chain, we first need to open our Kali Linux Terminal and move to the desktop using the command below. On the Desktop, we will need to create a directory where we can install the tool or clone the tool from GitHub. 
Step 2: We are currently on the Desktop. We have to create a new directory called YukiChan with the help of the following command. 
Step 3: We have created a directory named YukiChan. Move to this directory with the help of the following command: 
Step 4: We are now in the YukiChan directory. We must clone the YukiChan tool from GitHub here. Use the following command to clone the tool. 
Step 5: The tool has been downloaded to the directory. Now, using the following commands, list out the content of the tool. 
Step 6: We can see a new directory here which is Yuki-Chan-The-Auto-Pentest. Use the following command to move to this directory. 
Step 7: Use the following command to list the directory's content. 
Step 8: We have downloaded the tool, and now we need to give permission to the tool with the help of the following command. 
Step 9: Next, use the command below to list out the content of the tool once more to check permissions. 
Step 10: Now, we can see that permission has been changed. And now we will use the following command to give permission to the requirements. 
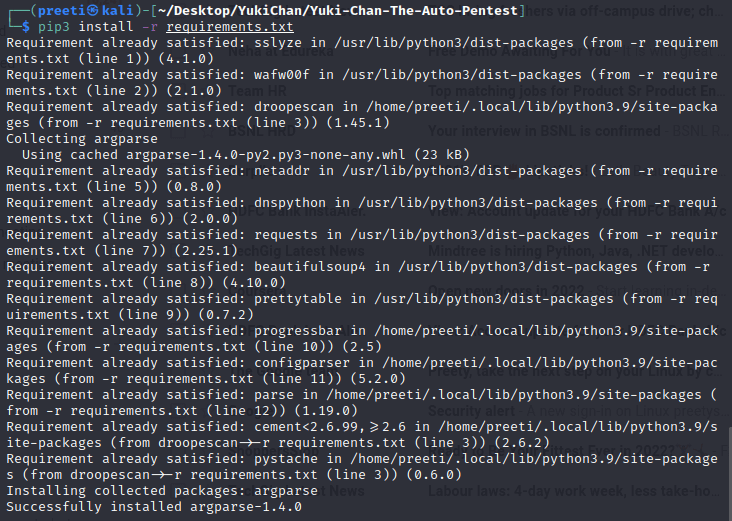
Step 11: Permission has been given to requirements also. So, run the following command in order to install all the requirements. We have to install this module now. 
Step 12: The system has been updated with all of the requirements. We must now install the Perl module. 
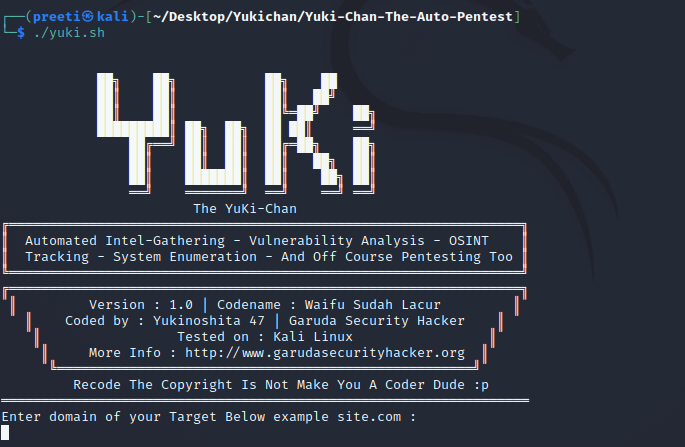
Step 13: In order to run Yuki Chan, we have to type the following command. 
Now, we can see in the above screenshot that Yuki tool has been installed successfully.
Next TopicDmitry Tool in Kali Linux
|
 For Videos Join Our Youtube Channel: Join Now
Feedback
- Send your Feedback to [email protected]
Help Others, Please Share


