| |

Laravel FormsLaravel handles the html forms by providing various in-built tags. Laravel generates the major elements required for an HTML. In order to generate the html elements, we need to add the html package in Laravel by using the composer. Installation
When we enter the above command in the Git bash window, then the output would be: 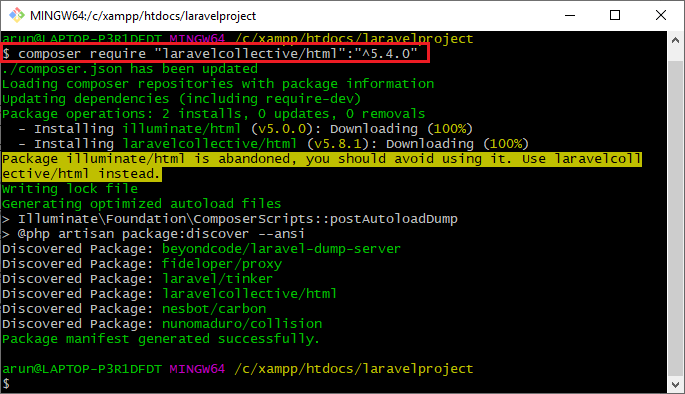
In the above window, we observe that the command "$composer require "laravelcollective/html":"^5.4.0" updates the composer.json file required for laravelcollective/html.
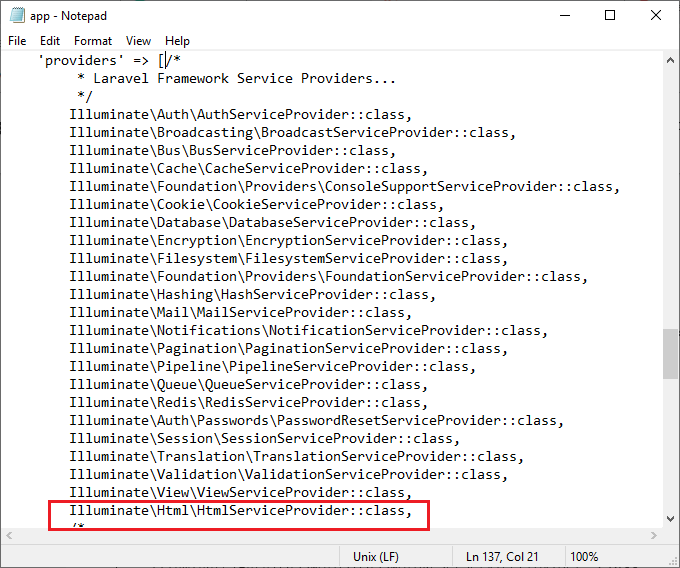
The above-highlighted area represents the HtmlServiceProvider added in the providers array of the config/app.php file.
Opening a FormWe can open a form by using the code given below: In laravel forms, the default method is assumed to be 'post' method if not mentioned, but we are free to specify any other method. Since forms support Post, Put, Delete, and Get methods, so these methods can be added in a form by using the hidden method field. If we want to use the put method in a form, then the code is given below: We can also open forms that point to the named routes or controller actions. Generating HTML Elements
Label is a normal text which appeared in the Html form. The syntax for writing a label element in Laravel is given below: Form::label('phone_no', 'Phone Number'); We can also specify the additional attributes in a label element. Form::label('phone_no', 'Phone Number',['class'=>'phone_no']); In this case, we have added the 'class' as an attribute in a Label element.
Text is an area where the user can input their data. The syntax for generating a text area in Laravel is given below: Form::text('email'); We can also specify the default value to the text box. Form::text('email','[email protected]');
Password is an html element in a form that captures the user input, and each character is represented in the form of (*) instead of displaying the entered digits. The syntax for the password field is given below: Form::password('password',['class'=>'pass']);
We can create the checkbox as given below: Form::checkbox('name','value'); By default, the checkbox is unchecked. We can also check the box by providing true value to the checkbox element. Form::checkbox('name','value',true);
We can create the radio button as given below: Form::radio('name','value'); By default, the radio button is not selected. We can also select the radio button by providing true value to the radio button element. Form::radio(''name','value',true);
We can also add the number input field in a form. Syntax for the number input field is given below: Form::number('name','value'); The file input field is an html element used in a form for file uploading. Syntax for file input field is given below: Form::file('image'); Where, image is the name of the file input field.
The drop-down element is used to display the list of all the pre-defined options. The syntax for creating a drop-down menu is given below: Form::select('digits', [1,2,3,4,5,6]) We can also set the drop-down list with a default value: Form::select('digits',[1,2,3,4,5,6],'2') The above code sets the value of the drop-down list with a second element of the array, i.e., 3 as indexing starts with 0. Generating Grouped list We can generate the grouped list through the drop-down element. Let's see this through an example: Form::select('animal',[
year, month, and day. The syntax for generating a date input field is given below: Form::date('name',\Carbon\Carbon::now())
We can also create the button in a web form by using the button field in a form. Let's see its syntax: Form::submit('Click me!!') The above line creates the submit button with the name "Click me!!". Let's understand the forms through an example. The following are the steps required to create a form. Step 1: First, we create the Master layout file named as master.blade.php file. Step 2: Secondly, we create the contact.blade.php file in which we add the code of Form. The above code is used to create the form which is containing different fields. Step 3: Now, we create the resource controller named as PostsController, and we only added the functionality in a store() function given as below: PostController.php In the above code, we add the code in a store() function, which validates all the fields in a form. Step 4: Lastly, add the route in the web.php file. Output 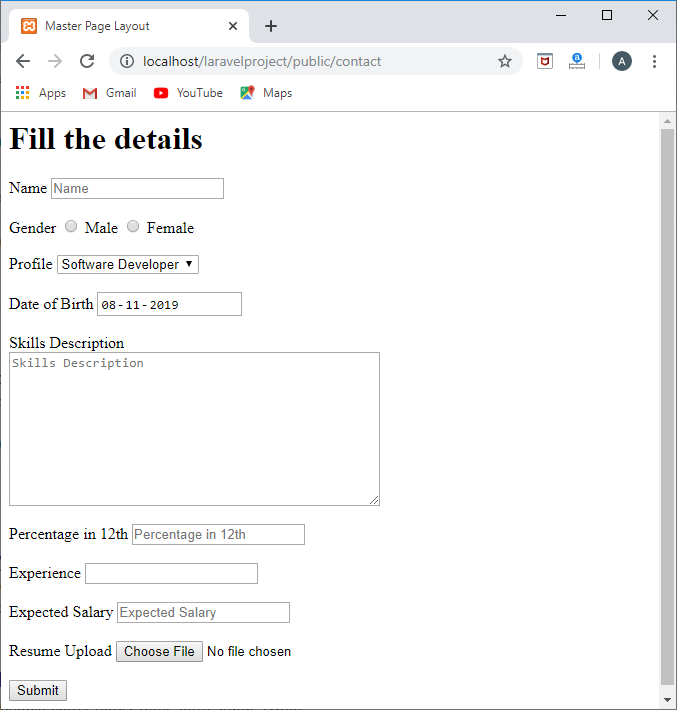
Suppose I enter the following details in the above form: 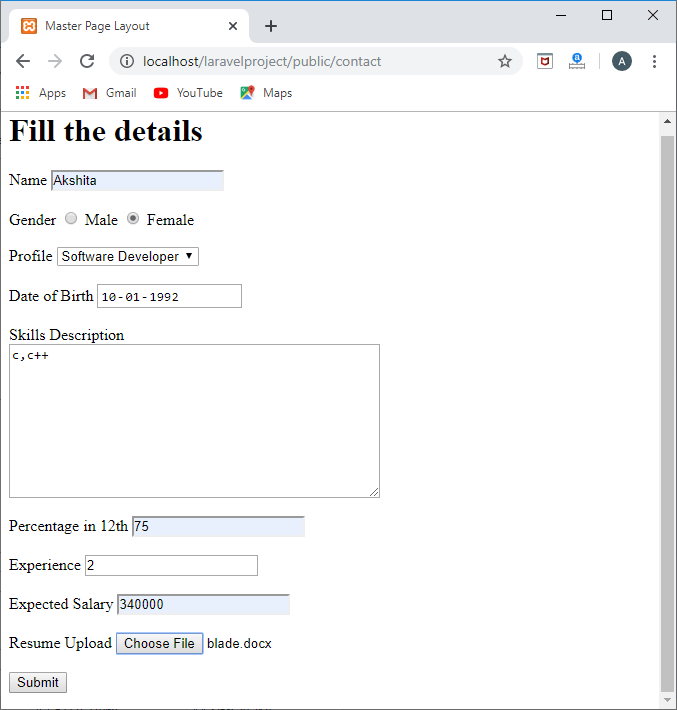
After filling all the details, click on the Submit button then the output would be: 
Next TopicLaravel Migration
|
 For Videos Join Our Youtube Channel: Join Now
Feedback
- Send your Feedback to [email protected]
Help Others, Please Share


