| |

Generating MigrationsIn the previous topic, we have acquired the knowledge of the migrations that are already available in the laravel project. Now, we will learn how to generate our own migration. Steps to generate the MigrationFollowing are the steps to generate the Migration:
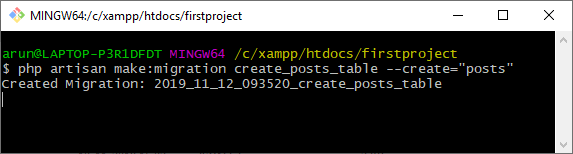
The above output shows that the migration table has been created with the name "create_posts_table". The '-create="posts"' Is the flag that creates the table with a name "posts". We follow the same rule to name the migration table as laravel did with the default migration table.
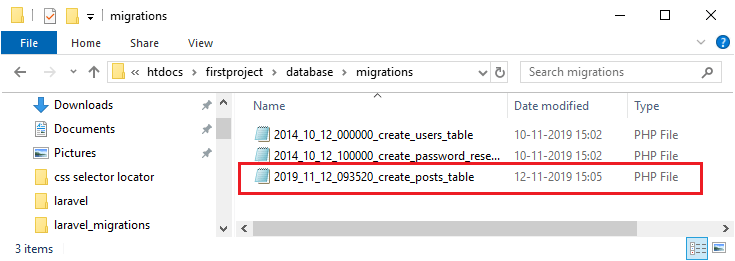
The above output shows that the migration table with the name "create_posts_table" has been created successfully.
The above code is the newly generated class that contains the two methods, i.e., up() method and down() method. The up() method implements the create() method that contains two parameters, i.e., name of the table(posts) and the closure function. The closure function contains the Blueprint class with its object $table as a parameter. The two columns are created by Laravel; the first one is the auto-incremental column with a name 'id', and the second column is of type timestamp. Suppose I added two more columns shown in the below code: Now we will do the migration to run the above code. Open the Git bash window to run the migrate command. 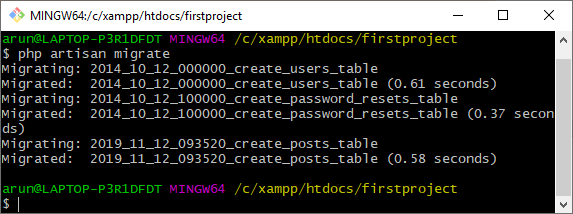
The above command creates the migration table in a database. Open the phpmyadmin to view the migration table. 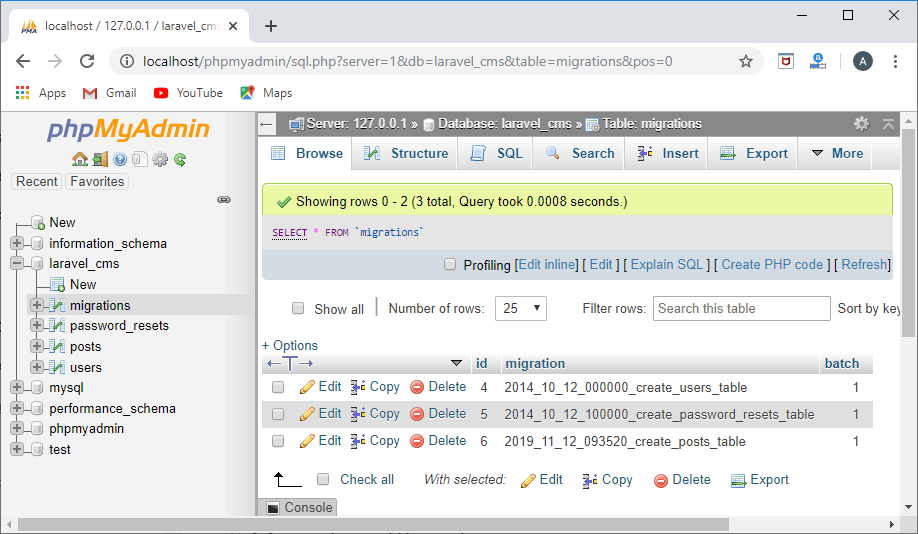
The above output shows that the migration is created, and also the 'posts' table. The structure of the 'posts' table is shown below: 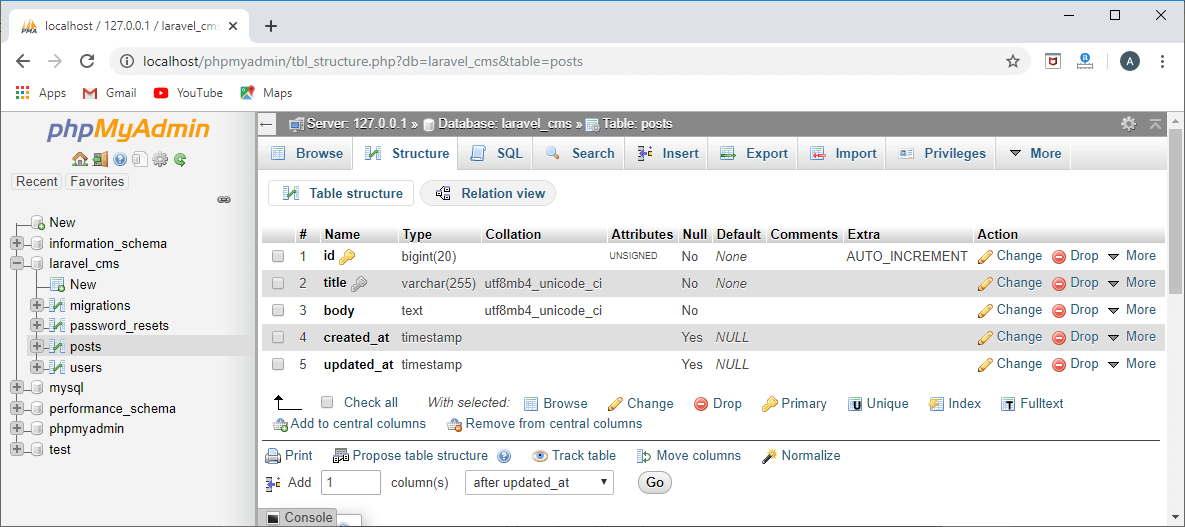
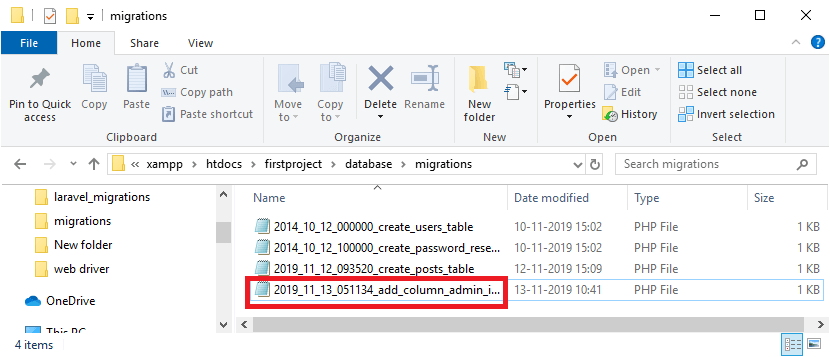
Adding columns to the existing table using migration I want to add new columns in a table that is already created. I do not want to move back to that file that has created the table, dropping the table, and then re-creating the table, and re-migrate it. So, I will create a new migration file that adds the new columns to an existing table. Following are the steps to add the columns to an existing table:
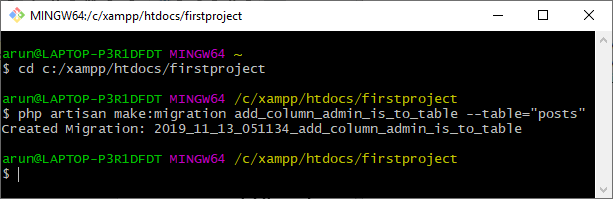
The above code shows that we are adding new column, i.e., is_admin to the posts table.
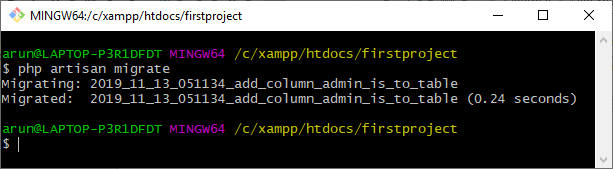
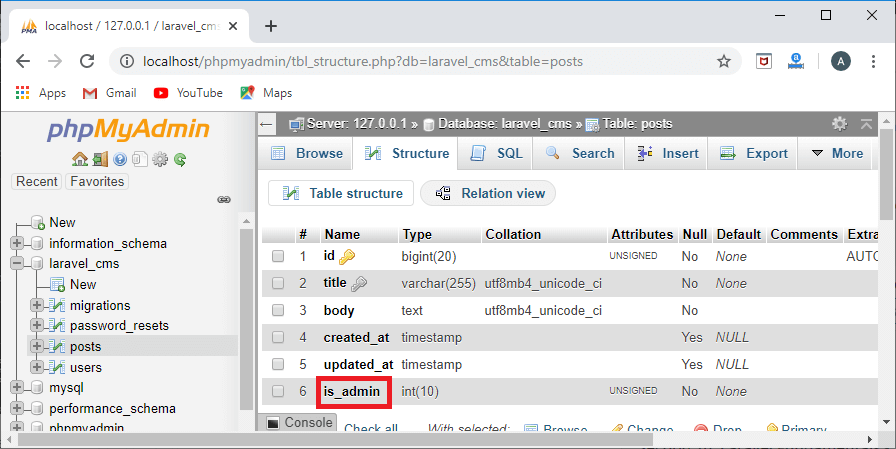
In the above output, we observe that the new column, i.e., is_admin, is created, and the type of the integer is unsigned. The unsigned integer means that this column does not contain any negative numbers.
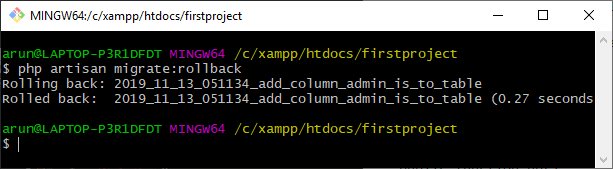
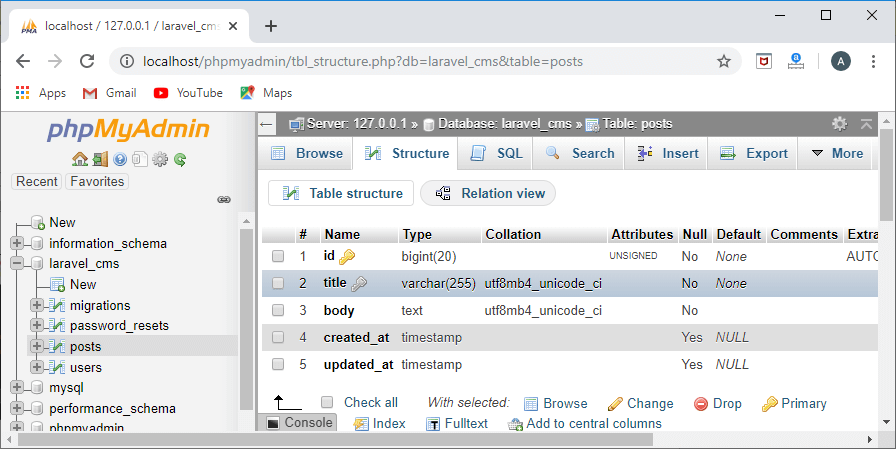
The above output shows that the is_admin column has been removed from the table.
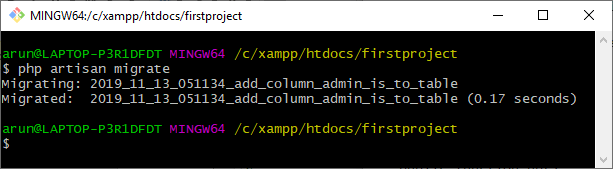
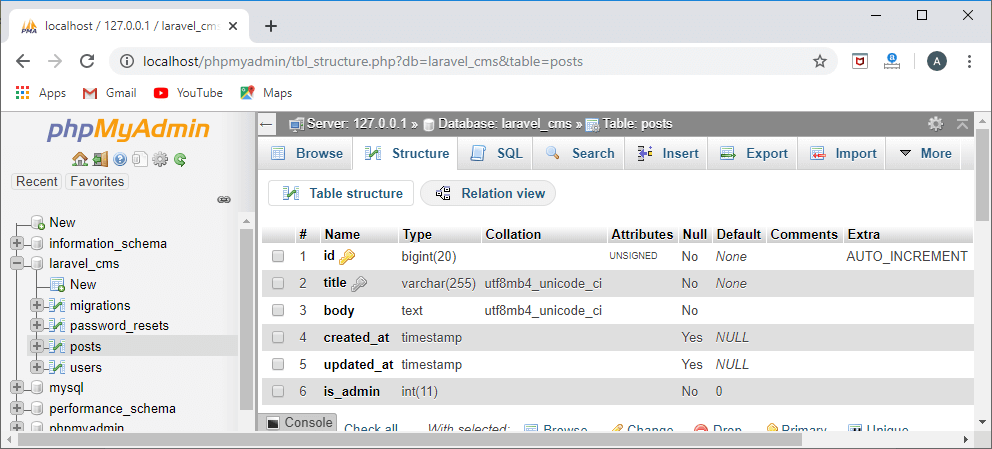
The above output shows that the is_admin column is added to the posts table with a default value 0.
Next TopicLaravel Migration Commands
|
 For Videos Join Our Youtube Channel: Join Now
Feedback
- Send your Feedback to [email protected]
Help Others, Please Share


