| |

Connecting RESTful Services to JPACreating a User Entity and some test Data Let's create a User entity and a UserRepository so that we can access the detail of the user. Step 1: Open pom.xml file and add spring-boot-starter-data-jpa dependency. Step 2: Make the User class as an entity by adding an annotation @Entity just above the User class. @Entity: Entities are nothing but POJO (Plain Old Java Object). It represents the data that can be persisted to the database. It represents a table in a database. Every instance of an entity represents a row in a table. We cannot declare an entity class as final. Step 3: Make the Id primary key by adding an annotation @Id just above the Id variable. Also, add an annotation @GeneratedValue. @Id: It defines that the member field below is the primary key of the current entity. Every entity must have a primary key that uniquely defines the column. @GeneratedValue: The @GeneratedValue annotation may be applied to a primary key property or field of an entity with the @Id annotation. It is used to support the primary key. We have to add the @GeneratedValue annotation to the primary key attribute and choose a generation type. The default generation type is GenerationType.AUTO. User.java Before moving to the next step, remove or comment the basic security dependency in the pom.xml. Step 4: Open application.properties file and enable the H2 console so that we can see what data we have inserted in the table. We also need to enable the SQL logging to see which SQL statements are executing. It starts SQL logging in the log when the statement executes. Now restart the application to pick up the changes. We can see in the following image that the table is created. 
Step 5: We have to create a SQL file to insert data in the user table. Right-click on the folder src/main/resource -> New ->Other -> Select SQL File -> provide the file name data.sql -> Click on finish. Step 6: In the data.sql file, insert the data into user table. We have inserted the following data: Run the application. Step 7: Open the browser and type http://localhost:8080/h2-console to connect the H2 console. Make sure that it has JDBC URL: jdbc:h2:mem:testdb. Do not write anything in the password field. 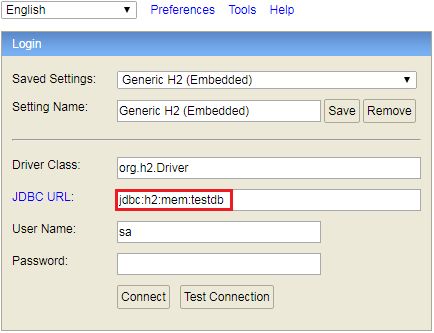
Step 8: Click on the Connect button to login. The table which we have created appears on the left-hand side of the page. Step 10: Type the query select * from user; It displays the table of records which we have inserted. 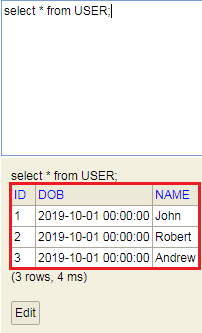
|
 For Videos Join Our Youtube Channel: Join Now
Feedback
- Send your Feedback to [email protected]
Help Others, Please Share


