Bugzilla Tutorial
In this tutorial, we will discuss the following topics: What is Bugzilla?Bugzilla is a bug tracking tool that helps to track the issues related to their product. Bugzilla tool is written in Perl language, and it uses MySQL database. It is a bug tracking tool. However, it can also be used as a test management tool because it can be linked with other Test case management tools such as Quality Center, Testlink, etc. It is an open source tool, i.e., this tool is available to the users at a free of cost. Features of Bugzilla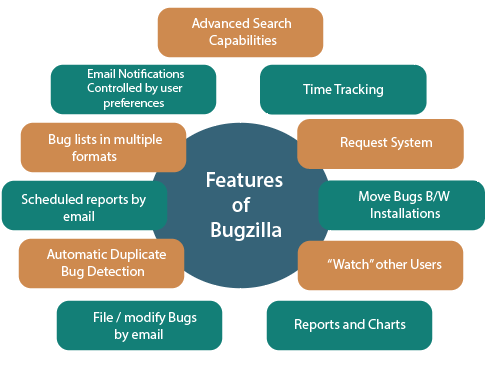
The following are the features of a Bugzilla: Advanced Search capabilities Bugzilla has two forms of search:
Email Notifications controlled by user preferences You will get an email if any changes are made in the Bugzilla, and the notifications that you get on which bug is totally controlled by the user preferences. ug lists in multiple formats Reports and Charts When you search for the bugs, then you can get the bug lists in multiple formats such as Atom, iCalendor format. The iCalendor format is used when you are using the time tracking feature in Bugzilla. There are even more formats available in Bugzilla such as printable format that contains the details of all the bugs, CSV format used for importing bug list into spreadsheets. Scheduled reports by email Bugzilla has a system that will send you, users or a group that you specify the results of a search on a schedule that you have mentioned. Automatic Duplicate Bug Detection When you are filing a new bug, and when you type the summary for the bug, then the system looks for similar bugs. If the system finds the similar bugs, then it allows the user to add themselves in the CC list of one of those bugs instead of creating a new one. File/Modify Bugs by email You can send an email to Bugzilla to create a new bug or modify the existing bug. You can even attach the files to Bug. Time Tracking Bugzilla also provides the feature of time tracking. You can determine how many hours a bug will take to get fixed and you can also even track the hours that you need to spend on the bug. You can also set the deadline by which the bug needs to be fixed. Request System The request system is a way of asking other users to do something with a bug. The user can either grant the request or deny the request, and Bugzilla will keep track of the answer. ove Bugs Between Installations Bugzilla has the ability to move the bug from one Bugzilla installation to another. In Bugzilla, a bug can also be moved across different versions. "Watch" Other Users Bugzilla allows you to watch other users. You will also get an email that the user gets from Bugzilla. This feature is useful when some developer goes for leave then other developer needs to handle the bug. Reports and Charts Bugzilla provides an advanced reporting system. If you want to know how the database of a bug looks like, then you can create the two fields across the X-axis and Y-axis. With the help of search criteria, you can limit the information of a bug. You can also export these reports in CSV format. Bugzilla InstallationThe following are the requirements to install Bugzilla:
Logging in to BugzillaThe Bugzilla installation requires the several software. But, some websites provide Bugzilla web application, and https://bugzilla.mozilla.org/home website is one of them.
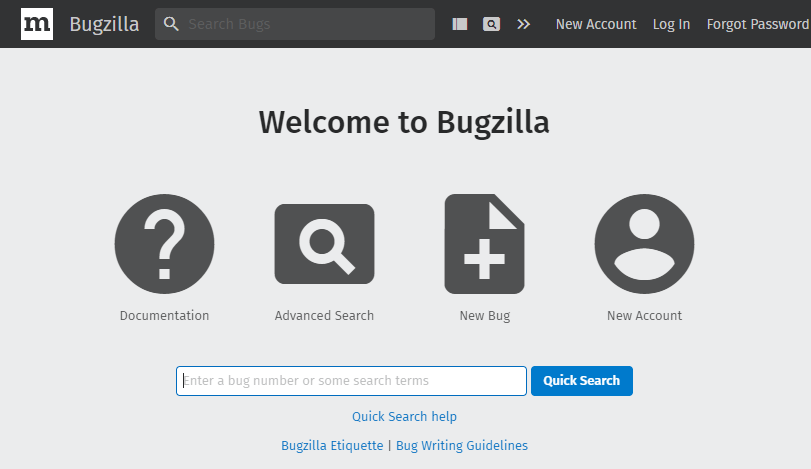
Click on the New Account to create a new user. 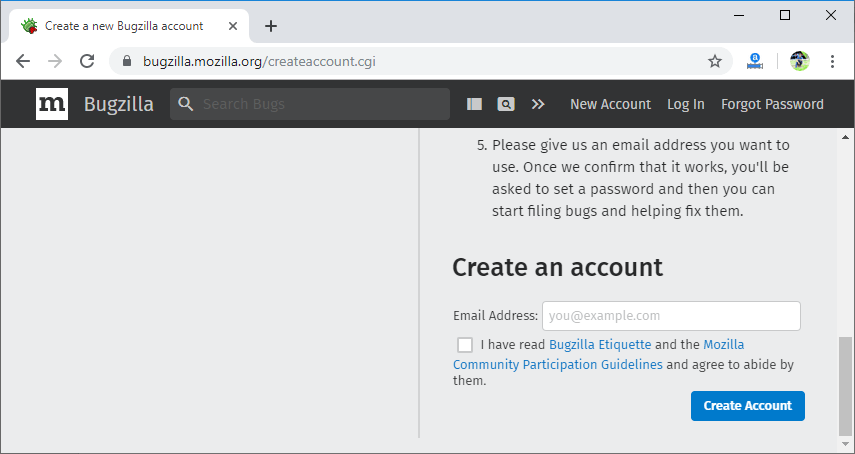
In the above screen, enter your email id and click on the Create Account button. On clicking on the Create Account button, a confirmation mail is sent to your email id. When you click on the link sent to your email id, then the Bugzilla page appears asking to reset the password. 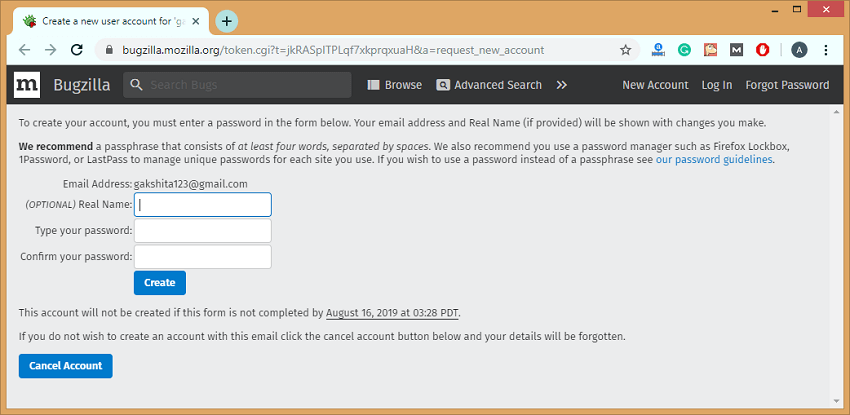
When you enter the name and password, click on the Create button. 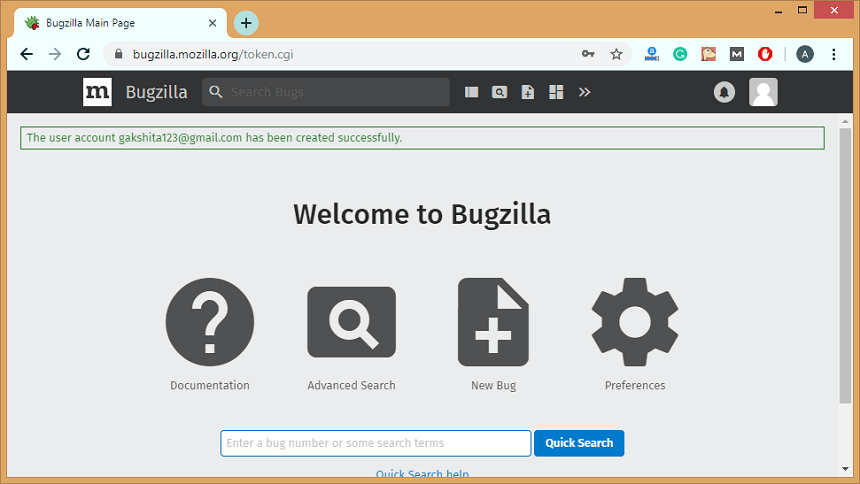
Components of BugzillaSome of the main components that are available in a Bugzilla: 1) New BugFollowing are the steps required to file a bug: Step 1: Click on the New Bug icon to file a new bug. 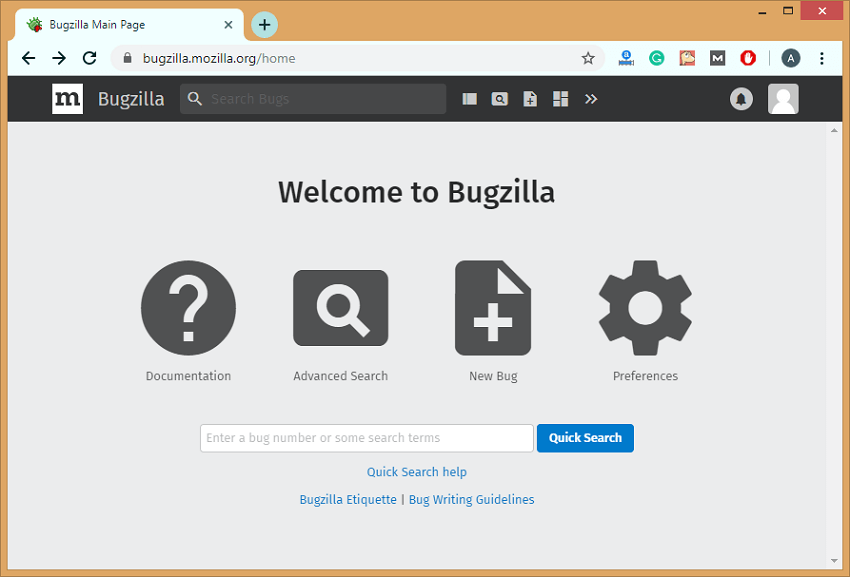
Step 2: On clicking on the New Bug, you will be redirected to the new page showing all the products. 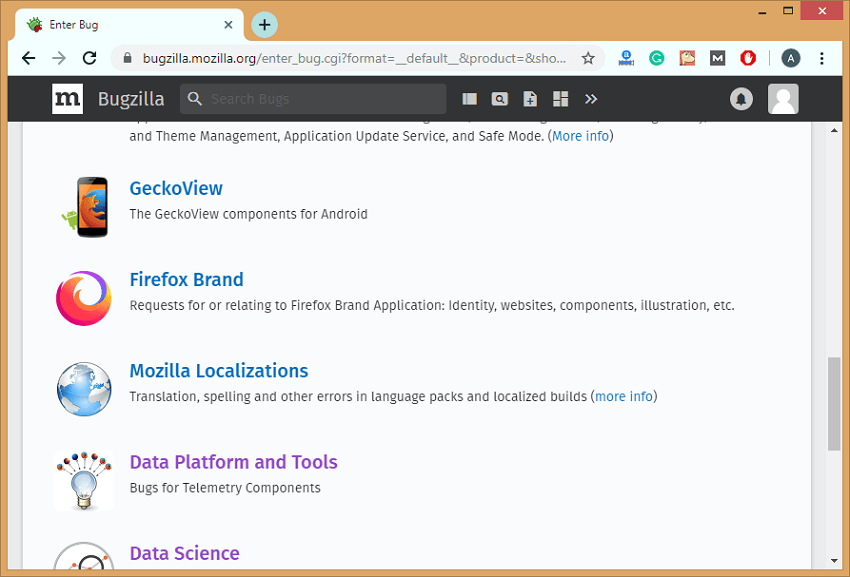
Step 3: Suppose I choose the product Data Platform and Tools. When I select the product, the screen appears, which is shown below: 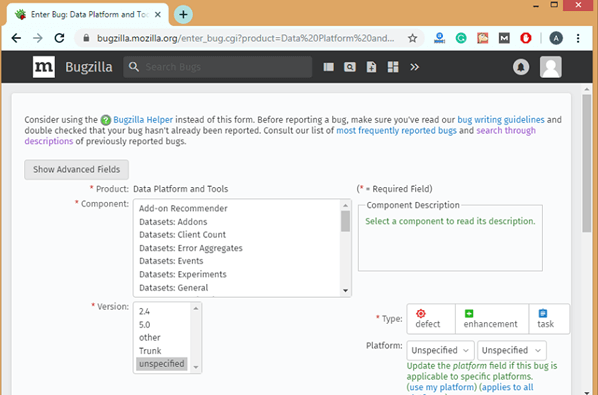
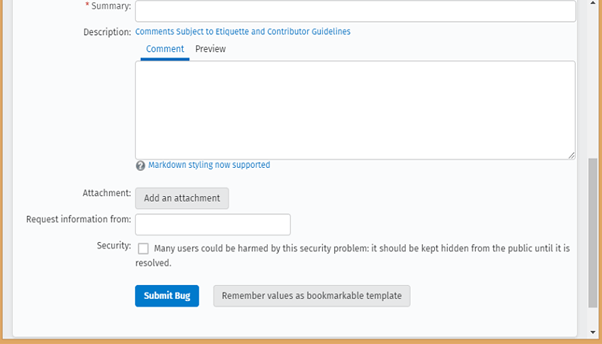
In the above screen, we need to fill the following fields: Product: It is a product that you selected just now, i.e., Data Platform and Tools. Component: Each product can be split into several components based on its functionalities. Version: Version of the product determines the product in which the bug has been detected. Summary: It is used to define the summary of a product. Request information from: Attachment: File can also be attached related to the bug. Description: It provides the complete description of a bug. Security: You can check the security box so that this bug can be kept hidden from the public until and unless it gets resolved. 2) SearchYou can also search for a particular bug. There are two types of searches:
Simple search Follow the steps to search for a bug: Step 1: Click on the Search icon available on the home page. 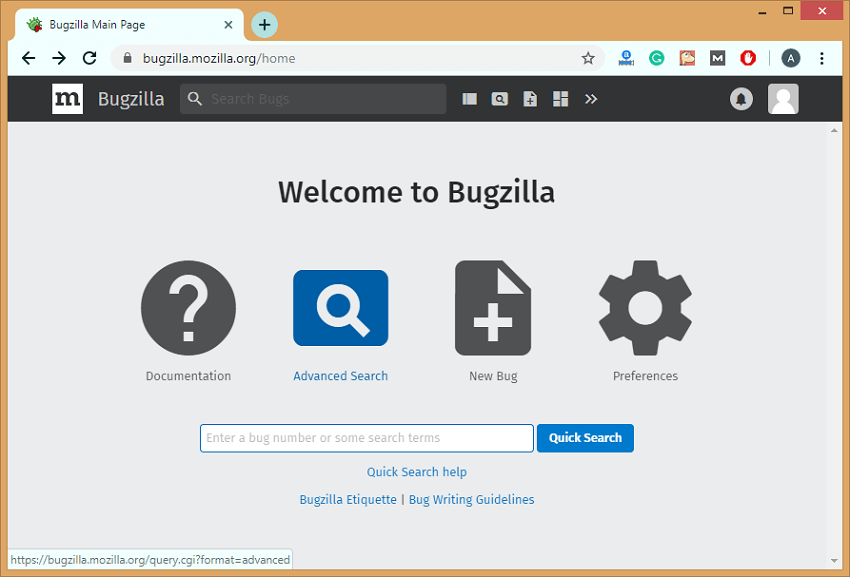
Step 2: After clicking on the search icon, the screen appears which is shown below: 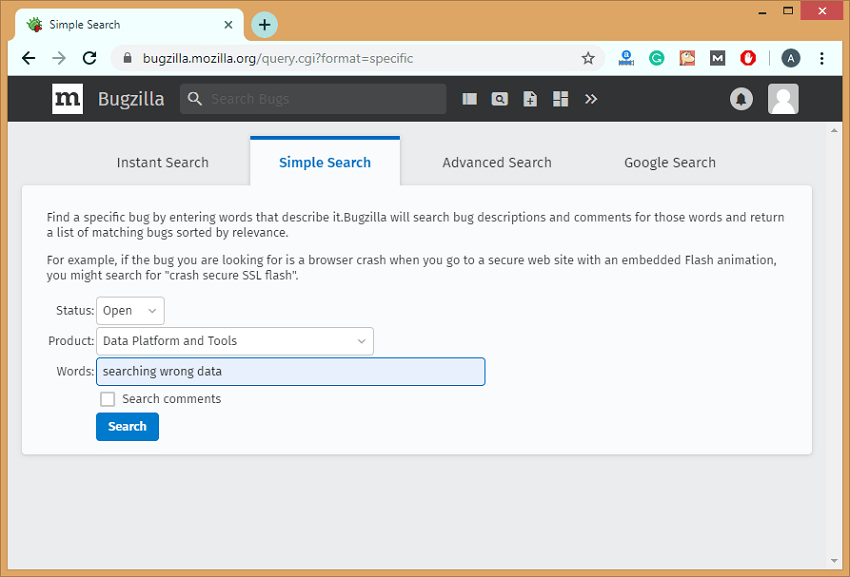
In the above screen, we need to enter the three fields, i.e., Status, Product, and Words. Step 3: Click on the Search button. After clicking on the Search button, the bug list appears which is shown below: 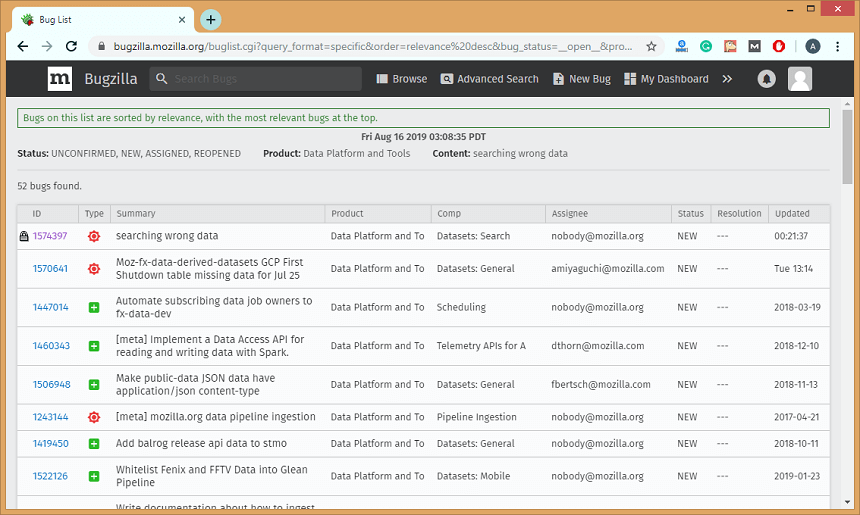
Advanced search Following steps are required for an advanced search: Step 1: Click on the Advanced search option. 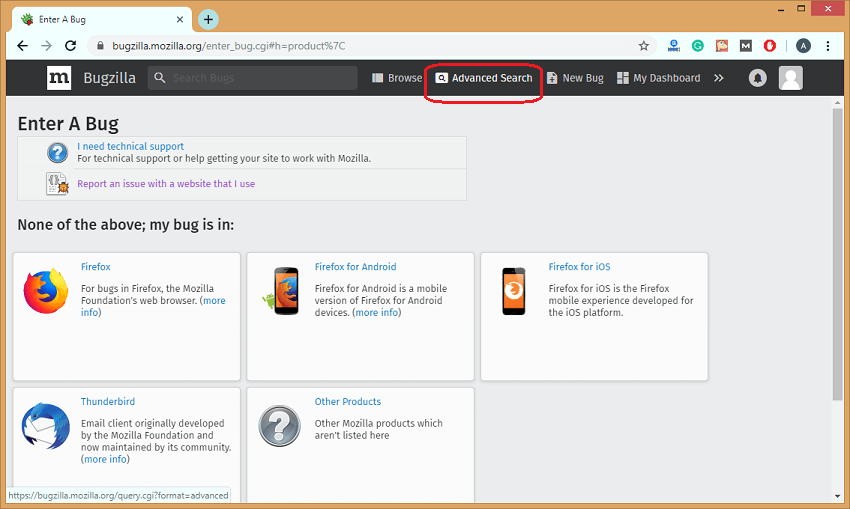
On clicking on the Advanced Search option, the screen appears which is shown below: 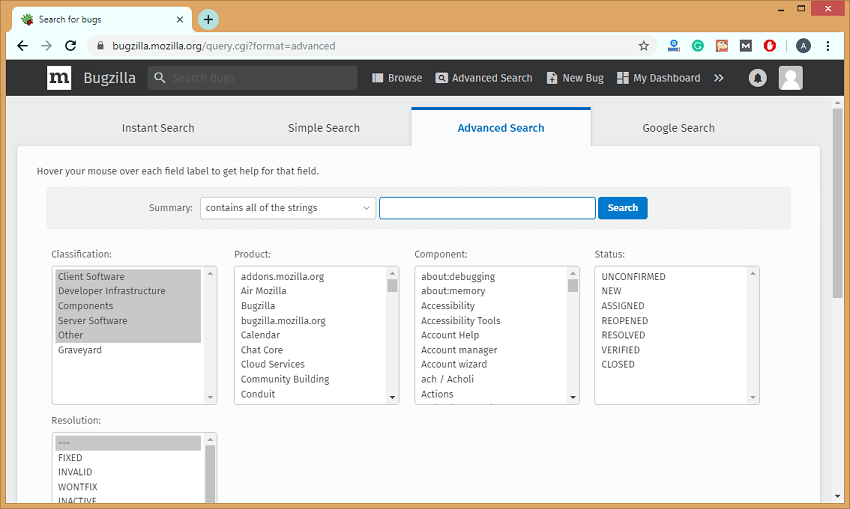
Step 2: Select the category of bug under the classification box, so I select Client software. Select the product in which bug has been created, so I select Data Platform and Tools under the Product box. Select the com. In the Component section, I have selected Client Count. You can also select the Status of a bug and Resolution. 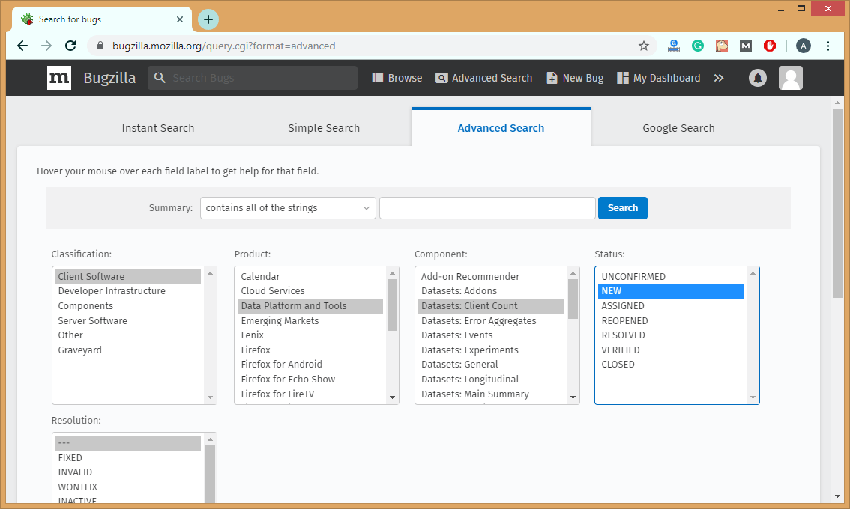
Step 3: After selecting all the fields, click on the Search button. 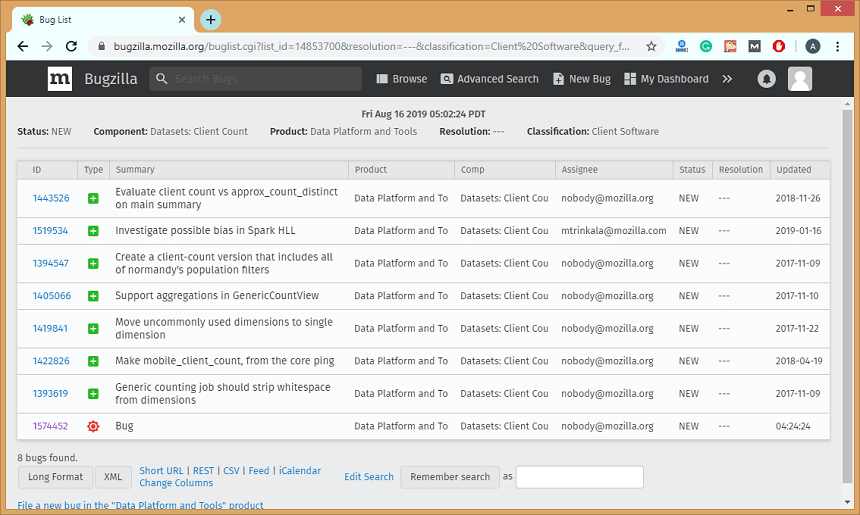
The above screen shows the bug list according to the search that you made. 3) PreferencesPreferences are used in Bugzilla to customize the default settings according to our requirements. Preferences in Bugzilla are given below: a) Account Information In Account Preferences, you can change the account information. For security purpose, you need to enter first your current password in the password field, and if you want to change the email address then the confirmation mail is sent to both old and new email address, this prevents from the account hijacking. Following are the steps required for the Account preferences: Step 1: Click on the User Preferences in the home page. 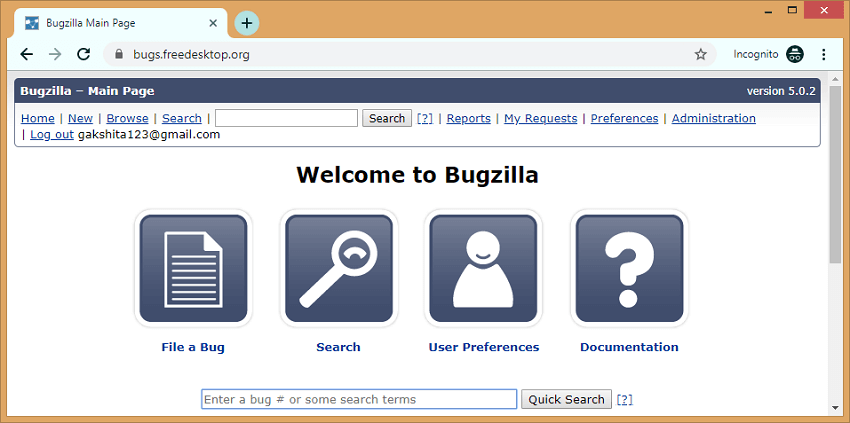
Step 2: Click on the Account Information tab shown in the below screen: 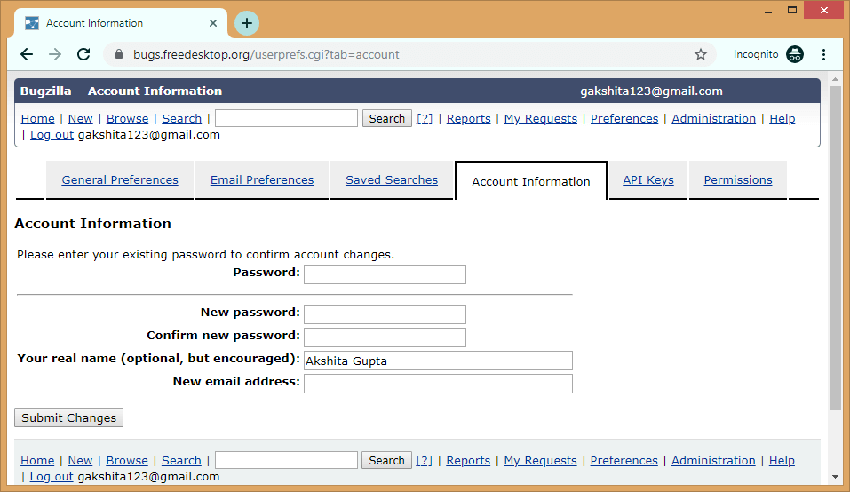
The above screen shows some fields related to your account, if you want to change your password then you need to enter your current password, new password, real name, and if you want to change your email address then enter your new email address. Step 3: After filling all the fields, click on the Submit Changes button. b) General Preferences General preferences are used to customize the default settings in Bugzilla. We can customize the following settings:
Following are the steps required to customize the default settings: Step 1: Click on the User Preferences in the Home page. Step 2: Click on the General Preferences tab. 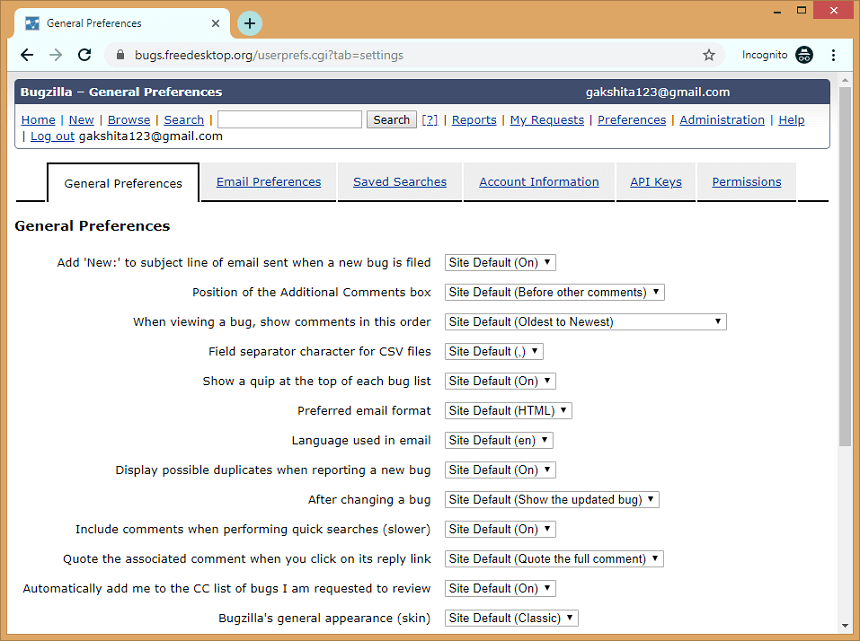
The above screen shows the number of settings that we can customize. c) Email Preferences Email Preferences allow you to send the email notifications on some specific events. It provides you a complete control over how much email should Bugzilla send. If you want to receive the maximum possible emails then click on the Enable All Mail button and if you do not want to receive any email from the Bugzilla then click on the Disable All Mail button. Following are the steps required for the Email preferences: Step 1: Click on the User Preferences in the home page. Step 2: Click on the Email Preferences tab. 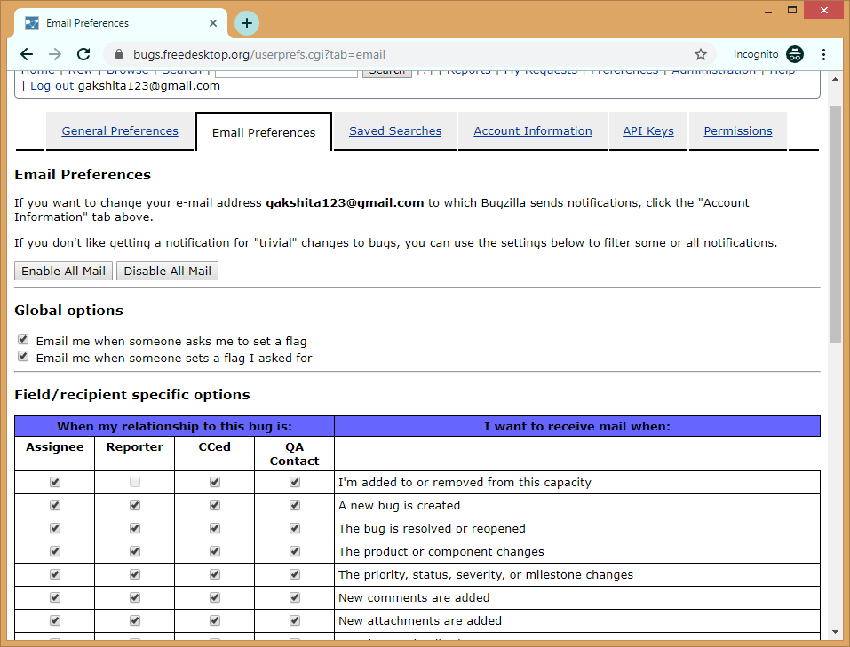
The rows represent the events that can happen to a bug while the columns represent the relationship with a bug. Assignee: The Assignee is the person who has been designated with the responsibility of the bug. The name/account field appears in the "Assigned to" field. Reporter: The person who reported the bug. The name/account field exists in the "Reporter" field. CCed: It means that you are on the CC list of the bug. Your account appears on the CC: text for the bug. QA Contact: It is The X-Bugzilla-Reason header that defines the QA contacts for the bug. d) Saved searches In saved searches, you can run the saved searches that you have created, and it also allows you to share the saved searches. You can also add the saved searches to the page footer in the screen. 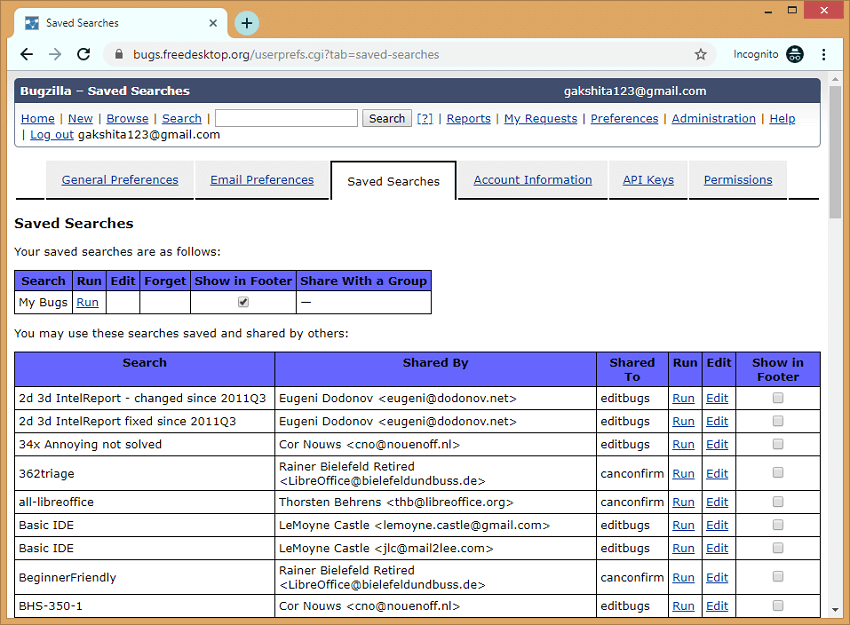
e) Permissions It's an informative page that defines the current permissions on the installation of Bugzilla. A complete list of permission is given below: bz_canusewhines: User can configure whine reports for self Canconfirm : Can confirm a bug. Editbugs : Can edit all aspects of any bug. 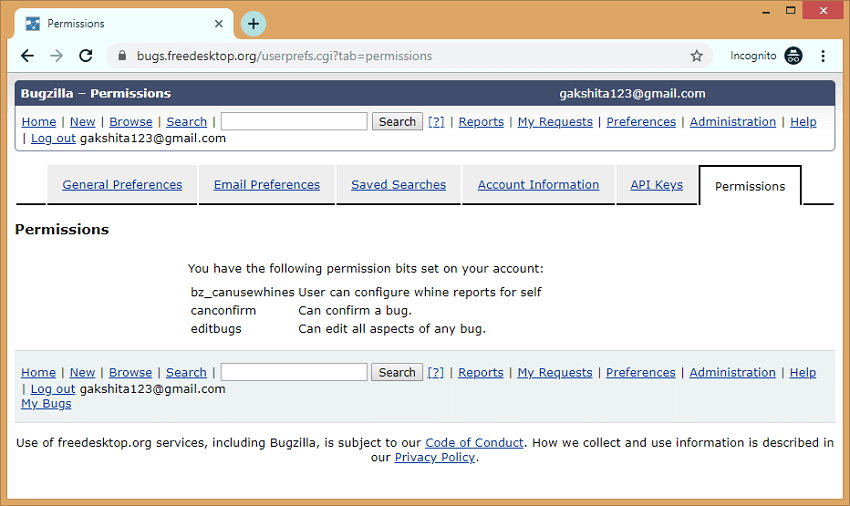
4) ReportsReports help to standardize the current state of a bug. The purpose of the defect is to see the analysis, progress and communication of a defect, and the current stage of a life cycle. Defect report is also useful after creating a bug that helps the developers to analyze the quality of a product. There are three types of reports that can be generated in Bugzilla:
Graphical reports Graphical reports are a group of line graphs, bar and pie charts. Graphical reports are helpful in many ways, for example, which component has the highest number of bugs, which bug has the highest priority, etc. To generate the graphical report, you need to follow the steps which are given below: Step 1: Log in to the Bugzilla account. Step 2: Click on the Reports link. 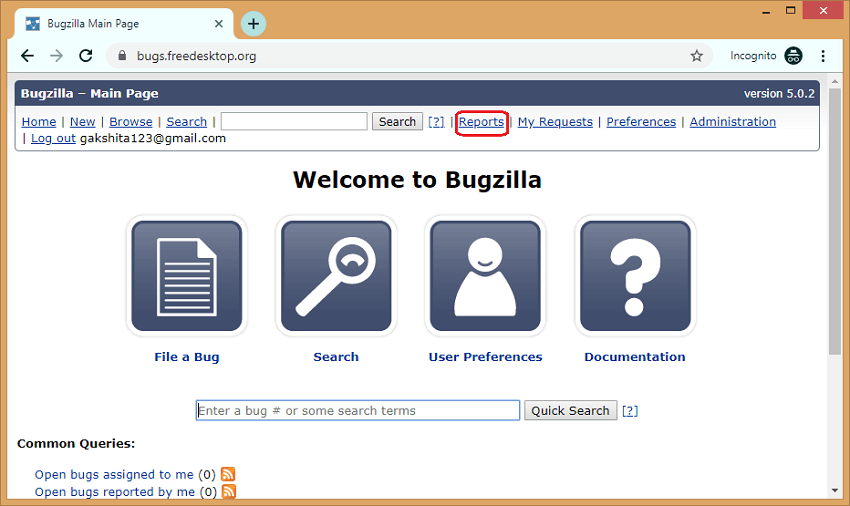
Step 3: Click on the Graphical reports link. 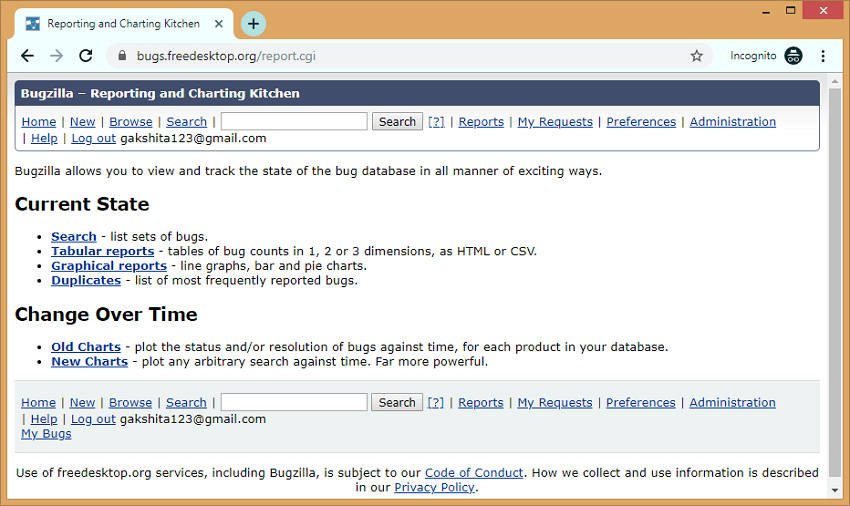
Step 4: After clicking on the Graphical reports, the screen appears which is shown below: 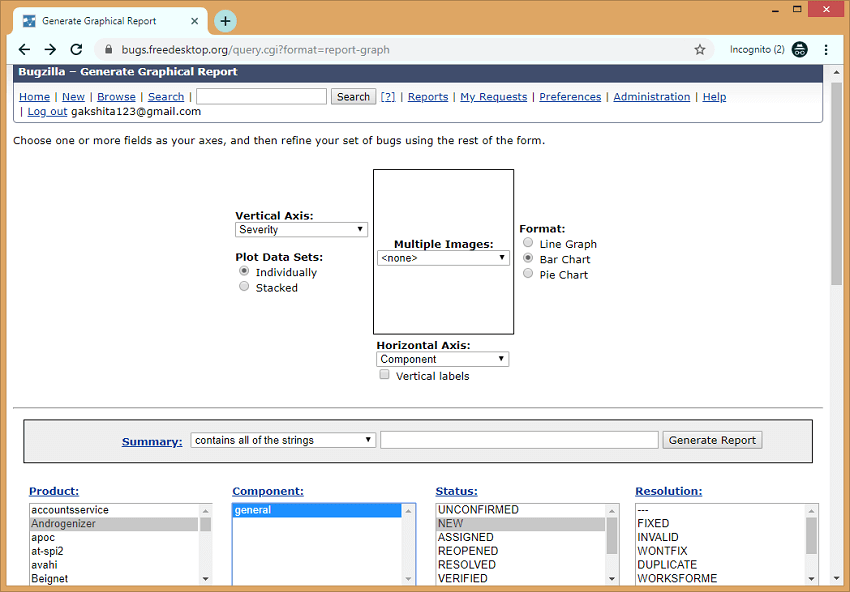
In the above screen, we need to first define the x-axis, y-axis and format of a graph. Suppose I choose the Bar graph as a format, y-axis as a Severity and x-axis as a Component. Now, we need to describe the product and component of which we have to create the graphical report. Bar Graph When the x-axis is a component and y-axis represents severity. 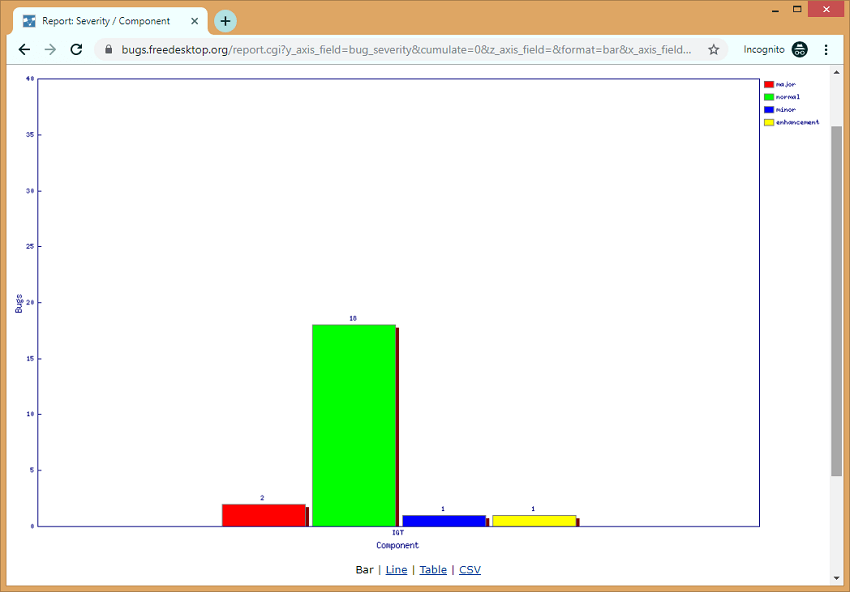
Line graph When the x-axis is a component and y-axis represents severity. 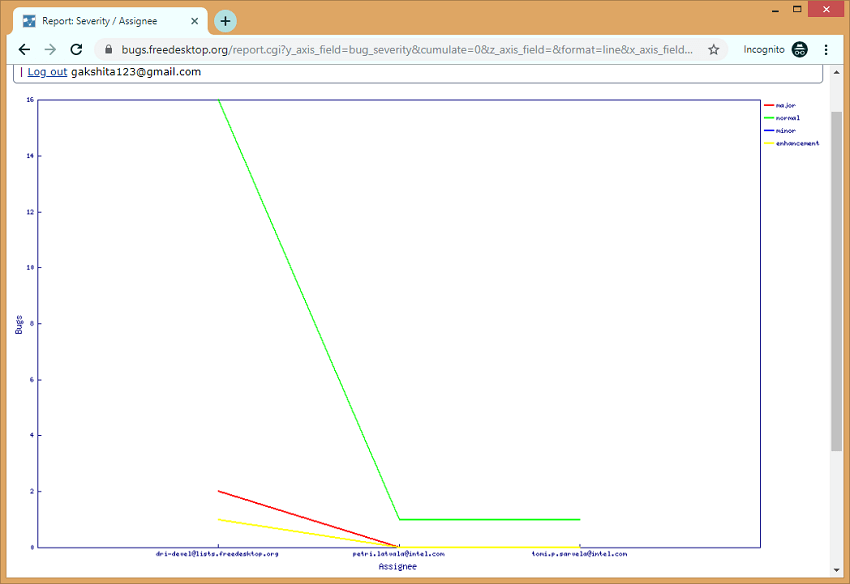
Pie chart When the x-axis is Assignee and y-axis is severity. 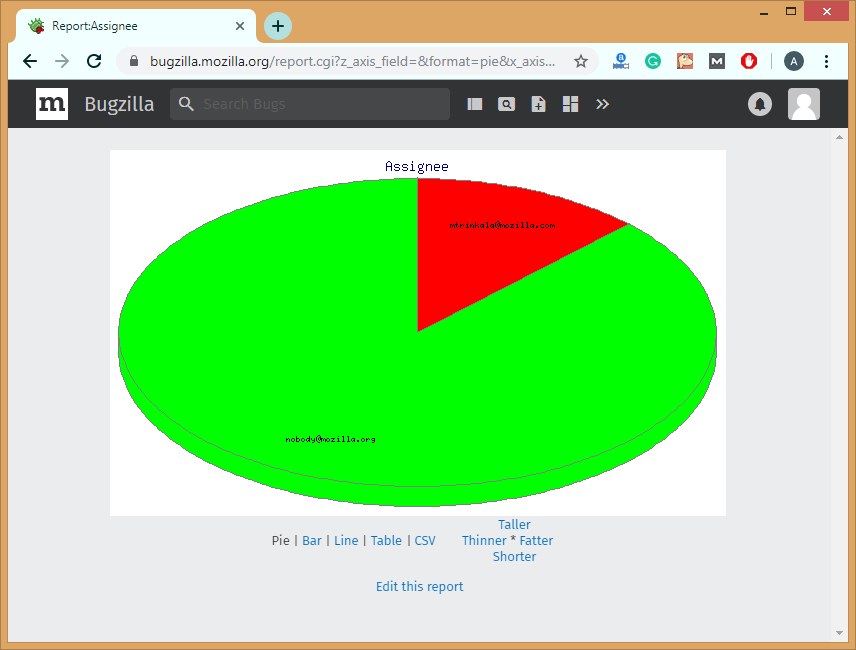
The red portion represents the major severity while green portion represents the normal severity. The above pie chart represents that the bugs assigned to the [email protected] are of major severity and the bugs assigned to the [email protected] are of normal severity. Tabular reports Tabular reports generate the tables of bug counts in 1, 2 or 3 dimensions, as HTML or CSV format. The following are the steps required to generate a tabular report: Step 1: Click on the Reports section. 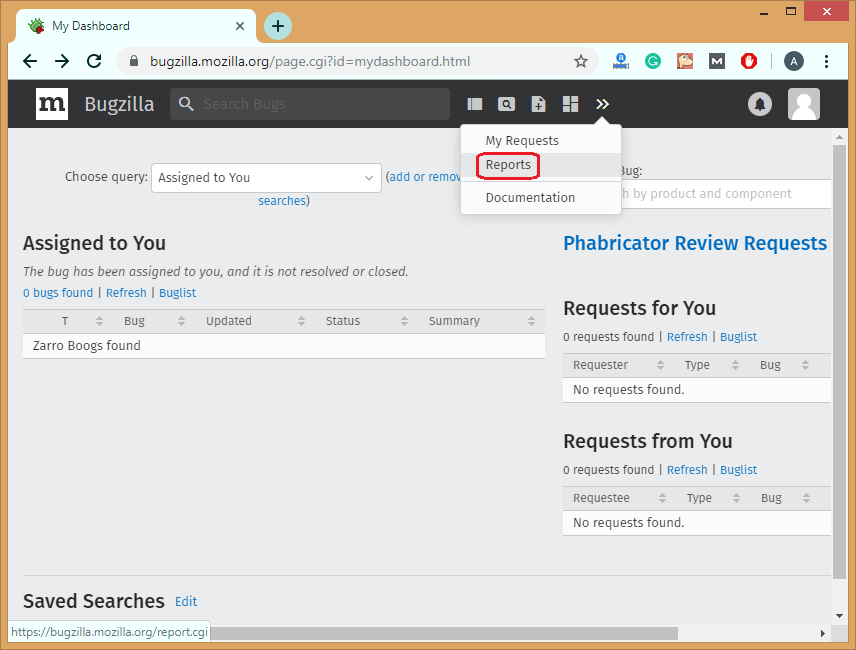
Step 2: Click on the Tabular reports, as shown in the below screenshot: 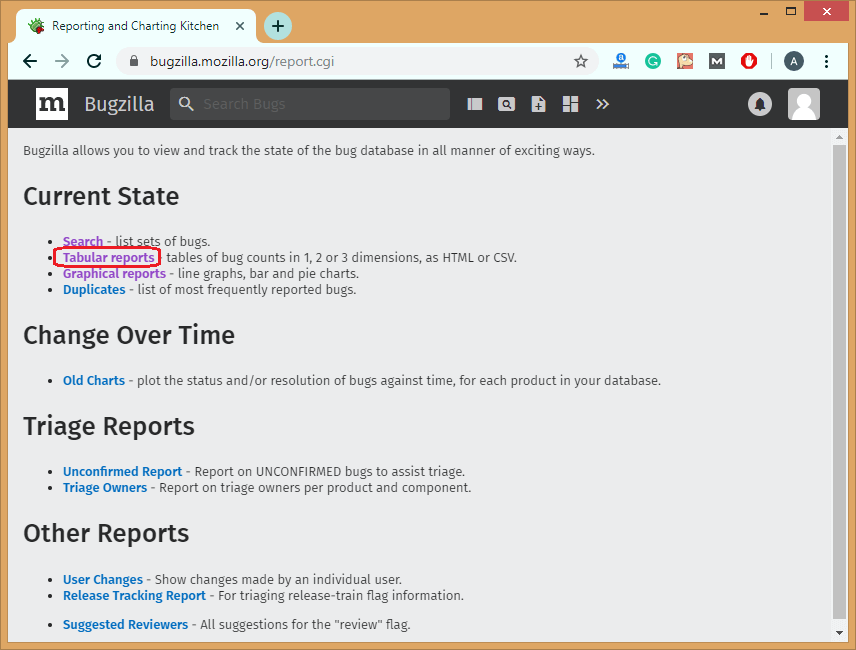
Step 3: On clicking on the Tabular reports, the screen appears, which is shown below: 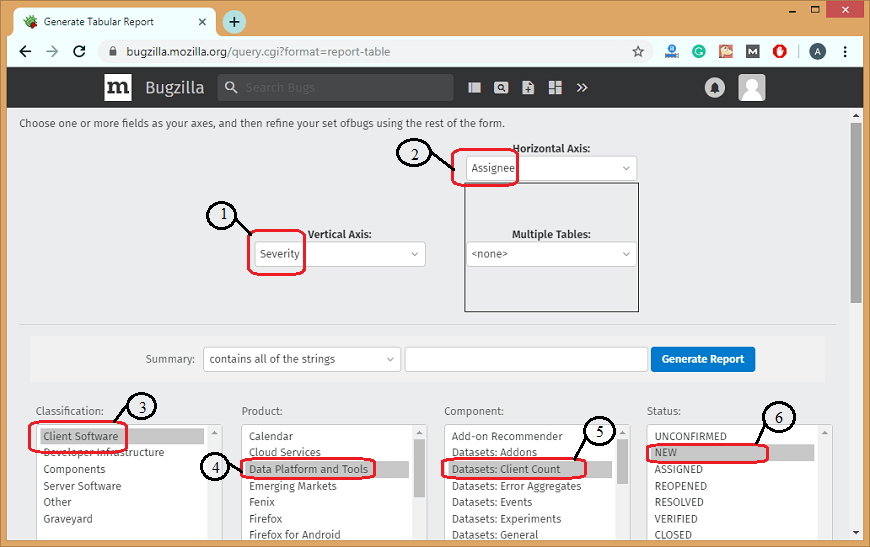
In the above screen, you need to fill some required fields to generate a tabular report such as the vertical axis (y-axis), the horizontal axis(x-axis), and product details. The product details are Classification, Product, Component, and Status. Under Classification, I selected Client software, Under Product, I selected Data Platform and Tools. Under Component, I choose Client Count, and under the Status section, I selected New. I selected Severity as a vertical axis and Assignee as a horizontal axis. Step 3: After filling all the required fields, click on the Generate Report button. Step 4: The below screen shows the generated tabular report. 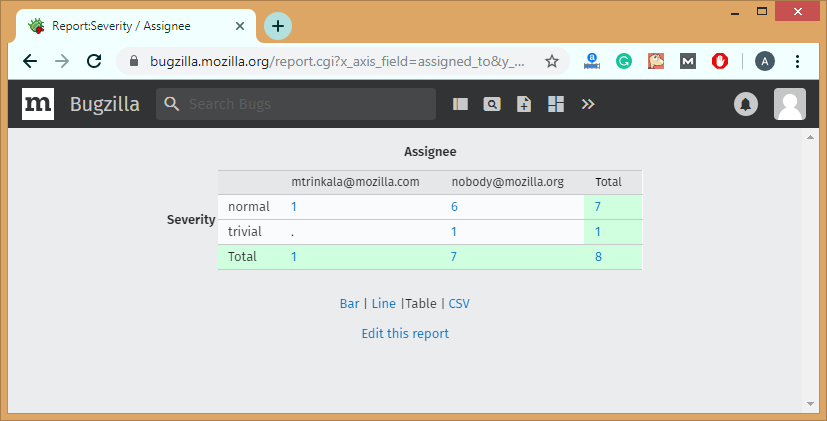
Duplicates In Bugzilla, duplicates are the most frequently reported bugs. The most frequently reported bugs mean the most frequently seen open bugs. Duplicates contain the field, i.e., Dupe Count that counts the number of direct and indirect of bugs. This helps in minimizing the number of duplicate bugs that are entered into Bugzilla. It also helps the QA tester to log a new defect rather than a defect that already exist. It also helps the stakeholders to find the root cause of a bug that are reopened. How to use a Duplicate list
The following are the steps required to use a duplicate list: Step 1: Click on the Reports. 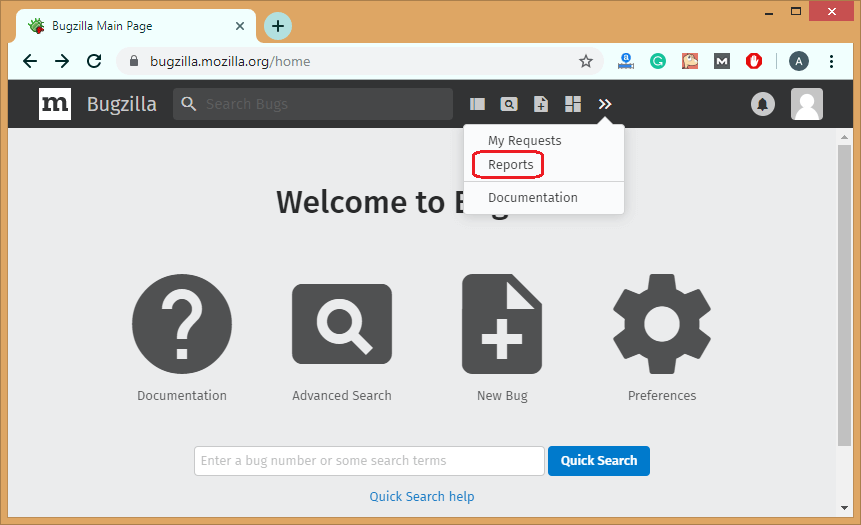
Step 2: Click on the Duplicates as shown below: 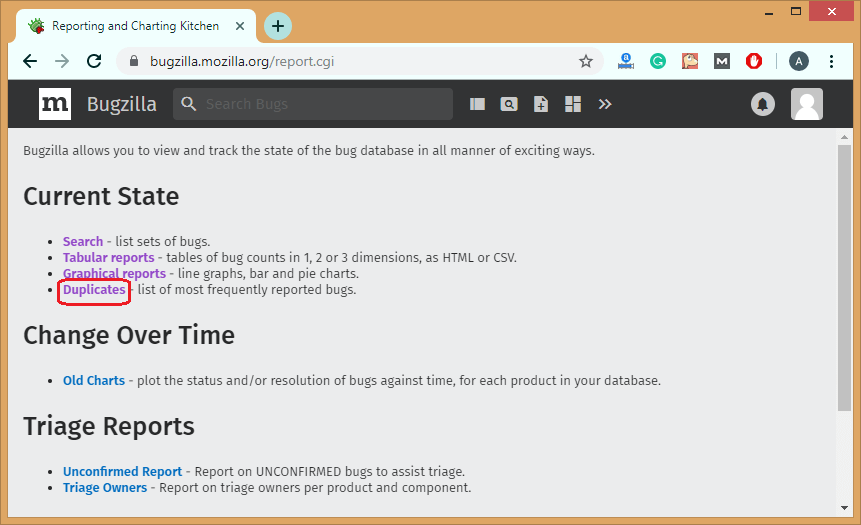
Step 3: After clicking on the Duplicates, the screen appears which is shown below: 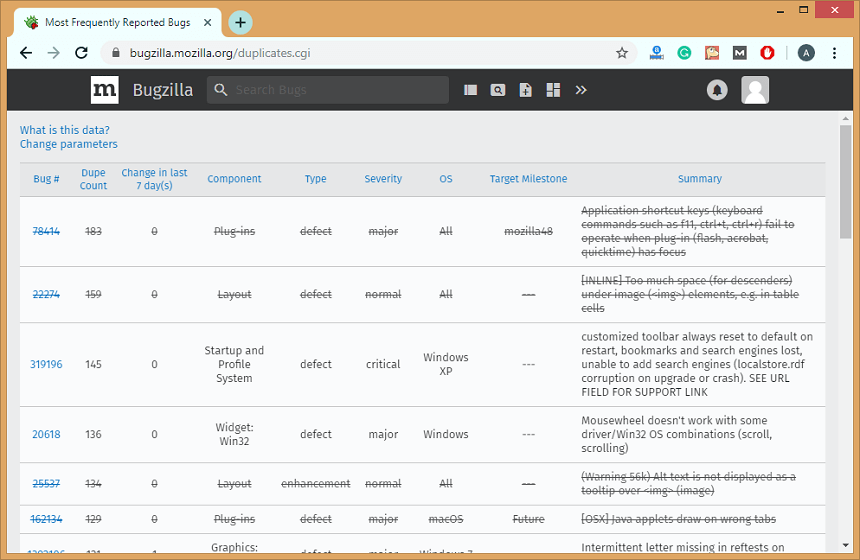
The above screen shows the most frequently reported bug table. This bug table consists of some important fields such as Dupe Count, Component, Severity, Summary, OS. Changing Parameters We can also customize the most frequently reported bug table. Following are the fields used to customize the bug table:
Let's change some parameters, and then we look at the bug table. 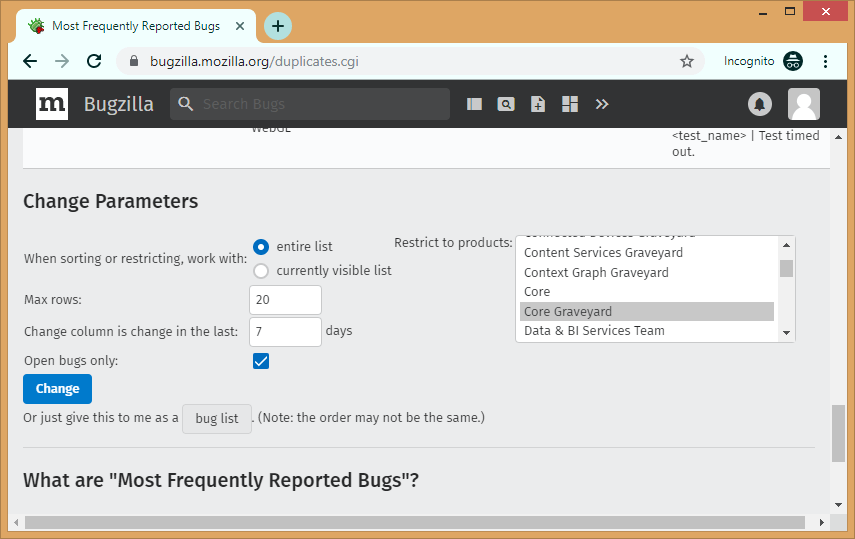
In the above screen, we have selected the Core Graveyard product, maximum rows are 20, and we have checked the Open bugs only field. After filling all the above fields, click on the Change button. 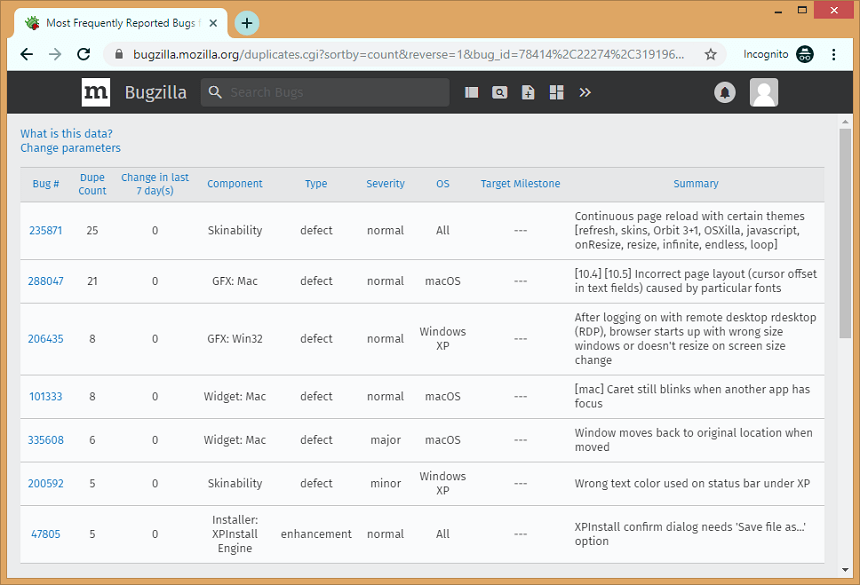
The above screen shows that the bug table has been filtered based on the data that we entered in the "Change Parameters".
Next Topic#
|
 For Videos Join Our Youtube Channel: Join Now
Feedback
- Send your Feedback to [email protected]
Help Others, Please Share


