| |

PHP Laravel 5.6 - Rest API with PassportIn this section, we are going to learn the rest API with passport authentication. We will use Laravel and PHP to do this. In our Laravel application, we will create rest API. We will also install and implement passports for authentication. In our application, we can very easily use it, and it is very easy to understand. The popular PHP framework is known as Laravel. Laravel is known as the best framework that's why mostly developer creates API for back end framework by using the Laravel. A lot of features are provided by Laravel, such as passport, routing, security, middleware, models, rest API, events, etc. These features can be easily used, and we can make Laravel clean code. In this Laravel application, we will learn Rest API with Passport Integration. If we don't have so much knowledge about Laravel, this application will be very useful for setting up APIs and authentication. In order to set up for rest API, the step by step process is described as follows: Step 1: In this step, we are going to Install the Laravel app. We will use the following command to get the fresh version of the Laravel 5.6 application. For this, we will open use our CMD, and then we will run the following command like this: Step 2: In this step, we are going to Install Package. Here we will use the Composer package manager to install the passport. For this, we will use our command prompt and run the following code into it like this: When the above package is successfully installed, we need to get default migration. We will use our database and create a new passport table by using this migration. For this, we will run the following command: After this, we will use the following command to install the passport. This command is used to create token keys for security. For this, we will run the following command: Step 3: In this step, we are going to perform Passport Configuration. Here, we will add configuration on the auth config file, service provider, and place model. For this, we will make some changes to three files that are User.php, AuthServiceProvider.php, and auth.php. The changes on these files are described below. In the User.php file, we have to add a class of passport named as HasApiTokens like this: app/User.php Now we will use AuthServiceProvider.php file and add "Passport::routes()" into it like this: app/Providers/AuthServiceProvider.php Now we will use the auth.php file and add api auth configuration into it like this: Step 4: In this step, we are going to Create a Product Table and Model. Here, we will use the below command to create migration for the post table. For this, we will first run the following code: When we successfully run the above command, we are going to see a new file in the database/migrations path. Now we will create a product table by using the migration file and put the following code into that file: When we successfully run the above command, we have to use the below command to run above-created migration like this: When we successfully create a "products" table, we have to create a product model for products. So we will use the app/Product.php path and create a new file named item.php. Then we will add the below code into this created file like this: app/Product.php Step 5: In this step, we are going to Create API Routes. We can easily write the web service route by using the api.php file, which Laravel provides. Now we will use that file and add a new route into it like this: routes/api.php Step 6: In this step, we are going to Create Controllers. Here, we will create RegisterController, BaseController, and ProductController as three new controller. Now we have to create an alone APIs controller. So we will use the Controllers folder and create a new folder named "API". Now we will create these controllers. First, we will create BaseController like this: app/Http/Controllers/API/BaseController.php Now we will create ProductController.php like this: app/Http/Controllers/API/ProductController.php After that, we will create RegisterController like this: app/Http/Controllers/API/RegisterController.php Now passport api and full restful api are ready to run in Laravel. We will use the following command to quickly run this code: We should keep in mind that the following header will be used in detail api. Now we will describe various route URL with a verb. First, we will describe the Login route URL with a verb like this: Login: Verb: GET, URL:http://localhost:8000/oauth/token When we run the above URL, we will get Login API like this: 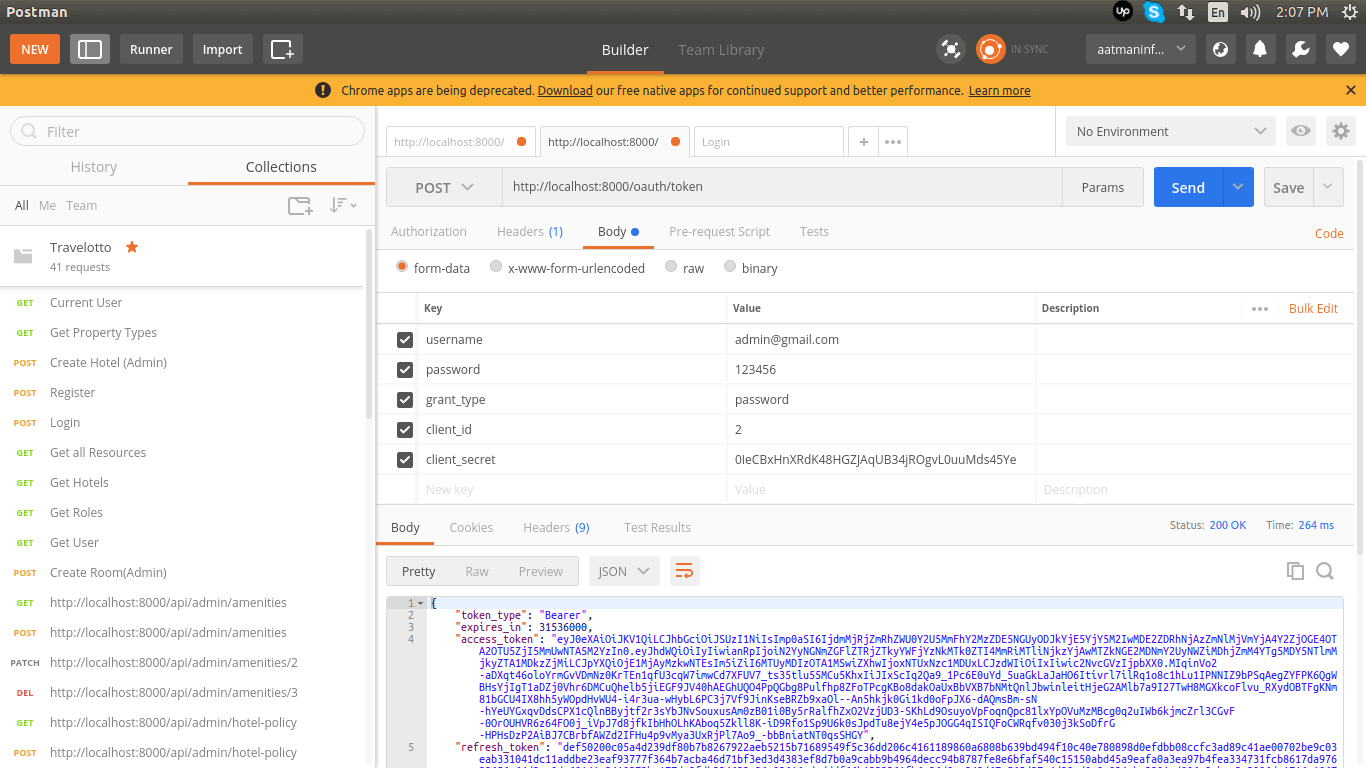
We will describe the Register route URL with a verb like this: Register: Verb: GET, URL:http://localhost:8000/api/register When we run the above URL, we will get Register API like this: 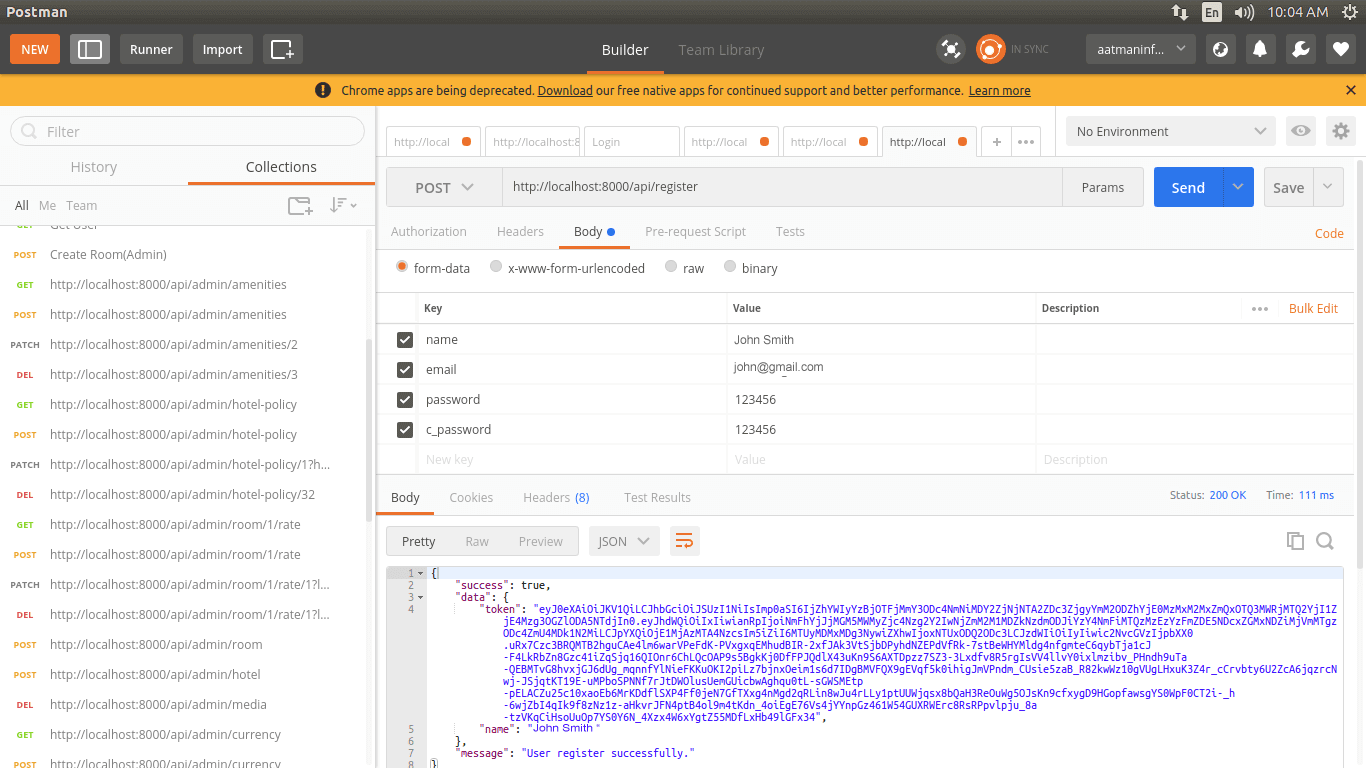
We will describe the List route URL with a verb like this: List: Verb: GET, URL:http://localhost:8000/api/products When we run the above URL, we will get List API like this: 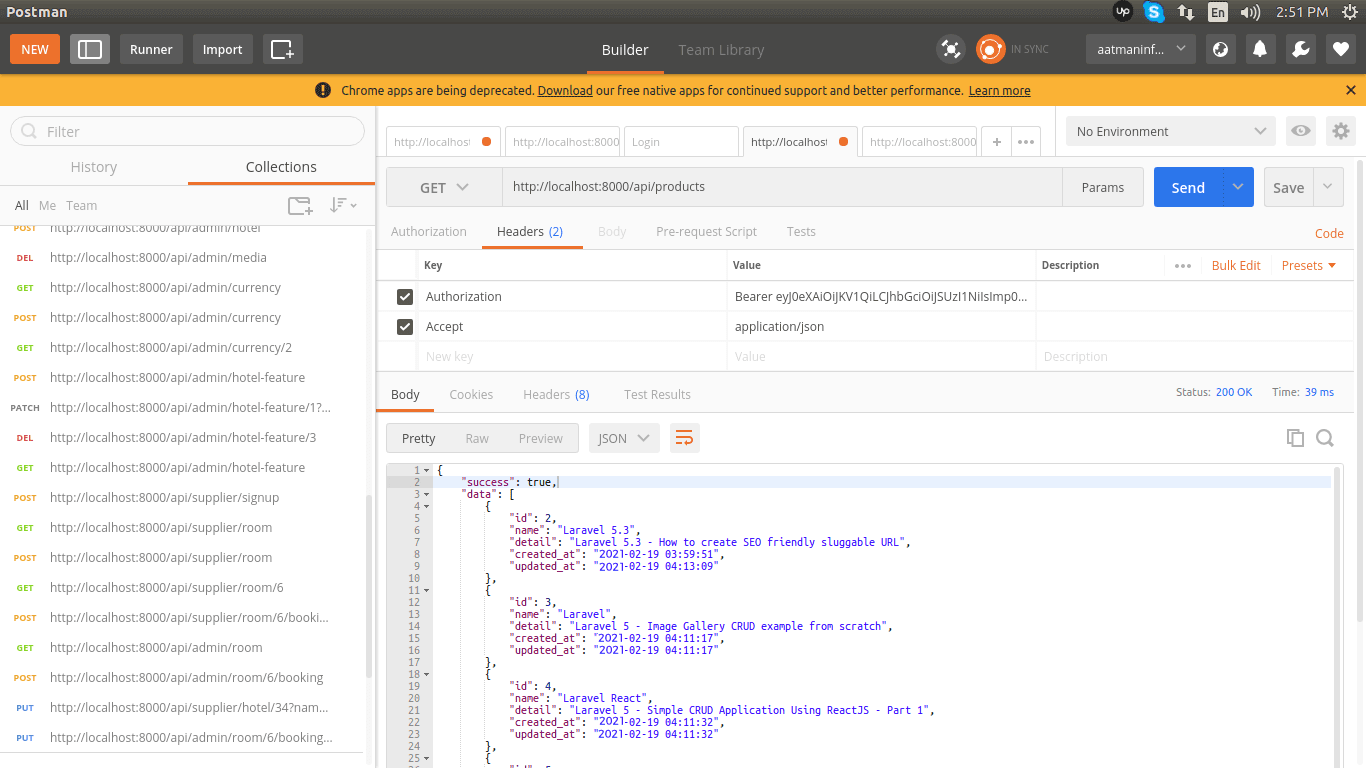
We will describe the Create route URL with a verb like this: Create: Verb: POST, URL:http://localhost:8000/api/products When we run the above URL, we will get Create API like this: 
We will describe the Show route URL with a verb like this: Show: Verb: GET, URL:http://localhost:8000/api/products/{id} When we run the above URL, we will get Show API like this: 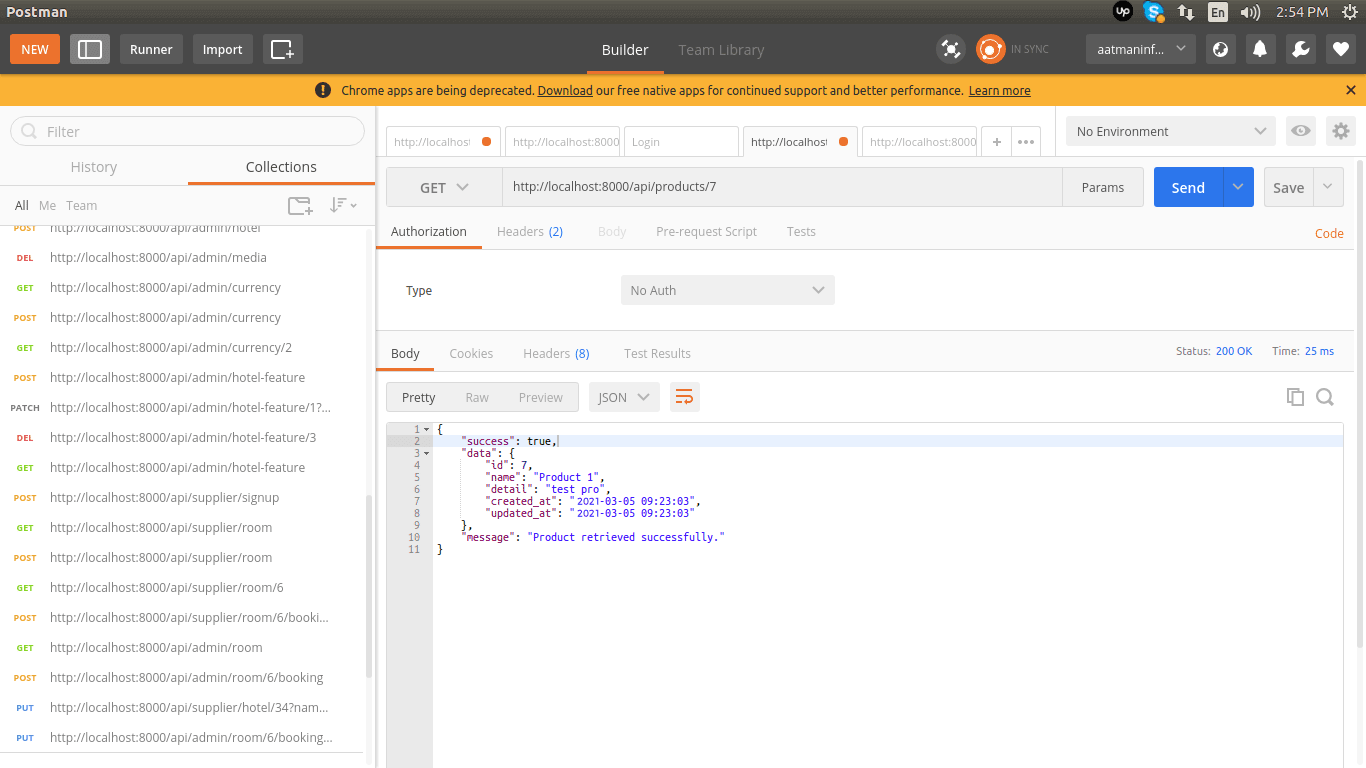
We will describe the Update route URL with a verb like this: Update: Verb: PUT, URL:http://localhost:8000/api/products/{id} When we run the above URL, we will get an Update API like this: 
We will describe the Delete route URL with a verb like this: Delete: Verb: DELETE, URL:http://localhost:8000/api/products/{id} When we run the above URL, we will get Delete API like this: 
Next TopicPHP compare dates
|
 For Videos Join Our Youtube Channel: Join Now
Feedback
- Send your Feedback to [email protected]
Help Others, Please Share


