Spring Angular Login & Logout Application
In this section, we are going to create a login and logout web application. This application includes a signup and login form. In this integration, we are using Spring to handle the backend part and Angular to handle the frontend part.
Working of Application
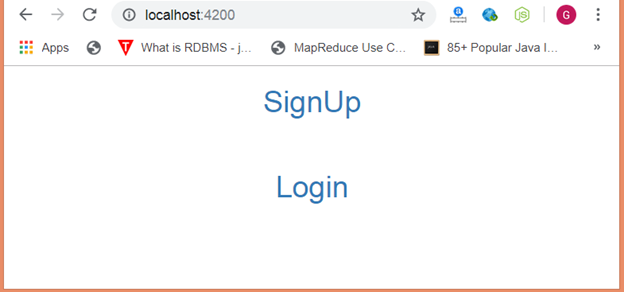
- Once we deployed our application on the server, a welcome page generates that contains two links - signup and login.
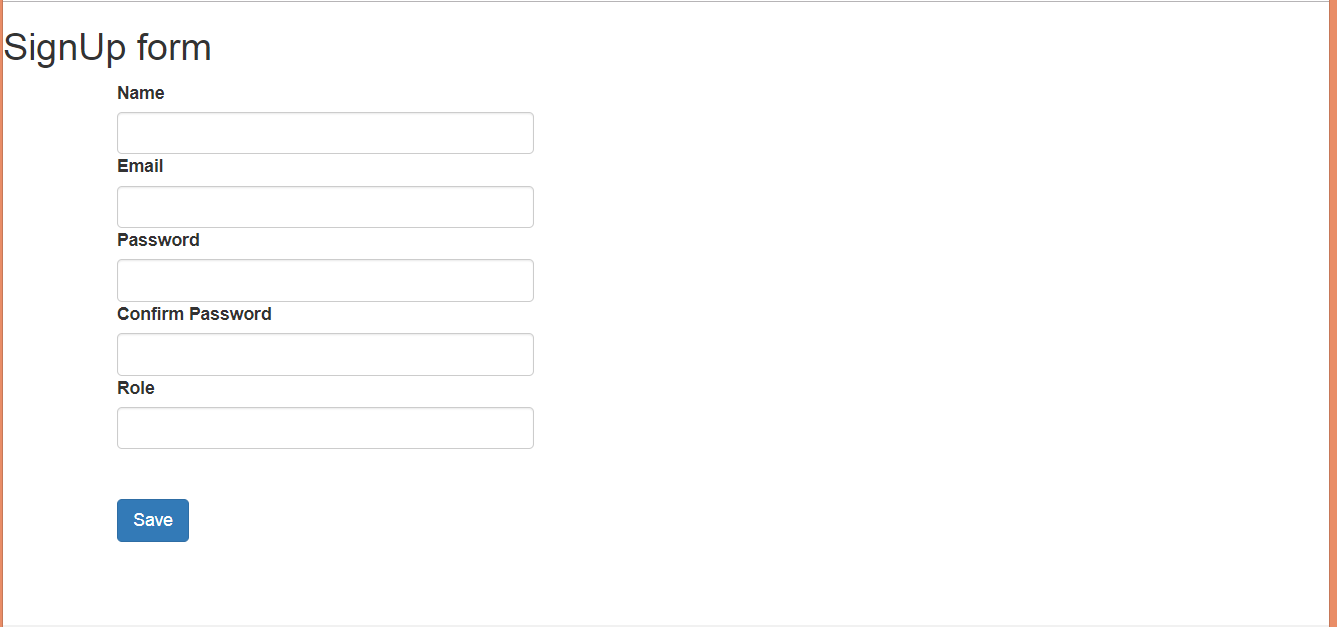
- A new user can choose the signup and register themselves by filling up the required details.
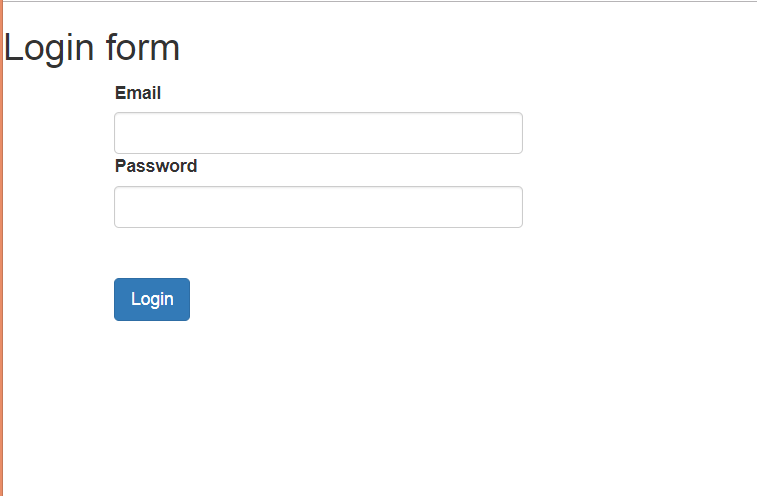
- However, the existing user can use their email id and password to log in.
- Once we logged in, we can fetch the details of existing users.
- In the end, we can exit from the current state by clicking the logout link.
Tools to be used
- Use any IDE to develop the Spring and Hibernate project. It may be MyEclipse/Eclipse/Netbeans. Here, we are using Eclipse.
- MySQL for the database.
- Use any IDE to develop the Angular project. It may be Visual Studio Code/Sublime. Here, we are using Visual Studio Code.
- Server: Apache Tomcat/JBoss/Glassfish/Weblogic/Websphere.
Technologies we used
Here, we are using the following technologies:
- Spring 5
- Hibernate 5
- Angular 6
- MYSQL
Create Database
Let's create a database loginlogoutexample. There is no need to create a table as Hibernate automatically created it.
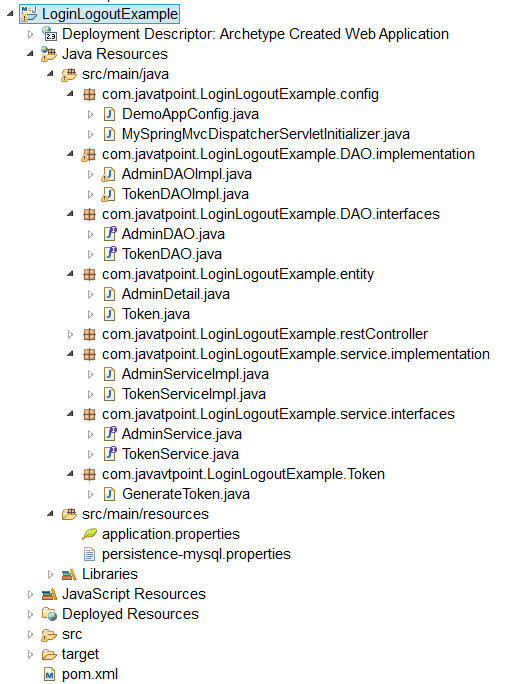
Spring Module
Let's see the directory structure of Spring we need to follow:
To develop a login and logout application, follow the below steps: -
- Add dependencies to pom.xml file.
- Create the configuration classes
Instead of XML, we perform annotation-based configuration. So, we create two classes and specify the required configuration in it.
DemoAppConfig.java
MySpringMvcDispatcherServletInitializer.java
- Create the entity classes
Here, we are creating the following entity classes:
- AdminDetail.java - It is an Entity/POJO (Plain Old Java Object) class.
- Token.java - It is used for authentication purposes.
AdminDetail.java
Token.java
- Create the DAO interfaces
Here, we are creating two DAO interfaces to perform database related operations.
AdminDAO.java
TokenDAO.java
- Create the DAO interface implementation classes
AdminDAOImpl.java
TokenDAOImpl.java
- Create the service layer interfaces
Here, we are creating the service layer interfaces that act as a bridge between DAO and Entity classes.
AdminService.java
TokenService.java
- Create the service layer implementation classes
AdminServiceImpl.java
TokenServiceImpl.java
GenerateToken.java
- Create the controller class
AdminController.java
- reate the properties file
Here, we are creating the properties file inside the src/main/resources in the project. The following file contains the hibernate connection configuration.
persistence-mysql.properties
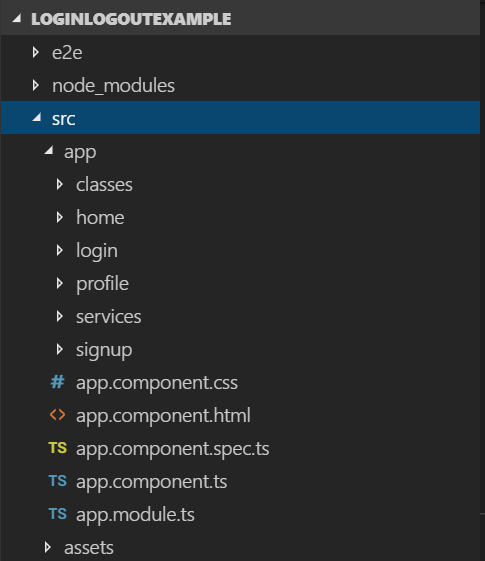
Angular Module
Let's see the directory structure of Angular we need to follow:
- Create an Angular project
Let's create an Angular project by using the following command:
ng new LoginLogoutExample
Here, LoginLogoutExample is the name of the project.
Install Bootstrap CSS framework
Use the following command to install bootstrap in the project.
npm install [email protected] --save
Now, include the following code in the style.css file.
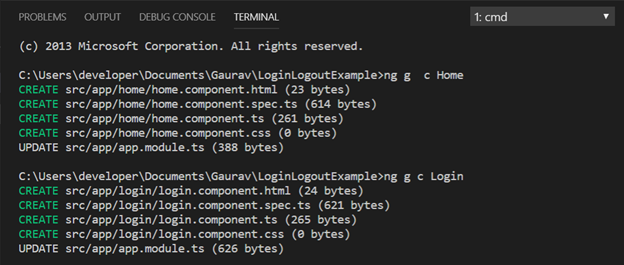
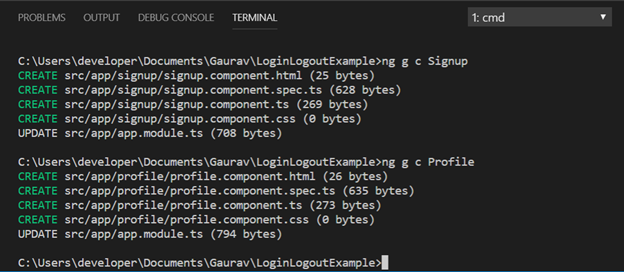
- Generate Components
Open the project in visual studio and then use the following command to generate the following Angular components:
ng g c Home
ng g c Login
ng g c Signup
ng g c Profile
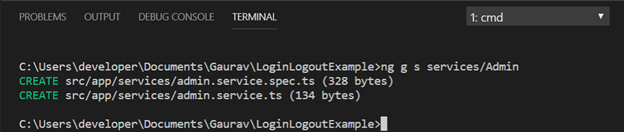
Let's also create a service class by using the following command: -
ng g s services/Admin
- Edit app.module.ts file
- Implement Routing - Here, we are importing RouterModule present inside @angular/router package and define path in the import array.
- Import ReactiveFormsModule - Here, we are importing ReactiveFormsModule for reactive forms and specify it in imports array.
- Import HttpModule - Here, we are importing HttpModule for server requests and specify it in imports array.
- Register Service class - Here, we are mentioning the service class in providers array.
- Edit the app.component.html file
- Edit the home.component.html file
This is a welcome page of the application that includes two links - SignUp and Login.
- Create the AdminDetail.ts class
Let's create a class by using the following command: -
ng g class classes/AdminDetail

Now, specify the required fields within AdminDetail class.
The purpose of this class is to map the specified fields with the fields of Spring entity class.
- Edit the admin.service.ts file
- Edit the signup.component.ts file
- Edit the signup.component.html file
- Edit the login.component.ts file
- Edit the login.component.html file
- Edit the profile.component.ts file
Once the user logged in, it will redirected to the profile component.
- Edit the profile.component.html file
User can fetch the admin details by clicking on the Get Admin Details link.
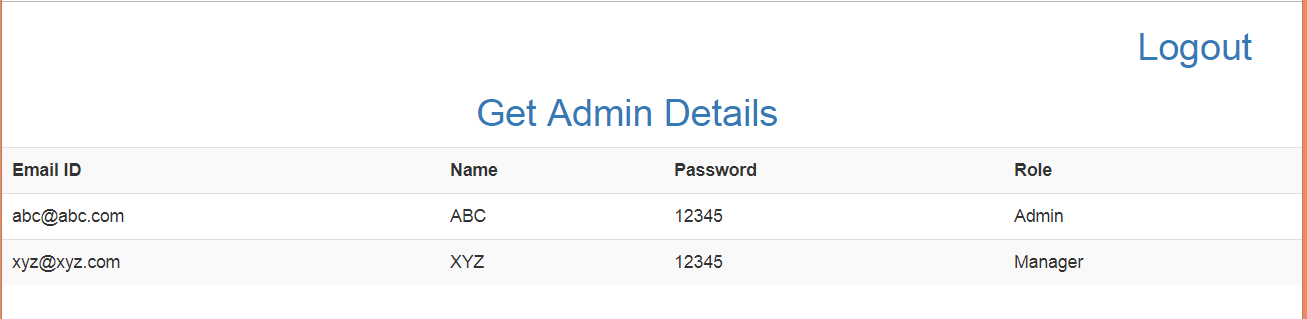
Now, the user can exit the current state by clicking Logout.
| 
 For Videos Join Our Youtube Channel: Join Now


