7-ZIP7-Zip is a free and open-source file archiver tool used to compress or decompress a group of files. It is an award-winning tool with high performance. It was developed in 1999 by Pavlov. It supports its own archive format, but it can perform read and write operations on other archive formats. The 7-Zip tool can be used by the command-line interface as well as the graphical user interface. The p7zip is the port of the command-line interface. It is useful for placing a group of files in one place. In this section, we will see the introduction & features of 7-Zip. Further, we will see how to download & use the 7-Zip tool on different platforms. Supported PlatformsThe 7-Zip is available for different versions of Windows and Linux operating systems. It supports the following versions:
Features of 7-ZIPSome supported features of 7-Zip are as following:
What is 7z FormatThe 7z is an archive format that provides a high compression ratio. The 7z archive format contains the following features:
Why 7-ZIPThe following are some reasons to choose the 7-Zip:
How to Download & Install 7-ZipThe 7-Zip can be downloaded for free; click here to download the 7-Zip. 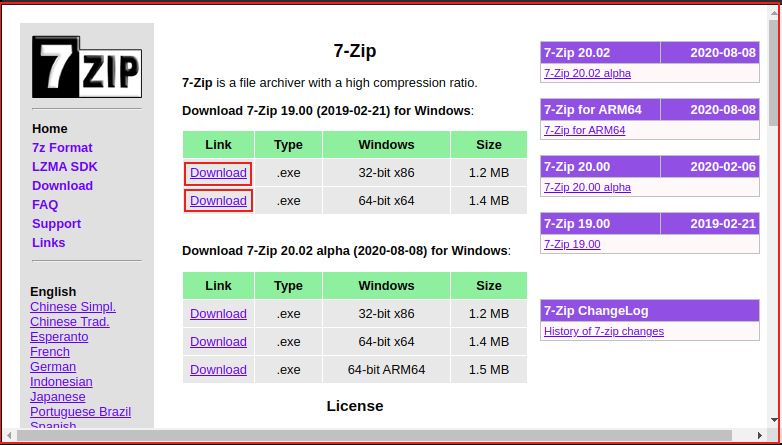
Click on the above download link as per system requirement. It will download an installer file. Now, run the installer file and follow basic installation prompts. It will install the 7-Zip archive tool for your system. We are not required to set any path to use it. Now, the 7-Zip tool is successfully installed on our Windows machine. Install 7-ZIP on LinuxTo install it in Linux (Ubuntu) system, execute the below commands: The above command will start a daemon process and install the 7-Zip on our Linux system. Consider the below snap of terminal: 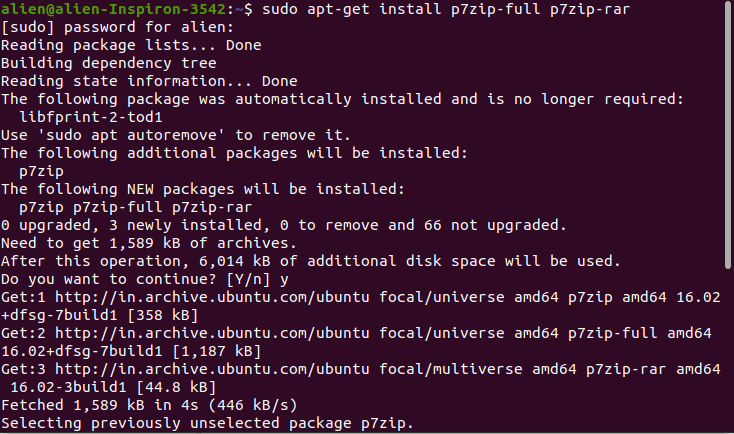
How to Use 7-ZIPWe can compress and decompress files using the 7-Zip tool. It is a free & easy tool. To Compress the files into one file, follow the below steps: Step1: Open 7-Zip The first step is to open the 7-Zip file manager. Step2: Select Files Now, select the files from the file manager. Step3: Click on the + icon After selecting files, click on the '+' icon given at the menu of 7-Zip: 
Step4: Specify the Archive Setting The Add option will open a dialog window to specify the archive settings such as format, name, etc. 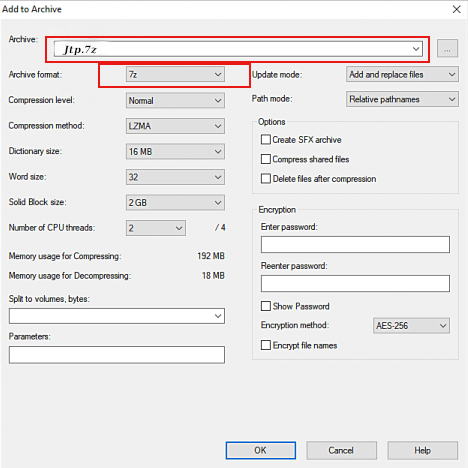
Specify the properties such as archive name and format and hit the Enter key to compress it. We can also set the password by specifying it in the Encryption menu. It will compress several files into one file. To compress the files in Zip format, select the Zip option from the Archive format menu. Now, understand how to extract files using the 7-Zip tool. To extract files, right-click on the file, select the 7-Zip option, and select the specific option. 
The Extract Here option will extract the files to the same folder. To extract files to a particular folder, select the Extract Files option & specify the folder. Hence, we can easily compress and decompress files using the 7-Zip in Windows. Let's understand how to use it in Linux: How to Use 7-Zip in LinuxThe Linux operating system is different from Windows. In a Linux system, Most of the operations are performed using the command-line interface. So the 7Zip utility is used through the command-line interface. It supports the 7z command to perform the compress and decompress operations. Let's understand how to compress files using 7Zip in Linux: Create/Add a New Compressed Document Using the 7z command, we can create a new compressed file in a supported compress format such as 7z or zip. Syntax: For example, to add all the files from the New folder, execute the below commands: To list all the files from the folder, execute the below command: The above command will list all files from the New folder: 
Now, compress all these files into one file, execute the below command: for example, The Above command will create zip files having all the files in the same directory. To verify the operation, execute the ls command. Consider the below output: 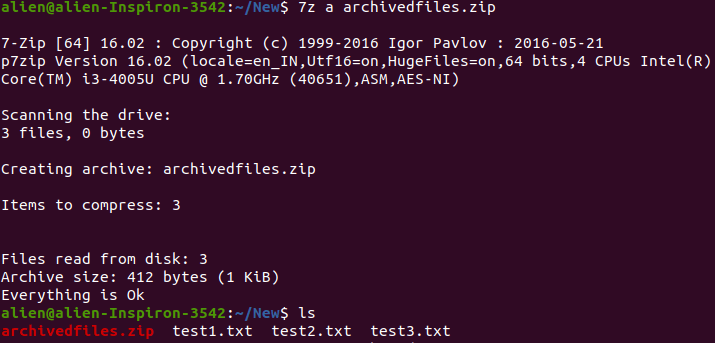
Display Content From Compressed File To display the content from compressed files, execute the command as follows: The above command will display all the files from the compressed file. For example, consider the below command: The above command will display all the files from the archivedfiles.zip file. Consider the below output: 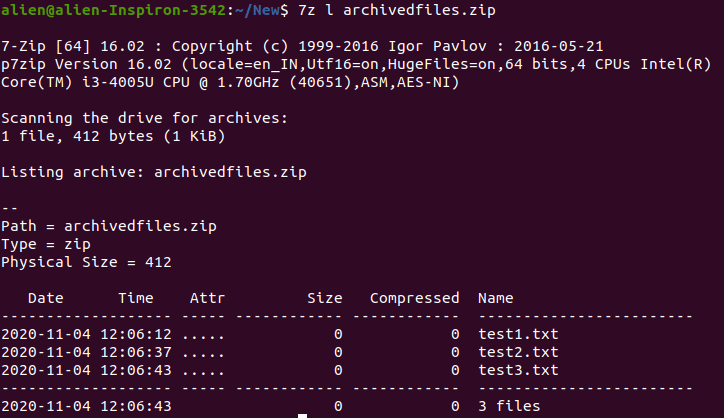
Remove a File from the Compressed Document Using the 7Zip, we can also remove a particular file from the compressed document. To remove a particular file from the document, execute the command as follows: For example, to remove the test1.txt from the archivedfiles.zip file, the command will be executed as follows: The above command will remove the test1.txt file from the specified file: 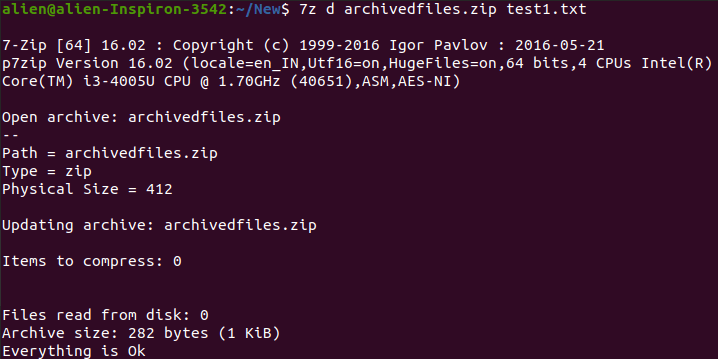
To confirm the file status, execute the below command: Now, we are done with compressing; let's see how to extract files: Decompress Files From a Compressed File Using the 7Zip, we can extract files from a compressed file having supported file formats such as 7z, Zip, etc. To decompress a file, execute the command as follows: The above command will extract files from the specified files to the same folder. For example, extract files from the archivedfiles.zip file. The above command will extract files to the same folder. Consider the below output: 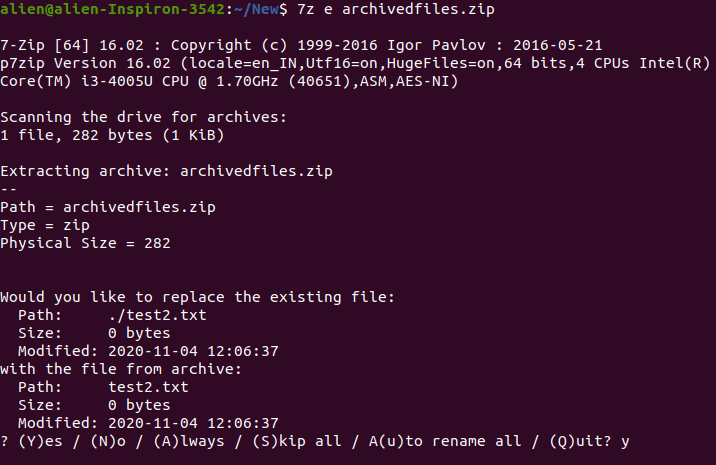
If there are existing files in the directory with the same name, it will ask to replace them. We can choose Yes, No, Always, Skip all, Rename tasks. To replace files, type 'Y' & hit the Enter key. It will replace files; consider the below output: 
Hence, we have successfully extracted files from the archivedfiles.zip file. Similarly, you can install & use the 7Zip tool to compress and decompress the files on Windows & Linux operating system.
Next TopicAUR (Arch User Repository)
|
 For Videos Join Our Youtube Channel: Join Now
Feedback
- Send your Feedback to [email protected]
Help Others, Please Share


