
PolyFill JSPolyfill JS provides functionality to the browser to support the methods and events which are not natively supported by them. In simple words, Polyfill JS is some script code that provides the ability to support modern functionality on older versions of the web browser. For example, it can be used to alter the functionality of the text-shadow in an older version of internet explorer, let's say in IE7, by using the property IE filters, or it can also dynamically update the rem value or media query of a web page by using some JavaScript code. It can update many other web browser properties per the developer's requirement. We do not use the polyfills exclusively to experience the better performance and functionality of the application. The native implementations of the JavaScript APIs provide better and faster performance than polyfills. For example, if we create an object by using the polyfills Object.create method, it will only contain the functionalities that can be achieved using the no-native implementation of the Object.create method. Instead, if we follow the native approach, it will be more functional and accessible. Most of the time, the polyfills are required use to meet some specific requirements or to address some issues where web browsers implement the same feature in different ways. In order to access the feature in a standard compliant, it uses non-standard features in certain browsers. Though the use of polyfilling is very rare nowadays. It was very useful in prevalent back in the days of IE6 and earlier versions. At that time, the browser was designed to handle JavaScript differently. Nowadays, the modern browsers handle the JavaScript almost in a similar way. At that time, JQuery's first version introduced the Polyfill. It was a compilation of the multiple browsers' specific workarounds, which helped the JavaScript developers by combining the features in a single API for different browsers. At that time, Developers were facing major problems while dealing with cross-browser functionality. The older browsers have so many discrepancies that the developers need to develop the website with different methods and have a much different user interface based on the user's browser. Thus, the Developers back then need to have a tiny handful of JavaScript APIs that supports cross-browser functionality. The use of Polyfill to handle cross-browser implementations is very rare today because modern browsers mostly implement a large set of JavaScript APIs according to standard semantics. Let's understand how we can use polyfills in JavaScript. How to use Polyfill in JavaScript?Nowadays, the web is full of many modern and wide ranges of new technologies. As new technology is introduced, there are so many new features which may not be supported by the older browsers. There are so many different browsers with different features available on the web, and they are getting updated every day. The latest version of the web browsers supports many features and comes with some improvements in the existing functionality. The latest version can perform many tasks that older ones cannot. But, while developing an application, it is necessary that it should support all web browsers and provide the results in a similar manner. Though, it is a challenging task to integrate the functionality of the latest features into the browser and ensures the behavior of the application should be the same without compromising the functionality on different browsers. Fortunately, we have Polyfills; with the help of Polyfills, we can implement the functionality to overwrite the default behavior of the browser and force the application to display the output as expected. The term Polyfill was introduced by Remy Sharp as he wanted a term that should describe the reproduction of an API using JavaScript if the browser does not support it natively. He described in his blog that He wanted a word should be simple to say and could conjure up a vague idea of what it does. The word Polyfill is a combination of the two words Poly and Fills; Poly means it could be solved using any number of techniques and is independent of just being done using JavaScript, and fill would fill the hole in the browser where the technology needed to be regardless of the web browser version. Features of the PloyfillsFollowing are some features and principles of Polyfills:
Below are some features that require explicitly defining the polyfill support in order to achieve functionality in the older versions of the web browsers.
How to use polyfills to implement the latest JavaScript features in older browser versions:Let's understand how Polyfill works in JavaScript. We will be using the node JS environment to implement the newer features in older versions. We will use the same ES6 features, such as promises then we will convert them into ES5 code to avoid incompatibility issues in older browsers. We will add this ES5 code babel-polyfill file from our node modules to our index.html file so that it can be compiled and run on the web browser. Follow the below steps to achieve the polyfill functionalities: Step1: create a project and set up the environment We will include a babel transpiler in our application to convert the ES6 features to the backward-compatible version of JavaScript to provide support for all the older and newer browsers. A Babel transpiler is an open-source tool that is available to everyone. To create a basic project and set up the environment, we need to have a node JS environment installed on our machine. The node JS environment will help the babel-polyfill to run. Let's create a new directory and open the terminal under it. Now, run the below command to initialise the project: Press enter to execute it. It will provide the following output: Output:
npm WARN config global `--global`, `--local` are deprecated. Use `--location=global` instead.
Wrote to E:\polyfill\package.json:
{
  "name": "polyfill",
  "version": "1.0.0",
  "description": ",
  "main": "index.js",
  "scripts": {
    "test": "echo \"Error: no test specified\" && exit 1"
  },
  "keywords": [],
  "author": ",
  "license": "ISC"
}
We need to install the Babel cli, core, and preset. Execute the below command to install the babel cli, core, and preset: Once the above command is executed, it will start running the installer files and will provide the information about the added package4s and npm versions. It will provide the below output: npm WARN config global `--global`, `--local` are deprecated. Use `--location=global` instead. added 196 packages, and audited 197 packages in 49s 11 packages are looking for funding run `npm fund` for details found 0 vulnerabilities npm notice npm notice New major version of npm available! 8.11.0 -> 9.6.7 npm notice Changelog: https://github.com/npm/cli/releases/tag/v9.6.7 npm notice Run npm install -g [email protected] to update! npm notice The folder structure will look as follows: 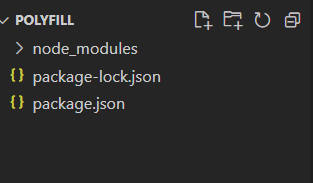
The package.json file contains all the installed dependencies of the project and the package-lock. json is automatically generated by npm at compile time and updated whenever you install or update packages. When we install the Babel-core package, it will also install the Babel-polyfill package along with it. Moreover, we need to add the es2015 to the presets in order to convert the code into an older browser-compatible code. We need to create a Babel configuration file, which will be placed in the root directory of the project. Create a .babelrc file to the root directory of the project and add the following preset value in it: Now, our file explorer will look as follows: 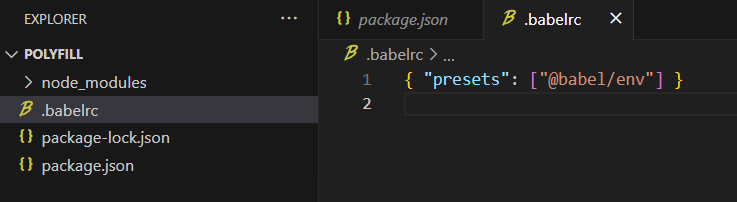
Step2: Create a JavaScript file Now, create a JavaScript file with some modern JavaScript concepts. We will use the ES6 feature and promises to use the Polyfill features. Create an index.js file and write the following code. In the below code, We are using the concept of the Polyfill along with the promises and will log a greeting message after 2 secs time interval. Index.js: The above code uses the latest feature of the ES6. Now, we will convert this code into ES5 so that it can be properly run on older browsers. Step3: Convert the ES6 Features to ES5 To convert the ES6 features in the index.js file to ES5 code, execute the below command: Once the above command is executed, it will create a new file having ES5 code as per the specified name. Consider the below code of the generated file: index_es5.js: Here, in the above code, we can see that the generated code in the index_es5.js file is compatible with the ES5 syntax. For example, we can see the arrow function syntax is automatically converted into traditional function keywords. Step 4: Include Polyfill along with the final compiled JavaScript Now, We need to include Polyfill along with the converted JavaScript code in the new file. To do so, let's create an html file called index.html having some heading values. We will bind the implemented feature in some <span /> tag and description content in <p /> tag, which will be displayed after 2s as per the specified time. We will include the babel-polyfill from the node modules in the created index.html file. Add the following script in the index.html file: <script type="text/javascript" src="node_modules/babel-polyfill/dist/polyfill.min.js"></script> <script type="text/javascript" src="/index_es5.js"></script> The index.html file should be placed in the root directory of the project. Below is our html code: Index.html: Our final folder structure will look as follows: 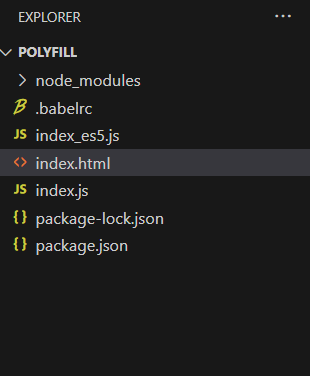
Step5: Run our application In order to run our application, we need to start our application using a server. So, Here we are using the live server plugin in Vs-code for running our application. Click on the Go Live option available at the bottom right of the code editor, or you can right-click on the file and select the live server option. It will start running the application on the configured port number. Final Output: We have implemented the polyfill functionality to our application so that we can use the ES6 features in the older browsers. We have used promises to display the output after some time interval using the setTimeout method. So, the specified content bound to some tags by their IDs will be displayed after the specified time. Also, this code is compatible with browsers having only ES5 features support. Consider the below output: 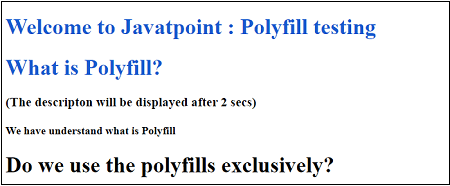
After 2 seconds, output: 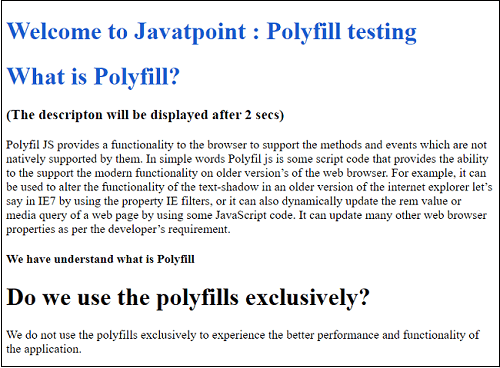
Conclusion:From the above output, we can see by using the Polyfill concept; we have implemented the ES6 promises features in ES5 code and achieved the same functionality. Similarly, we can convert other JavaScript features which are introduced in the latest version of JavaScript in the older version's compatibility. Though, nowadays, the use of polyfills is hardly required because modern browsers similarly deal with JavaScript, there may be different use cases wherever you need to follow this approach for a different scenario.
Next TopicWhat is WebSocket
|
 For Videos Join Our Youtube Channel: Join Now
Feedback
- Send your Feedback to [email protected]
Help Others, Please Share


