SSIS Tutorial
SSIS tutorial provides basic and advanced concepts of SQL Server Integration Services. Our SSIS tutorial is designed for beginners and professionals. SQL Server Integration Service is a fast and flexible data warehousing tool used for data extraction, transformation, and data loading. It makes it easy to load the data from one database to another database such as SQL Server, Oracle, Excel file, etc. In this tutorial, we will discuss the following topics:
What is SSIS?
SSIS is a tool mainly used to perform two functionalities:
What is Data Integration?Data Integration is a process that you follow to integrate the data from multiple sources. The data can be either heterogeneous data or homogeneous data. The data can be structured, semi-structured, or unstructured. In Data Integration, the data from different dissimilar data sources integrate to form some meaningful data. Some methods are used to achieve data integration: 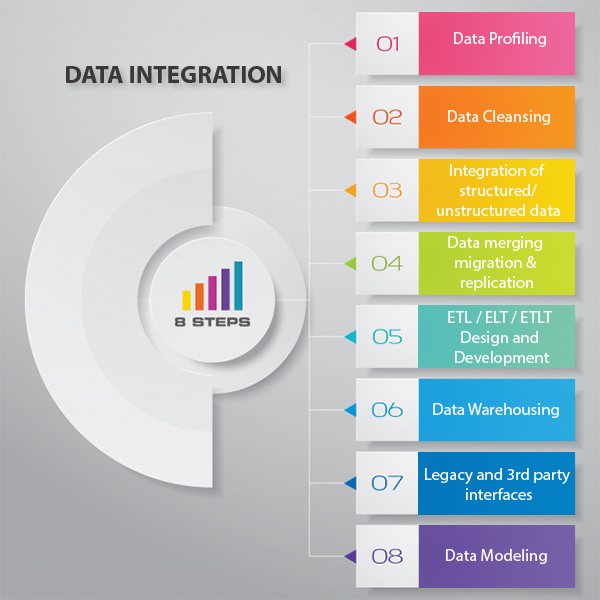
Advantages of Data Integration: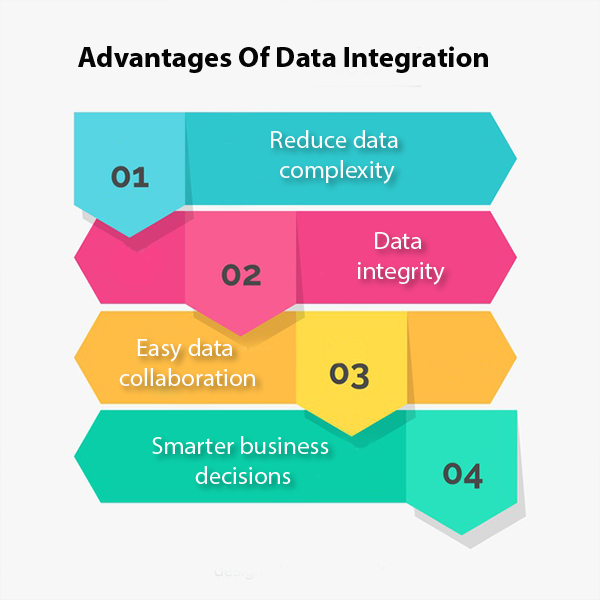
Why SSIS?SSIS is used because of the following reasons: 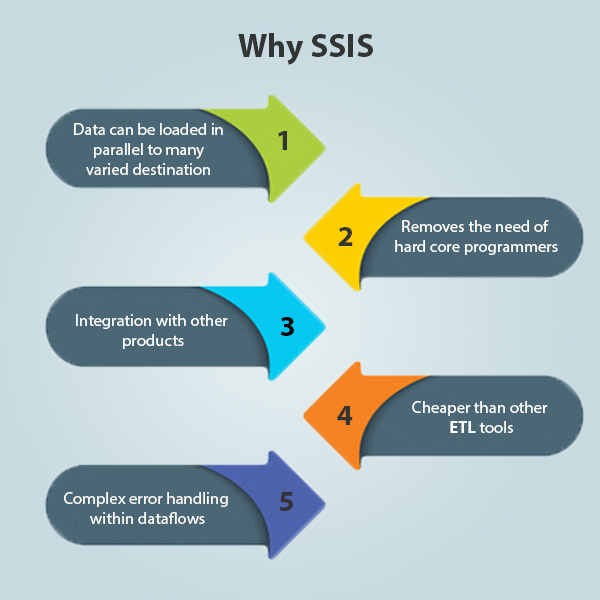
How SSIS works?We know that SSIS is a platform for two functions, i.e., Data Integration and workflow. Both the tasks Data transformations and workflow creation are carried by using the SSIS package. SSIS package consists of three components: 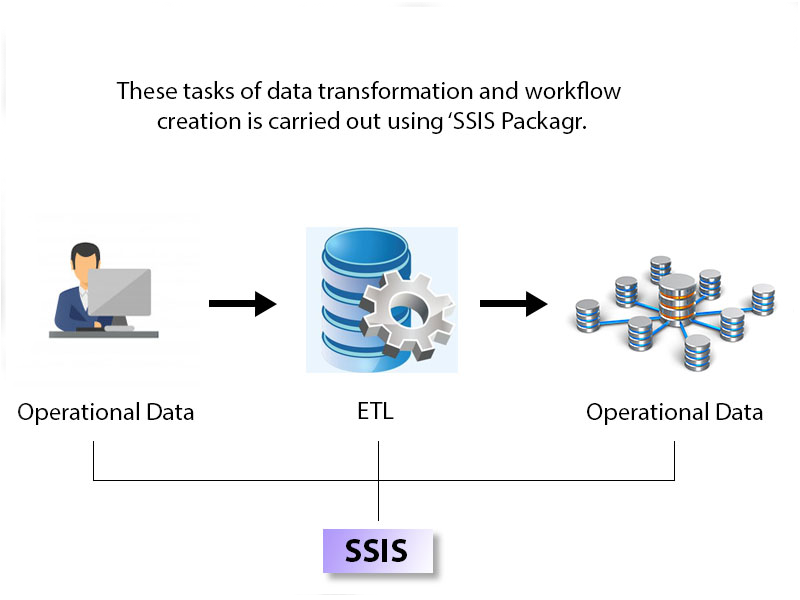
Operational dataOperational data is a database used to integrate the data from multiple data sources to perform additional operations on the data. It is the place where the data is housed for current operation before sending to the data warehouse for storing, reporting, or archiving. ETL
An ETL is a three-word concept, but it is divided into four phases: 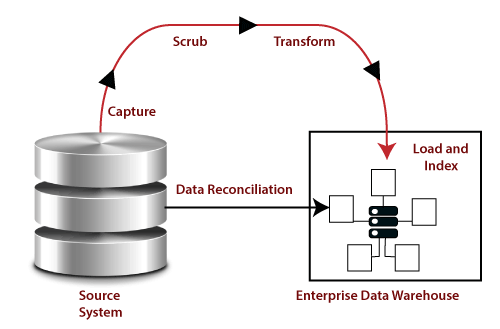
Capture: Capture phase is also known as Extract phase. In this phase, it picks the source data or metadata, and the data can be in any format such as xml file, flat file, or any database file. Scrub: In this phase, the original data is checked. It checks the data, whether it consists of any errors or not. It checks for the errors or inconsistency of data by using some artificial intelligence techniques. In short, it verifies whether the quality of the product is met or not. Transform: It is the third phase in ETL. Transformation is the process in which the original format is converted into a required format that you want. Transformation is modelling or changing the data according to the user requirements. The changes can be either change in the number of columns or rows. Load and index: The fourth phase is Load and index. It loads the data and validates the number of rows that have been processed. Once the loading of data is completed, the indexing is used. Indexing helps you to track the number of rows that are loaded in the data warehouse. Indexing also helps to identify the data, whether it is in the correct format or not. Data WarehouseData warehouse is a single, complete, and consistent store of data which is formulated by combining the data from multiple data sources. Difference between Database and Data warehouse The answer can be yes as well as no. Both the database and data warehouse have a large unit of data and similar physical representation but the response time of complex queries in Data warehouse is faster than the database. Requirements for SQL Server Integration ServicesThe following are the requirements to install the SQL Server Integration Services:
Follow the below steps to install the SQL Server Data tools: Step 1: Click on the link https://docs.microsoft.com/en-us/sql/ssdt/previous-releases-of-sql-server-data-tools-ssdt-and-ssdt-bi?view=sql-server-2017 to download the SQL Server data tools. Step 2: When you click on the above link, the screen appears shown below: 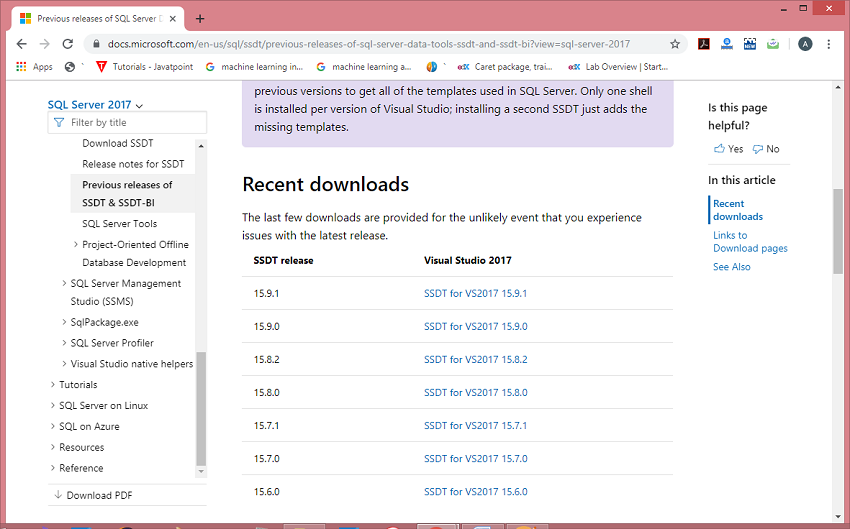
In the above screen, select the version of SSDT that you want to install. Step 3: Once the downloading is completed, run the downloaded file. When you run the downloaded file, the screen appears which is shown below: 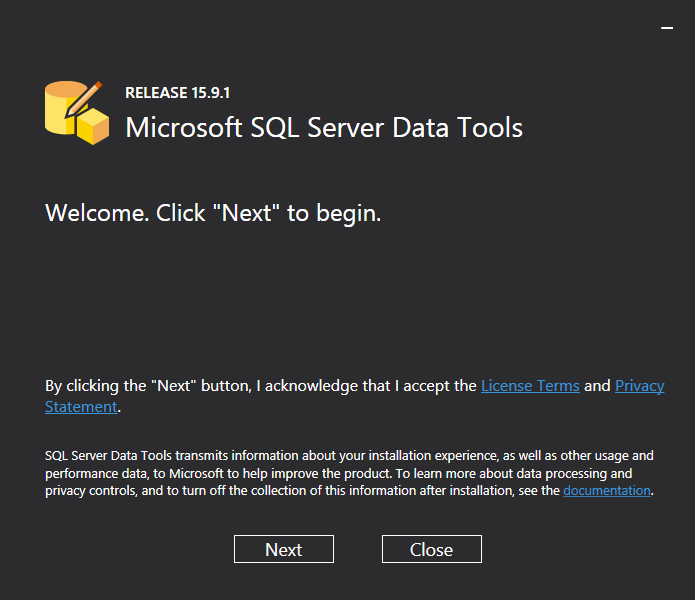
Step 4: Click on the Next button. Step 5: Select the visual studio instance and the tools that you want to install in the visual studio 2017. 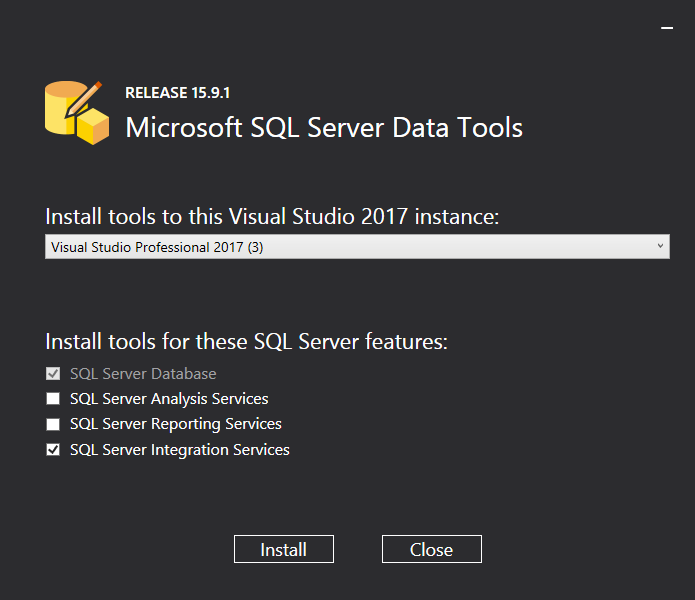
Step 6: Click on the Install button. What is the SSIS Package?The Package is a fundamental block where you code in SSIS. Here, code does not mean that you are coding in some programming language; it means the development that you do. The development is done in the SSIS package. SSIS is mainly used for the ETL process, and the ETL process is performed inside the SSIS package. SSIS package is composed of three parts: 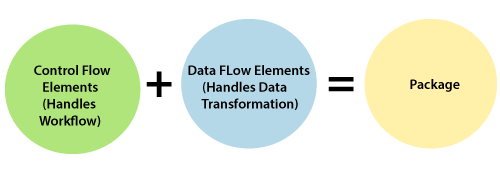
SSIS TasksIn SSIS package, we can add the tasks. A task is a unit of work and we will have different types of tasks to perform different kinds of work. There are various types of tasks, but we will discuss the most common tasks used in SSIS:
Let's see some working example of a Data integration service. Example of Data Flow TaskStep 1: First, we create an excel file in Microsoft Excel. Suppose I create the student database in Microsoft Excel, and fields in student table are student_id, student_name, marks, and gender. 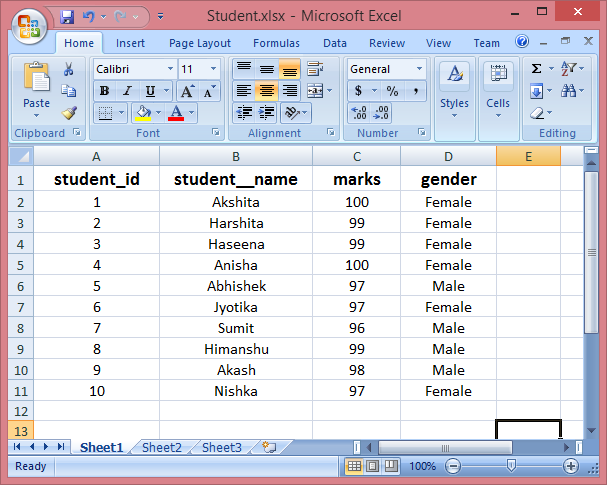
Step 2: Open the visual studio (SQL Server Data Tools). 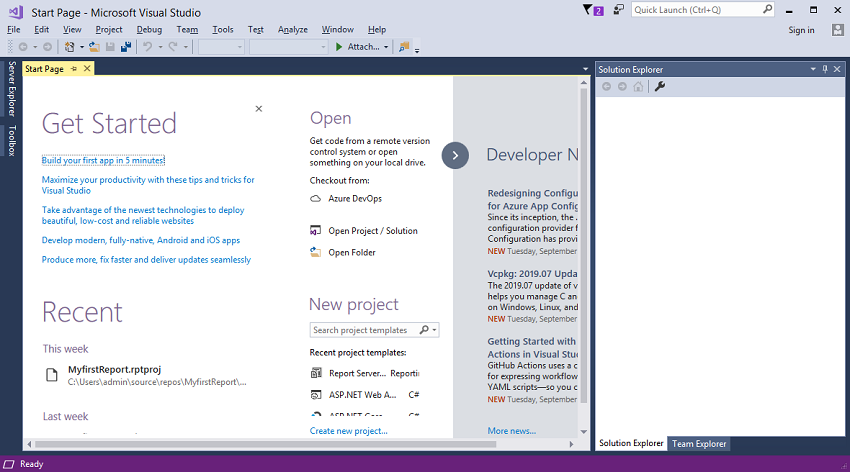
Step 3: Click on the File option and then move to New->Project. 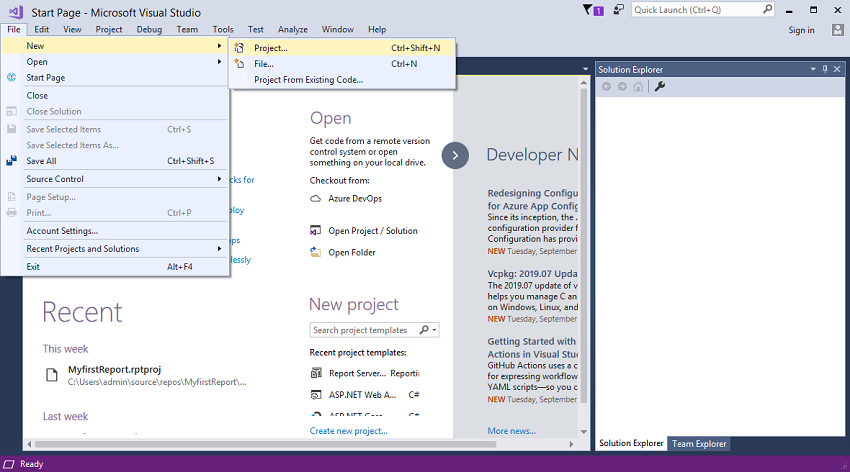
Step 4: When you click on the Project, the screen appears, which is shown as below: 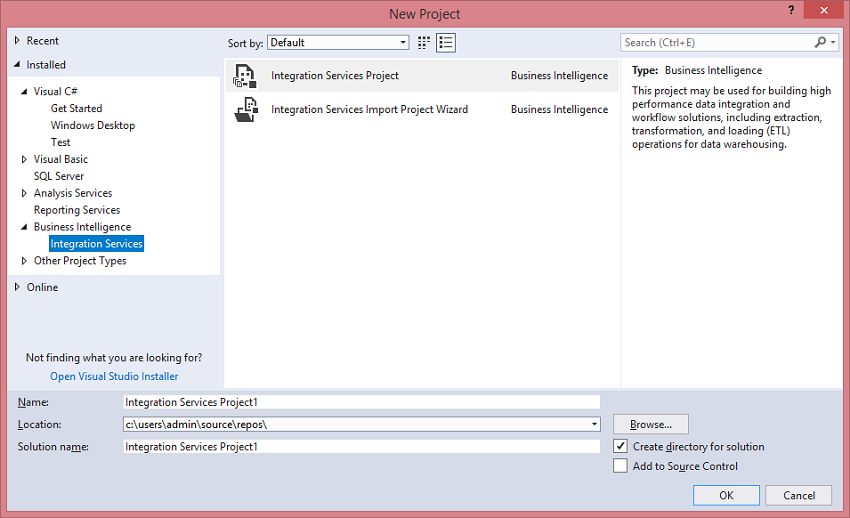
In the above screen, click on the Integration Services appearing at the leftmost side of the panel and then click on the Integration Services Project. Step 5: After clicking on the Integration Services Project option, the screen appears shown as below: 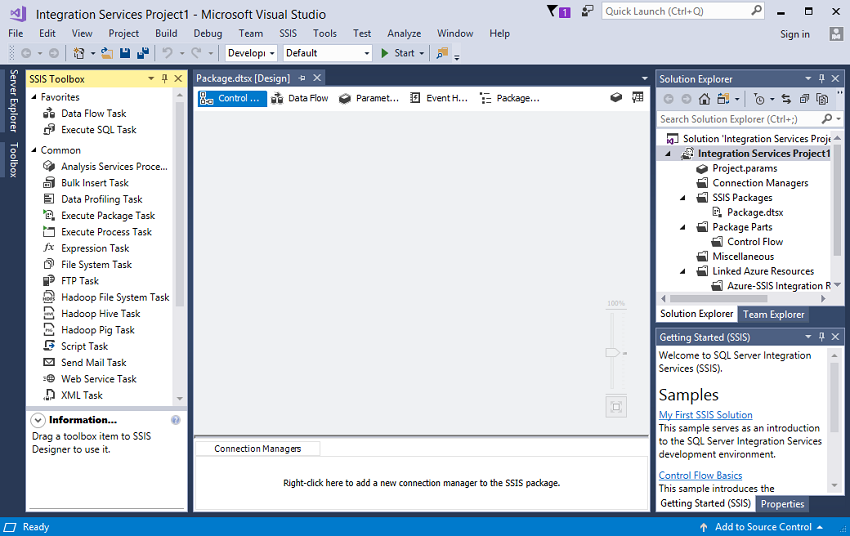
The above screen consists of five tabs such as Control flow, Data flow, Parameters, Event Handler, and Package Explorer. We have already discussed the Control flow and Data flow, both the control flow and data flow exist inside the SSIS package. step 6: To import the data, we need first to create the database in which we create the table in SQL Server database. As we know that student data is available inside the Excel file, and we want to import the data in SQL Server database. In order to achieve this, we need first to create the table in SQL Server. Open the SQL Server Management studio. Step 7: Create the student database. Right-click on the database, and then click on the New Database option. 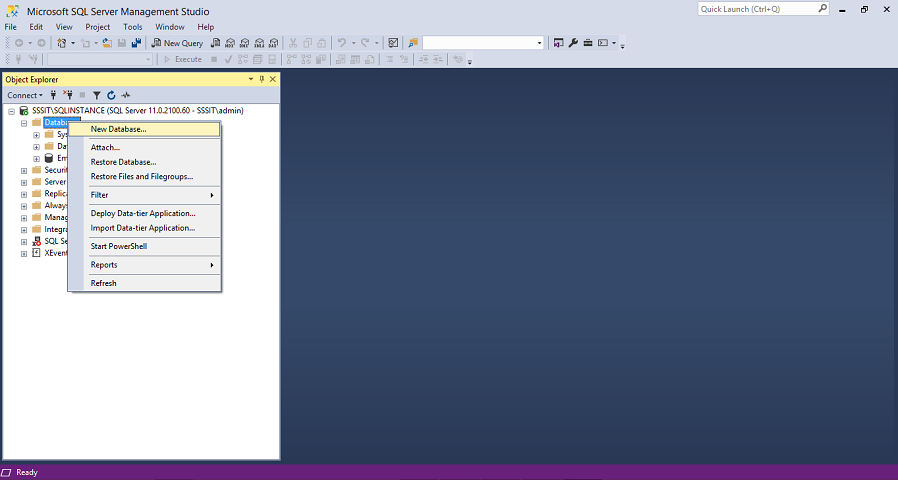
Step 8: Enter the database name in the below screenshot: 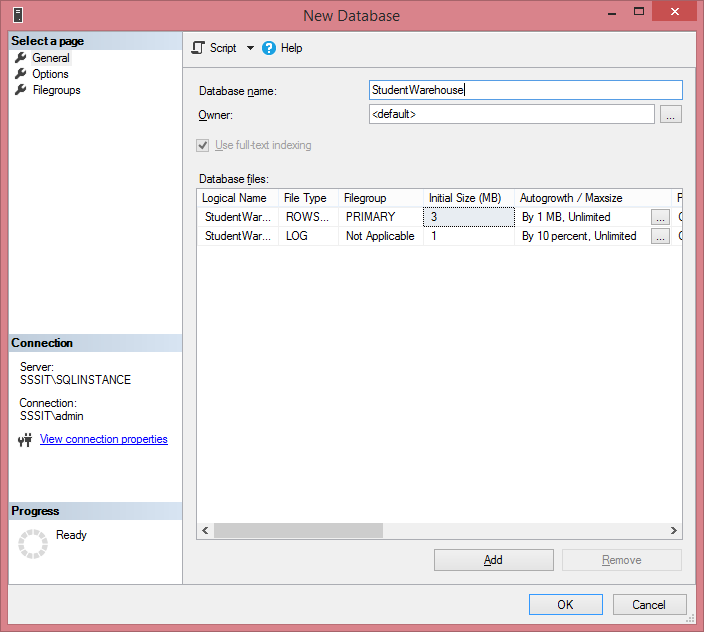
I have given the StudentWarehouse as a database name. Step 9: Click on the OK button. Step 10: Now, we create the table in a StudentWarehouse database. Right-click on the Tables, and then click on the New Table. 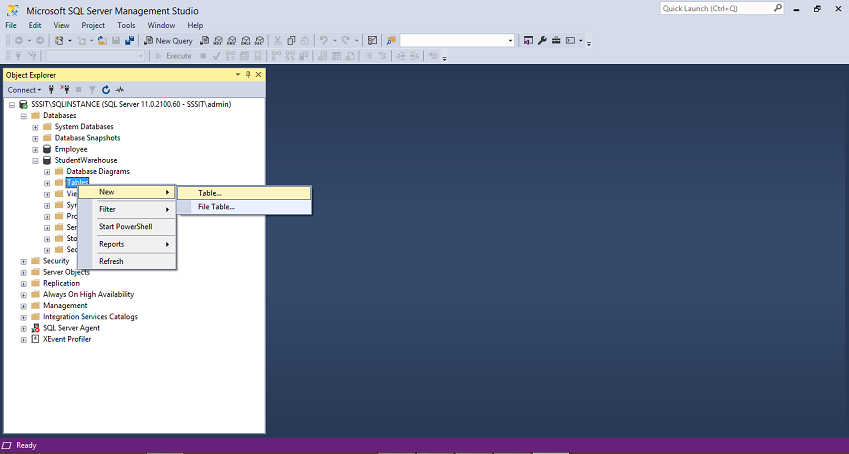
Step 11: Now we add the fields in a table such as student_id, student_name, marks, and gender. We set the student_id as a primary key which uniquely identifies each row. 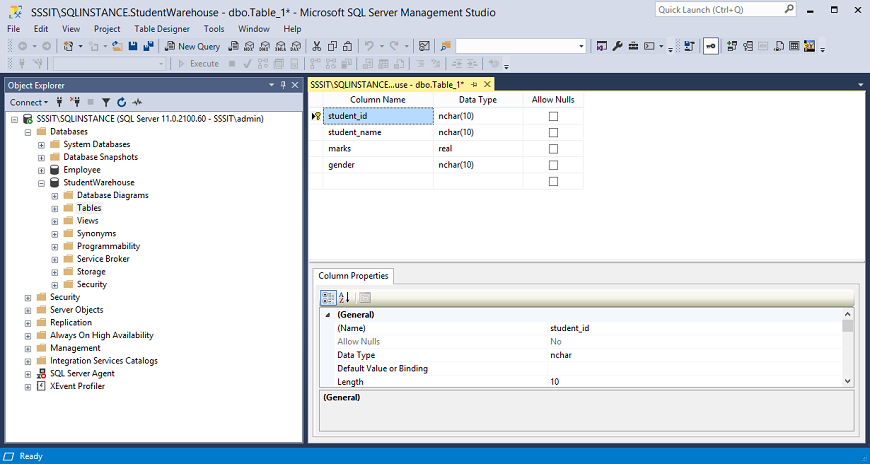
The above screen shows that we add four fields in a table. After adding all the fields in a table, we save the table by providing some useful name. Suppose I have provided the student as a table name. Step 12: Move back to the visual studio. Control flow contains the Data Flow Task, drag and drop the Data Flow Task on the main window. 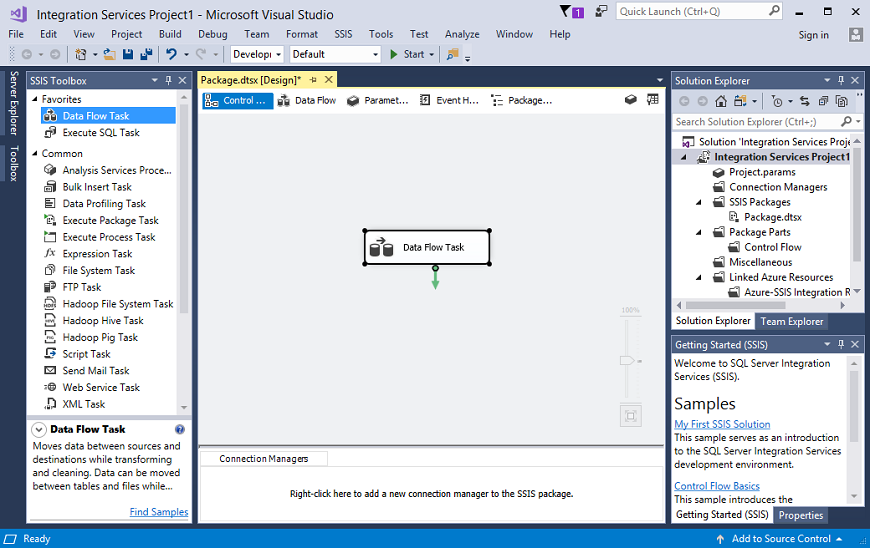
Step 13: When we double-click on the Data Flow Task, the control automatically moves to the Data Flow from the Control Flow, so we can say that Control Flow is a container of Data Flow. Step 14: Now, we can perform the transformations in Data Flow. We want to extract the data from Excel file that we created earlier, so drag and drop the Excel source from the other sources appearing at the leftmost side of the panel. 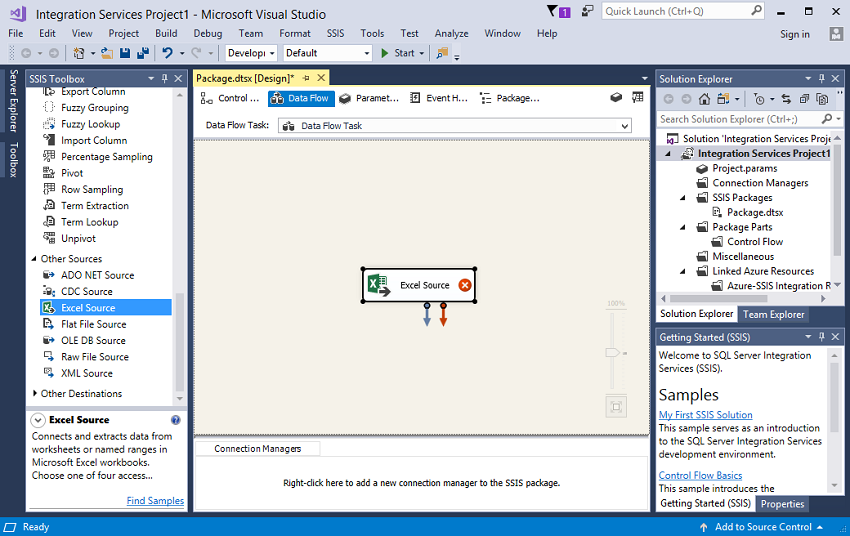
From the above screen, we observe that the red cross appears inside the Excel Source, it means that the component is configured with the Excel Source. Step 15: To configure the component, right-click on the Excel source and click on the Edit option as shown in the below screenshot: 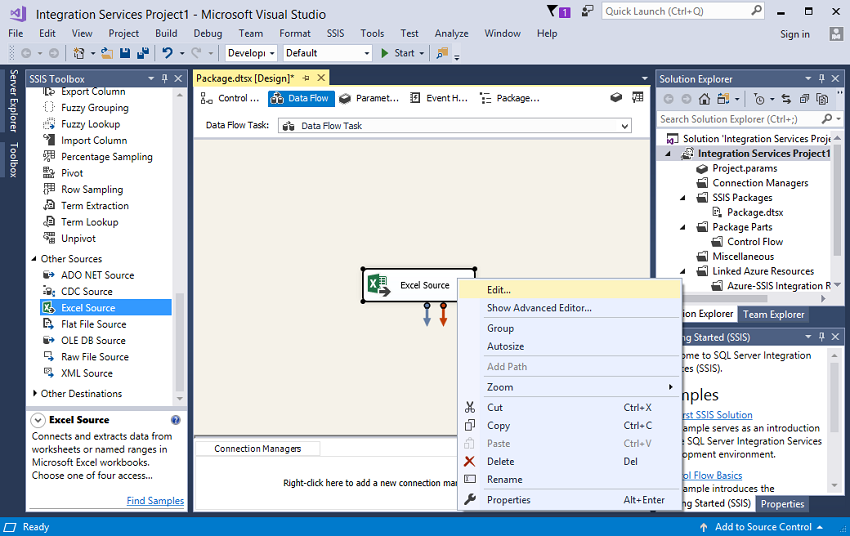
Step 16: Fill the details shown in the below screenshot: 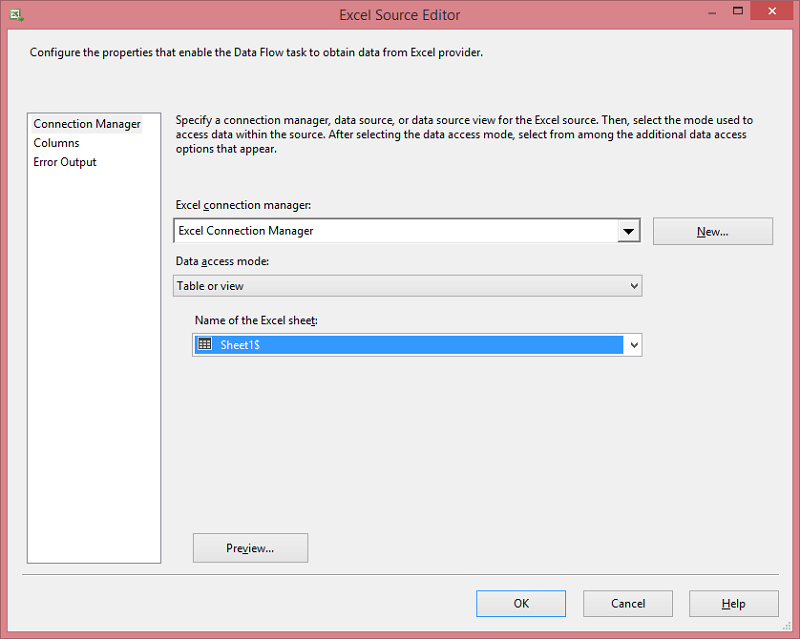
Step 17: After entering all the details, the screen appears shown as below: 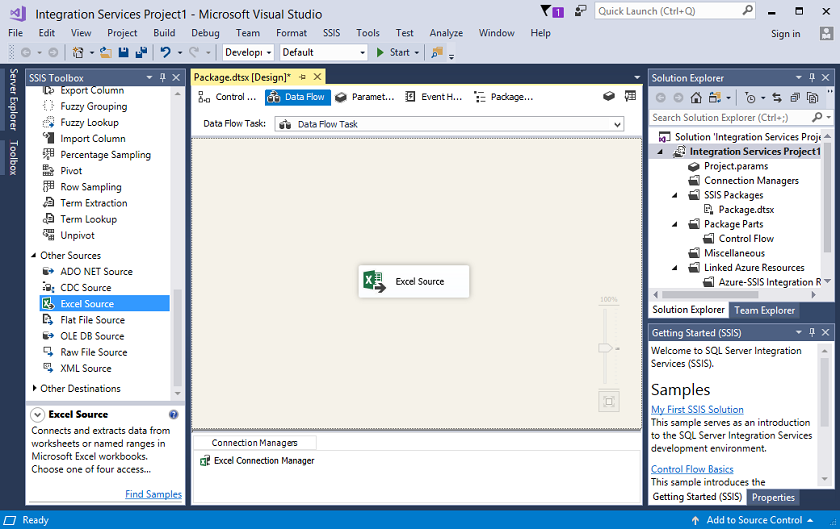
Step 18: Click on the Excel Souce. 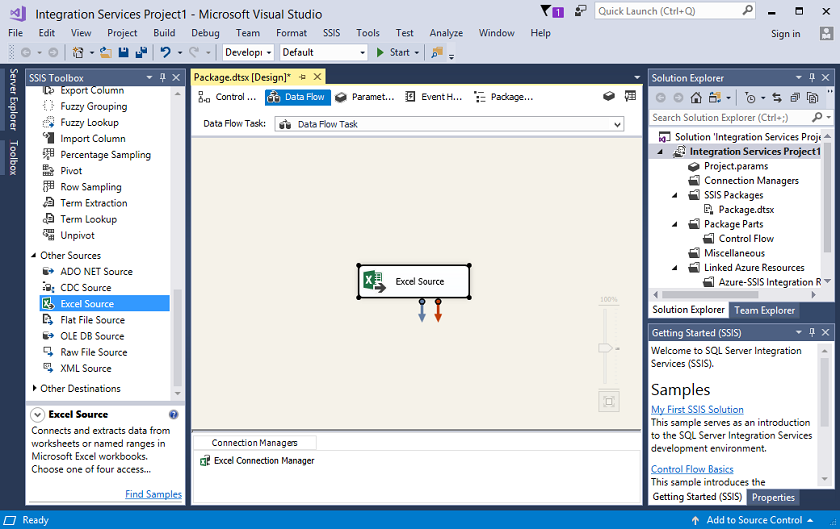
The above screen shows two arrows, red and blue arrow. The blue arrow defines the actual data that we receive from the Excel file, and the red arrow denotes the errors that we have. Now we have to perform the transformations, and before performing the transformations, we need to load the database. Step 19: To load the database, click on the Other Destinations and then click on the Destination. 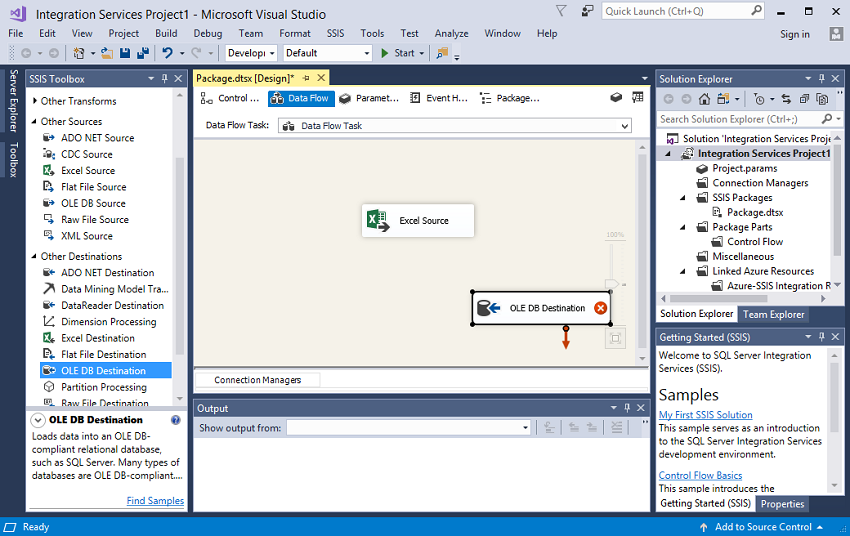
Step 20: After adding the destination, connect the source to the Destination. 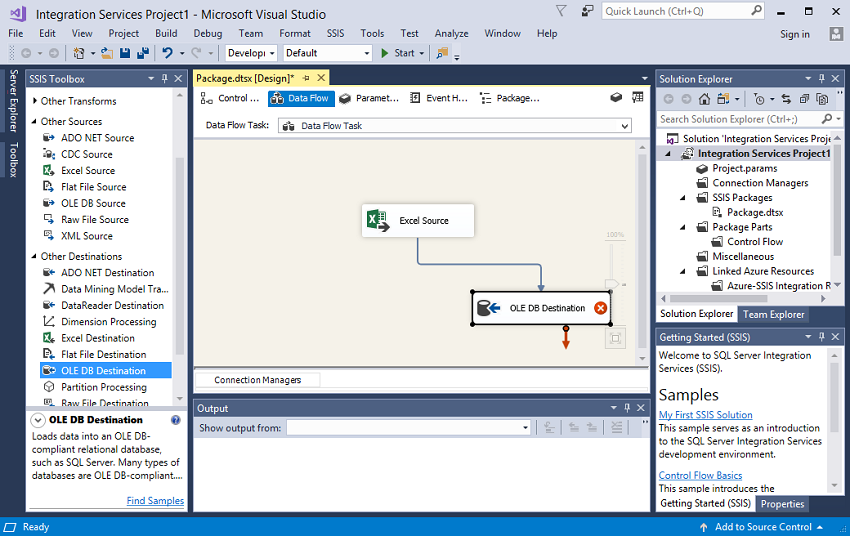
Step 21: In the above step, we noticed the red cross in ADO NET Destination, which means that it is not configured with a component. Right-click on the ADO NET Destination and then click on the Edit option as shown in the below screenshot: 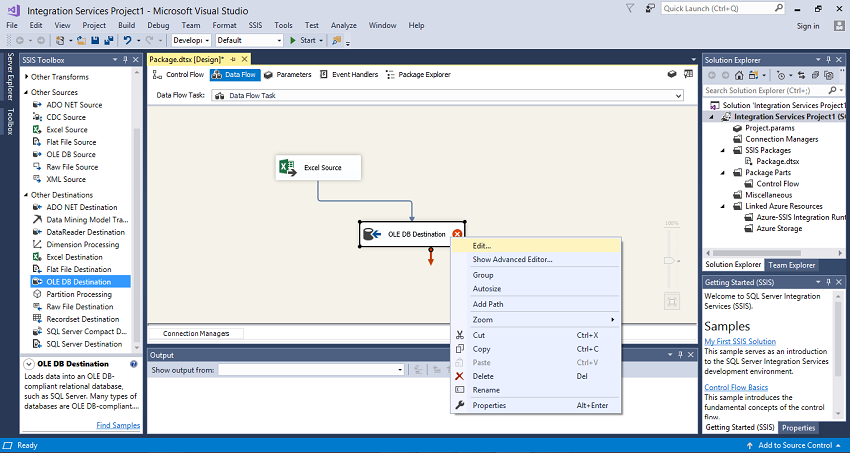
Step 22: You need to specify the configuration manager. 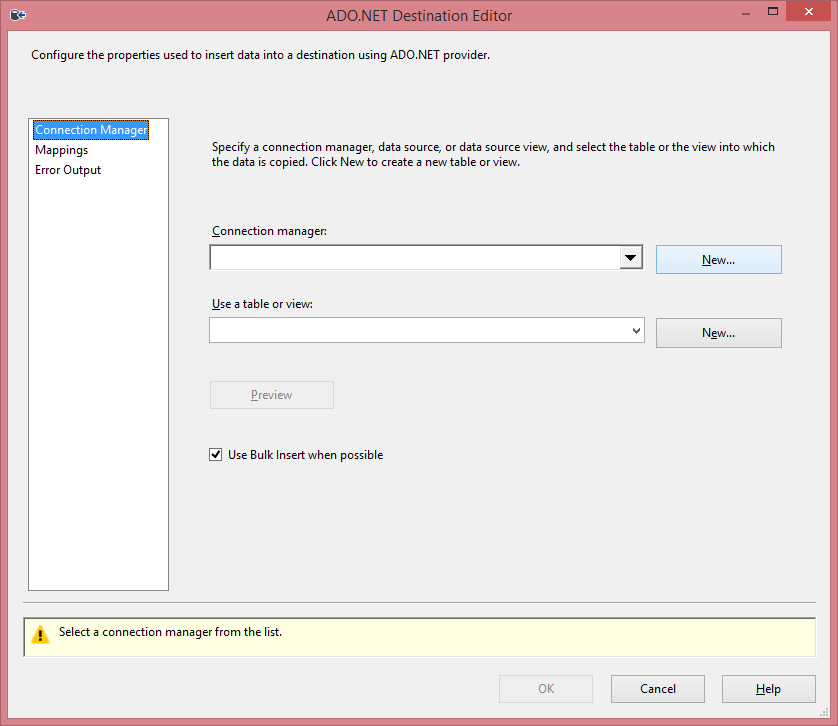
Step 23: Click on the New button to add the connection manager. When you click on the New button, the screen appears shown below: 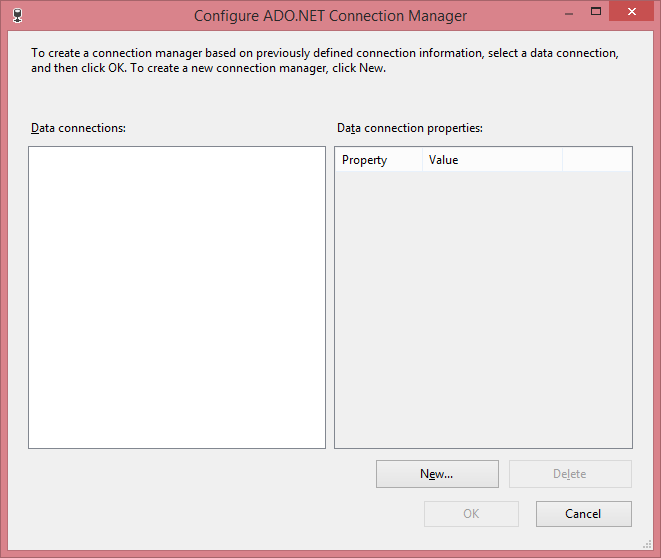
Step 24: Add the Server name and select the database name from the SQL Server. 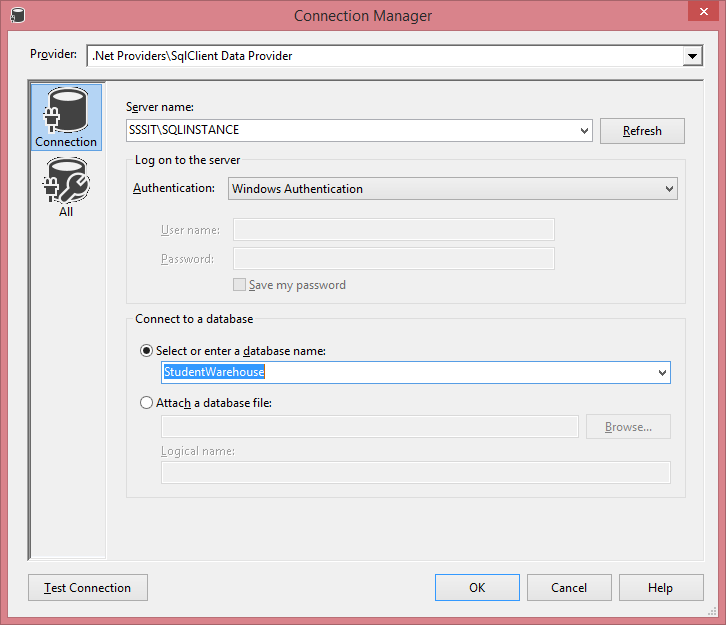
Step 25: Click on the OK button. Step 26: Add the table name in which you want to load the data. 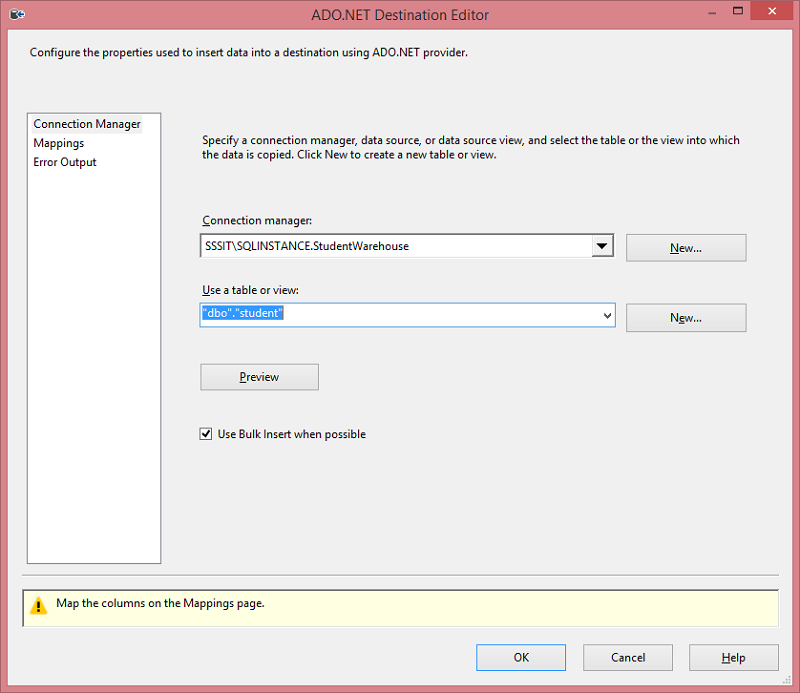
Step 27: In the below screen, map the field of input source to the field of the destination source. 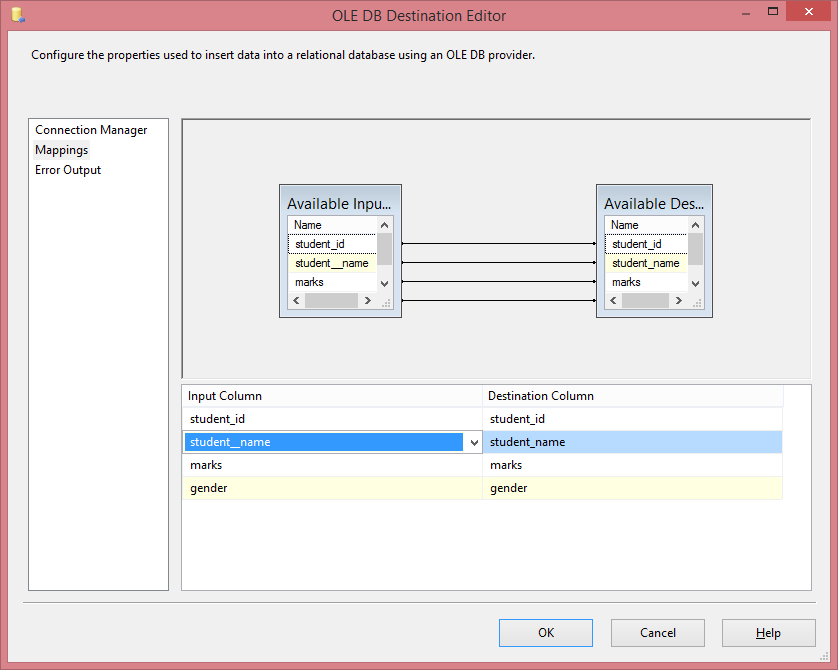
Step 28: After adding a mapping, the source is connected to the Destination, as shown in the below screenshot: 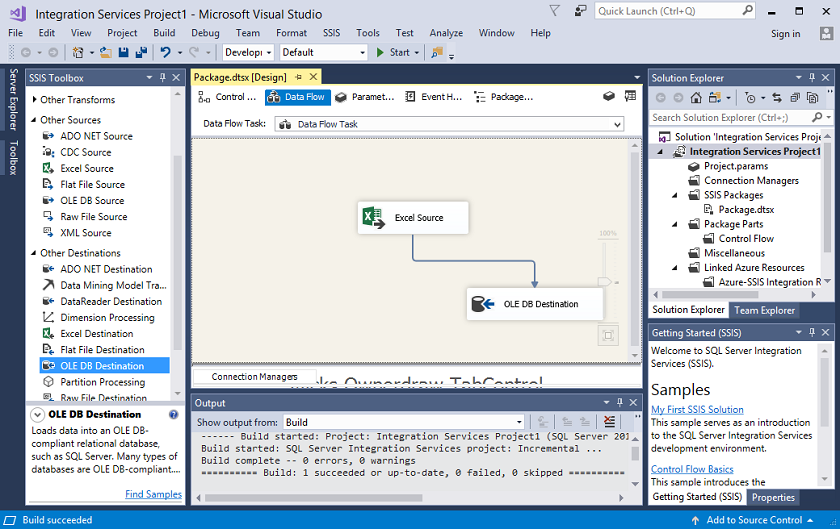
Step 29: Click on the Start button to run the Integration Services Project. When you run the project, the data gets loaded to the destination, i.e., SQL Server. Example of Execute SQL Task
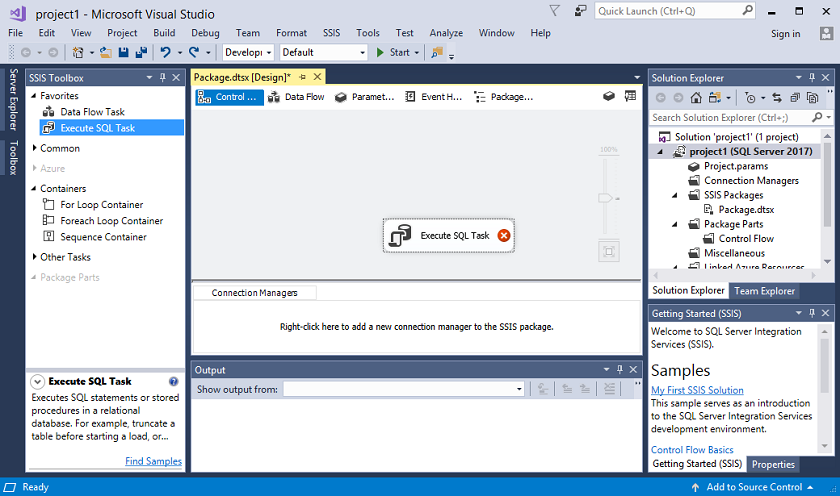
In the above screen, we observe that the red-cross appears in the Execute SQL Task, which means that the Connection Manager is not configured with the Execute SQL Task. To configure it, we need to add the Connection Manager.
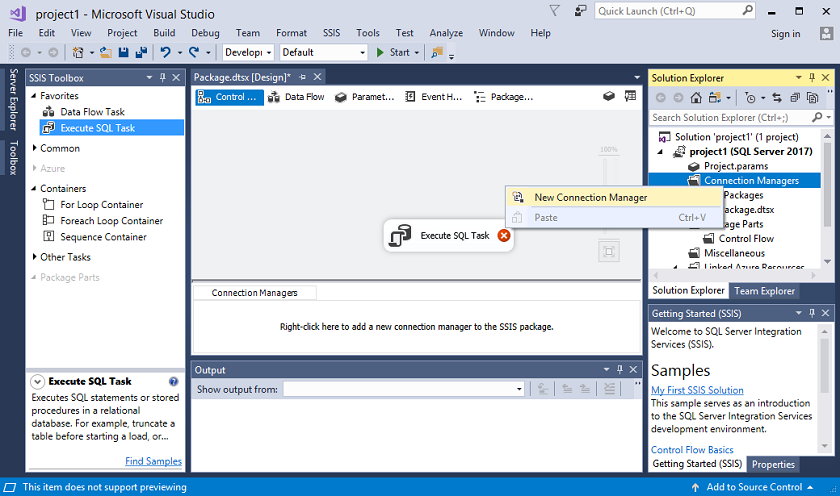
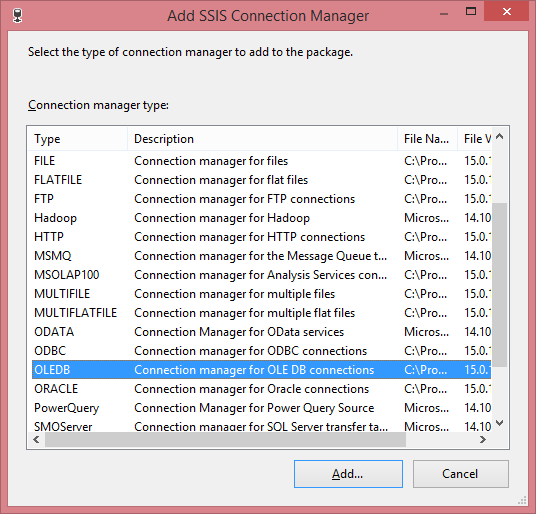
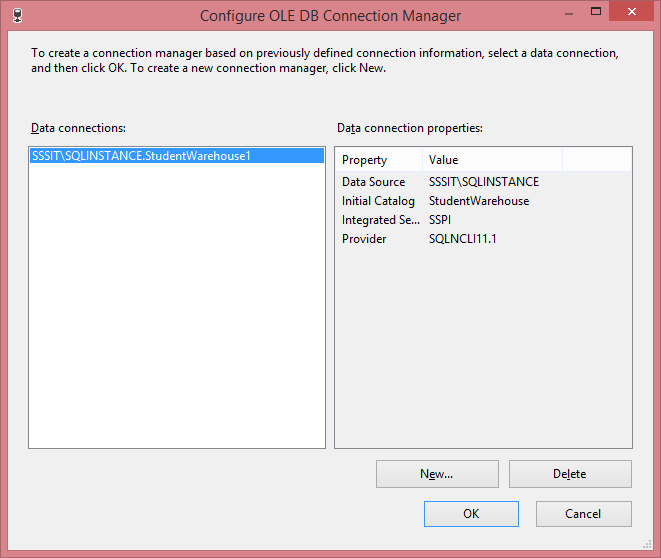
In the above screen, we observe that the data connection of StudentWarehouse database is already available as we created in the previous step. Click on the OK button.
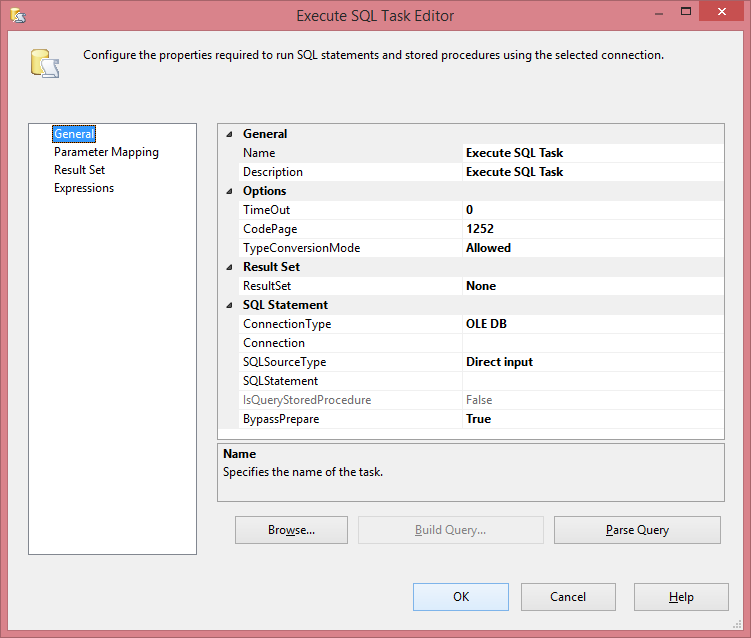
In the above screen, you need to enter the details such as the name of your task, description, SQL statement (SQL task that you need to perform on the table).
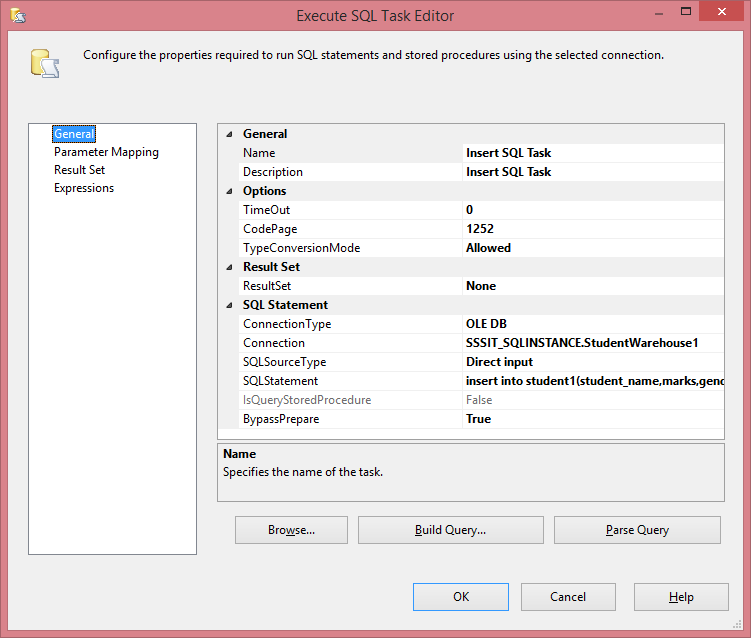
In the above case, I have provided the insert command in SQLStatement.
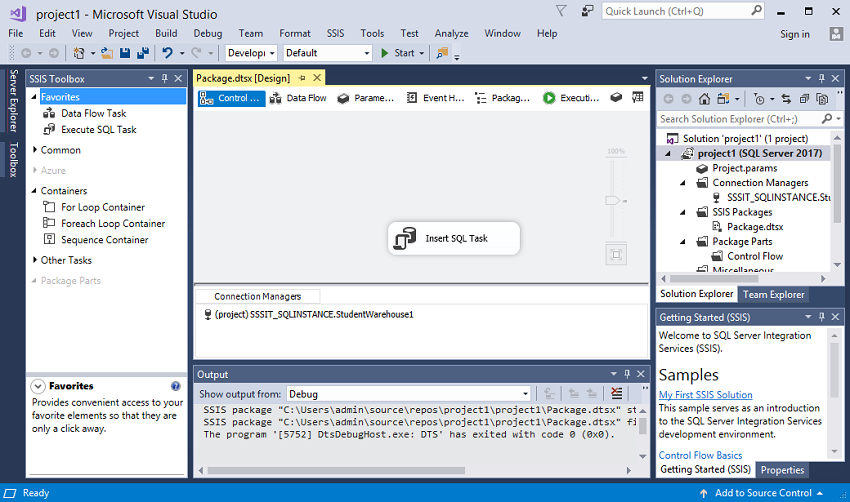
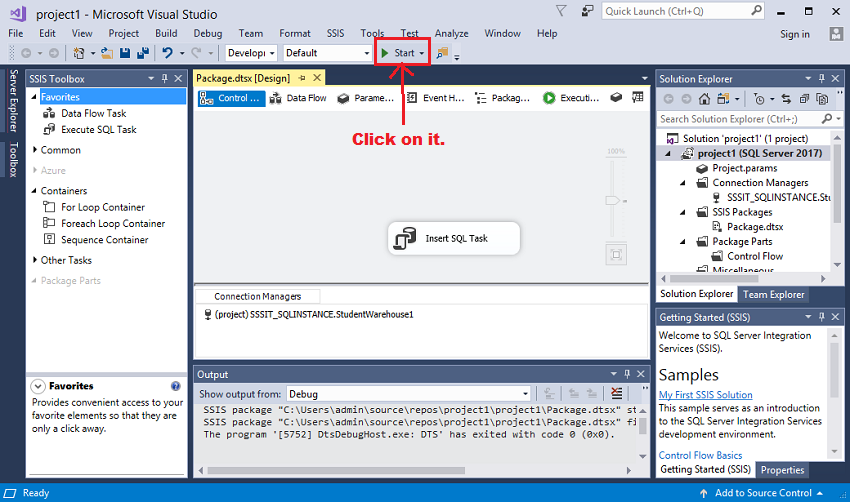
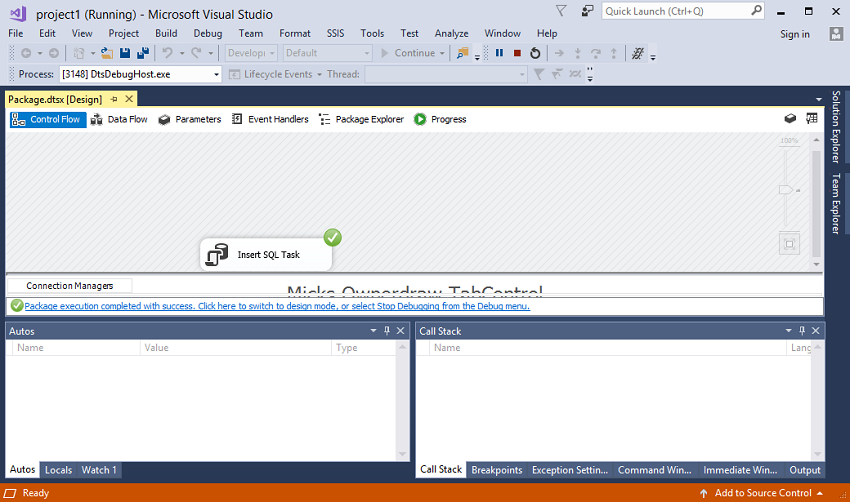
In the above screen, the tick mark shows that your SQL Task has been successfully completed. The insert statement which we added in the previous steps has been executed, and the data is added in table. i.e., student1.

PrerequisiteBefore learning SSIS, you must have the basic knowledge of SQL Server. AudienceOur SSIS tutorial is designed to help beginners and professionals. ProblemWe assure that you will not find any problem in this SSIS tutorial. But if there is any mistake or error, please post the error in the contact form.
Next Topic#
|
 For Videos Join Our Youtube Channel: Join Now
Feedback
- Send your Feedback to [email protected]
Help Others, Please Share


