| |

GIMP Select MenuThe select menu provides various select options such as select all, none, invert, float, and many more. The select menu contains the following tools:

AllThe Select All tool is used to create a new selection that contains everything on the current layer. To activate select all, select the select all tool from the select menu or stroke the CTRL+A keys. NoneThe None tool cancels all the current selections. In the case of no selections, it will not do anything. To cancel all the selections, select the none option from the select menu or stroke the SHIFT+CTRL+A keys. InvertThe Invert tool is used to invert the current selection in the active layer or image. It means that all the selected content which were outside the selection will be inside it and vice-versa. In the case of no selection, it will select the entire layer. To invert the selection, select the invert option from the select menu or stroke the CTRL+I keys. FloatThe Float tool is used to convert a natural selection into a "floating selection." A floating selection is similar to a layer. When we paste something, by default, it becomes a floating selection. To float a selection, select the float option from the select menu or stroke the SHIFT+CTRL+L keys. By ColorThe Select By Color tool is used to select a similar color pattern. If you click on a color, it will select a similar color pattern part of the entire image. To select by color, select the by color option from the select menu or stroke the SHIFT+O keys. From PathThe From Path tool is used to transform the current path into a selection. In the case of a disconnected path, the command will connect the endpoints with a straight line. In this scenario, the original path is unchanged. To select from the path, select the by path option from the select menu stroke the SHIFT+V keys. Selection EditorThe Selection tool is used to display the "Selection Editor" dialog window. It displays the current selection in the current image and provides easy access to the selection-related tools. It is a handy tool while working on a selection. To activate the selection editor, select the selection editor option from the select menu. FeatherThe Feather tool is used to feather the edges of the selection. It is a handy tool for creating a smooth transition between the selection and its surroundings. Usually, it is used to feather the selection border with the "Feather Edges" option, but if you want to feature them again with this tool. To feather a selection, select the feather option from the select menu. 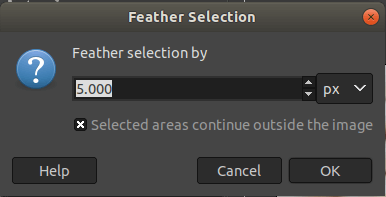
SharpenThe Sharpen tool is used to reduce blur or fuzziness around the edge of a selection. It is a reverse tool of the Feather Selection tool. It is a handy tool for image editing; The new edge selection follows the dotted line of the old edge selection. In the sharpen tool, the Anti-aliasing is also removed. To activate the sharpen tool, select the sharpen option from the select menu. ShrinkThe Shrink tool is used to reduce the size of the selected area. It moves each point on the edge of the selection a precise distance further away from the nearest edge of the image. To shrink a selection, select the shrink option from the select menu. It will open a dialog window for asking the shrinking value. Enter the value by which you want to shrink the selection. 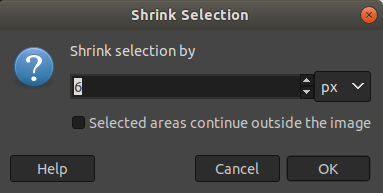
GrowThe Grow tool expands the size of a selection in the current image. It is just opposite to the shrink tool but works similarly. To expand a selection, select the grow option from the select menu. It will open a dialog window for asking the growing value. Enter the value by which you want to grow the selection. 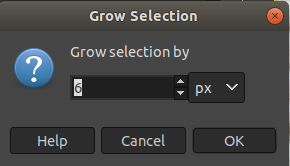
BorderThe Border tool is used to create a new selection along the edge of an existing selection. The edge of the current selection acts as a base of the border; the new selection is created around it. To create a border selection, select the border tool from the select menu. It will open a dialog window and ask for the border values. Enter the value by which you want to create a border selection. 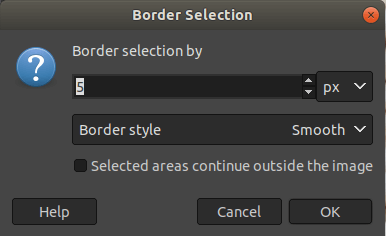
Below is the example of border selection. 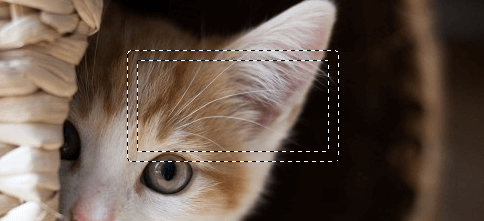
Remove HolesThe Remove Hole tool is used to remove the holes of a selection. Generally, the holes are the unselected or partially selected areas in the selection. To remove the holes from a selection, select the remove holes option from the select menu. DistortThe Distort tool is used to deform the selection contour. The contour is an outline, especially of a curving or irregular figure. To activate the distort tool, select the distort option from the select menu. It will open a popup window. Enter the values by which you want to distort the selection. 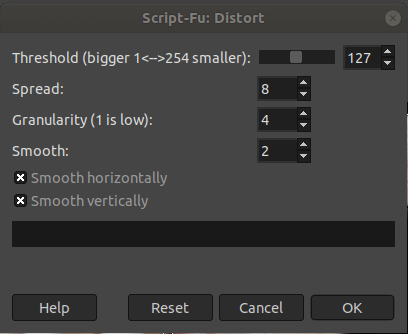
The distortion values have the following four options:Threshold: If the threshold value is higher, it will shrink the distorted selection. If the value is lower, It will make the selection bigger. Spread: The higher value of Spread increases the deformation. Granularity: The higher value of Granularity increases the deformation. Smooth: The higher value of Smooth decreases the deformation. The Deactivation of Smooth horizontally or Smooth vertically increases the deformation. Rounded RectangleThe Rounded Rectangle tool is used to convert an existing selection (rectangular, elliptical, or other shapes) into a rectangular selection with rounded corners. To activate the rounded rectangle tool, select the rounded rectangle option from the select menu. Toggle quick MaskThe quick Mask is used partially to paint a selection. To toggle the quick Mask, select the quick mask menu from the select menu or stroke the SHIFT+Q keys. Save To ChannelThe Save to Channel tool is used to save the selection as a channel. The channel can be used as a channel selection mask. To activate the save to channel task, navigate it by the select the menu. To PathThe To Path tool is used to convert a selection into a path. The image will not be changed, but the new path can be seen in the Paths Dialog. It is a handy tool for precisely adapt the outline of the selection. To activate the to path tool, select it from the select menu.
Next TopicGIMP View Menu
|
 For Videos Join Our Youtube Channel: Join Now
Feedback
- Send your Feedback to [email protected]
Help Others, Please Share


