| |

Photo Editing in GIMPGIMP is one of the leading photo editors in the world. It is an open-source editor, which makes it more widespread. It is widely known as Photoshop alternative because Photoshop is a paid tool and does not support the Linux operating system. It offers various plug-ins and tools to make photo editing an easy task. Of course, it is free, so many Photographers and graphic designers choose it as their default photo editor. In this section of GIMP Tutorial, we will discuss some basic and advanced editing tasks. Further, we will discuss some useful and extensive filters and tools. we will discuss some useful and extensive filters and tools. Before diving into Photo editing, let's discuss some considerations that we must keep in mind while using GIMP. Why GIMP?Let's see some of its extensive features that describe why we should use GIMP. Also, see a comparative overview of GIMP Vs. Photoshop. Below are some key features of GIMP:
Apart from all the above features, many other built-in features will make us switch from any other editing tool to GIMP. Further, it can perform most of the primary and advanced editing and graphical tasks. Before start editing with GIMP, there are some points to be considered:
Let's understand how to edit photos in GIMP? How to Edit Photos in GIMP?GIMP offers several filters and other primary and advanced tools for photo editing. It has a simple user interface like any traditional image editor. If you are familiar with other image manipulation programs such as Photoshop, you'll find GIMP a familiar tool. Let's understand some primary effects for photo editing. To use GIMP, we must have installed it on our machine. To install GIMP on your machine, see Install GIMP. After a successful installation, we can edit any photo using GIMP. To edit a photo, open it with GIMP by navigating to File-> Open menu. If we want to create a new photo, select the New option from the File menu. Now, perform some basic operations: GIMP Editing BasicsPhoto editing is not limited to a few tasks; it depends on the editing level. GIMP facilitates with some extensive features and plug-ins that allow us to edit a next level photo. We can edit any photo at any level using GIMP, but in this section, we will talk about some necessary editing tasks. Later we will discuss other advanced tasks such as remove background, merge images, make a transparent background, and many other tasks in other sections of this tutorial.
How to Crop Photos Using GIMPCropping a photo is a vital task of photo editing whether we want to paste in another photo, or we want to remove the unwanted part of the image, or any other aspect. Cropping is a straightforward process to crop a photo, open the photo in GIMP and navigate to Tools-> Transform Tool-> Crop menu or hit the SHIFT+C keys together. It will allow us to select the region to be cropped. Select the part of the image which we want to be cropped: 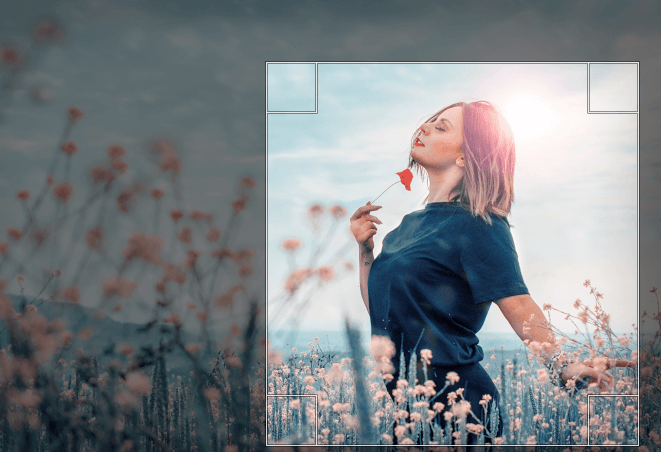
Hit ENTER key to crop the selection. It will crop the selected region. How to Straighten Photo Using GIMPStraighten is a fundamental and useful task of photo editing. Sometimes, capturing images can be clicked by a different angle; we can fix this by rotating it and making it straight or in the required view. 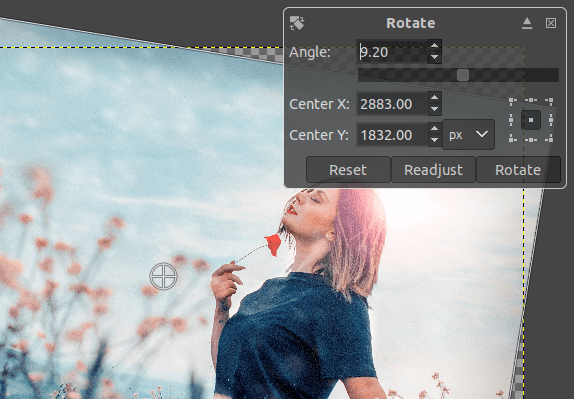
To rotate a photo at a specific angle, select the rotate option from the Tools-> Transform Tools-> Rotate menu or stroke the SHIFT+R keys. However, there are some other options such as flip are available to reposition the image. But, the rotate tool is excellent. It provides a flexible rotation option. We can rotate our image by specifying the rotation angle. How to Zoom Image in GIMP?Zooming is also an integral part of photo editing. We can see defects and changes by zooming an image. It is good to zoom before performing some editing tasks such as dust removal, spot removal, adjusting the exposure, and many others. To zoom an image, select the zoom option from the View-> Zoom menu. There are several zooming options, such as zoom in, zoom out, revert zoom, etc. Select the required option. How to Adjust Brightness and Contrast in Photo Using GIMPBrightness and contrast are an essential aspect of the image that defines how the image will look like. Sometimes captured photo is too dark due to low light, but, we can improve its lightning by using GIMP. To adjust the brightness of the image by selecting the brightness tool from the Colors->Brightness-Contrast tool. El of brightness and contrast by using this tool and make the image brighter/Darker. A contrast tool is a complementary tool of the brightness when we perfectly balance the brightness and contrast the image will look more beautiful. 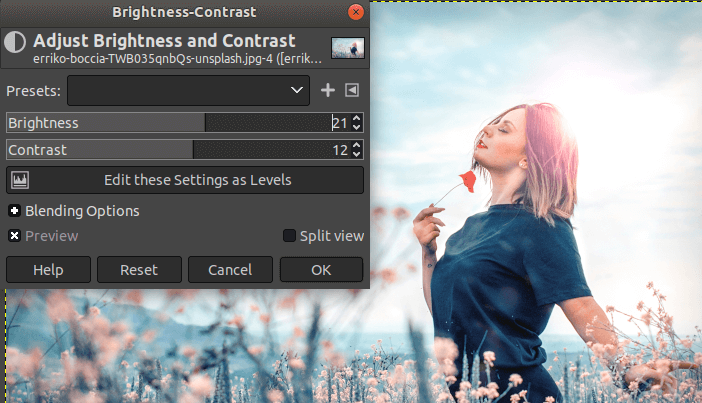
How to adjust Exposure Using GIMPExposure is also a useful aspect of the image to make it more attractive. It reduces the noise of the image. It is useful for making tweaks. Lower the exposure, the darker the image. And, the higher the exposure, the brighter the image. To adjust the exposure, select the exposure tool from the Colors-> Exposure menu. We can define the exposure by selecting the level of the exposure. 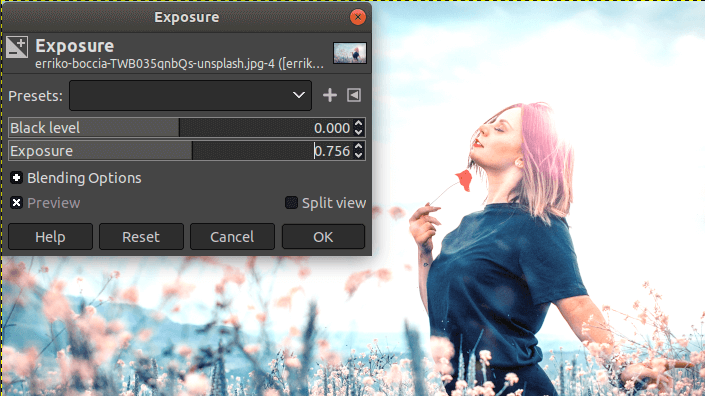
It is recommended to keep shadows and exposures minimum to look the image naturally. How to Adjust the Color Balance?Color Balances defines the colors of the image. It is also one of the best tools for editing. We can adjust the colors of the image according to our choices for the shadows, highlights, and mid-tones. It provides the ultimate control over the colors of the images. It can be accessed from the colors menu and let us manage the colors of the current layer or the selection. To adjust the color balance, navigate to Colors-> Color Balance menu. 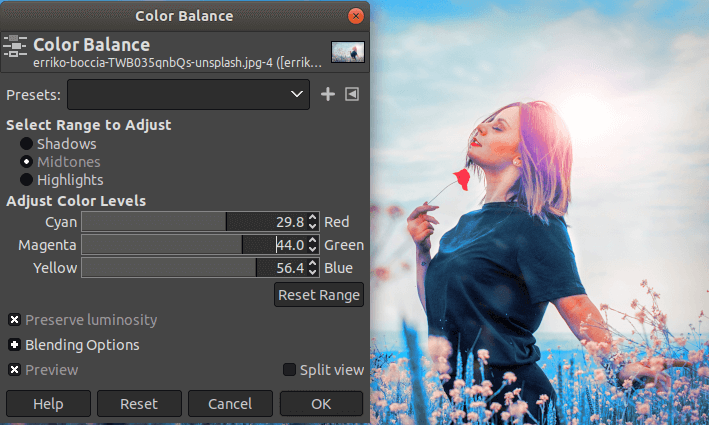
How to Remove Spots?Sometimes, a photo may have spots due to dust on the lens, dings on the wall, or maybe unsightly marks. We can remove these spots easily by GIMP. To remove a spot, select the heal tool from the toolbox or Tools-> Paint Tools-> Heal menu. The heal tool in GIMP works precisely as in Photoshop. Pick a reference point then start clicking at the specific points to heal it. How to Resize Photo?Resizing a photo is also a prevalent and useful need for us. Resizing is a straight forward process. We may require to resize image for several aspects like for the web image to reduce or enlarge the image. It will not affect the view of the image. But, it is recommended to keep the enlargement average. Otherwise, it may affect the image depending upon the image quality. To resize an image, select the scale option from the Image menu. It will open a dialog window to specify the image resolution. 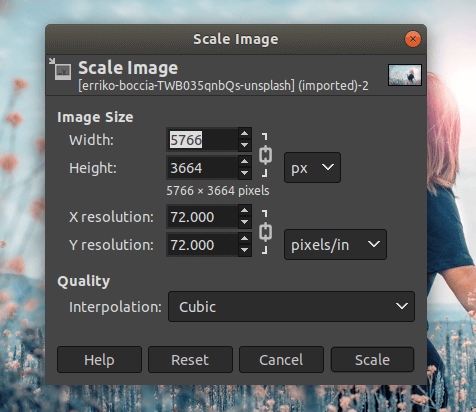
Specify the image resolution and click on the Scale button. It will resize the image accordingly. For more details on resizing the image, visit How to Resize Image in GIMP? How to Remove Background of the Image?The remove the background of the image is also another demanded and useful tasks for the photo editing. Sometime our favorite image may have an annoying background. We can fix this issue by adding an attractive GIMP background with the use of a few tools. We will remove the background by following steps: Step1: Add Transparency to the Image To add transparency to the image, add the alpha channel to it. Select the Alpha Channel option from the Layer-> Transparency-> Add Alpha Channel menu. It will add the alpha channel and make the background transparent so that we can place a new one. Step2: Select the Object Now, Select the object that we want to keep using the free selection tool. Use the free select tool and select it from the Tools-> Selection Tools-> Free Select menu. Step3: Cut or Copy the Selection Now, Cut or Copy the selection to place it with other backgrounds. Step4: Add a new Layer Add a new layer from the layers menu to add the new background to it. Step5: Add a new Background Add a new background image or fill it with any foreground color to the added layer. Step6: Paste the Selection here we are all set to add the image to a new background. Paste the copied object on the image at the desired location where we want to place it. It will add the image to the new background. It will look something like: 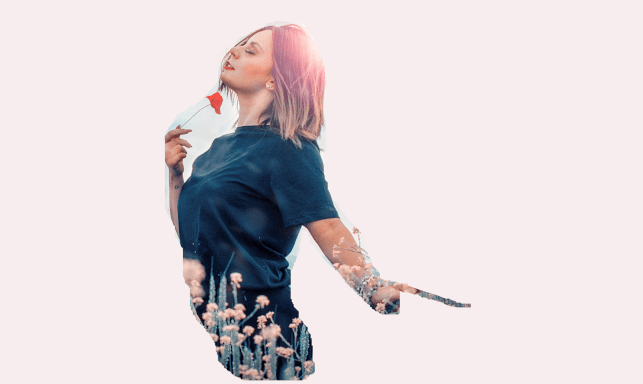
From the above image, we can see that the image has attached a new background. It's not perfect editing i just have done it for the tutorial purpose only. You can do this much better by using your creativity. How to Save the image in different formats in GIMP (Export)?After all the basic editing operations, we have to save it. To save in different formats such as JPEG, JPG, TIFF, GIF, or any other format, we have to use the Export As option form the file menu. The Save and Save As option will save the file in GIMP's default format, which is ".Xcf". When we select the Export As an option, it will open a dialog window to specify the file format and location. Either we can Specify the file extension with the file name or access the supported file formats from a drop-down list. At the bottom of the Export As dialog window, we can see the select file type (By extension) option. We can expand it for browsing a drop-down list. 
Scroll down for more options and select the required file extension and click on Export to proceed. |
 For Videos Join Our Youtube Channel: Join Now
Feedback
- Send your Feedback to [email protected]
Help Others, Please Share


