Hibernate Example using Annotation in EclipseThe hibernate application can be created with annotation. There are many annotations that can be used to create hibernate application such as @Entity, @Id, @Table etc. Hibernate Annotations are based on the JPA 2 specification and supports all the features. All the JPA annotations are defined in the javax.persistence package. Hibernate EntityManager implements the interfaces and life cycle defined by the JPA specification. The core advantage of using hibernate annotation is that you don't need to create mapping (hbm) file. Here, hibernate annotations are used to provide the meta data. Example to create the hibernate application with AnnotationHere, we are going to create a maven based hibernate application using annotation in eclipse IDE. For creating the hibernate application in Eclipse IDE, we need to follow the below steps: 1) Create the Maven Project
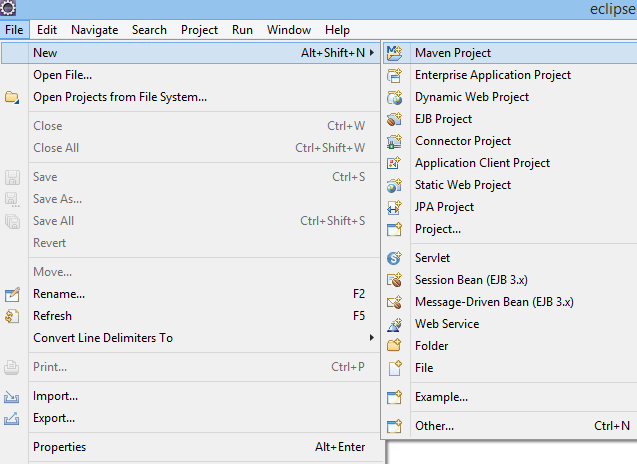
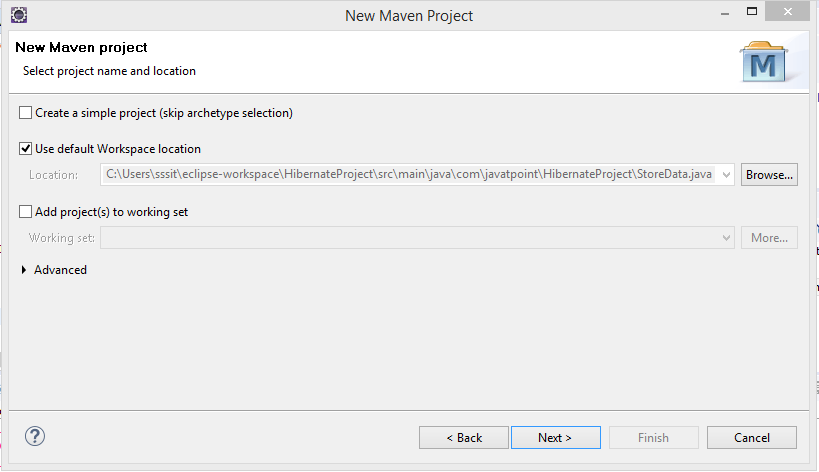
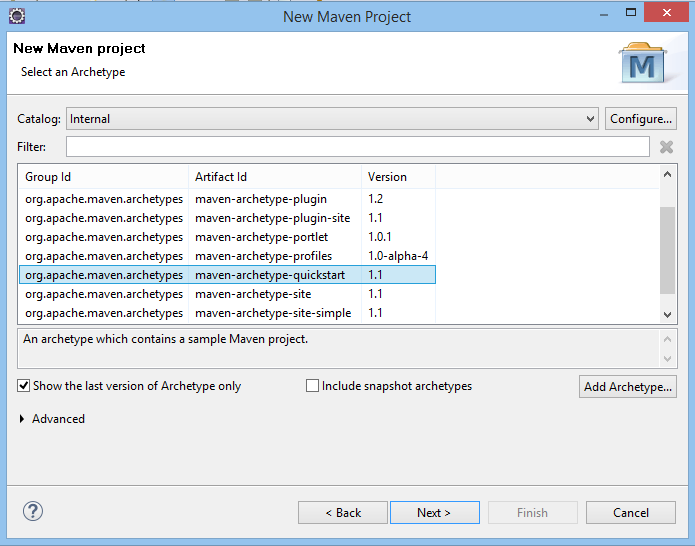
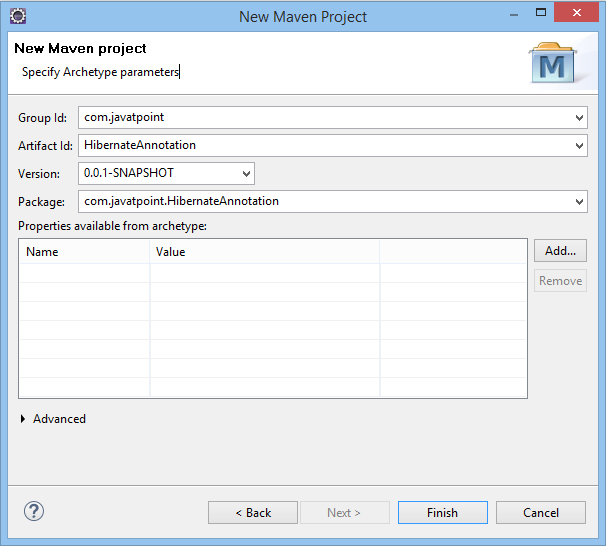
2) Add project information and configuration in pom.xml file.Open pom.xml file and click source. Now, add the below dependencies between <dependencies>....</dependencies> tag. These dependencies are used to add the jar files in Maven project. Due to certain license issues, Oracle drivers are not present in public Maven repository. We can install it manually. To install Oracle driver into your local Maven repository, follow the following steps:
3) Create the Persistence class.Here, we are creating the same persistent class which we have created in the previous topic. But here, we are using annotation. @Entity annotation marks this class as an entity. @Table annotation specifies the table name where data of this entity is to be persisted. If you don't use @Table annotation, hibernate will use the class name as the table name by default. @Id annotation marks the identifier for this entity. @Column annotation specifies the details of the column for this property or field. If @Column annotation is not specified, property name will be used as the column name by default. To create the Persistence class, right click on src/main/java - New - Class - specify the class name with package - finish. Employee.java 4) Create the Configuration fileTo create the configuration file, right click on src/main/java - new - file - specify the file name (e.g. hibernate.cfg.xml) - Finish. hibernate.cfg.xml 5) Create the class that retrieves or stores the persistent object.StoreData.java 6) Run the applicationBefore running the application, determine that the directory structure is like this. 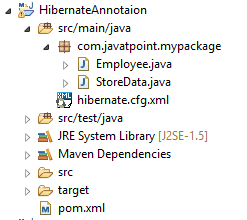
To run the hibernate application, right click on the StoreData - Run As - Java Application.
Next TopicWeb Application With Hibernate
|
 For Videos Join Our Youtube Channel: Join Now
Feedback
- Send your Feedback to [email protected]
Help Others, Please Share


