Creating the First table in ABAP Dictionary (Practical Implementation)
The practical implementation to create the database table in the ABAP dictionary is given below:
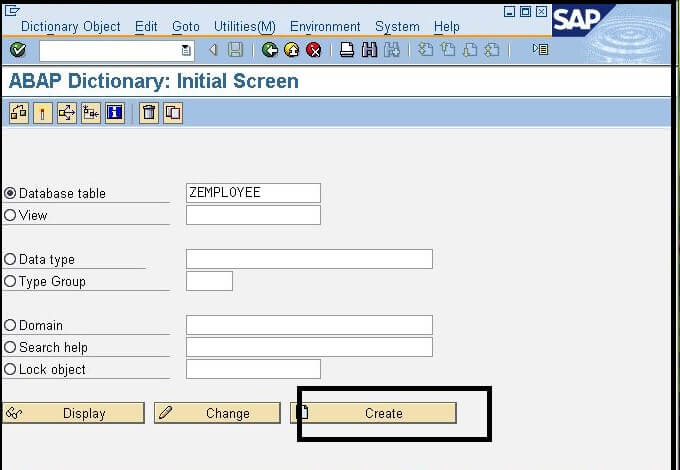
- Step-1: Login to the SAP GUI and open the ABAP Dictionary Initial Screen using the SE11 transaction code. In this section, we will focus on creating a transparent table.
- Step-2: To create the table, first, we need to enter the name of the table that we want to create (it must be started with the letter z or y), and click on the Create button at the bottom. Let's create a table named ZEMPLOYEE. Consider the below image:
- Step-3: Once we click on the Create button, a new window appears, which looks like the below image:
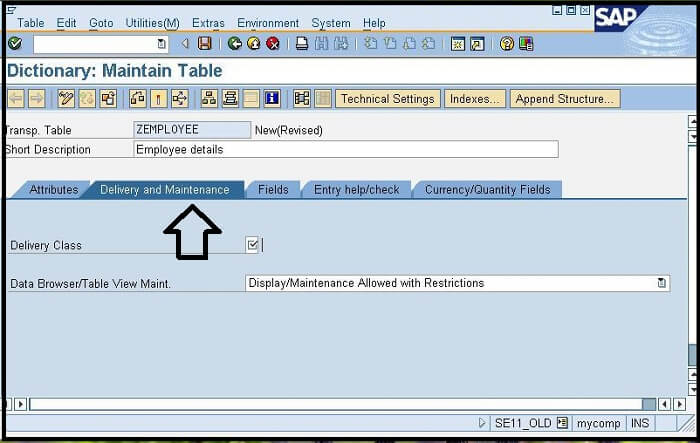
In the above image, we can see there are various options given. Let's discuss each option one by one:
- Short Description: The first option given is Short Description, which is used for the description of the table. So here, we can provide a brief explanation of the table.
- Delivery and Maintenance: As we can see in the above screen image, there are four tabs given in which the second tab is Delivery and Maintenance(arrowed). For the Delivery Class, click on the field, and then click on the drop-down button. A new window appears, which shows the list of the Delivery class, from where we need to select the Application table. Consider the below image:
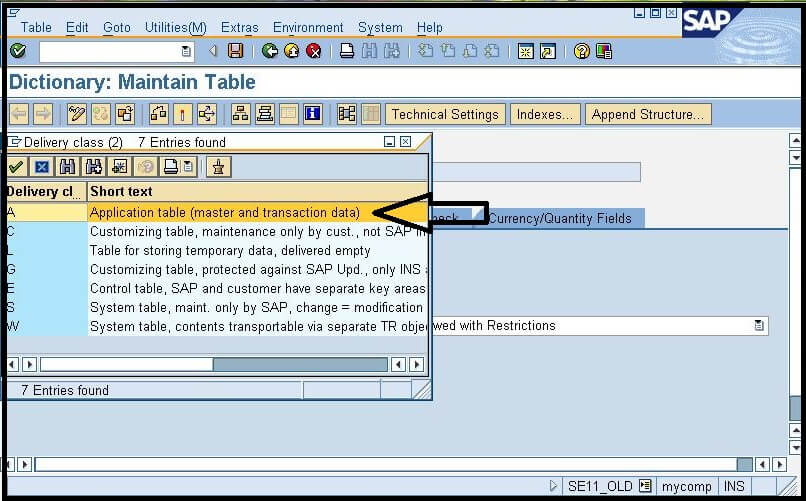
Here we have selected the Application table, as we need to hold the master and transaction data both in the table.
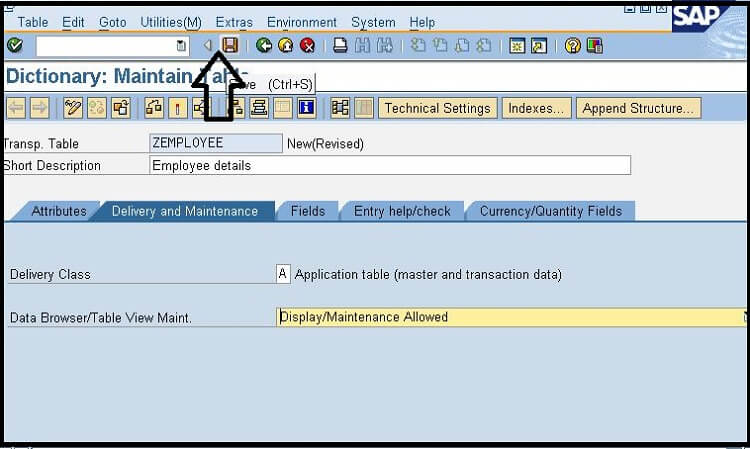
The second option given is Data Browser/Table View Maint, so for this again, click on the dropdown button, and select the option Display/Maintenance Allowed. By choosing this option, we can directly enter the data in the table later on also.
- Step-4: Now, click on the save button given at the menu bar. Consider the below image:
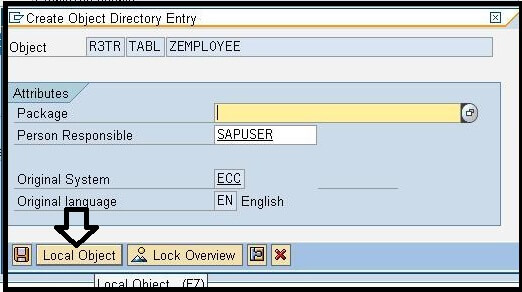
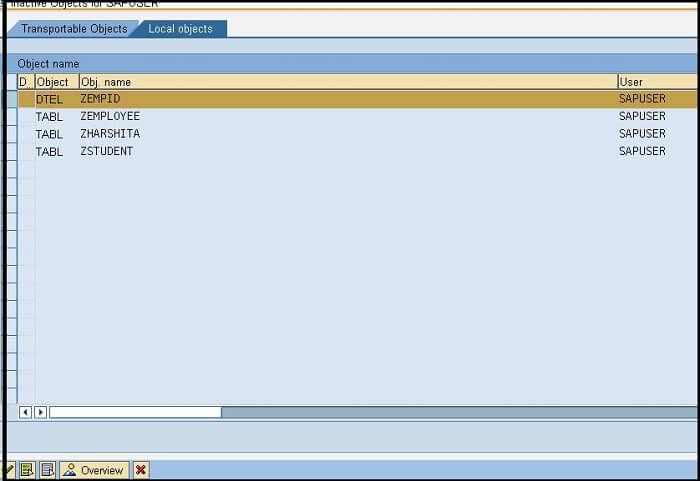
- Step-5: A new window pops-up, named as Create Object Directory Entry. Here we just need to click on the Local object as we do not need to transact it further. Consider the below image:
- Step: 6- As we can see, our table is successfully saved, now we need to select the Field Tab on the screen. We need to enter the field names for our table. Below is some guideline for the field name:
- The field name does not need to start with the letter Z or Y like the table name; hence it can be started with any letter.
- The field name can be of a maximum length of 16 characters.
- Our table must have at least one key field, which is used for the searching and sorting of the data, and also used to identify the unique record in the table.
- In the field name, we need to give an initial value, which is used to specify the data that is mostly used in the table.
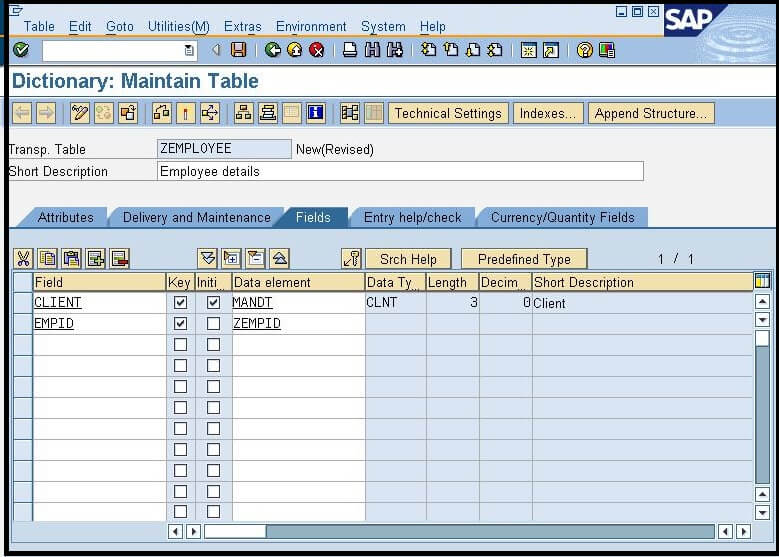
In this first field, we will enter the field name as CLIENT, and in the Data element, we will enter MANDT, which is already specified in the SAP system. Once we press the ENTER, the other options, such as the data type, length, decimal places, and short text, will automatically be filled. Consider the below image:

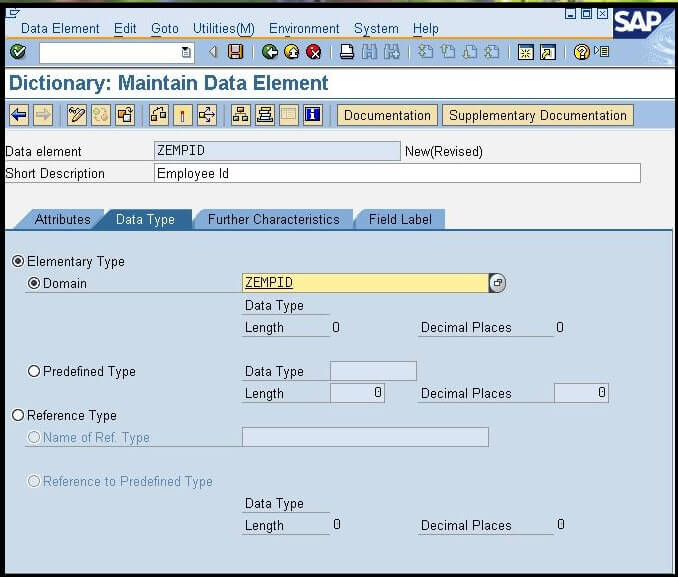
- Step-7: We will create the second field as the EMPID field, and it will also be the key field. In the field of data elements, we will enter a new custom data element named as ZEMPID. Consider the below image:
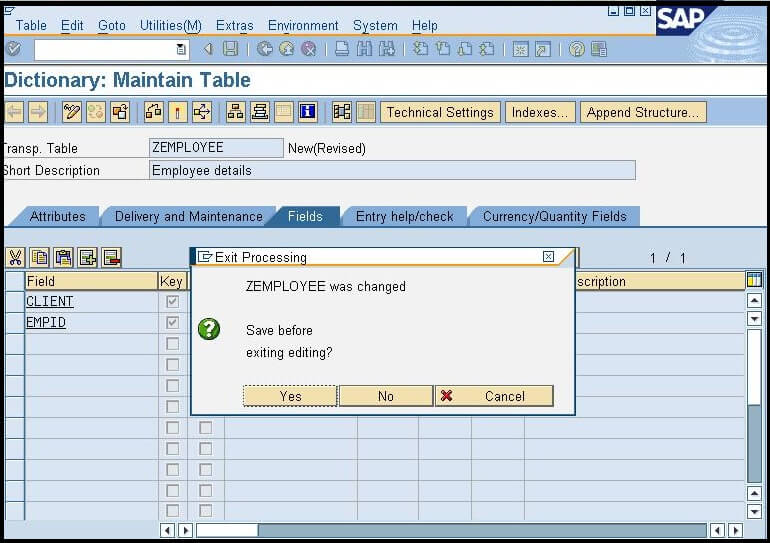
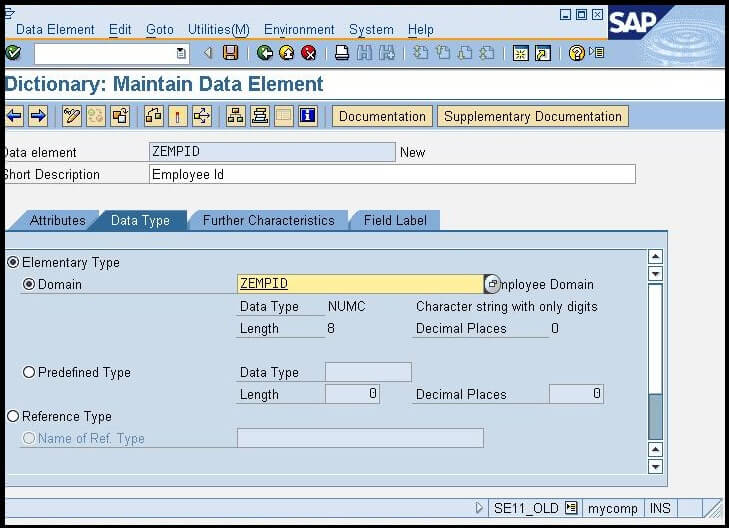
Since this is the custom data element, so we need to create it. We have already discussed the data element creation from ABAP Data Dictionary, but here we will create it from this screen only. So first Save the table using CTRL+S and double click on the name of the data element, the below window will appear:
- Once we click on the Save button, a new window of data element appears.
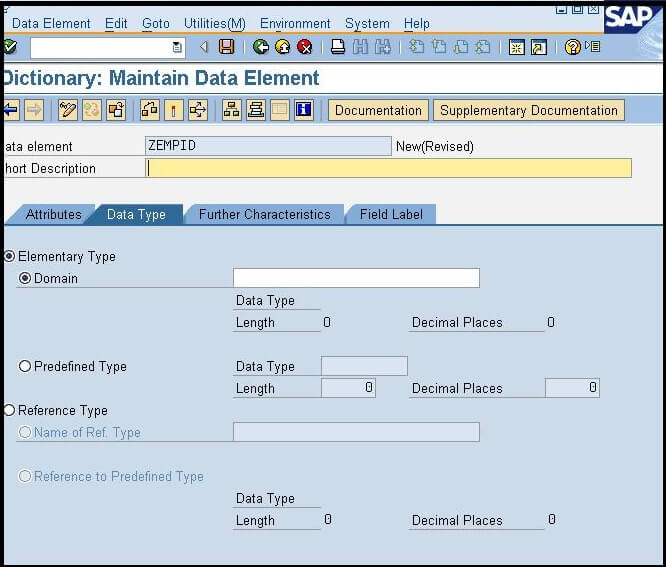
In the above screen, we will choose the Elementary type with the Domain field. Here will create the custom domain for this data element of the same name (
We can choose any custom name). Consider the below image:
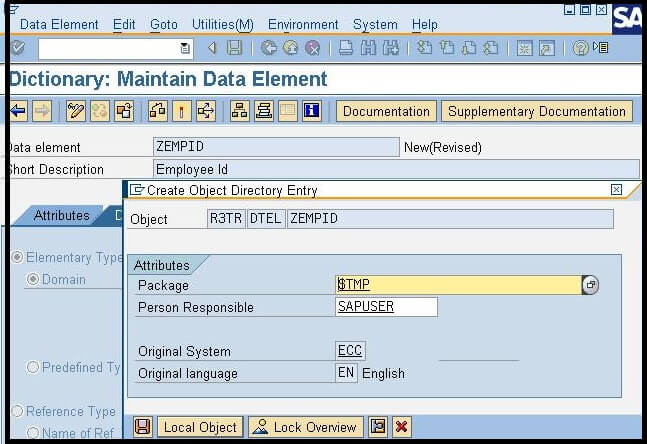
- Now click on the save button and save it as a local object. Consider the below image:
- When we double click on the domain name, it opens a new window.
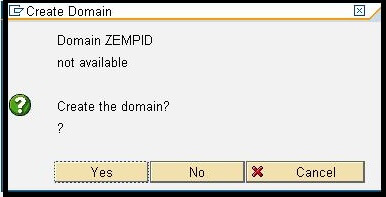
Click to Yes option, and it will open the window to create the domain. Consider the below image:
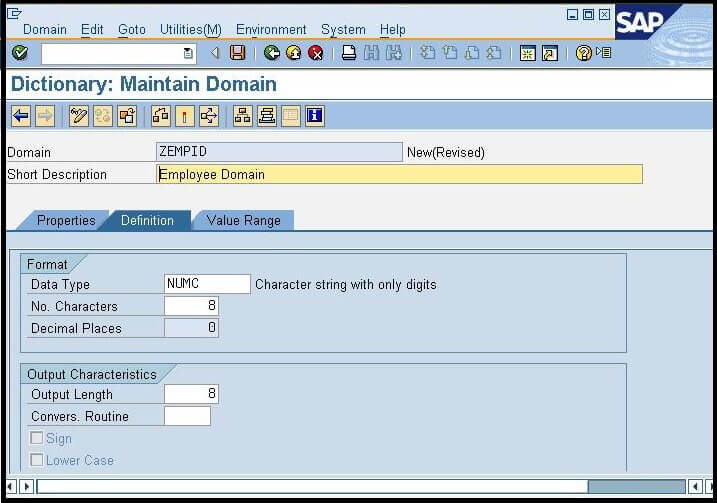
In the above image, we have filled all the fields according to the requirement.
- Click on the Save button to save the domain as a local object, and activate the domain. Consider the below image:

Click on the Green tick, and the domain will be successfully activated. Now click to the back button, to reach to the data element screen.
As we can see in the above image, all the details of the data element are already filled due to the Domain ZEMPID.
- Click on the Field Label and enter the details. Consider the below image:
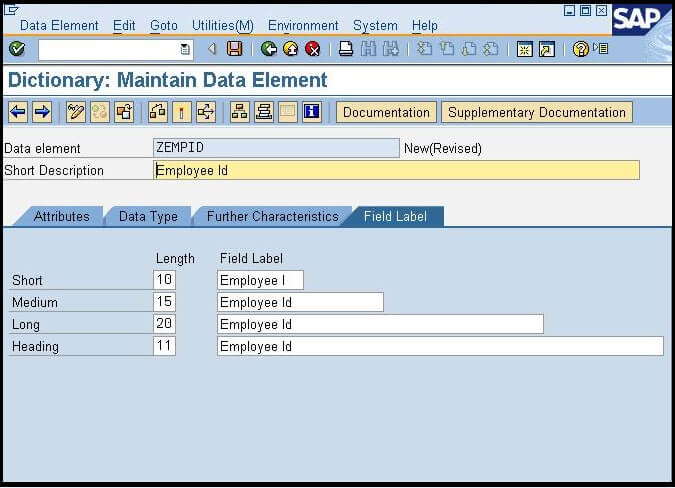
- Now save and activate the data element to use it in the table. Consider the below image:
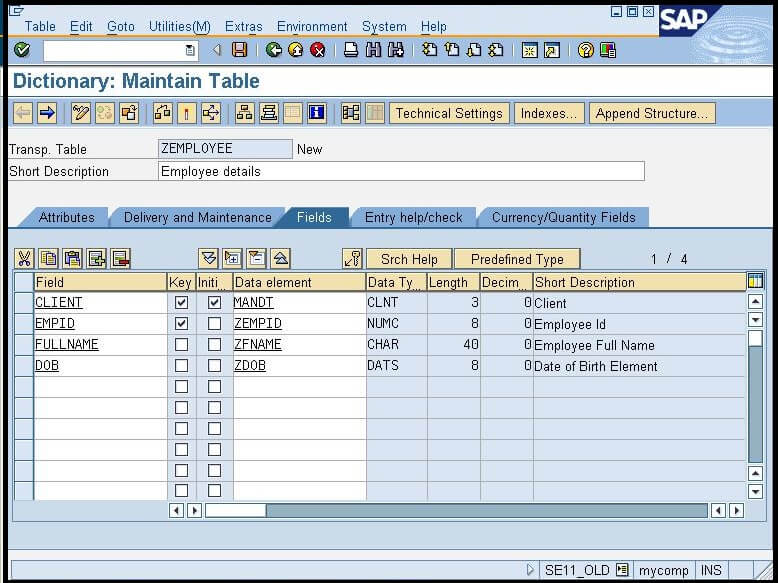
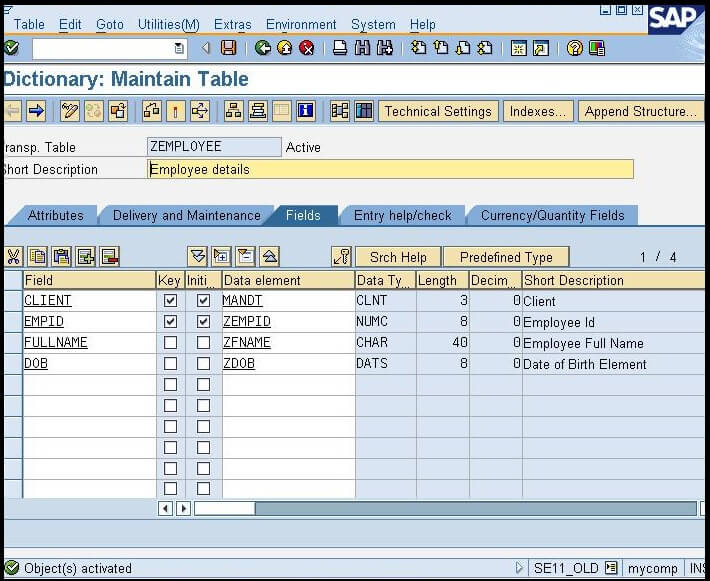
- Click on the green tick and press F3 or Back button to open the Table Window. In the table, the EMPID field details will now automatically filled with the data elements details. Similarly, we will create two more fields named as FULLNAME and DOB with the corresponding custom data elements. Now the table will look like the below image:
- Now save the table and click on the Technical Settings given at the menu bar, to set the technical attributes of the table. Consider the below image:
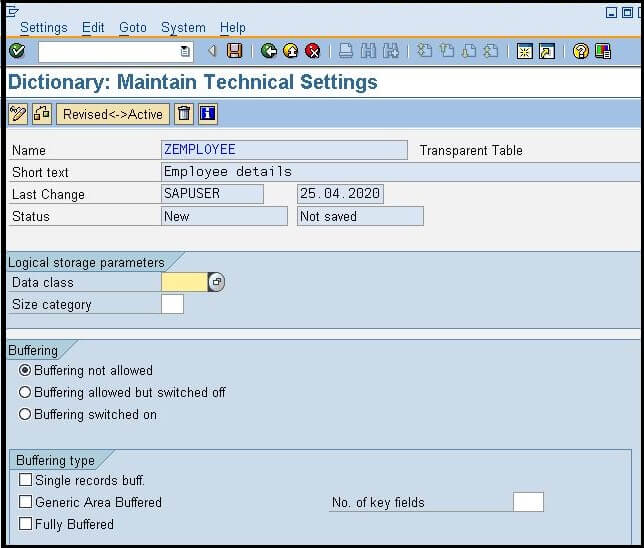
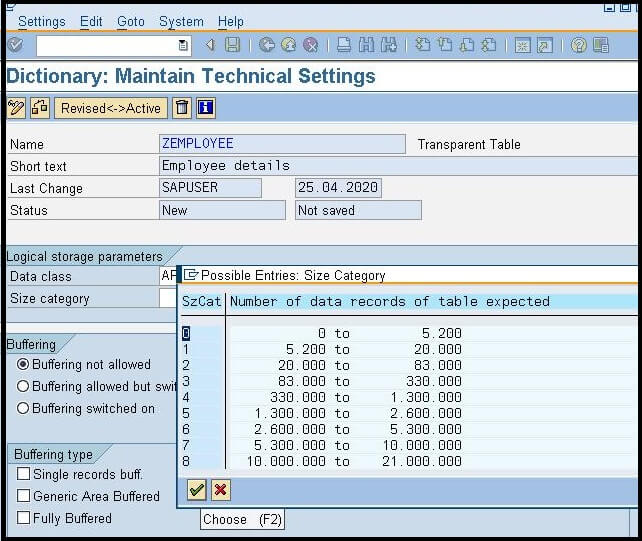
- In the above image, for data class, we will click on the drop-down option and select the option APPL0 for the master data, and in size category, we will choose the first option(as we don't have much data to save). Consider the below image:
- Now click on the SAVE button, and activate the table. Our final table of Employee details after activation will look like the below image:
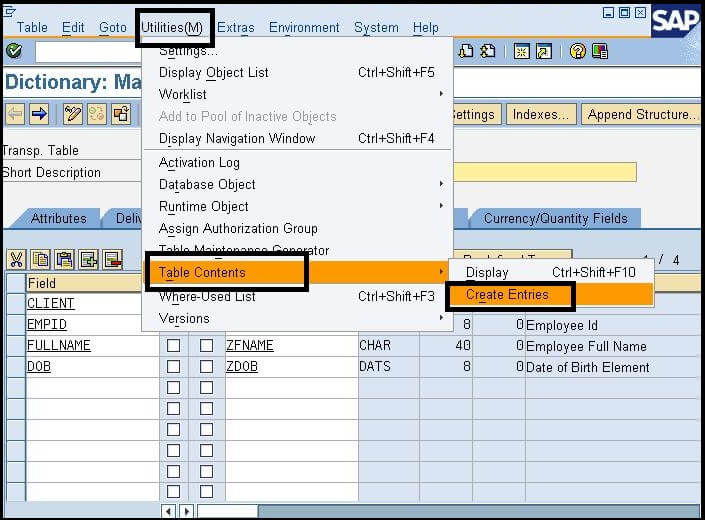
Creating Records in the Table:
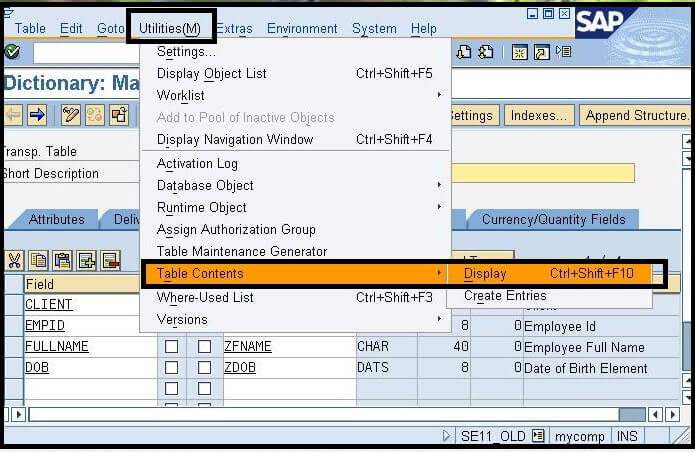
- Click on the "Utilities" →Table Contents→
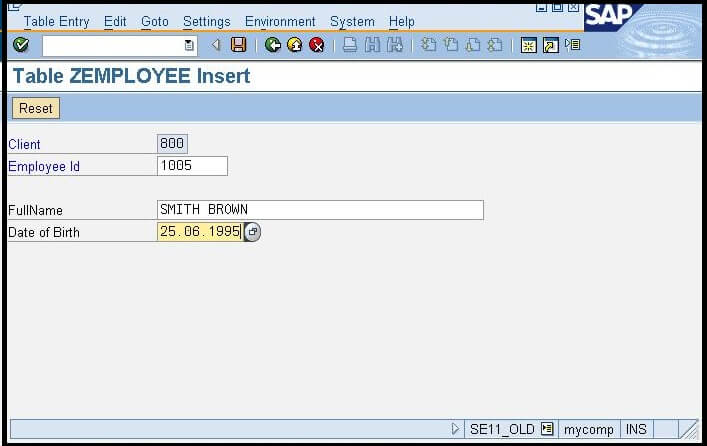
- Provide the details as per your table and click on save.
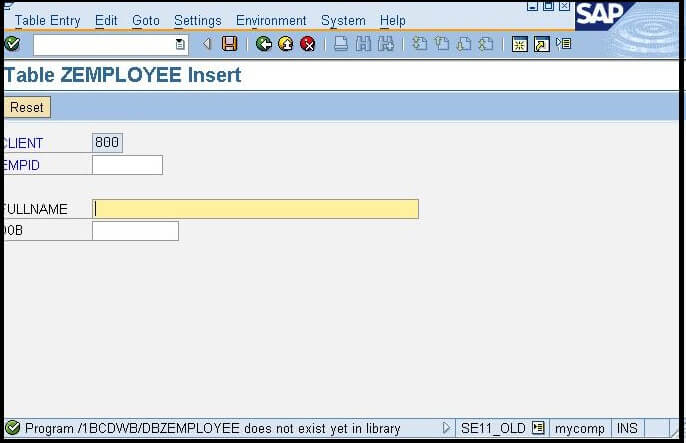
- Enter the details as much you want to save by resetting the fields.
Displaying the Records of Table
- Click on the "Utilities" →Table Contents→
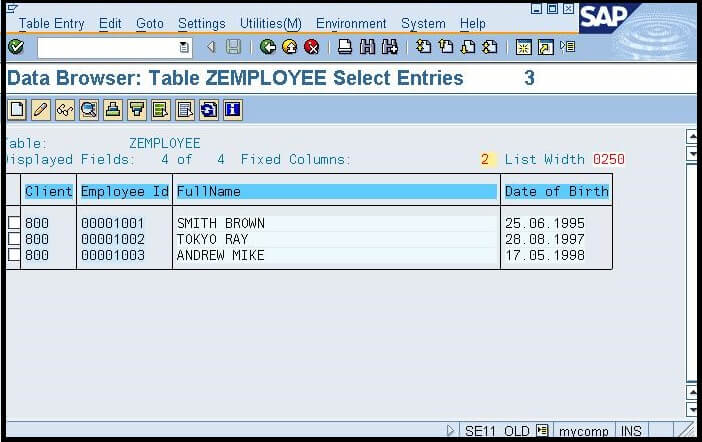
- Click on the execute button given on the screen to view all records stored within the table.
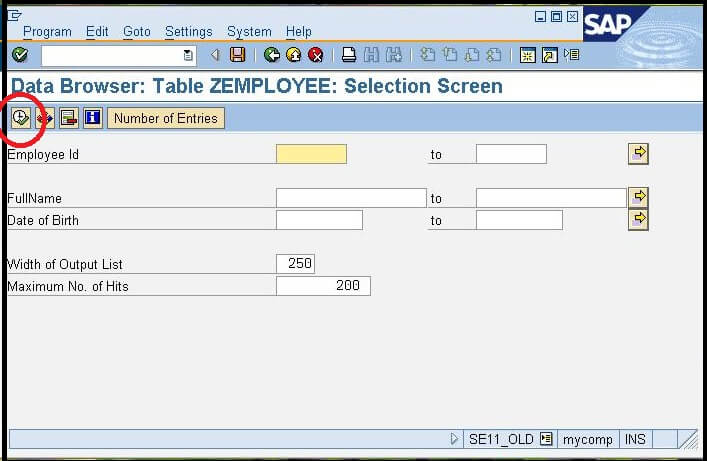
- When we click on the execute button given on the screen, it will display all the saved records in the table. We have saved 3 records in the table, which will appear as the below image:
|

 For Videos Join Our Youtube Channel: Join Now


