LINQ to SQL (DBML File)The LINQ to SQL is the component of .NET Framework version 3.5. It provides the run time infrastructure to manage the relational data as objects. It allows us to access and get the data from the SQL database with LINQ queries. It allows us to perform the select, insert, update, and delete operations on tables like SQL using the LINQ Query. In LINQ to SQL, the data model of the relational database is mapped to an object model and while executing the LINQ object model converted into SQL to get the required data from the database, while returning the data from the database, the LINQ to SQL will convert SQL results to LINQ objects model. Here is the pictorial representation of the architecture of LINQ to SQL. 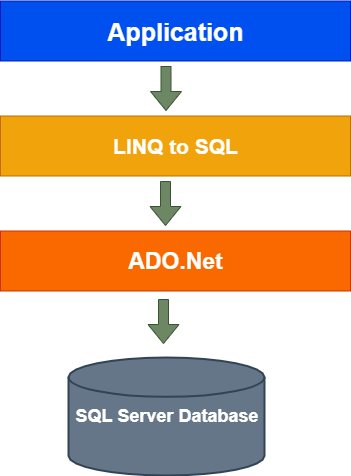
By using LINQ to SQL, we can perform multiple operations like insert, delete, and update. We can get data with minimal coding when we compared this with ADO.Net. Creation of LINQ to SQL and use in Web ApplicationHere we are taking an example of how to create and use LINQ to SQL(dbml file) in asp.net web application. Firstly we create a new application. For that open visual studio->Go to file->New->Project. 
Now we select "Asp.Net Empty Web Application," and give the project name as "LINQTOSQL" and click OK as shown below. 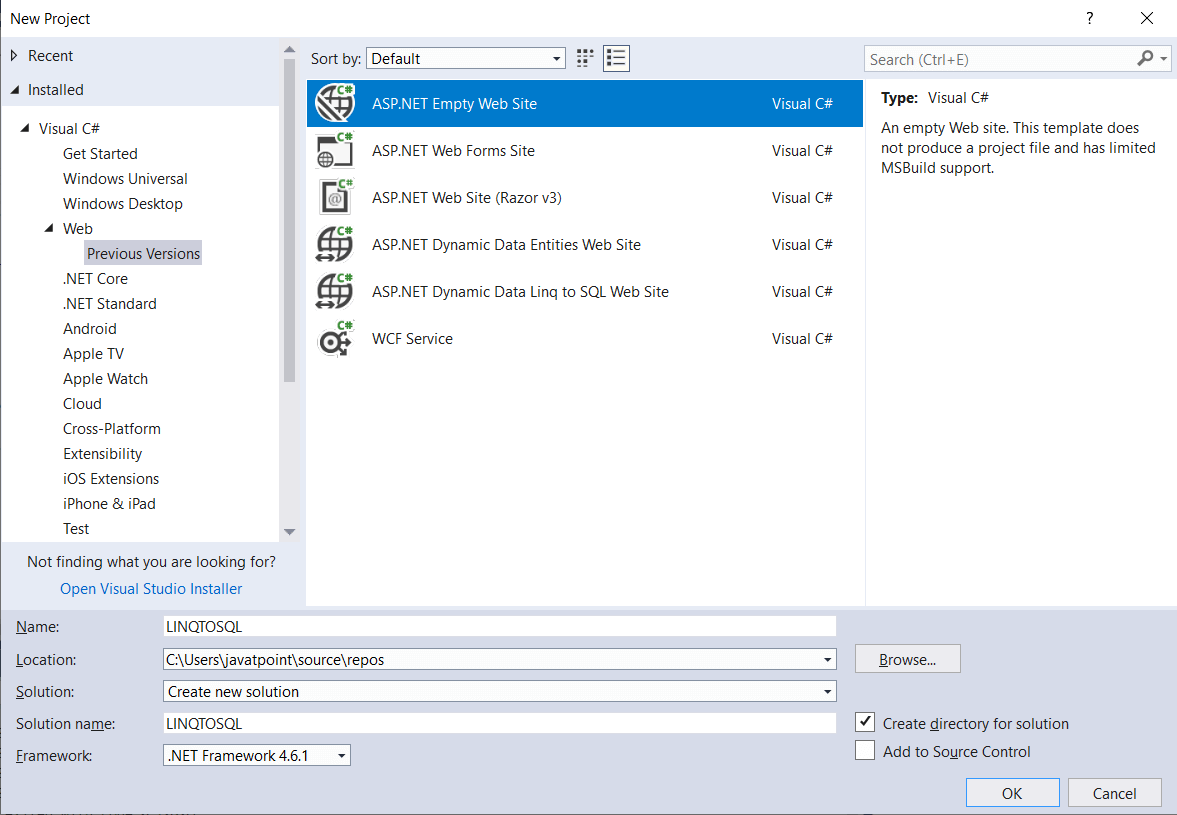
Now the project creation is complete. In our application to use the LINQ to SQL, we need to create a "DBML" file. DBML file will contain the source code, which will allow us to write LINQ queries to get the data from SQL Database. For creating the DBML file, right click on the project-> go to Add-> Select New Item-> Select template LINQ to SQL and give name as "Student" as shown below. 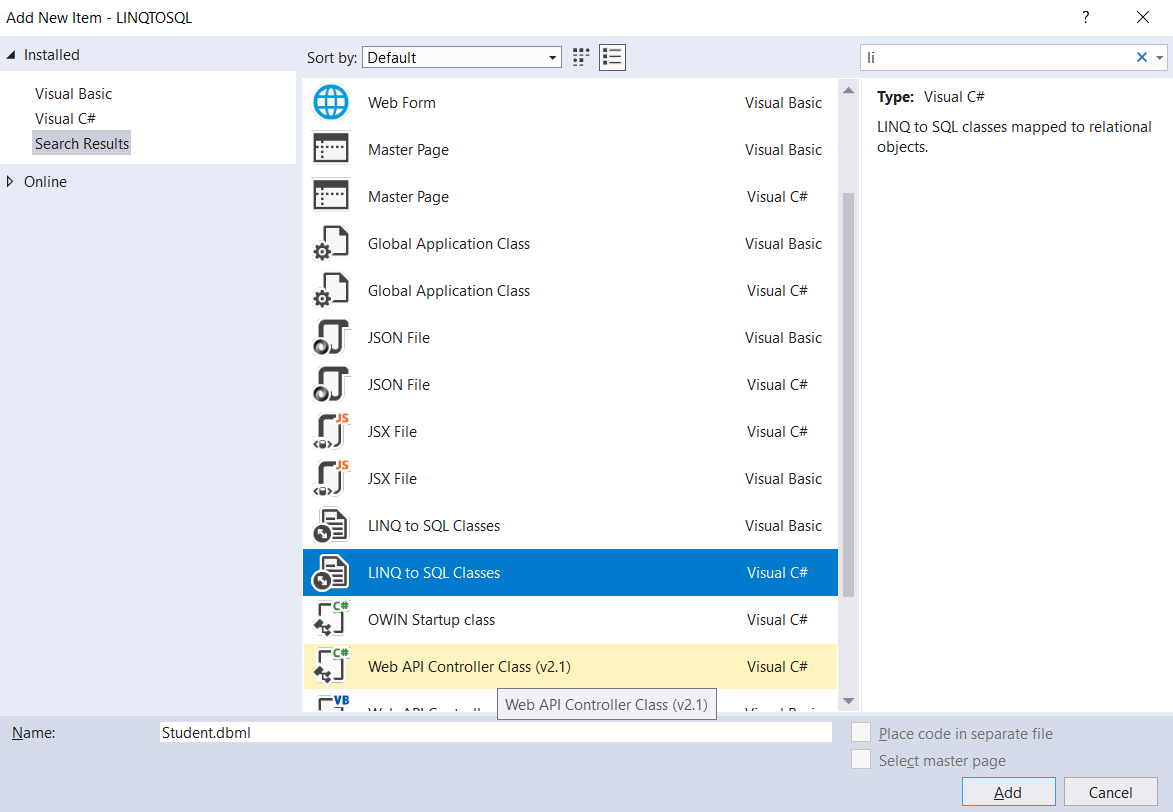
After adding the LINQ to SQL dbml file, the window will be opened as shown below: 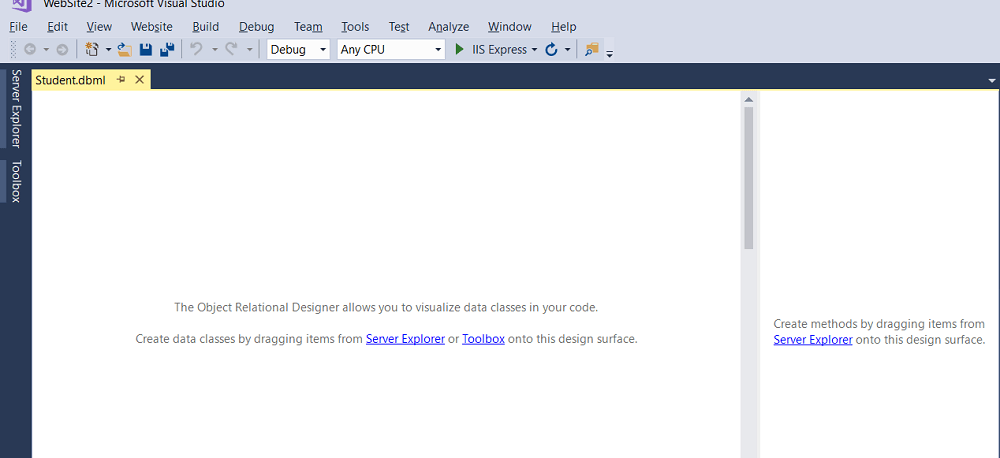
Here we observe, we have two sections in the left side section. Here we can add or create tables as objects, and on the right side, we can add required stored procedures to get the data. Now open the Server Explorer and right-click on the Data connection and select Add connection like as shown below. 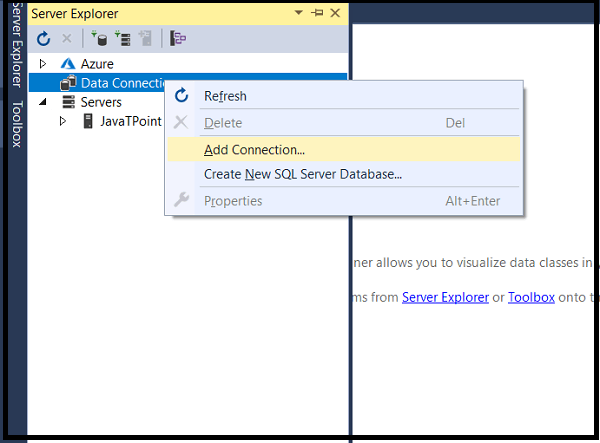
After selecting the Add Connection, a new pop up will open in that we need to Choose Data Source. Here we will connect to the existing database. That is why we select "Microsoft SQL Server" and click on continue, as shown below: 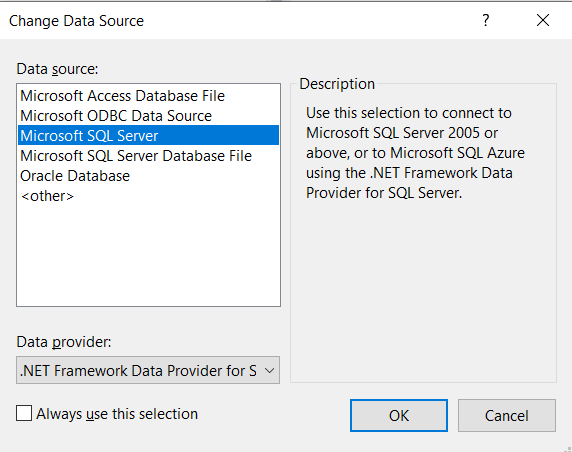
Now enter the database server detail to connect, as shown below: 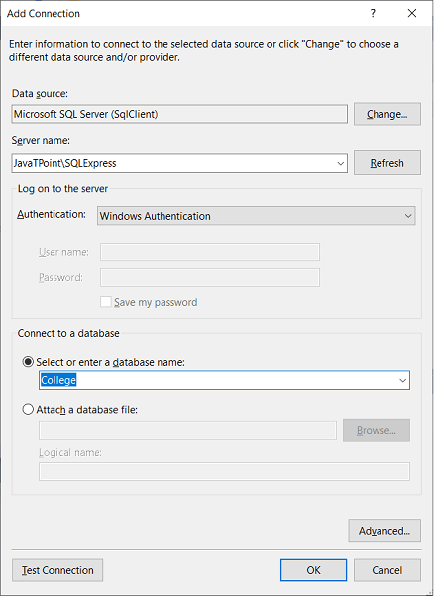
Once we entered all the details to connect the database, click the OK button. After adding the database now, we will create new table StudentData by using the following script. After creating the StudentData table in a database that would be shown as: 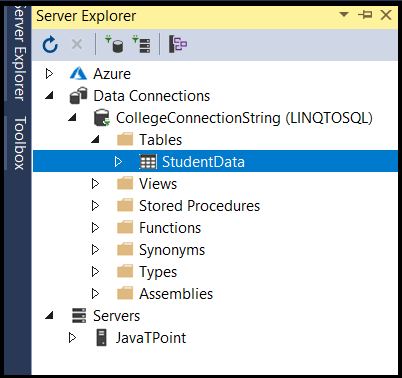
Now we will drag and drop the table in the Student.dbml file. 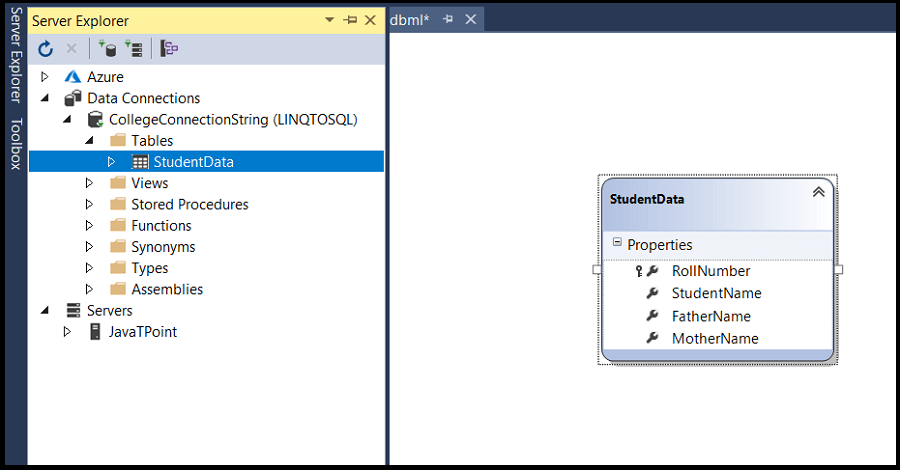
Now we will see how to use LINQ to SQL to get the StudentData in our application. For that we will right-click on the application-> select Add-> New Item-> Select Web Form-> Give name as Default.aspx and click ok button. Now we will open the Default.aspx page and write the code like as shown below. Default.aspx This is the design phase of the application. DESIGN 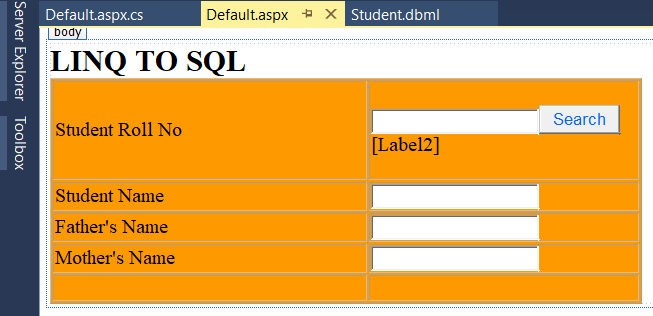
Here we will write the code for searching the information of the Student from the collected database. For the functionality of the above design, we will write the code in the Default.Aspx.cs page. Default.Aspx.cs Now we will run the code and see the output that would look like as shown below. Here is the result of LINQ to SQL example. OUTPUT 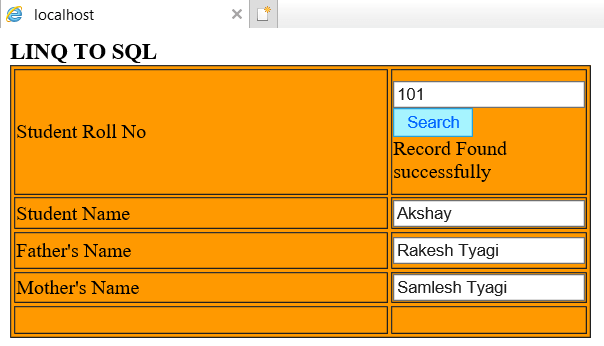
Next TopicLINQ to SQL Select Query
|
 For Videos Join Our Youtube Channel: Join Now
Feedback
- Send your Feedback to [email protected]
Help Others, Please Share


