| |

Adobe Illustrator PrintingWe should understand the basic printing principle to make an optimum decision about printing. We also need to understand the resolution and calibration of our monitor or printer. Print a composite of artwork in IllustratorThe Composite is an artwork on a single-page that corresponds to what we see in the window of Adobe Illustrator. For example - a straight forward print job. Step 1: Go to the File menu and select the print option from the drop-down menu. 
Step 2: Now, on the print dialogue box, select a printer from the printer menu, or you can choose the Adobe PDF. 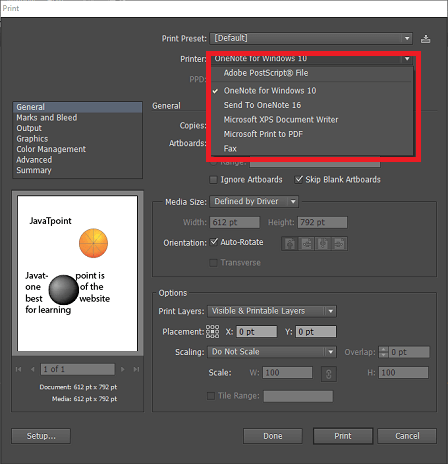
Step 3: On the left side of the print dialogue box, select Output, and make sure that mode is set to Composite. 
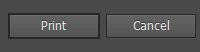
Step 4: After that, set the additional printing options. Step 5: Finally, click on Print. 
Print dialogue box options There are a number of options available in the Print dialogue box, from general to summary options. The possibilities are organized to guide you through the printing process of your document.

Printer resolution and screen frequencyThe resolution of the printer will be measured in the number of ink dots produced per inch. The resolution will be 600 dpi for most of the desktop laser printers and 1200 dpi set for the imagesetters. How to change the screen frequency and printer resolution in Illustrator Step 1: Go to the File menu and select the Print option from the drop-down list. 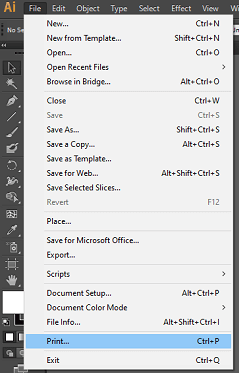
Step 2: Select a PostScript printer for printer or Adobe PDF. 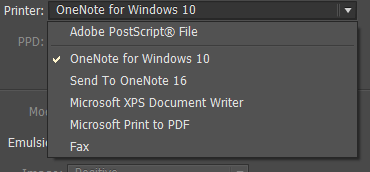
Step 3: On the left side of the Print dialogue box, select Output. 
Step 4: Select a screen frequency and printer resolution combination for Printer resolution. Printing color separationFor the reproduction of continuous-tone and colored images, usually, the printers will separate artwork into four plates, i.e., cyan, magenta, yellow, and black portions of the picture. We should perform the following tasks before we print the color separation from Illustrator:
Step 1: Go to the File menu and click the print option from the drop-down menu. Step 2: Now, select the PPD or printer file. Step 3: On the left side of the Print dialogue box, click on the Output. Step 4: Select either the separation or In-RIP separation for mode. Step 5: After that, specify an image exposer, emulsion, and printer resolution for the separations. 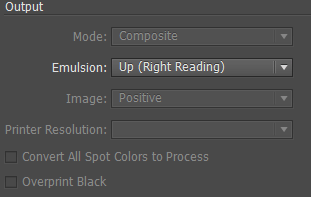
Step 6: Now, from the available options, choose the required option for the color plates you want to separate. Step 7: Finally, click on the Print button.
Print an object on all platesFollow these steps to print an object on all plates in the printing process: Step 1: Click and select the object you want to print. Step 2: Click on the Registration color swatch in the Swatches panel that is located in the first row of patterns. 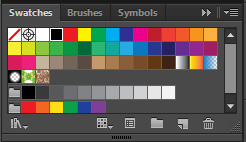
Print with color managementStep 1: Go to the File menu and select the Print from the drop-down. Step 2: On the left side of the Print dialogue box, select Color Management. 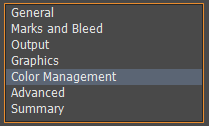
Step 3: Choose Let Illustrator Determine Colors for Color Handling. 
Step 4: Choose the profile for your output device for Printer Profile. 
Step 5: Now, click on the Setup menu at the bottom of the Print dialogue box to access the operating system print settings. 
Step 6: After that, you need to access the color management settings for the printer driver by right-clicking the printer you are using and select properties. Step 7: For the printer driver, turn-off color management. Step 8: Finally, return to the Illustrator Print dialogue box and click on the Print button. Overprinting in IllustratorThe top color in the object knocks out the area underneath when you print opaque by default. To prevent it and make the first overlapping printing ink appear as transparent, we can use overprinting. Following are the situation when we use overprint:
We should use the Overprint Preview mode after we set the overprinting option to see an approximation of printing of color. Steps to be followed to set up overprinting: Step 1: Open the artboard and select the object on which you want to apply overprint. Step 2: Now, select the Overprint Fill, Overprint Stroke, or both in the Attributes panel. How to overprint black in IllustratorFor the overprinting of black in your artwork, you need to select the Overprint Black option in the Print dialogue box when you create color separations. We can also use the command overprint black with the following steps: Step 1: Go to the artboard and select the object or objects that you want to overprint. Step 2: After you select the object, go to the edit menu, then select the edit color option from the drop-down. 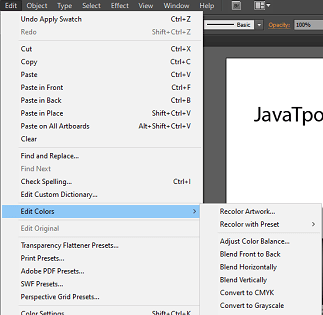
Step 3: Select the Overprint black from the submenu. 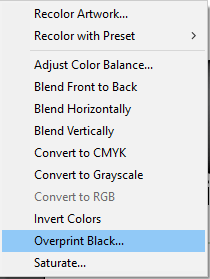
Step 4: Now, you can enter the amount of black in the percentage you want to overprint. 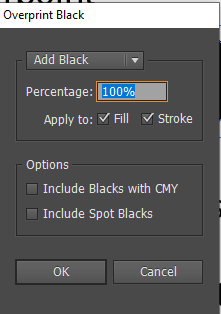
Step 5: To specify the way to apply the overprinting, select the fill, stroke, or both. 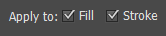
Step 6: For the overprinting of process color such as cyan, magenta, or yellow with the specified % of black, select "Include Blacks with CMY." 
Step 7: Select "Include Spot Black" to overprint the spot colors whose process includes the specified percentage of black. 
Postscript printing in Illustrator The Postscript Printer Description (PPD) file contains information about the output device. It customizes the behavior of the driver for our specific Postscript printer. Before printing, it is essential to select the correct PPD. Change the PPD file When we print to a PostScript file, PostScript printer, or PDF, then the Illustrator automatically uses the default PPD for that device. Step 1: Go to the File menu and click on Print from the drop-down menu. Step 2: Select one of the following from the PPD menu:
Crop Marks for trimming or aligning We can use multiple sets of crop marks to crop the artboard for printing within our artwork. It indicates the area of the printed paper to be cropped. It can be useful when we want to create marks around several objects on a page. Such as when we print letter cards, business cards, etc. Follow the below steps to create crop marks around an object. Step 1: Go to the artboard and select the object. Step 2: Go to the object menu and select Create Trim Marks to create editable trim marks or crop marks. 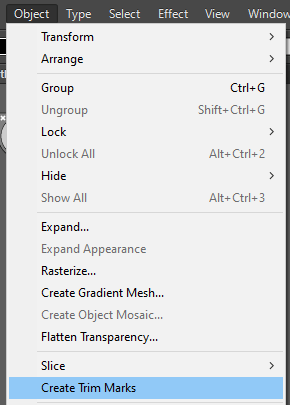
Step 3: Now, click on the Effect menu and select the crop mark from the drop-down. 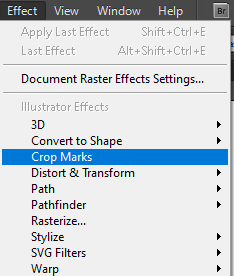
To delete the crop marks, select the trim mark and press the delete button on your keyboard. 
Printing gradients, meshes, and color blendsFollowing are the guidelines to improve the printed results because files with gradient, color blends, or meshes can be difficult for some printers to print smoothly.
Screen Frequency for printing gradients, meshes, and blends We may notice that the resolution of our printer, when combined with the chosen screen frequency, allow fewer than 256 levels of gray when printing our file. The higher the frequency, the lower the gray level available to the printer. Following is a table that lists the maximum line-screen setting we can use with our printers to maintain all 256 degrees of gray:
Printing and saving transparent Artwork in IllustratorIf you want to get an output of an object as transparent, it usually needs to undergo a process called flattening. The transparent artwork can be divided into vector-based areas and rasterized areas in the process of flattening. 
On the above image, the overlapping art is divided when flattened. Steps to set transparency flattening options for printing Step 1: Go to the File menu and click on Print from the drop-down menu. Step 2: The print dialogue box will appear, select advance on the left side of the dialogue box. Step 3: Now, click on the Custom to set specific flattening, or you can select a flattening preset from the Preset menu. Step 4: Select an option from the Overprint menu, if the artwork contains overprinted objects that interact with transparent objects.
Next TopicAutomating Tasks in Illustrator
|
 For Videos Join Our Youtube Channel: Join Now
Feedback
- Send your Feedback to [email protected]
Help Others, Please Share


