| |

Type in Adobe IllustratorCreating Text in Illustrator at a pointThe point type is a vertical or horizontal line of text that begins where we click and expands as we enter characters. Space will shrink or grow according to our edits. Step 1: Go to the Tools palette and select the Type tool or the Vertical Type tool. 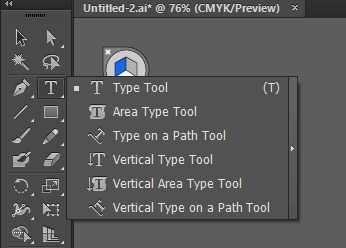
Step 2: Now, you have to set the text-formatting option in the control panel, which is optional. 
Step 3: Go to your artwork and click from where you want to begin your line. Step 4: Enter the text in the textbox and press enter to begin a new line within the same type object. 
Step 5: After you finished entering the text, click on the Selection tool Entering text in an Area typeThe area type uses the boundaries of an object to control the flow of character, either horizontally or vertically. When the entered text reaches a limit, it automatically wraps to fit inside the defined area. Step 1: First, you have to define the bounding area. Go to the Tools panel and select and drag the Type tool 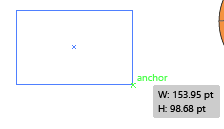
Step 2: After that, draw an object that you want to use the bounding area. Step 3: You can now set the formatting of the text, which is optional. Step 4: Now, enter the text and press Enter. 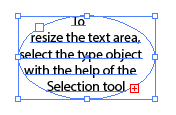
Step 5: To select the type object, click on the Selection tool Resize a text area To resize the text area, select the type object with the help of the Selection tool and then drag a handle on the bounding box with a click. 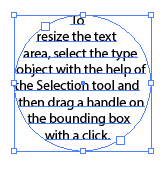
Change the margin around a text area To change the margin of the text area, Select the area type object and choose the Type in the Area type option. Click OK after specifying the value for Inset Spacing. 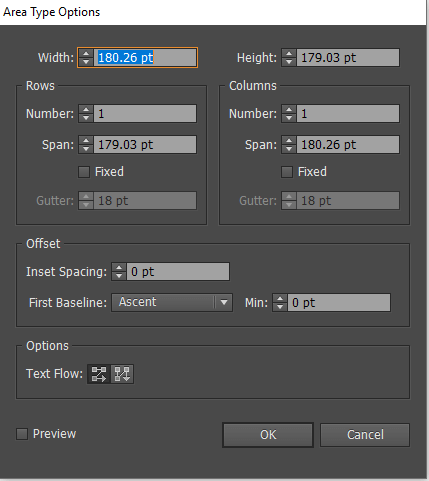
Create rows and Columns of text Step 1: Go to the artboard and select the area type object on the artboard. Step 2: Choose the Type and then select the Area Type Option. 
Step 3: Set the following option in the rows and column section of the dialogue box.
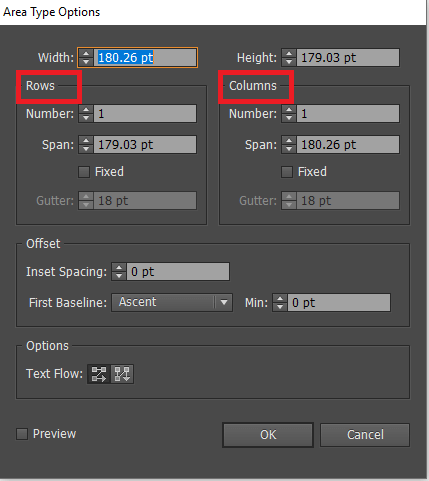
Step 4: A new option dialogue box will appear, select the Text Flow option to determine the way text flows between rows and columns. 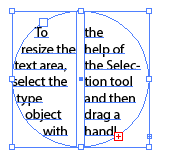
Step 5: Finally, hit the OK button. How to thread text between objects in IllustratorLinked type object can be used to tread text from one object to the other. All the area type object contains the in port and an out port that allows us to link to other objects and create a linked copy of the type object. You can see an arrow in the image below that indicates that the object is linked to another object. The out port can be indicated by a red plus sign. Step 1: Go to the Tools panel and select the selection tool to choose an area type object. Step 2: After that, click on the in-port or out-port of the selected type object. When you click on it, the pointer will change to the loaded text icon. 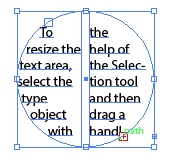
Step 3: Now, position your pointer to the type object on the artboard. Step 4: Finally, click on the path to link the objects. 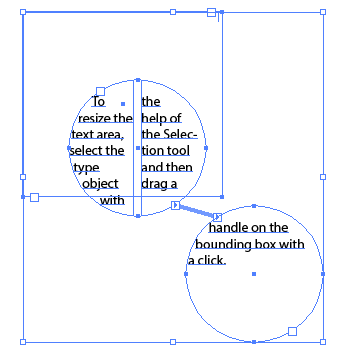
Removing threadStep 1: Open the artboard on which you want to remove the threads. Step 2: Select the linked type object on the artboard. Step 3: Double-click on the port of either end of the thread to break the thread between two objects. Step 4: If you want to remove all the threads, then choose the type object and click on the thread text. After that, click on Remove Threading. Step 5: The thread will be removed and the text stays in place. Wrap text in IllustratorWe can wrap the texts around any objects, imported image, or the objects we draw in Adobe Illustrator. Step 1: You need to make sure that these conditions are true for the object type you want to wrap:
Step 2: Select the object around which you want the text to be wrapped. Step 3: After selecting the object, click on the Text Wrap. 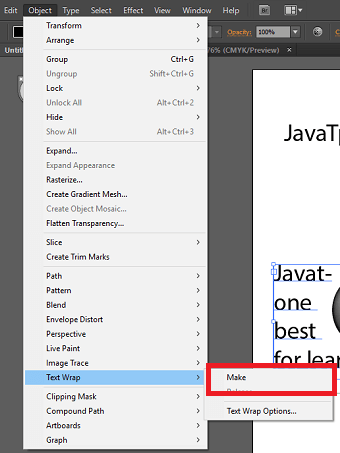
Step 4: Finally, click on Make. 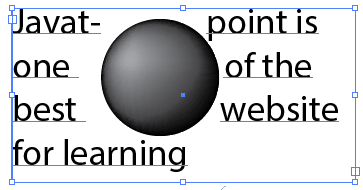
Type on a Path in IllustratorMove or flip text along a path Step 1: Open the artboard and select the type object. When you choose the object type, a bracket will appear at the beginning of the Type, at the end of the path, or the midpoint between the start and end brackets. Step 2: Now, move your pointer over the Type's center bracket until a small icon appear next to the pointer. Step 3: Drag the center bracket along the path to move text. While doing this, hold the control button to prevent the Type from flipping to the other side of the path. 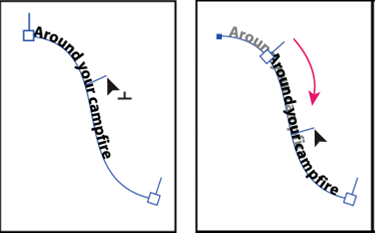
Apply path type effects in Illustrator The path type effect allows us to distort the orientation of characters on a path. Step 1: Open the artboard and create a type object and select it. 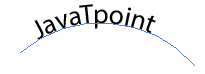
Step 2: Choose the Type, a dropdown menu wil appear. Step 3: Select Type On A Path, a sub-menu will appear. 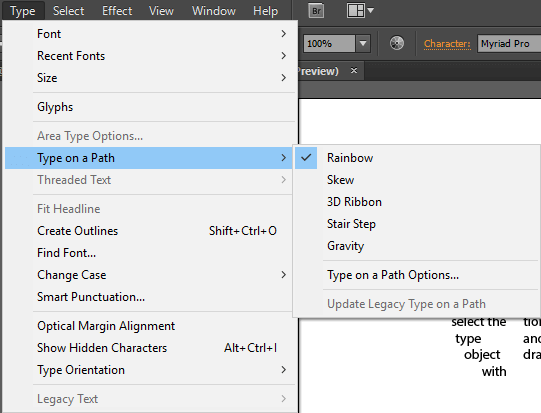
Step 4: Select an effect from the effects available in the sub-menu. 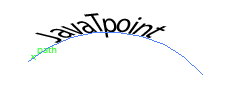
Adjusting the vertical alignment Step 1: Open the artboard and select the type object. Step 2: Choose the Type, a menu will appear. Step 3: Choose the "Type On A Path" option from the menu. Step 4: Now, select Type On A Path Option from the sub-menu. Step 5: From the options, choose one from the Align To Path menu to specify the way of aligning all the characters to the path. Following are the choices you can see:
Spelling and Language dictionariesSteps to check spelling Step 1: Go to the edit menu and click on Check Spelling. 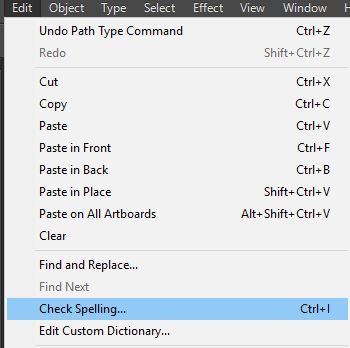
Step 2: Click the arrow icon at the bottom of the appeared dialogue box to set the option for finding and ignoring words. 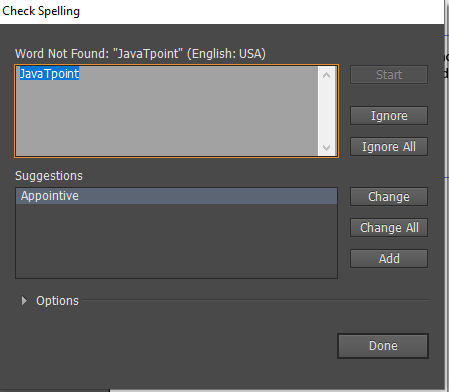
Step 3: Click on the start button to begin checking the spelling. Step 4: Click on Ignore or Ignore All to continue to spell-checking without changing any word, or you can select a word from the suggestions list. Step 5: When the Illustrator has finished the spell check, click on the Done button on the bottom of the dialogue box. FontsThe complete set of characters is known as fonts- it consists of letters, numbers, and symbols. All the characters share the common weight, width, and style, such as 13-pt Times New Roman Bold 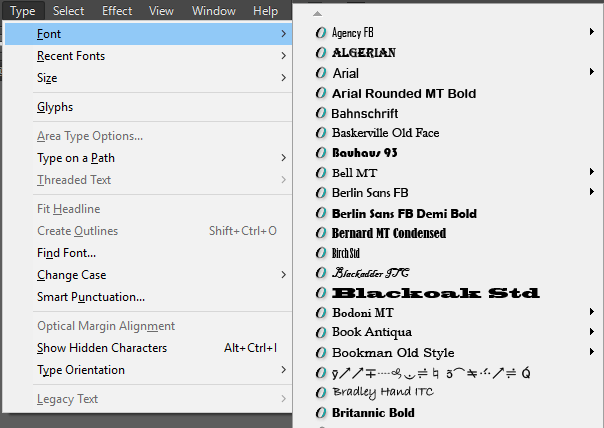
Typeface: It is the collection of fonts that are designed to use overall appearance together, such as Adobe Garamond. Typestyle: it is a variant version of an individual font in a font family, Such as a Roman or Plain member of a font family is the best font. It includes type styles such as regular, bold, semibold, italic, and bold italic. Previewing Fonts We can see the sample of the font style in the Font menu in the Character Panel. Following are the icons that are used to indicate different kinds of fonts:
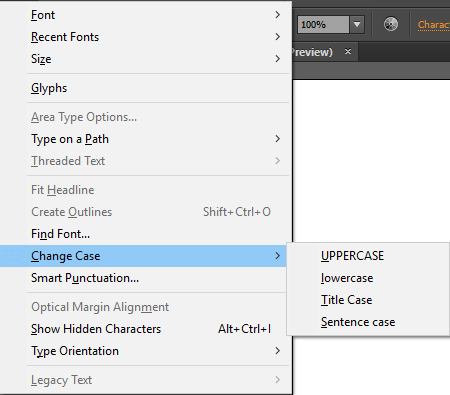
Find and replace fonts Step 1: Go to the artboard and choose the Type and then click on Find Fonts Step 2: After that, select the font that you want to find in the top section of the dialogue box. Step 3: On the appeared dialogue box, select a replacement font in the bottom section. Step 4: Click on the Change button to change only one occurrence of the selected font. Step 5: To find and replace a different font, repeat steps 2 through 4. Step 6: To close the dialogue box, click on the done button. Change capitalization styles Step 1: Select the character that you want to change the capitalization of. Step 2: After that, Go to the type menu then Change the Case submenu. Select any of the following from the appeared list.
Creating superscript or subscripts in IllustratorIt is the reduced-size text that is raised or lowered concerning a font's baseline. Adobe Illustrator applies a predefined baseline shift value and types of size when we create superscript or subscript. Step 1: To create superscript or subscripts in regular fonts, select the Type you want to change. Step 2: Choose the Superscript and subscript inside the Character panel menu. 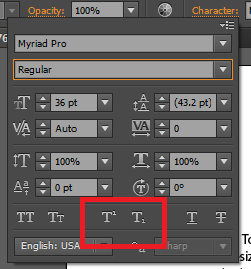
To create in OpenType fonts Step 1: Open the artboard and select the character you want to change to superscript/subscript. Step 2: After that, select the open type font from the font menu. Step 3: From the available option from the pop-up menu, choose one.
|
 in the Tools panel to select the type object.
 or the Vertical Type tool
  diagonally.
 after entering the text.
 For Videos Join Our Youtube Channel: Join Now
Feedback
- Send your Feedback to [email protected]
Help Others, Please Share


