| |

GitHub Tutorial
GitHub is an immense platform for code hosting. It supports version controlling and collaboration. It is an American company. It hosts the source code of your project in the form of different programming languages and keeps track of the various changes made by programmers. In this tutorial, we will learn GitHub essentials like a repository, branches, commits, pull requests, and more. Further, we will learn how to use GitHub and will create our first project on it. For advance, Git and GitHub, visit our latest tutorial on Git, Visit HERE. In this tutorial, we are going to cover the following topics:
What is GitHub?GitHub is an immense platform for code hosting. It supports version controlling and collaboration and allows developers to work together on projects. It offers both distributed version control and source code management (SCM) functionality of Git. It also facilitates collaboration features such as bug tracking, feature requests, task management for every project. Essential components of the GitHub are:
Advantages of GitHubGitHub can be separated as the Git and the Hub. GitHub service includes access controls as well as collaboration features like task management, repository hosting, and team management.
Features of GitHubGitHub is a place where programmers and designers work together. They collaborate, contribute, and fix bugs together. It hosts plenty of open source projects and codes of various programming languages. 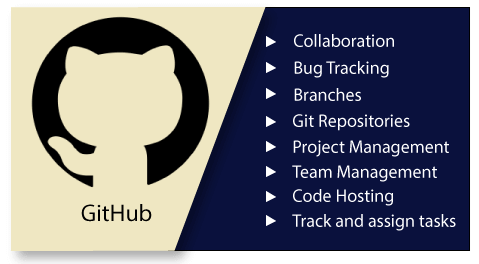
Some of its significant features are as follows.
GitHub vs. GitGit is an open-source distributed version control system that is available for everyone at zero cost. It is designed to handle minor to major projects with speed and efficiency. It is developed to co-ordinate the work among programmers. The version control allows you to track and work together with your team members at the same workspace. 
While GitHub is an immense platform for code hosting, it supports version controlling and collaboration. It allows developers to work together on projects. It offers both distributed version control and source code management (SCM) functionality of Git. It also facilitates collaboration features such as bug tracking, feature requests, task management for every project.
GitLab vs. GitHubGitLab is also a DevOps tool like GitHub. It is a Git repository hosting service. It provides issue tracking, wikis, and CI/CD Pipeline (Combined practices of continuous integration and delivery). It is open-source and free and distributed under MIT license. It is very similar to GitHub in case of functionality. It can be considered as a better choice for teamwork. 
Let's see some key differences between GitLab and GitHub.
Bitbucket Vs. GitHubBitbucket is also a web-based version control system owned by Atlassian. It contains the source code and allows us to share it among developers. It offers both free accounts and commercial accounts (paid). It provides an unlimited number of repositories for free accounts. But it has some limitations for the free accounts like a private repository can have a maximum of five users. Bitbucket was launched in 2008 to support Mercurial Projects. Atlassian acquired it in 2010, and from 2011 it also started to support Git. 
It is much similar to GitHub. However, no one can be considered the best. Every service has a different feel to them, and it targets different demographics no matter where you're going to get excellent service and get your work done. Let's see the similarities and differences between Bitbucket and GitHub.
GitHub EducationGitHub education offers free access to various developer tools with GitHub partners. It provides real-world experience. We can create a project in our college days on GitHub and show creativity to the world. We can collaborate with public repositories of other companies and impress them. There are many communities that are already partners with the GitHub. GitHub organizes campus programs for the school. See the eligibility and how to apply for the campus program, visit GitHub Schools. A student can apply for the GitHub Student Developer Pack. GitHub student developer pack offers free access to tools and services used by professional developers. Let's understand the student developer pack. What is the GitHub Student Developer Pack?The GitHub student developer pack is one of the best resources to start as a developer. A student can apply for the GitHub Student Developer Pack. It offers benefits from GitHub partners. It also provides free access for the GitHub pro account as well as 20 developer's tools and courses. Eligibility for GitHub Student developer packFollowing are some eligibility criteria to apply for the GitHub student developer:
How to apply for the GitHub Student Developer pack?Below are the steps to apply for GitHub student developer pack: Step1: Visit GitHub Education and click in the top right option Get Benefit. 
Step2: Under getting benefit option, describe yourself whether you are a student or faculty. 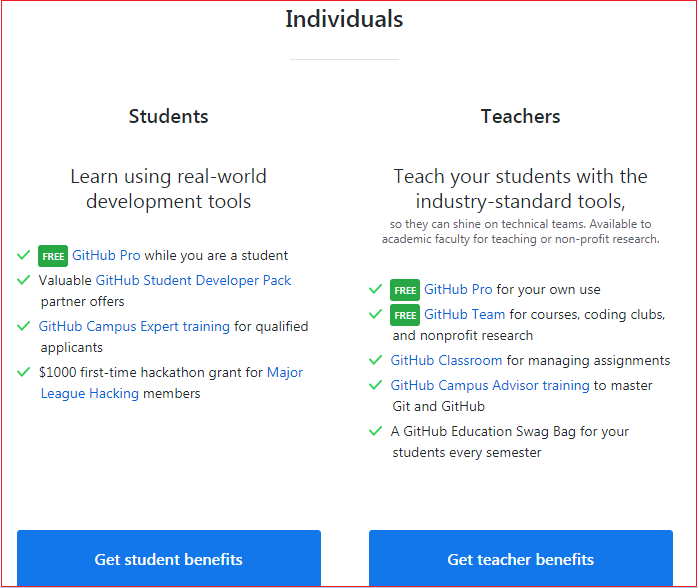
Step3: Add your academic email address. The next will prompt for an academic proof. Step4: Upload academic proof. You can capture an image from your device in place of uploading it. Place your valid academic ID or any other proof of current academic status in the frame, then click Take photo. Step5: Enter your details like your name and fill the description of what's your plan for using GitHub. Step6: Verify application details, then click on Submit option. If your application is approved, you will be notified by a confirmation email. It will be processed within a few days. How to Use GitHub?This question is prevalent for the developers who have never used GitHub. This tutorial will assist you in overcoming this question. There is nothing to worry about, the necessary steps for the using GitHub are as follows:
Create a GitHub AccountThe first step to explore the benefits of GitHub is to create a GitHub account. GitHub provides both the free and pro membership to its user. We can explore many exciting and useful things in its pro account. We can explore unlimited private repository and can control the user access. To create a GitHub account, visit GitHub. Click on the Signup option at the upper right corner. 
Fill the necessary details under sign up like your name, email address, and password. Then click on the Next: Select a plan option. 
Under the above option, you will see the plan. Select your plan, whether you want to be a pro member, or would like to continue with a free account. 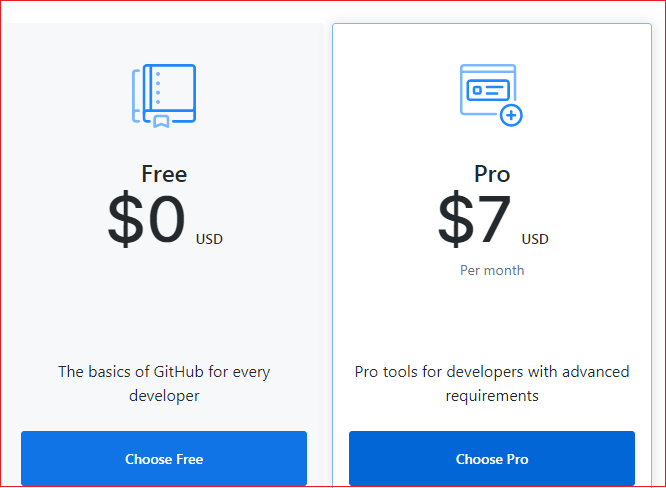
After selecting a plan, a confirmation link will send to your email address. Activate your account by clicking on the received link, and you are ready to go with GitHub. GitHub LoginLog in to your GitHub account to use the GitHub service. To login to your account, click on the Sign-in option on the upper right corner. It will ask you for your email id and password. You can log in by entering your credentials. At your first login, the homepage will ask you to create your first repository and some other options like exploring the repository. GitHub RepositoryThe repositories are the data structures used by GitHub to store metadata for files and directories. It encloses the collection of the files as well as the history of changes made to those files. Generally, the repository is considered a project folder. A single project can have more than one repository. Create a repositoryWe can create an unlimited public repository and unlimited private repository (For the pro user) on GitHub. To create a repository on GitHub, click on the '+' symbol on the upper right corner on the login screen. 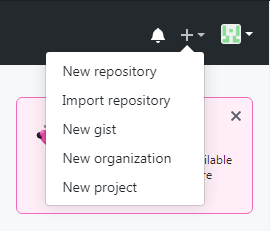
There are some other options available like import repository, gist, organization, and new project. To create a repository, choose New repository option from the given list. When you first log in to your account, you will see the UI as follows: 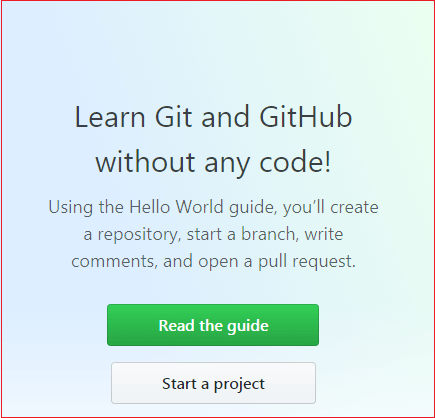
GitHub asks you to learn Git and GitHub without any code. It will ask you to read the hello world guide for the first uses. Also, you can create a repository (Project) from here. Click on the new repository option and then fill the required details like repository name, description, and select the access of this repository. You can also initialize the repository with a README file. After filling all the details, click on the Create Repository option. It will create a repository for you. Consider the below image: 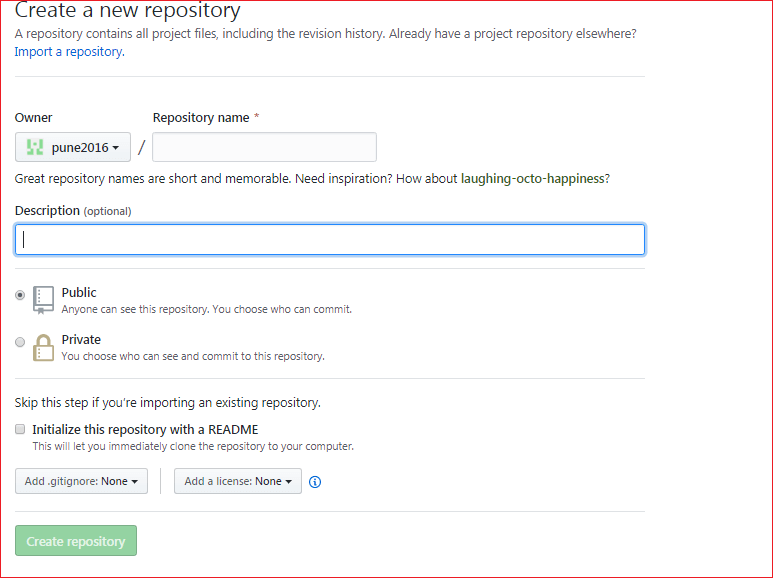
Hence, we have created a public repository. How to create a private repository? We can set up a repository as private during initialization and make and manage the accessibility of the repository. The private repository feature is only allowed to pro members. Pro members can create unlimited repositories and set access for them. If we are on GitHub free account and want to change a repository's visibility from public to private, we will lose access to features like protected branches and GitHub Pages. The GitHub pages site automatically removed from our account. Hence we have created a repository and set its access. Now, we are all set to create our first file. Let's create a file: Create a fileIn GitHub, creating a file is a straight forward process. Let's create a file in our newly created repository. Consider the below snap of our repository: 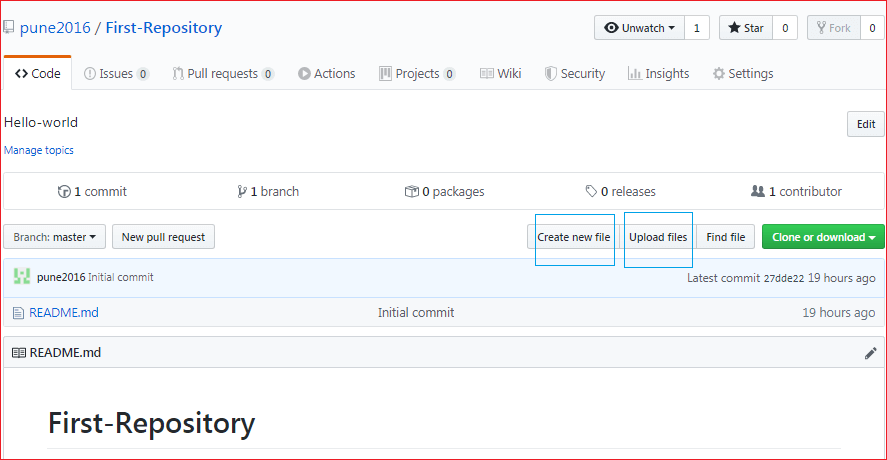
There are distinct options available to add files to the repository. GitHub allows us to design and upload files. To create a file, click on the 'Create new file' option. It will open a file structure, and it will look like as follows: 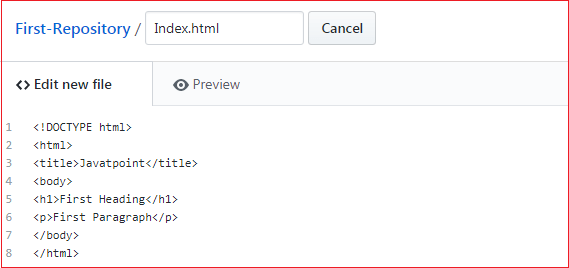
Enter the file name on the box and type the code on the editor area. At the bottom of the page, the commit options are available. Consider the below snap: 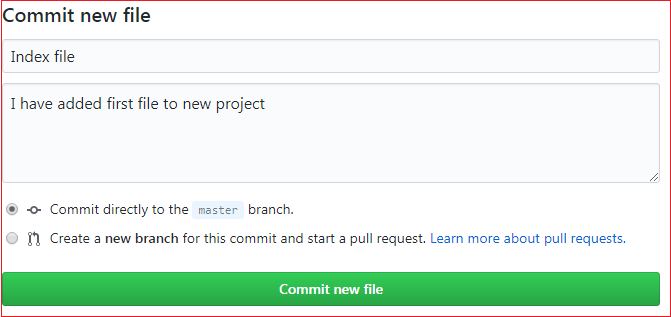
In the above image, we can give the commit message in the first text area and the description in the second text area. Also, we can specify whether we want to commit it to the master branch or want to create a new branch. Click on the 'commit new file' option. We have successfully added and committed a new file to our repository. We can edit and delete this file from our project. There are many options available, like edit, delete, Raw, Blame, and history. Consider the below snap of the file. 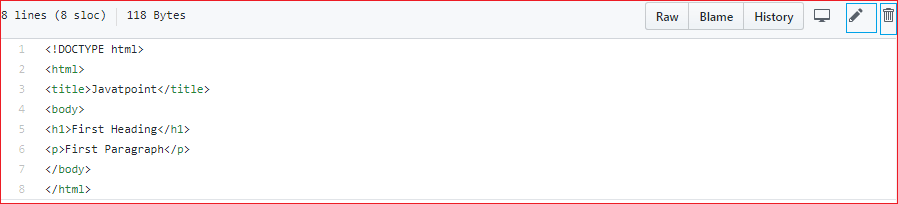
Hence we have learned how to create a file and commit changes. Now we will see how to create a new branch. How to create a new branch?Branches are the pointer to snapshots of changes. Branches are created for a particular purpose like fixing a bug, testing, release, and more. To understand the types of branches, visit Git Flow. It is complex to merge the unstable code with the main code base and also facilitates you to clean up your future history before merging with the main branch. The master branch is the default branch of the repository. Let's understand how to create a branch in GitHub. To create a new 'feature' branch, drag the branch option under the repository. This option will list the available branches. A search option is available under the branch. It will search for the requested branch if it is not in the repository, then it will create a new branch by the given name. Consider the below image: 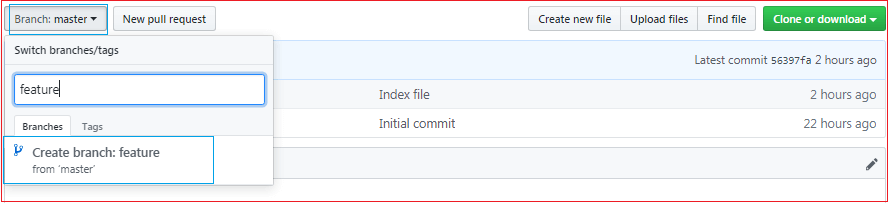
Also, we can create the branch when we add a file or make some commit. It asks to commit the changes in the existing branch or create a new one. To learn more about branches, visit Git Branch. Connect GitHub with your computerGitHub DownloadWe can connect the GitHub with our computer. GitHub allows downloading its desktop application. Also, we can connect the GitHub repository with our computer by Git. There are different kinds of audiences, some people love Git commands, and some love the attractive user interface for their work. The people who love the user interface, the GitHub desktop application is one of the best Git clients for them. Let's see some of its features. Features of GitHub DesktopThe desktop application of GitHub has incredible features that make collaboration easy for the contributor. Some of its attractive features are as follows:
Let's understand how to install it on your system. GitHub Desktop for WindowsTo setup GitHub Desktop, we must already have a GitHub account. It is a fast and straight forward way to contribute to GitHub. It is developed to make straight-forward all the processes of GitHub. GitHub Desktop is an open-source that can be downloaded. If we talk about its technical specification, it is written in Typescript and uses react. It is available for Microsoft Windows or macOS operating systems. Below are the steps to install the GitHub desktop: Step1: Visit https://desktop.github.com for Github desktop. To download the setup, click on the 'Download for Windows (64bit)' option. Consider the below image: 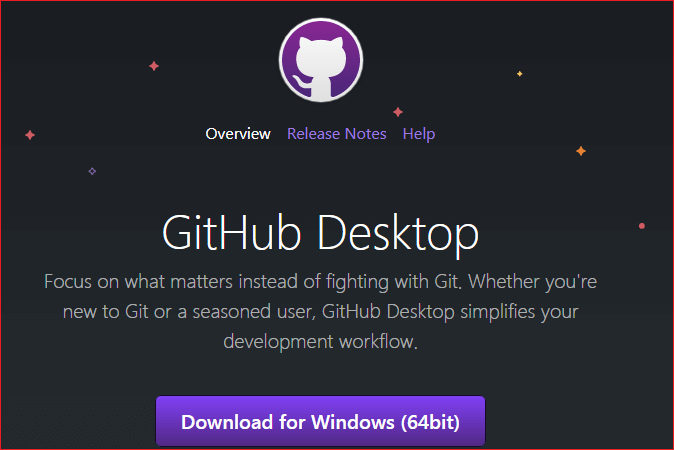
Step2: Installation: Install the GitHub desktop application by running the installer file. There we can see options like create an account, sign in. However, we can skip this step. It looks like as follows: 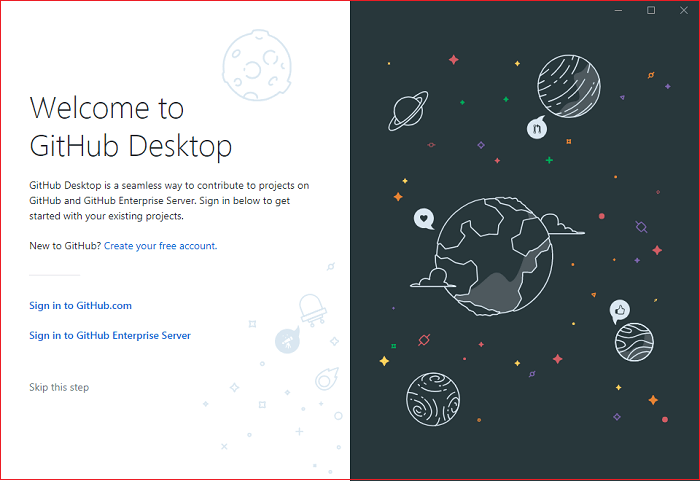
Step3: Setting up the desktop application: The next step after installing the GitHub is to customize it. However, we can skip this step. Sign in to your GitHub account. The configuration will look like as follows: 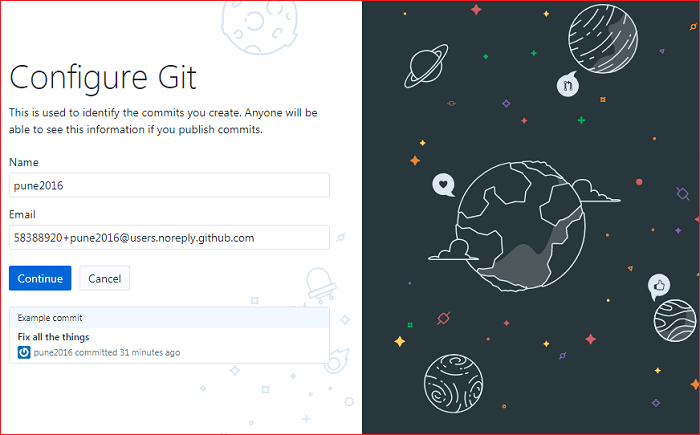
Now we are all set to go with Desktop application of GitHub. The UI of the GitHub desktop will look like as follows: 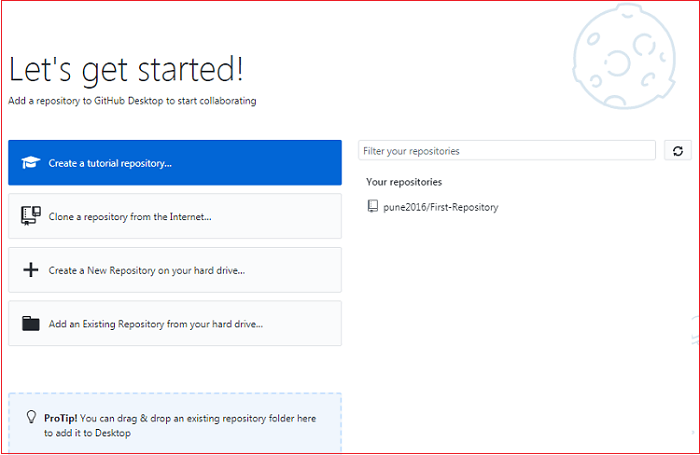
We can create, clone, or upload a repository to our project with GitHub desktop. It also lists your existing GitHub repositories. How to clone (copy) GitHub repository to our PCThere are many ways to copy a GitHub project. We can make a copy of a GitHub project on our local machine. To do so either, we can use the GitHub desktop application or Git Bash. Since here we are talking about GitHub so let's see how to copy by GitHub desktop application. To copy from GitHub desktop application, follow the below steps: Step1: Open the GitHub desktop Open the application, if you have not logged in yet, log in to the application by using your account credential. Select the option 'clone a repository from the internet.' Consider the below image: 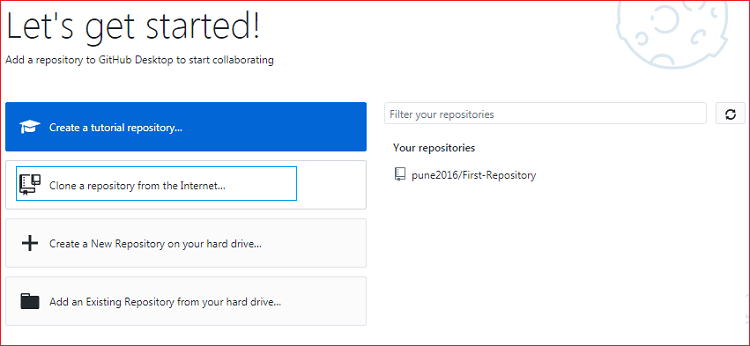
Step2: Select the repository After selecting the clone option, it will list all the available repository on your GitHub account. Consider the below output: 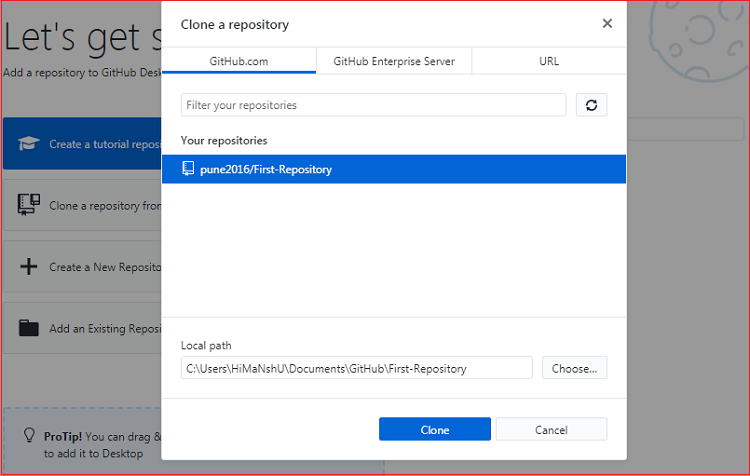
Step3: Clone the Repository Select your desired directory which you want to clone and click on the clone option. It will start copying the project. Consider the below image: 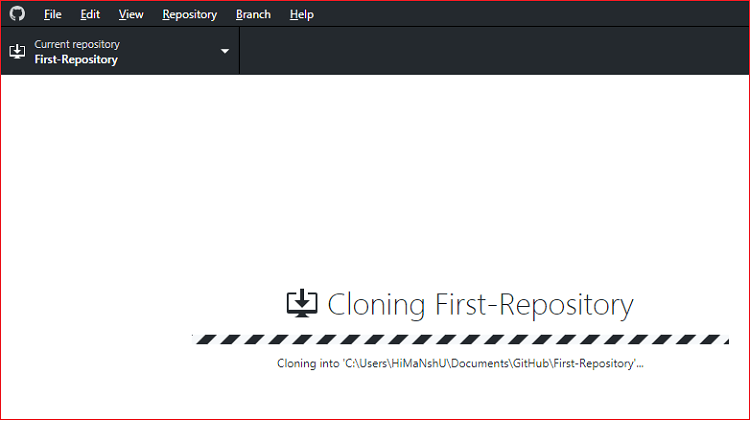
It will take a while to copy the project. To clone a repository by Git Bash, run the clone command as follows: How to pull from GitHubWe need to pull the data from GitHub to keep the local repository updated with the GitHub repository. Suppose any team member made or propose changes for our project. If you want to merge with your local directory, make a pull. We can pull the updates from the GitHub project by GitHub desktop and Git Bash. To pull the changes by GitHub desktop, navigate to the repository menu, and select the pull option. 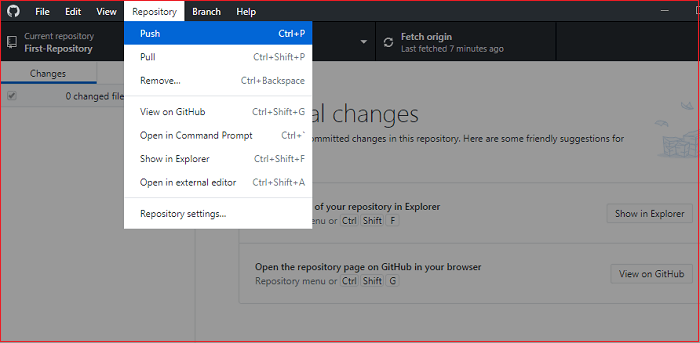
It will pull the GitHub repository. To pull the repository by the Git Bash, run the below command: What is GitHub pull request?Pull request is a process for a developer to notify team members that they have completed a feature. Once their feature branch is ready, the developer files a pull request via their remote server account. Pull request announces all the team members that they need to review the code and merge it into the master branch. How to commit and push to GitHubPushing is the act of transferring the local changes to GitHub. Suppose we made some changes to your local repository and share it on GitHub. To do so, we can push the changes. We can commit changes from our GitHub desktop application as well as Git Bash. To commit the changes from the GitHub desktop application, follow the below steps: Step1: Open the file explorer Open the file explorer from GitHub desktop. To open the file explorer, either press the 'Ctrl +Shift +F' keys together, or we can select it from the menu. Step2: Made the changes Now, you are in the file explorer made the desired changes. In our case, we have created a file new_file.txt. Step3: Commit the changes It is necessary to commit the changes to share it on GitHub. To commit the changes, open GitHub desktop; here, we can see the changes that we made. Consider the below image: 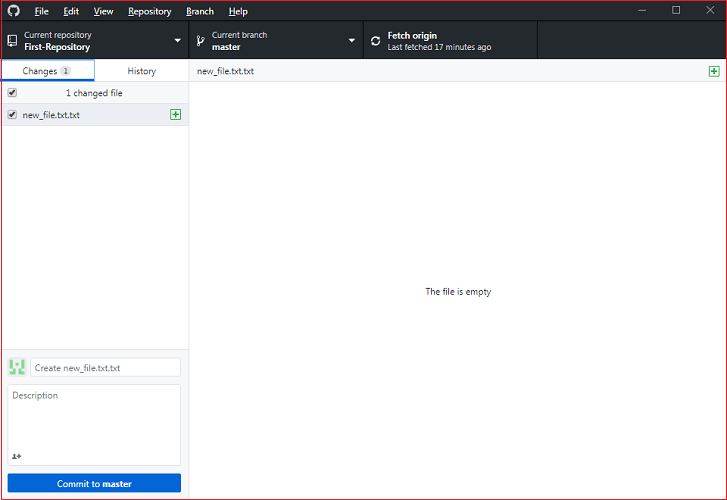
To commit the changes, type commit message, and description. After that, click on the commit option as displayed on the above image. Now, you have successfully made a commit. The next step is to push it to GitHub account. Step4: Push the changes to GitHub account The change that we have made is now ready to be pushed on GitHub account. The GitHub desktop application starts displaying a notification like a commit is ready to be pushed. Consider the below image: 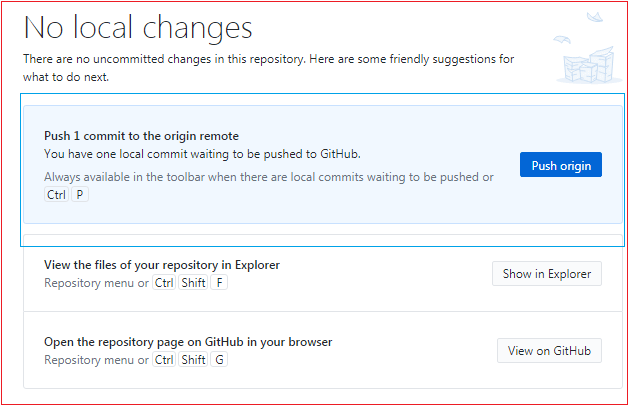
We can use the 'Ctrl + P' keys or 'push origin' option to push the changes to the GitHub repository. Now, we have these changes in our GitHub repository. To push the changes by Git Bash, run the below command: GitHub forkA fork is a rough copy of a repository. Forking a repository allows you to freely test and debug the changes without affecting the original project. One of the excessive use of forking is to propose changes for bug fixing. To resolve an issue for a bug that you found, you can:
When to Use Git ForkGenerally, forking a repository allows us to experiment on the project without affecting the original project. Following are the reasons for forking the repository:
How to fork a repository?The forking and branching are excellent ways to contribute to an open-source project. These two features of Git allows the enhanced collaboration on the projects. Forking is a safe way to contribute. It allows us to make a rough copy of the project. We can freely experiment on the project. After the final version of the project, we can create a pull request for merging. It is a straight-forward process. Steps for forking the repository are as follows:
We can't fork our own repository. Only shared repositories can be a fork. GitHub pages siteWe can use GitHub pages to host a website. It can be managed directly from the GitHub repository. Generally, GitHub Pages are static site hosting service. It takes the HTML, CSS, JavaScript files directly from the repository and runs the files through a predefined build process, and create a website. GitHub pages are available for all accounts like free, pro, cloud, cloud server, and enterprise accounts. The domain for the pages is pages.github.com. Types of GitHub pages sitesThere are three types of GitHub Pages sites, and they are as follows: Project: These sites are connected to a specific project on GitHub, like JavaScript libraries or Java frameworks. User: The user sites are concerned with a specific user account. These sites published from the repository named < user>.github.io unless you are using a customized domain. Organization: The organization sites are concerned with a specific organization. These sites published from the repository named <organization>.github.io unless you are using a customized domain. GitHub GistsThe gists are used to share file(s), and complete application with others. Directories can't be shared by gists. We can access our gists http(s)://[hostname]/gist, or http(s)://gist.[hostname] if subdomains are enabled. The gists are like a repository so that it can be forked and cloned. There are two types of gists:
How to create a gist?We can create public and secret both types of gist. To share the idea with the world, create public gist. To create a gist, visit GitHub gist. Click on the '+' icon on the upper right corner. Consider the below image: 
After clicking on the create gist icon, fill the desired gist name, description, and accessibility. Consider the below image: 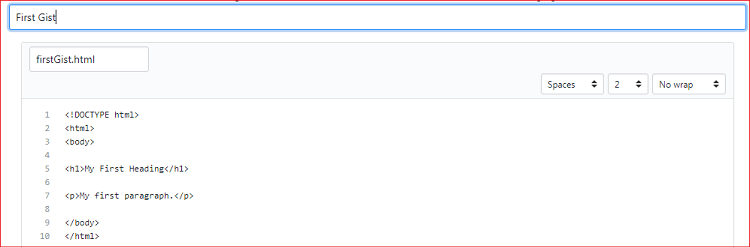
Provide gist description, name, and code in their specific area. After that, select how you want to create a gist. There are two options for creating gist one is 'create secret gist,' and the other is 'create public gist.' Consider the below image: 
Hence we have created our first gist. Also, we can explore the public gist on GitHub. GitHub MarkdownMarkdown is a technique to make the text remarkable and classy on GitHub. We can manage the text style on the web. Also, we can set the formats of words like bold or italic. We can also add images and create a list by the GitHub markdown. The places where the markdown can be used;
PrerequisiteGitHub is not a programming language, so you don't need to much worry about essential knowledge. You should be familiar with modern tools. AudienceOur GitHub tutorial is designed to help beginners and professionals. ProblemWe assure you that you will not find any issue with this GitHub tutorial. But if there is any mistake or error, please post the error in the contact form. |
 For Videos Join Our Youtube Channel: Join Now
Feedback
- Send your Feedback to [email protected]
Help Others, Please Share


