| |

How to Install Java on MacOSIntroductionJava is the most widely used general purpose, secured, robust, object-oriented language which was developed by Sun Microsystems in 1990. Java is portable which means it follows write once run anywhere paradigm. The latest version is java9 which was released on September 21,2017. In this tutorial, we will learn the installation process of Java on MacOS. Prerequisites
InstallationThere are the following steps used to install Java on MacOS. 1) Download The latest version We can visit the official website of oracle by simply pasting the link in the browser's search bar: http://www.oracle.com/technetwork/java/javase/downloads/jdk9-downloads-3848520.html and download the disk image file for MAC Operating System. 2) Mount the dmg file The downloaded file is in .dmg format that is disk image file. On Mac Operating system, we can't install the dmg files by using installer command. Installer command is used with the files that are in package format. To get the file in the desired format, we need to mount the file by using following command. 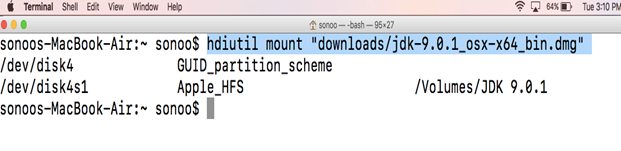
Hdiutil command is used with the option -mount to get the disk image file mounted. When we run this command, we'll get a mounted file with the same name but in the .pkg format. This file is located inside Volumes directory. 3) Install the Package Installer command is used to install the package. This can be done as shown below. 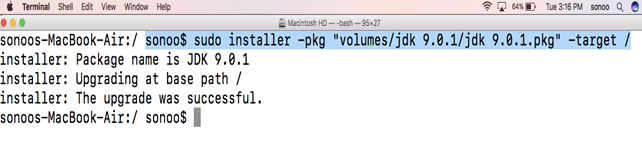
This command is used with the target option which represents the location where the package is to be installed. In this case, we are installing the package in the root directory. To run the installer command, we must have the super user privileges. For that purpose, sudo is used which prompts the user to fill the admin password. The command installs brand new Java 9 on our MacOS. 4) Checking java version To confirm, whether java is installed on the computer or not, we may use the java -version command as shown below. 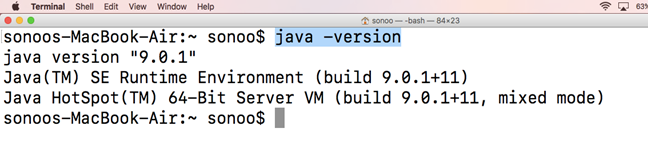
5) Unmount the Disk Image File Hdiutil command with unmount option is used to unmount the disk image file. Unmounting frees the volume which was used to store the package when we were installing the package. Now if we search for the pkg file in the Volumes directory then we are not going to find it. Extra InfoTo use the java complier, we can simply type javac in the terminal. To Execute the java files, we can use java tool by simply typing, java <file-name> . This is how, we can use java on MacOS installing through terminal.
Next TopicHow to Install Python on Mac
|
 For Videos Join Our Youtube Channel: Join Now
Feedback
- Send your Feedback to [email protected]
Help Others, Please Share


