| |

How to Install Node.js on MacOSIntroductionNode.js is an open source, cross platform, JavaScript runtime platform which enables JavaScript to be used for server-side scripting. Although .js is the extension to a JavaScript file but it doesn't represent any file of the framework. Now it has become foundational element of "JavaScript everywhere" paradigm. In this tutorial, we will learn the steps involved in the installation process of Node.js on MacOS. Prerequisites
InstallationThis includes the following steps. 1) Update repository index of Homebrew package installer Repository index of homebrew package installer needs to be updated first. It can be done with the help of following command: 2) Install Node.js After updating the repository index of homebrew package installer, we need to install Node.js using the following command: This installs Node.js inside the Celllar directory of /usr/local/. 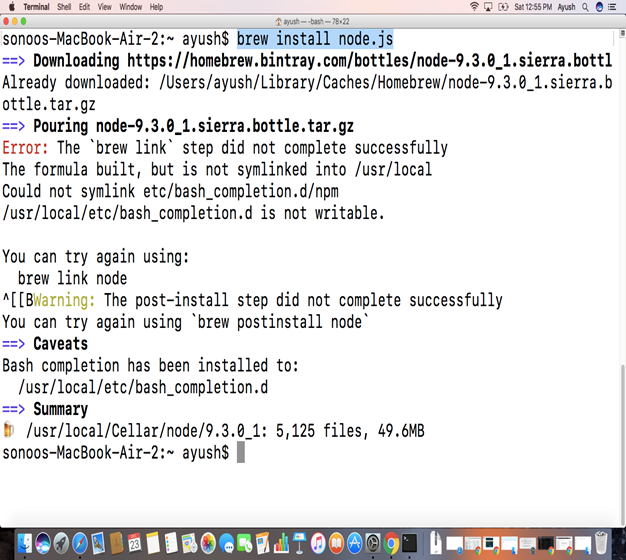
To verify that we have installed the desired version of Node.js, we can run the command node -v. It will show the version installed on our MacOS. 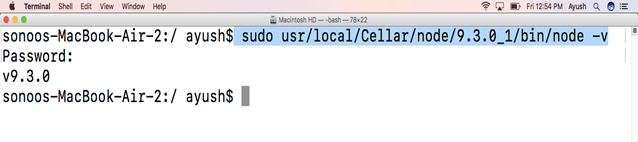
To run node.js on MacOS, just execute the node command. It will provide the development environment in which we can run the JavaScript code. 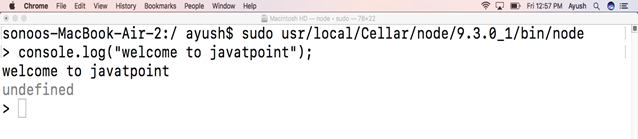
Well, we have successfully installed Node.js on MacOS.
Next TopicHow to Install Drupal on Mac
|
 For Videos Join Our Youtube Channel: Join Now
Feedback
- Send your Feedback to [email protected]
Help Others, Please Share


