Internationalization of RESTful ServicesIn this section, we will discuss the Internationalization of the RESTful Web Services. InternationalizationInternationalization is the process of designing web applications or services in such a way that it can provide support for various countries, various languages automatically without making the changes in the application. It is also known as I18N because the word internationalization has total 18 characters starting from I to N. Localization is performed by adding locale-specific components such as translated text, data describing locale-specific behavior, etc. It supports full integration into the classes and packages that provide language-or-culture-dependent functionality. Java provides the foundation for internationalization for desktop and server applications. There are following important internationalized areas of functionality.
We need to configure two things to make the service internationalized.
Default Locale is Locale.US. If somebody does not specify the location, it returns the default locale. We also need to customize the ResourceBundle. It has a list of properties that are to be internationalized. We will store the properties in ResourceBundle. ResourceBundleMessageSource is a Spring MVC concept for handling properties. After that, we will use MessageSource, and a header called Accept-Language. Let's configure the internationalization. Step 1: Open RestfulWebServicesApplication.java file. Step 2: Configure a Bean for default locale. Note: Import import org.springframework.web.servlet.LocaleResolver package while importing LocaleResolver.Step 3: Now, we will store properties in a specific file called messages.properties. Right-click on src/main/resources folder -> New -> File -> Provide the file name: messages.properties. It contains the default locale message. messages.properties Step 4: Create another property file with the name messages_fr.properties for French locale. It contains a message for the French locale. messages_fr.properties Step 5: Read properties and customize them based on the input accept header. Open the RestfulWebServicesApplication.java and configure another Bean for ResourceBundle. RestfulWebServicesApplication.java Step 6: Update the service to use these sources. Open the HelloWorldController.java and autowired the MessageSource. HelloWorldController.java Step 7: Open the REST client Postman and perform the following changes:


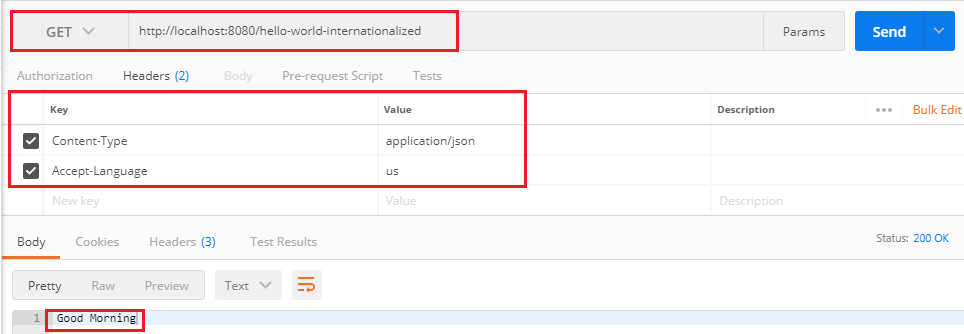
It returns the US locale message Good Morning. Now we change the RequestHeader us to fr and send a GET request again. 

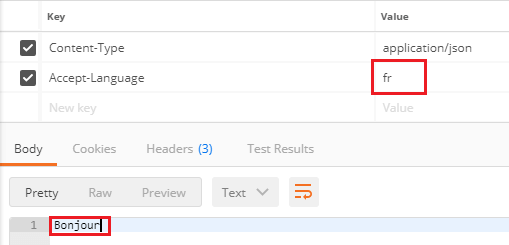
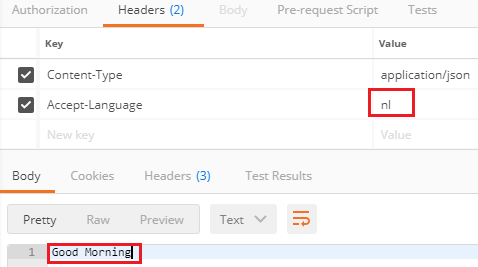
It returns the French locale message Bonjour. Again, change the RequestHeader fr to other RequestHeader, say nl. It returns the default locale (US) message Good Morning. 
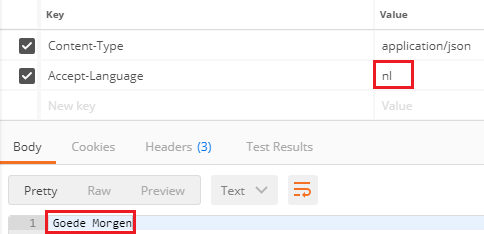
Let's create a property file message_nl.properties for RequestHeader nl. It contains a message Goede Morgen in the Dutch language. messages_nl.properties Again send a GET request that returns the message, Goede Morgen. 
Simplify the InternationalizationNow we will simplify the implementation of internationalization, which we have done above. In the previous implementation, we have accepted locale (a RequestHeader) as a parameter to the REST controller method. If we add this to every method that has to be internationalized, it will increase the cost. Spring provides an alternative way to get it from the LocaleContextHolder. Let's implement the LocaleContextHolder instead of RequestHeader. Step 1: Open the HelloWorldController.java and change the return type of the helloWorldInternationalized() method. HelloWorldController.java Step 2: Open RestfulWebServicesApplication.java and change SessionLocaleResolver to AcceptHeaderLocaleResolver. LocaleResolver implementation uses the primary locale specified in the "accept-language" header of the HTTP request (locale send by the client browser). RestfulWebServicesApplication.java The advantage of AcceptHeaderLocaleResolver is that we do not require to configure request header as a parameter in every controller method. Step 3: Open the REST client Postman and send a GET request by setting the key as Accept-Language and value as fr. It returns the message Bonjour. Now uncheck the RequestHeader, change the value fr to en. It returns the default locale (US) message Good Morning. Step 4: Move to RestfulWebServicesApplication.java. Remove the ResourceBundleMessageSource() method and configure it in the application.properties file. Step 5: Open application.properties file and configure the message basename instead of creating a separate bean in RestfulWebServicesApplication.java. application.properties Step 6: Repeat step 3. |
 For Videos Join Our Youtube Channel: Join Now
Feedback
- Send your Feedback to [email protected]
Help Others, Please Share


