| |

Setting up Spring Cloud Config ServerStep 1: Create a Maven project using Spring Initializr https://start.spring.io/ Step 2: Choose the Spring Boot version 2.2.0 M6 or higher version. Do not choose the snapshot version. Step 3: Provide the Group name. In our case, com.javatpoint.microservices. Step 4: Provide the Artifact id. We have provided spring-cloud-config-server. 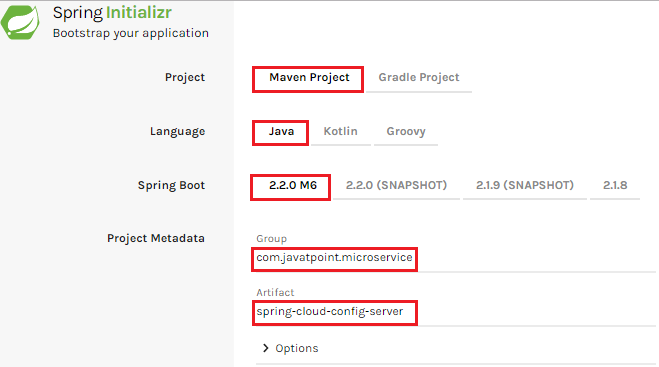
Step 5: Add the Spring Boot DevTools and Config Server dependencies. 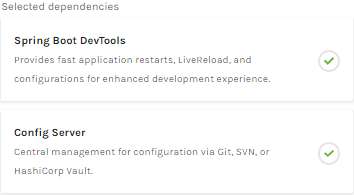
Step 6: Click on Generate the project button. A zip file will download, extract it in the hard disk. Step 7: Now, open the eclipse. Import the downloaded maven project. It will download the required files. In the next step, we will create a simple Git repository and configure the spring cloud config server to pick up the values from the particular Git repository. We need to install the local Git. Installing Git and creating a local repositoryStep 1: Download Git from https://git-scm.com/ and install it. Step 2: Create a Git repository and store the files that we want to be able to configure a limits-service. We will try to access them from the spring-cloud-config-server. Open the Git bash and type the following commands: Creating a new directory: Initializing a new Git repository: It initializes an empty git repository. Step 3: Now move to the spring-cloud-config-server project and add a link to the specific folder.
Step 4: Configure the user name and user email: The command commits any file we have added with the git add command and also commits any files we have changed since then. Now execute the command to commit the changes in the repository. It records or snapshots the file permanently in the version history. 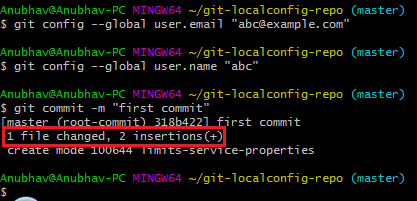
We can see that a file is changed with two new instructions. These instructions are changed in the local repository. |
 For Videos Join Our Youtube Channel: Join Now
Feedback
- Send your Feedback to [email protected]
Help Others, Please Share


