| |

Adding Error Dialog in MEAN StackIn our previous section, we successfully created the error interceptor. In this section, we will use it and display the basic error dialog. Theater, we will add the error dialog in our app. Now, we will use the angular material dialog. To use it, we will use the following steps: 1) In order to use the angular material dialog, we have to unlock it. So, we will go back to our app.module.ts file and import MatDialogModule from @angular/material After importing it, we have to add it to the imports array too. 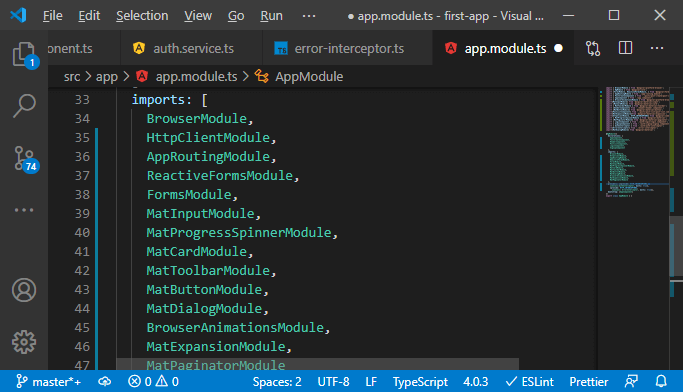
2) We can open a dialog by injecting the dialog service into whichever place in our app we want to use it. After that, we will call open on the injected object, and there we pass a reference to the component which we want to use as content for the dialog. We can also pass some additional configurations like width. We will use the dialog in the error interceptor, and for that, we have to add @Injectable because we want to inject a service into the dialog service. 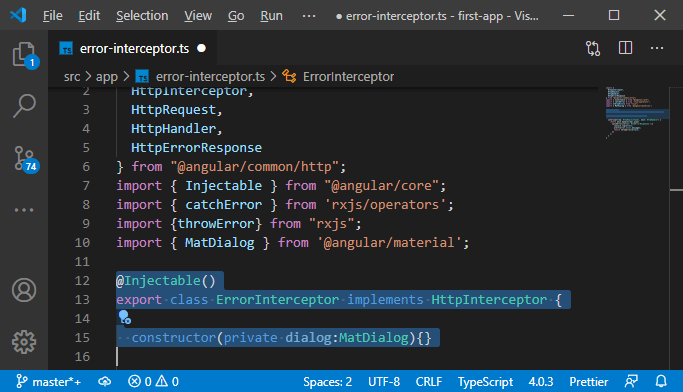
To inject the dialog service, we created a constructor and used MatDialog there. 3) Now, we get the dialog available, and we can display something with it, but we need to add a component that we want to use as the content. So, we will create a new folder, i.e., error, and in this folder, we will create a new typescript file, and we will name it component.ts file. 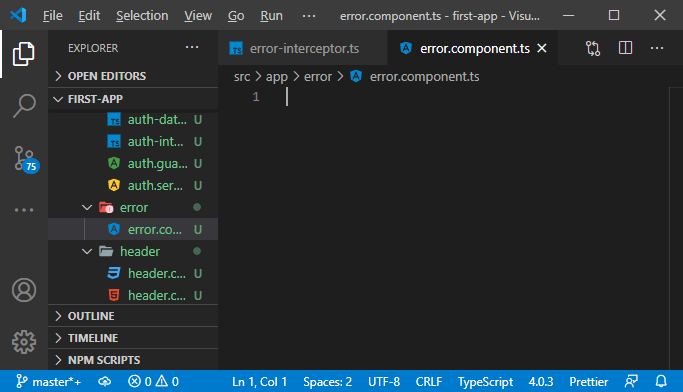
4) We will create a new class in this file using the export keyword and make it a component by using the @Component We don't need to add a selector because we will not use this component by its selector, but we need a template. So, we will create the HTML file and point it to the decorator. 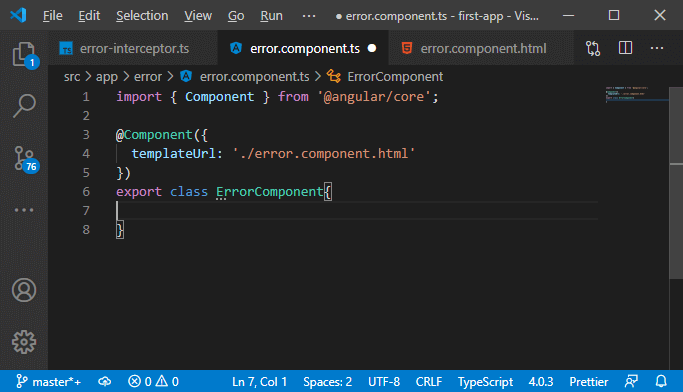
5) We will now define what we want to see in that error dialog that we are going to open. In the html file, we will have an h1 tag that shows An Error Occurred! and below that, we will have a paragraph with the message. We will use string interpolation to output a message property, which we will add to our Error.component.ts file. 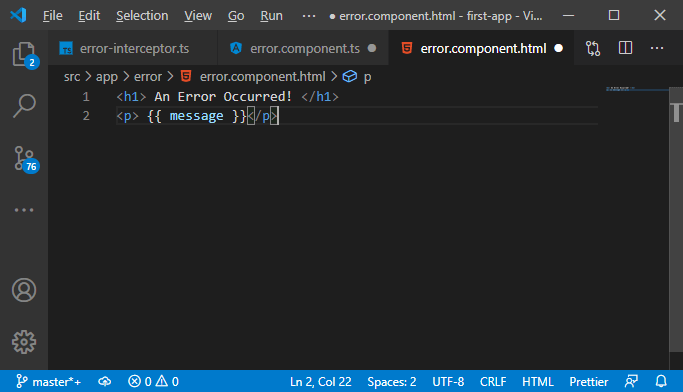
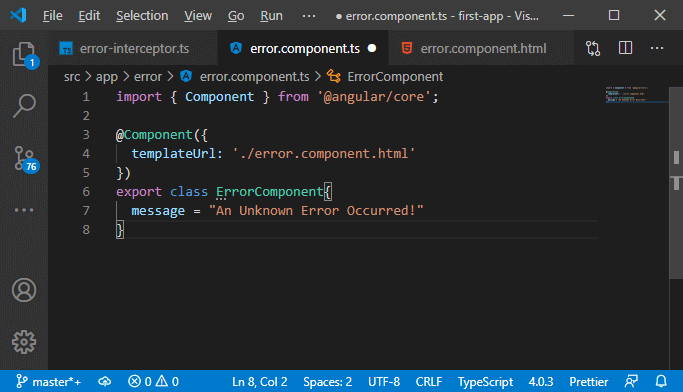
6) Now, we have to register this component, and you know very well how to register a component. 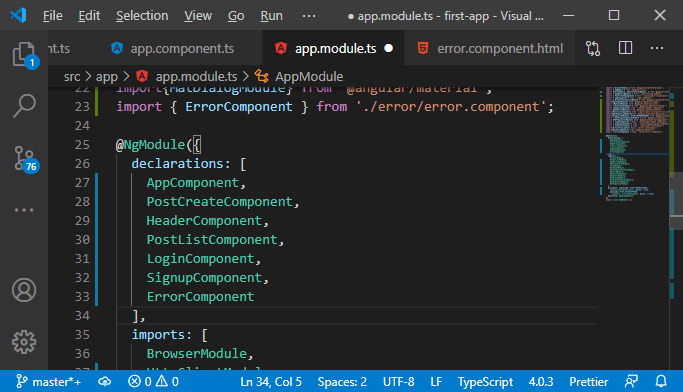
7) Now, we need to do something different or special. We will load that component, neither through a selector nor through routing. We have to tell angular that it needs to be prepared to eventually create this component. It normally needs to be prepared by the fact that somewhere we used the selector or that we used it as a component in the router. But since we will dynamically create that component, we need to tell angular that this is going to happen; otherwise, we would get an error. For that, we add a fifth item to our ngModule configuration. We will add the entryComponents array. We will use it rarely, but here we do. In this array, we simply add the ErrorComponent. This will simply inform angular that this component is going to get used, even though angular can't see it. 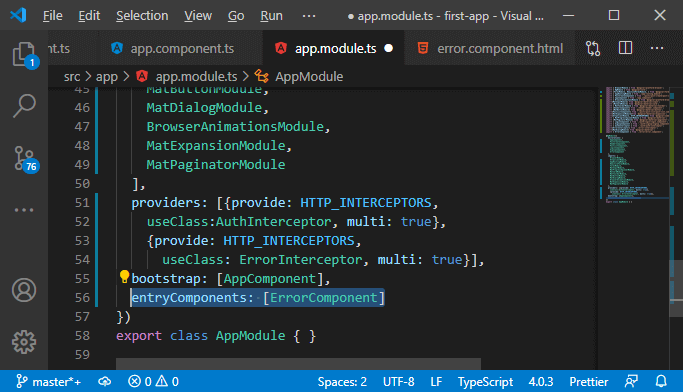
8) Now, we will go to our error interceptor and use that dialog service to open a dialog with this error component. We will reach out to our dialog service, call the open method and pass our ErrorComponent to that method. 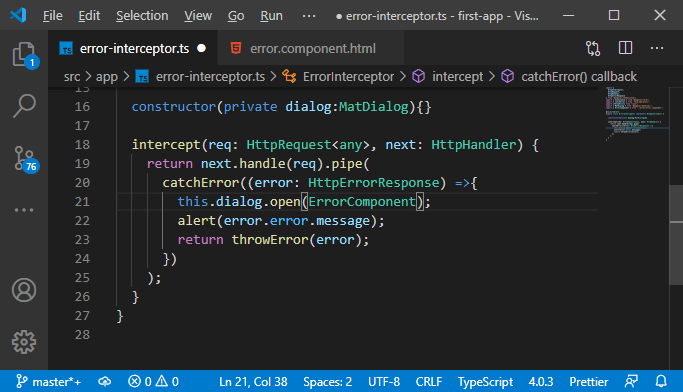
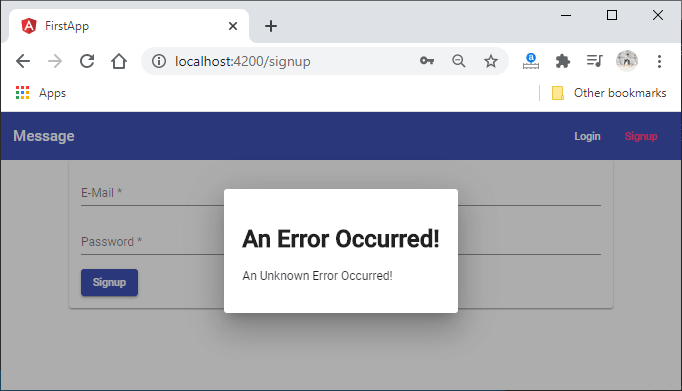
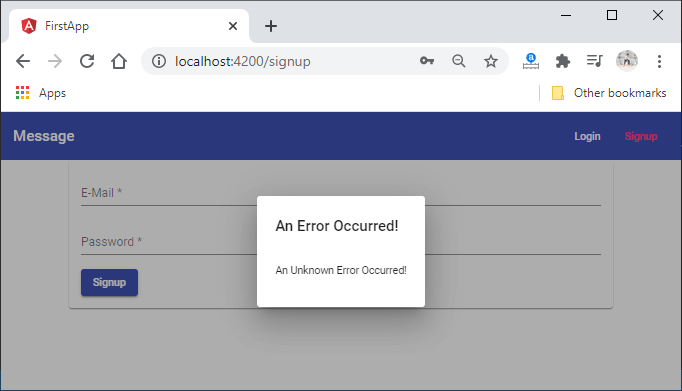
Everything is looking good. We will save all the files and go back to our angular app. Now, if we try to sign up with an already registered email, we should see the dialog. 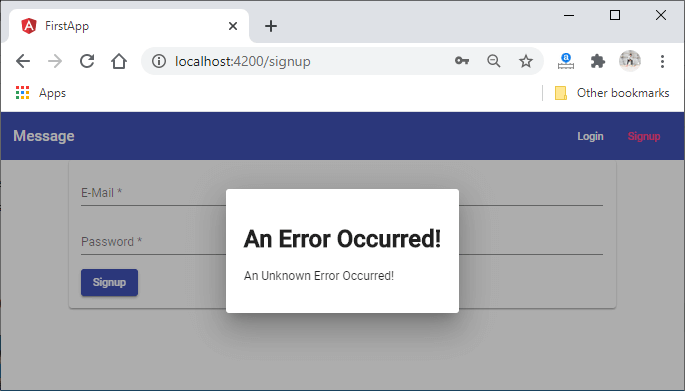
Now, we will add this dialog, and for that, we have a couple of problems, which are the styling, and we didn't see the message. The message can't be seen because of the way our Error component is created. We can't set up properties as we have set before. 9) We want to display a message, but we can pass in data in a different way. In the error interceptor where we are opening the dialog, we can pass in data by adding a second argument to the open method. We can set a data property that allows us to pass in an object that represents the data we want to work in this error component. The message is something we need to derive in this interceptor. We will check for the message in the error object of our error. If it is present, then we will use it. Otherwise, we will use the default message. 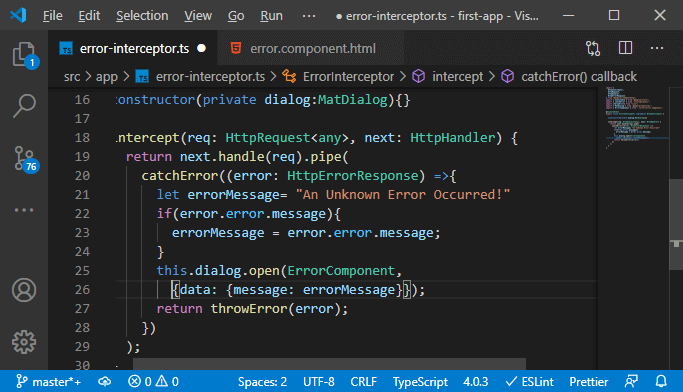
10) Now, to retrieve that data, we have to go to the error component and inject something into it. We will create a constructor and that something we will also be provided by @angular/material. We pass the data by using a special decorator, i.e., @Inject decorator, which allows us to then specify a special token. It is required to specify the token because for the dependency injection system, which angular uses to identify the data we are passing around. This special way of injecting is required due to this error component's special way. The token we want to use is the MAT_DIALOG_DATA token. It is the identifier used internally. This will hold data in the following way: 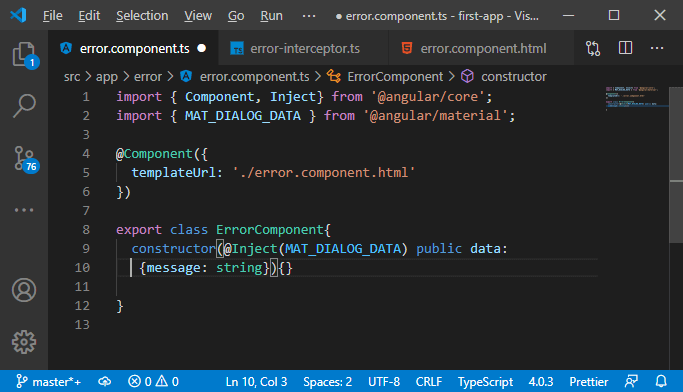
11) Now, the data field is available in the error component, and we will output it in the component.html file. 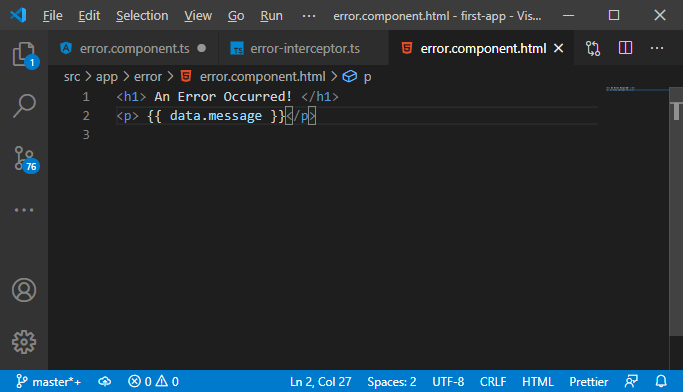
12) It is working well but lookwise it's very bad. Our angular material dialog gives us some classes which help us to improve the look of our dialog. We will add the mat-dialog-title directive to the h1 tag, and to the paragraph, we will add mat-dialog-content. 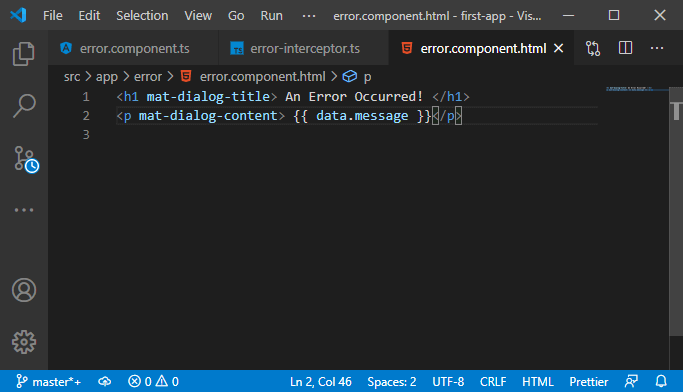
These directives will give our dialog a much nicer look. 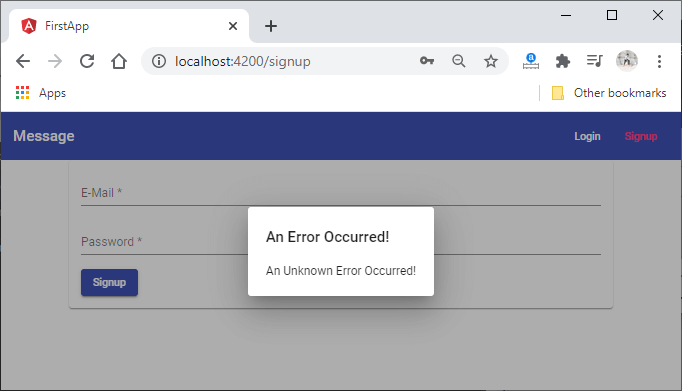
13) The paragraph still looks wrong because we cannot add the mat-dialog-content directive to the paragraph. We will use the div tag, and there we will add this directive and add the mat-body-1 class to change the font style in the paragraph tag. After that, we will add our paragraph tag in between the <div></div> 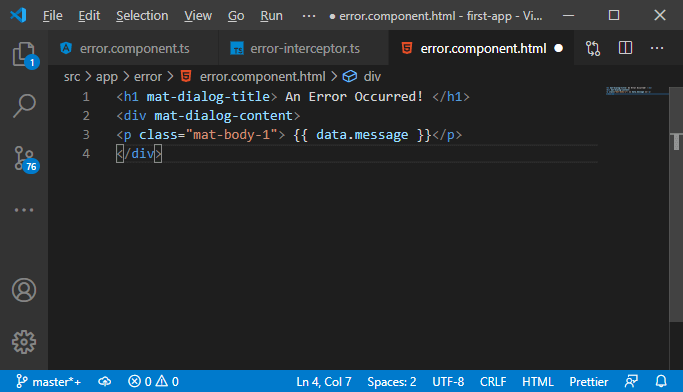
14) Now, it might be nice if the dialog has some buttons. We will simply add a button by adding another div, which will have the mat-dialog-action directive or selector to position them correctly just as the content is positioned correctly with that. In between the dive tag, we will add a normal button with the mat-button selector, and as the text, we will use the Ok We will also add another directive to the button, i.e., mat-dialog-close. This directive will ensure that this button automatically closes the dialog if we click it. 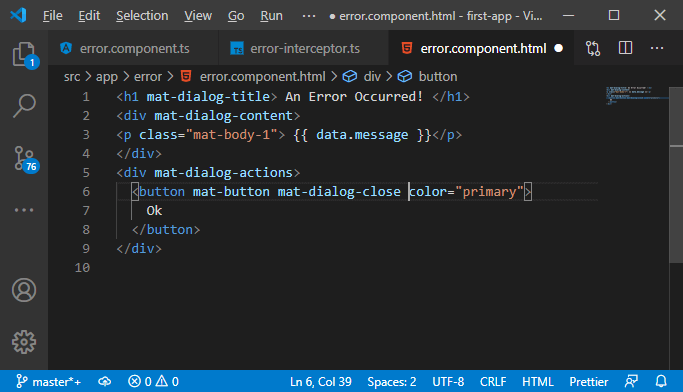
Now, if we go back to our angular app and try to sign up with an already registered email, we will see a dialog with buttons like as: 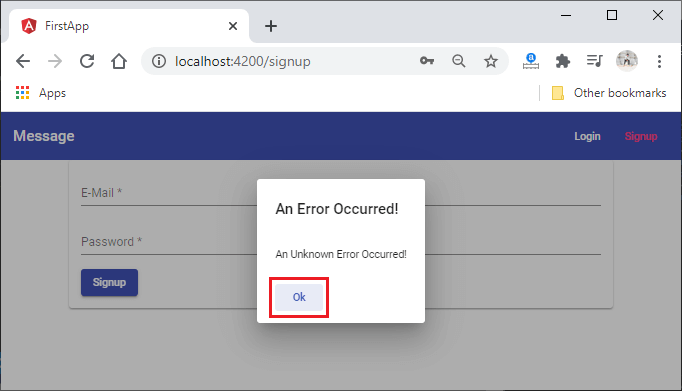

Now, it would be nice to use or see this error handler in action for other errors where we have a better message, and we will do this later in the next section.
Next TopicReturning Error Message on the server
|
 For Videos Join Our Youtube Channel: Join Now
Feedback
- Send your Feedback to [email protected]
Help Others, Please Share


