| |

Adding the File Input Button in MEAN StackIn this section of the image upload module, we will learn about the File Input Button. When we click on the File Input Button, a file picker will open, and from that file picker, we will pick an image file. We will use the following steps to add the File Input Button: 1) We will go to our post-create.component.html file, and here we will add a new button. We will add this button below the title of the post. We will use the <div></div> and here, we will create <button></button> with the mat-button directive that will turn the button into an angular material button in the following way: 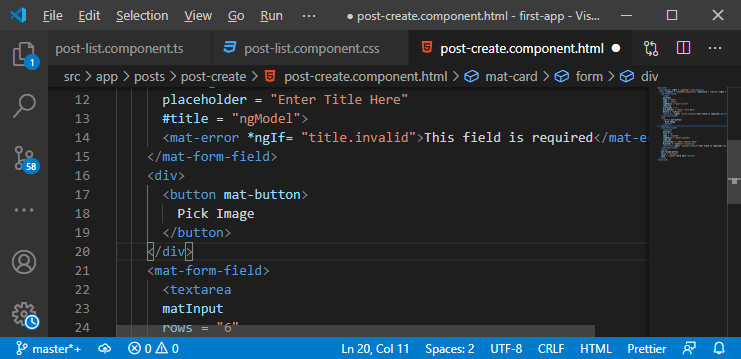
Now, if we go back to our angular app and click on the Pick Image button, we will get the validation error because, by default, this button will try to submit the form. 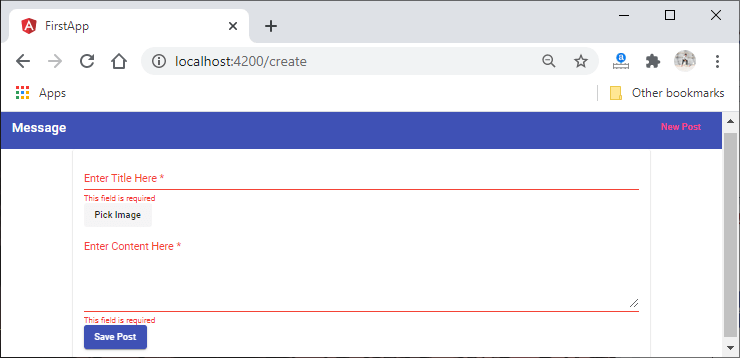
2) We will change this by setting the type of this button to button in the following way: 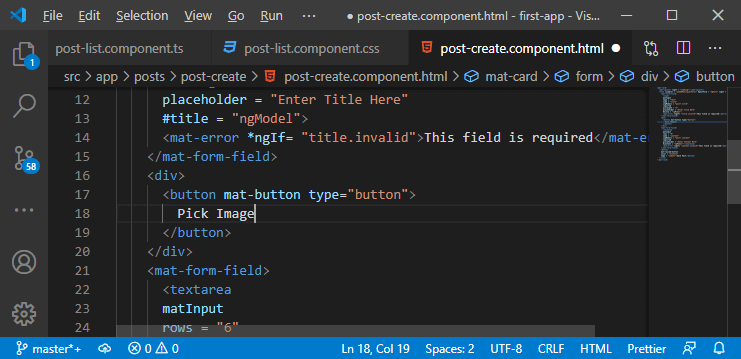
We will change the look of this button. We will use the mat-stroked-button rather than using mat-button in the following way: 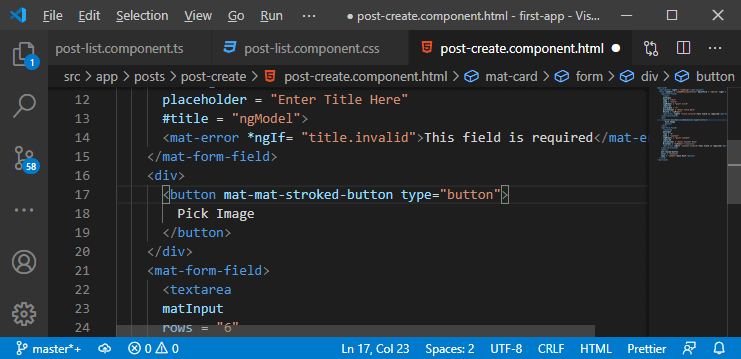
The button should look like this: 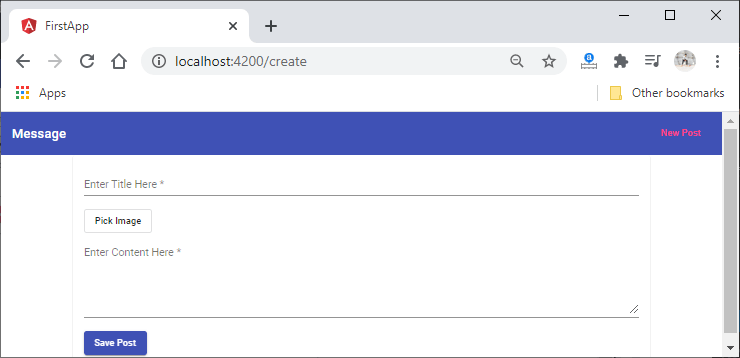
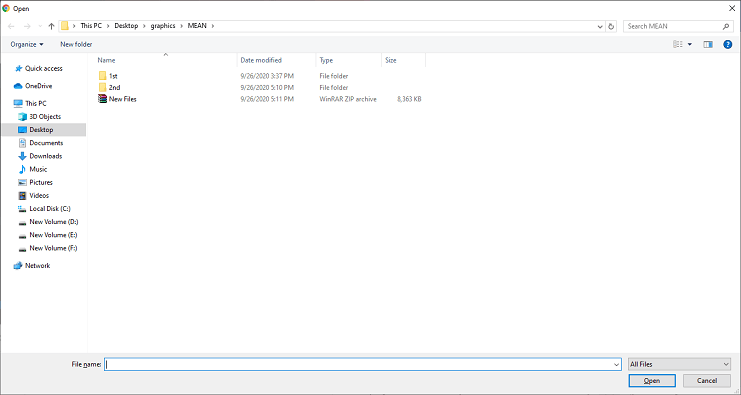
3) Now, we need to add the functionality of opening the file picker dialog. We have a default input that we can use the type file. When we add this, we will get the file picker dialog like as: 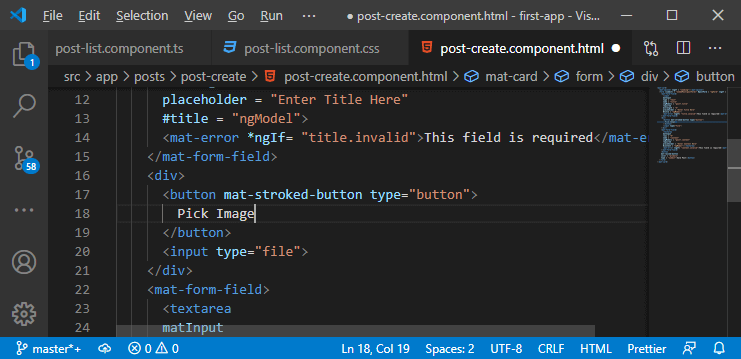


4) This picker really looks ugly, and it doesn't have the default material styling. So, we have to hide this picker, not remove it from the DOM. It should be there and just be hidden. When we click on that button, we want to simulate a click event on that picker. So, we will use that default click functionality, and we store the picked file in that input. But we don't see that ugly interface. Now, to do that, we will hide the input, and we will do this in the CSS file of this component. We will write the CSS code like this: 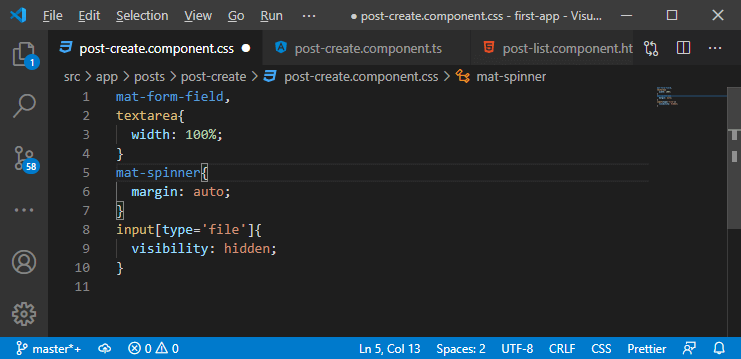
After writing the CSS code, the file picker is gone, and it is still part of the DOM. 
5) Now, we will proxy our click on the button onto this input by giving a local reference to the input with a hashtag and on the button click, we will execute the file picker like as: 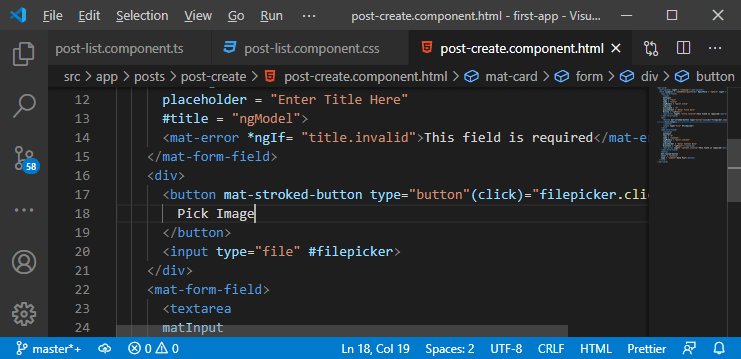
Now, if click on the button, we will see the file picker like this: 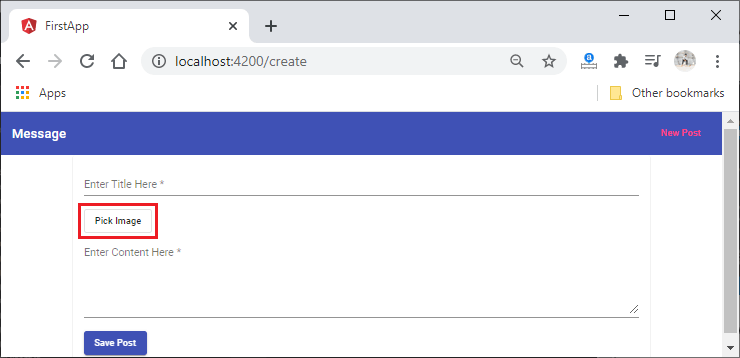
Now, we need to register this input as an input of our form, and we will do this by switching to the reactive approach for creating and handling that form. It gives us more capabilities, more features. We also want to add our own validator to validate that we only upload image files. This is an advanced functionality which is very easier to implement if we use the reactive forms approach. In the next section, we will learn how to convert the form from a template-driven approach to a reactive approach. |
 For Videos Join Our Youtube Channel: Join Now
Feedback
- Send your Feedback to [email protected]
Help Others, Please Share


