| |

Adding Image Controls and Preview Image in MEAN StackIn our previous section, we successfully converted our form from a template-driven approach to a reactive approach. In this section, we will add image controls to store the image in MEAN Stack. Now, we want to make sure that when we select an image from the image picker, it should be stored as an input or as a value in our form. Previously, we connected the button to the image picker. So, we need to do something whenever an image was picked. We will use the following steps to do that: 1) We will handle the case where the user selects an image from the image picker. We will register the change event on the image picker. The change event fire whenever the user changes the selected file. So, if the user changes from "no file selected" to "here is a file", or if he changes the file thereafter, we will execute the event or a method in the following way: 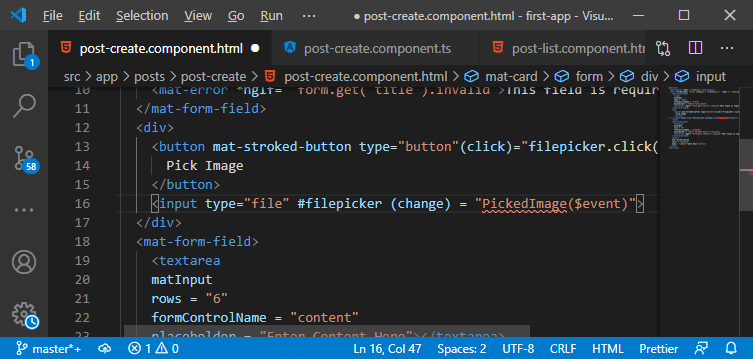
2) We will go to our typescript code and add this method. In this method, we expect to get an event that is of type Event. 
3) Now, we will extract the file which was added. For this purpose, we will create a new constant and access the file by accessing the event target on which we clicked. This line of code will show an error. The problem is typescript doesn't know that our event target is a file input, and therefore it doesn't know that this file's property exists. We will solve this by converting this event target or by explicitly telling typescript that this will be of type HTML input element. For that, we will wrap the event target with parenthesis and then add as HTMLInputElement. This is a type conversion, and it clearly tells typescript that the entire expression will be an HTML input element that happens to have a files property. 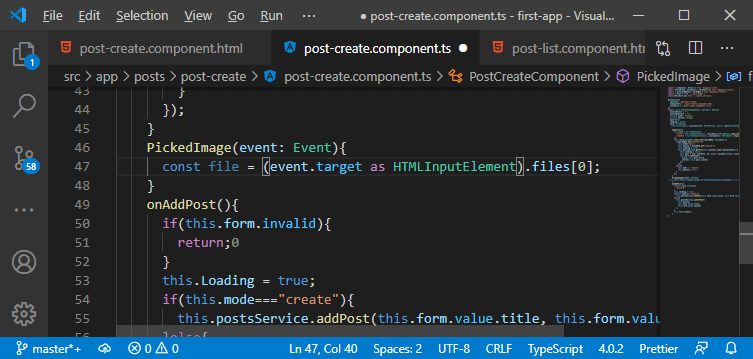
The "Files" is an array of files, and we only need to select one, so we used the files[0] to take the first element from that array, which is the file the user selected. 4) Now, we need to store this file in form control. We only have two controls, i.e., title and content. In the ngOnInit, we will create a new "form-control", and in this "form-control", we will initially set a value of null like as: 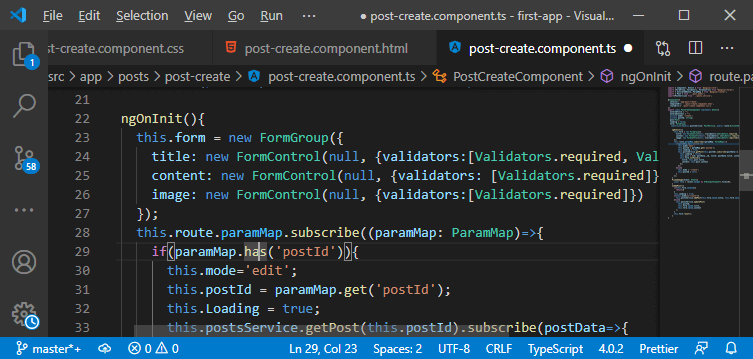
One thing we are not doing here is we won't bind the image control to any HTML element. We will not bind it with the file picker input because we have hidden this, and we didn't want to display anything there. So, we will not synchronize this to HTML, and that is the cool thing about the reactive approach. We don't need to synchronize this. Instead, we can totally manage a value behind the scenes in typescript only. So, this is now control of a form, and we can control the value manually with typescript. 5) Now, in the PickedImage() function, we will reach out to our form and call the patchValue(). In the setValue(), we would set the values of all the inputs or all controls on our form. The patchValue() allows us to target a single control. We will pass an object to this method and pass the name of the control and its value like this: 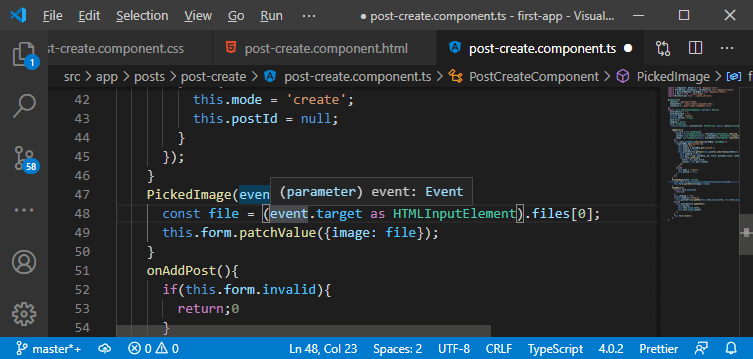
6) We reach out to our form and access our image and call the updateValueAndValidity() method. 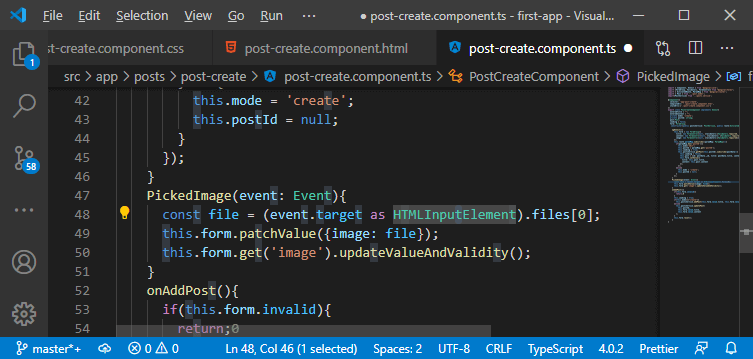
The updateValueAndValidity() method informs angular that we change the value, and it should re-evaluate that, store that value internally and check whether the value I did patch is valid or not. It will run the validator on this input even though the user never directly typed in there. 7) Now, we need to preview the stored image to the user. To preview our image, we need to add something in our HTML code below of the image picker. We will add a div here and give it a CSS class, and the name is up to you. 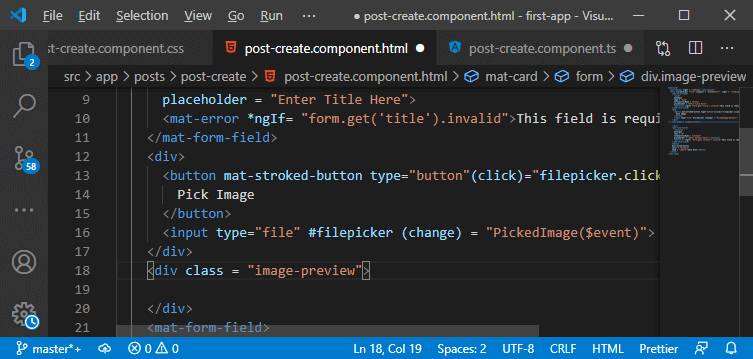
8) In the div, we will add a normal image element, and we have to bind it through src. We will also set the title in the following way. 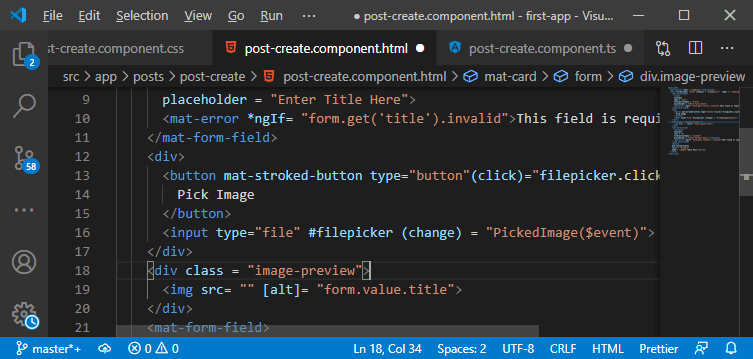
9) Now, we need to display the image in the div. For this, we need to convert the file into something which can be displayed. We will go back to our PickedImage() method, and here we will convert our image to a so-called data URL, which is a URL that can be used by the normal image tag. We will create a new property of type string. After that, we will use the JavaScript feature, i.e., FileReader. We will create a new constant property in the PickedImage() method and store a new instance of the FileReader because we have to instantiate that or store that in that reader constant. 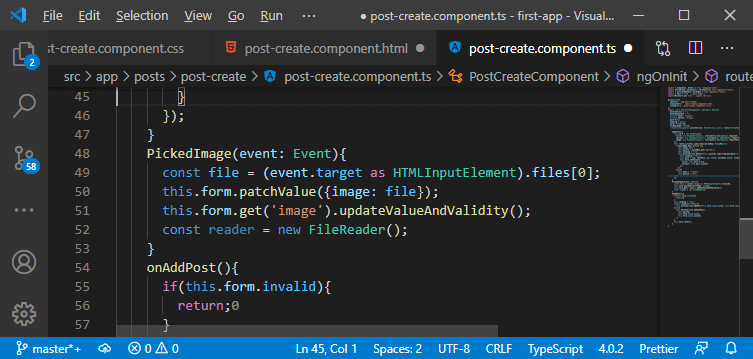
10) Now, we will use that reader constant and define the onload event. This event will be a function that gets executed when it's done loading a certain resource. In this function, we will store the reader's result in the Pickedimage property, which we have created before. 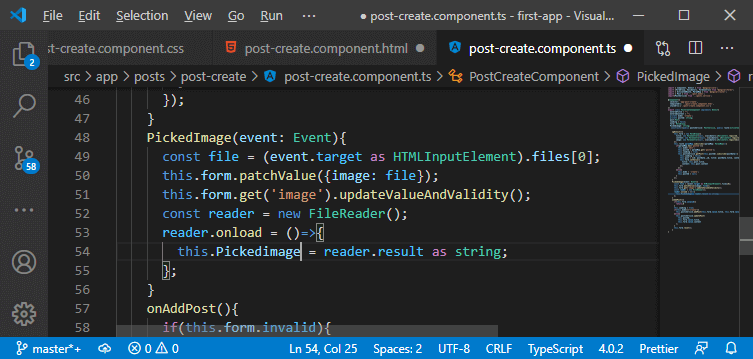
11) It won't do anything unless we tell it to do something. So, we will call the readAsDataURL() method of the reader and pass our file as an argument like this: 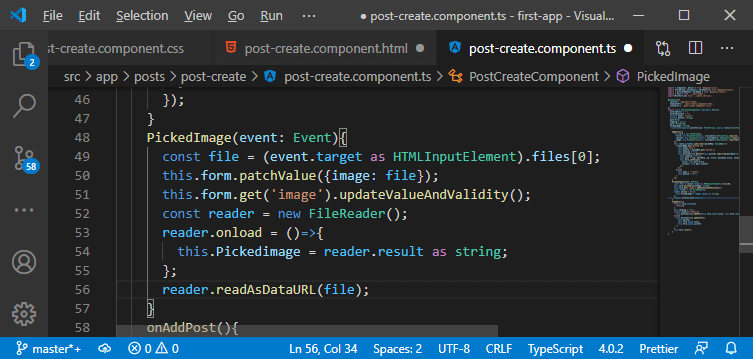
12) Now, we will go back to our HTML code and in the div we will use the *ngIf and check if the Pickedimage not equals to an empty string and also if image preview is not null like this: 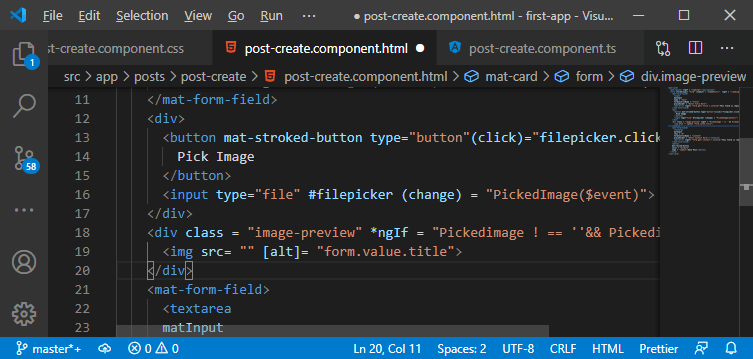
So, if the Pickedimage exists and if it is not equal to an empty string, then the div will be loaded. 13) We will bind the src tag of the image to Pickedimage that is the image we want to display. 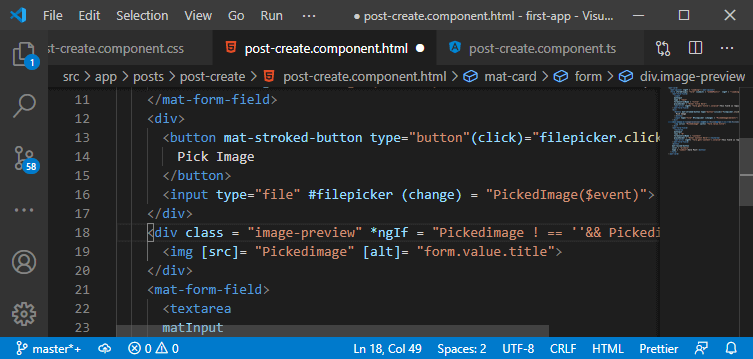
14) It will look ugly right now, so we will go back to our CSS file and use the CSS code to style the image-preview class and image-preview img. We will add the following line of code in our CSS file: 
Now, we save all the files and try to choose a pic from the image picker. 
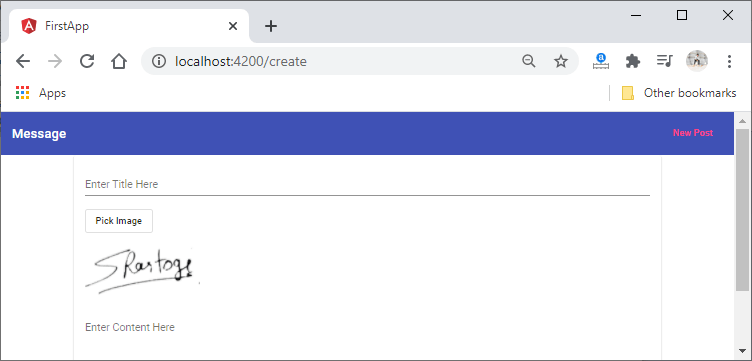
Everything is working well right now, and in the next section, we will learn about the Mime-Type validator.
Next TopicMime-Type Validator
|
 For Videos Join Our Youtube Channel: Join Now
Feedback
- Send your Feedback to [email protected]
Help Others, Please Share


