| |

How to Change DNS Server on Android?The DNS extends to the "Domain Name System," which allows web servers to connect with their particular domain name. The internet service provider (ISP) gives their own DNS server to get connected. You can change DNS to which one your device is using. 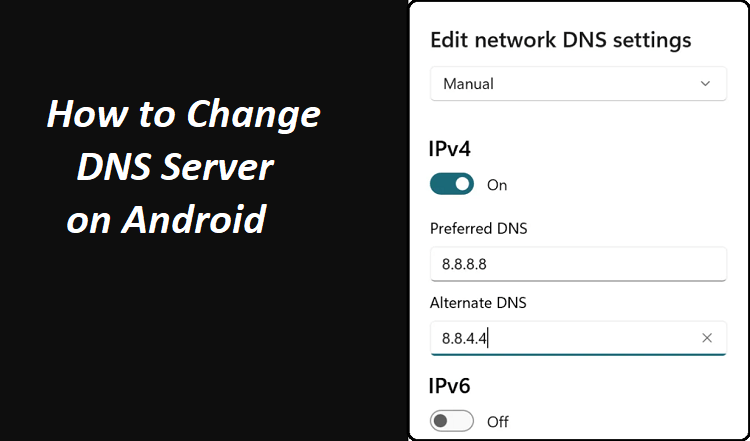
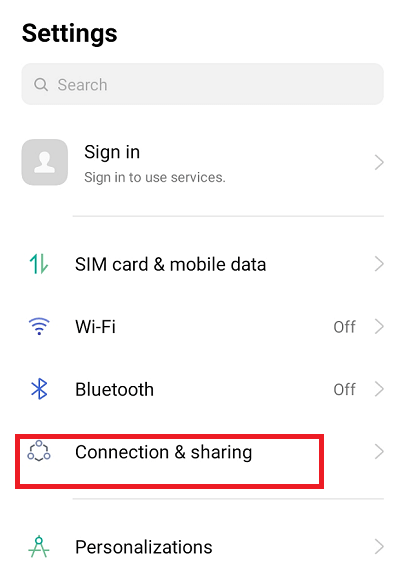
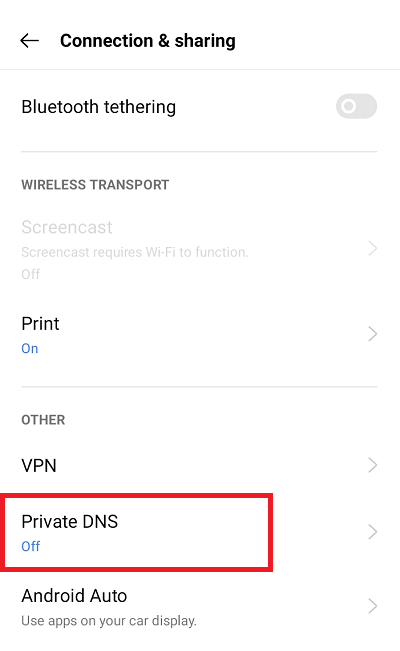
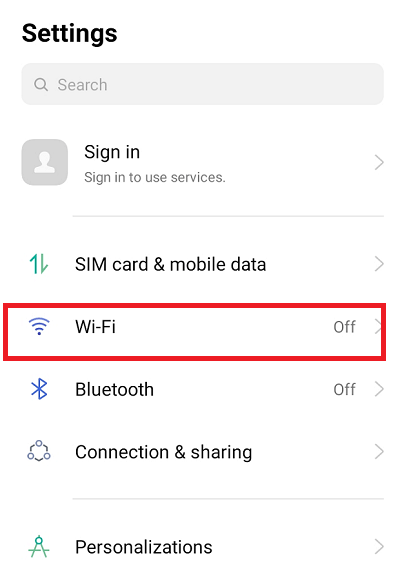
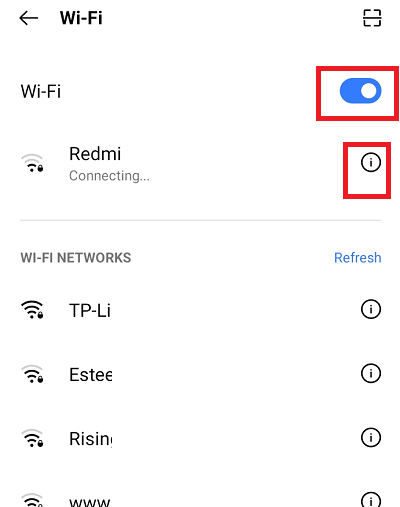
If you want to improve your online privacy & security and sometimes the Internet speed of your Android smartphone, it is suggested to change the use of a custom DNS server. Changing the DNS server on an Android phone is as simple as you do on other platforms. This article illustrates how you can change the DNS server on your Android phone to experience a good internet connection and how it works. Why Change DNS Servers?As we all know, DNS servers are essential to perform internet activities. Any issues in this system have a massive impact on your internet experience. Sometimes default DNS server settings offered by ISP are slow or do not function well because of configuration problems. This case mainly happens when users load a page that draws content from other domains (advertisers and affiliates). Changing the DNS servers on your phone can optimize it and speed up web surfing, whether you are accessing it at your home or office. Add custom DNS server on AndroidAdding a custom DNS server on an Android phone works out of the box for each connected Wi-Fi network separately. However, your Android device needs a static IP address for a custom DNS address. Making changes in DNS settings will only affect your current Wi-Fi network connection. Here, we will illustrate how to change your DNS servers on your Android Pie or higher version. Changing DNS on Android 9 and HigherChanging to DNS address on Android 9 or higher is quite easy. Here are the manual steps to change the DNS server on your Android phone. The steps might vary based on the mobile manufacturer company and Android OS level.
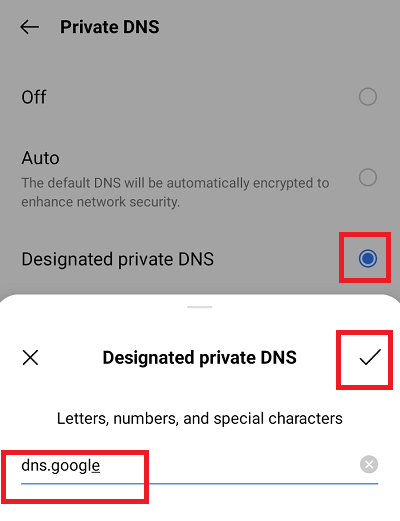
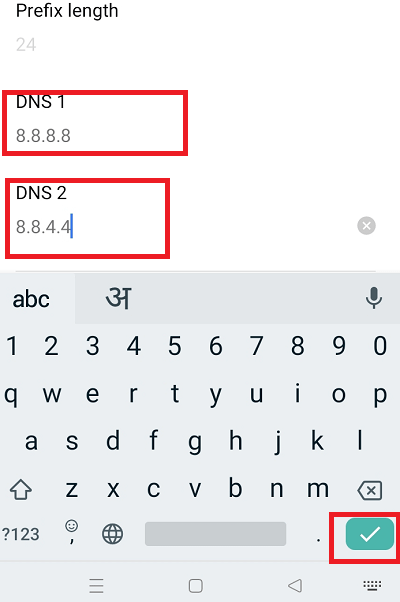
Here, I am configuring and want to use Google DNS so that I input dns.google as the hostname. You may enter whatever you want to use the DNS service. Changing DNS on Android 8 and LowerIf you have a device running on Android 8 or a lower version, the steps might be different to change the DNS server on Android.
Follow the above steps with the wireless connection you want to use as an alternative DNS address. Android or other devices also facilitates configuring different DNS server for different Wi-Fi network connection. Change the DNS server with Third-Party App:If the above-discussed method doesn't work for you or you find it complicated, try a third-party app to change the DNS server of your Android phone. Third-party DNS server changer apps make this task easier to change DNS server settings. Search on the Play Store, and you will find several DNS changer apps there. This third-party DNS changer app also works on non-rooted Android smartphones. Benefits of using Third-Party Apps to change DNSGenerally, people use the default DNS servers offered by their Internet Service Provider (ISP). But for you, an alternate option is also available by using third-parties DNS that provides a better experience. Third-party DNS apps give better speeds, but it depends on how closer you are to their server. Remember that some IPSs also record your internet browsing history and share them with others without your knowledge. So always use an app that facilitates no-log DNS to maintain online privacy. Additionally, third-party DNS servers also play regionally blocked content and bypass censorship. How to set up Third-Party DNS on iOSHere are the steps to set up third-party DNS on your iOS devices (iPhone or another device):
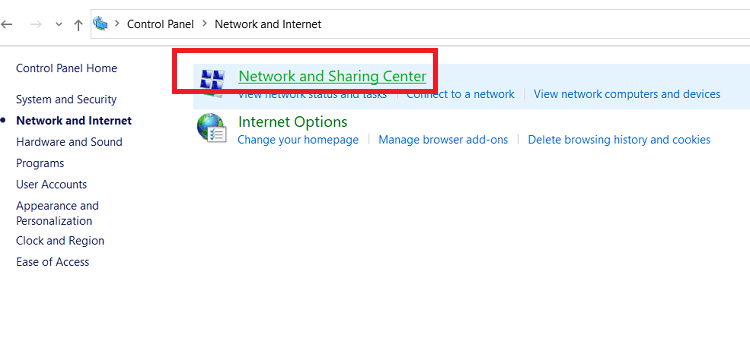
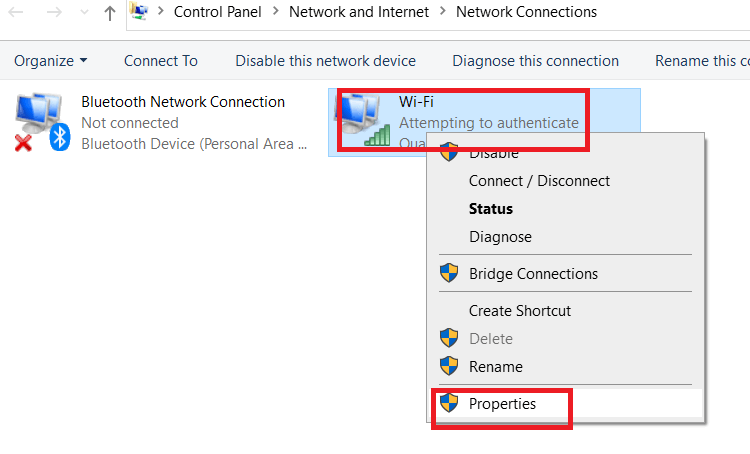
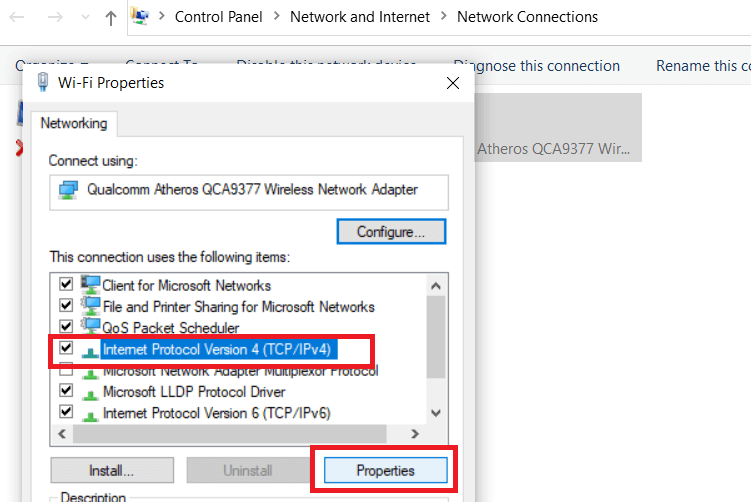
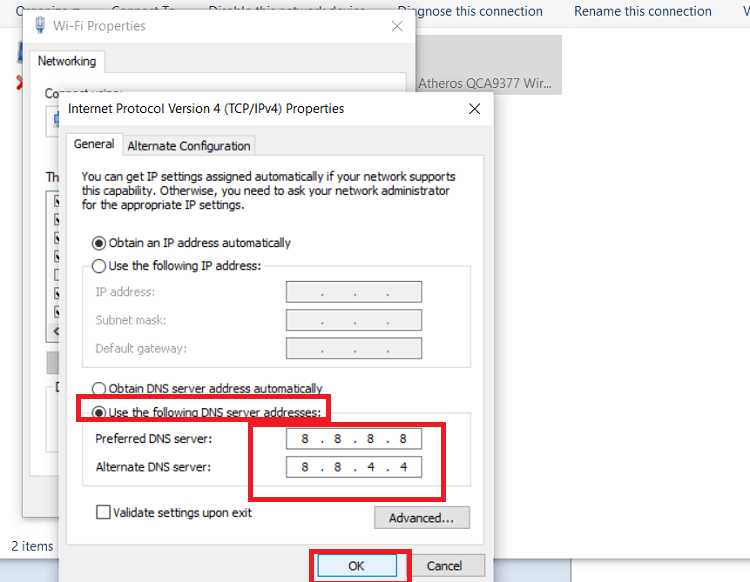
How to set up Third-Party DNS on WindowsLike Android and iOS devices, you can also set up a third-party DNS server on your Windows PC. For this, you need to change the network properties of your connected network. How to change DNS on Windows 10 or below?Change the DNS server on Windows 10 from Control Panel. Here are the steps to set up third-party DNS on your Windows 10 and below PC:
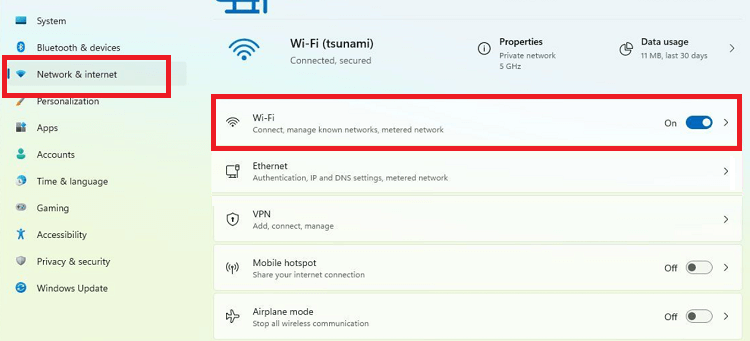
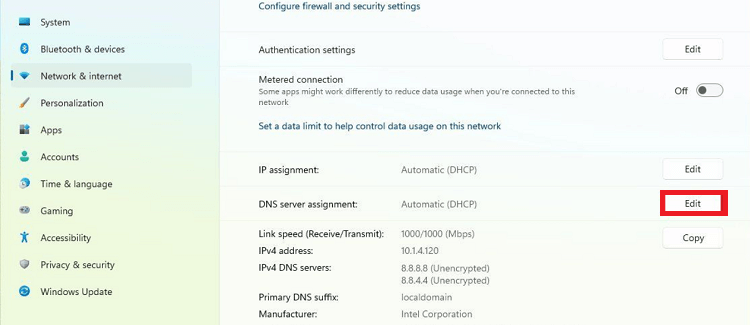
How to change DNS on Windows 11?On Windows 11, the steps to set up DNS are different. You can use Settings, Control Panel, or Command prompt to change DNS on Windows 11 PC. Change DNS on Windows 11 from Settings
You are all done and successfully changed the DNS server in Windows 11 PC. Change DNS on Windows 11 from Control PanelAlternative to using the Settings panel, you can also use Control Panel to change the DNS server on Windows 11 PC. Use the above steps to change the DNS server on Windows 10. Change DNS server on Mac deviceLike other devices, Mac also allows changing the DNS server to use your custom DNS server. Follow the below-mentioned steps to change the DNS server on Apple's Mac device.
More About DNS and Changing Your ServersAs you learn, DNS stands for "Domain Name System and Server over the Internet world. The primary task of DNS is to translate domains (like javatpoint.com) into routable IP addresses. It is difficult to remember the IP address of the domain, and never prefer to type it every time you visit. And without DNS service, the domain address can't be converted into a routable IP address. It is the importance of DNS. The device that accesses Wide Area Network (WAN) uses a DNS server, which helps the phone to reach a given address. That addresses are almost or always tied to your device carrier or the wireless network you use. List of popular DNS server and their IP addressYou feel comfortable using custom DNS by changing the default DNS server on your Android or other devices. Below we have listed some popular DNS servers and their IP addresses. However, the most popular DNS Servers are Google, Cloudflare, and OpenDNS. You may refer to these IP addresses to change the DNS server.
Next TopicHow to Track an Android Phone or Tablet
|

 For Videos Join Our Youtube Channel: Join Now
Feedback
- Send your Feedback to [email protected]
Help Others, Please Share


