| |

Adobe After Effect InterfaceThis page provides us with the fundamentals of working with the Adobe After Effect Interface. Its interface seems intimidating for beginners. We will understand the interface's key elements on this page of the After Effect tutorial and how we can work with the various application panels. Workspaces and panelsAdobe After effect provide a consistent, customizable user interface. It also provides a different set of the panel as other application of the Adobe. We can move and group the panels in the same way in each application. 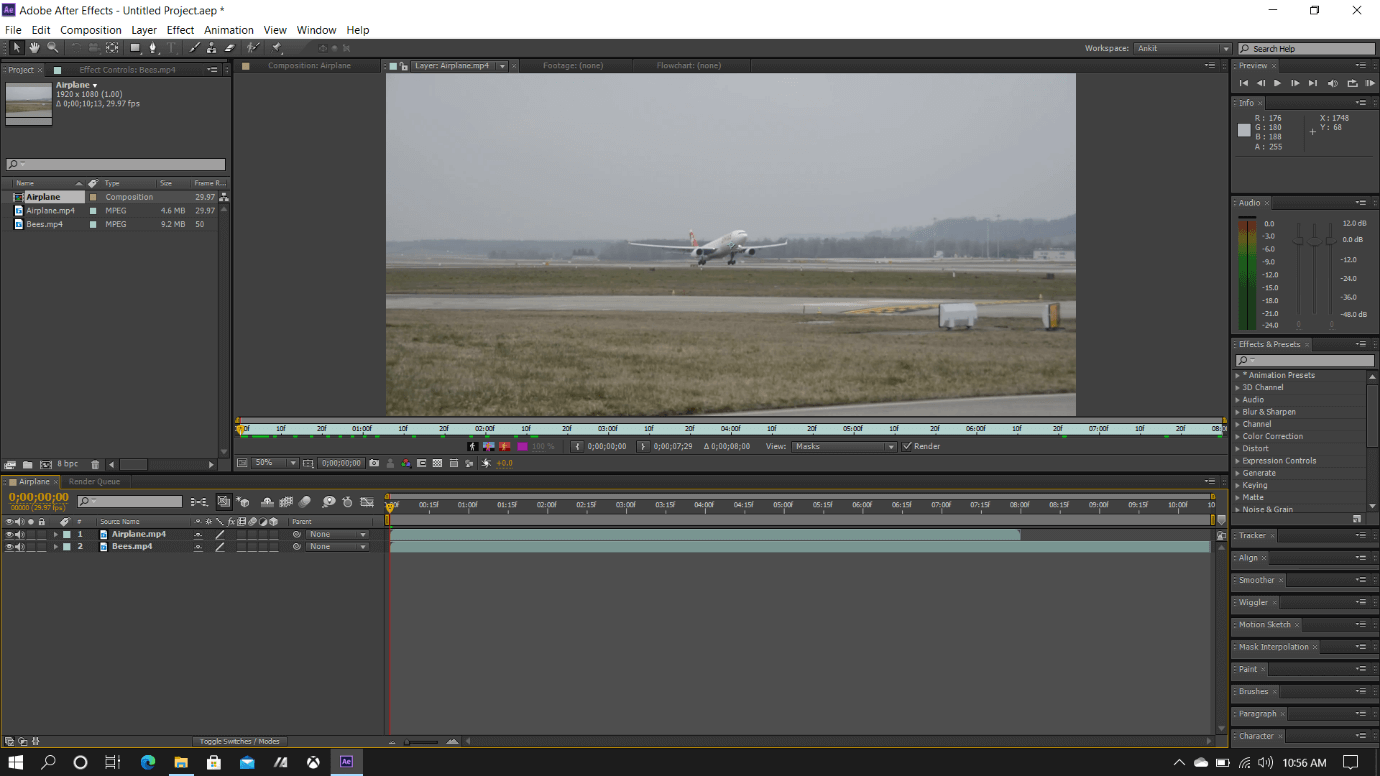
Application Window: It is the main Window of Adobe After Effect. All the Adobe Application includes several predefined workspaces that optimize the layout of panels for specific tasks. We can drag and move panels in or out of a group and place them alongside each other. We can also undock a panel to keep floating in a new window above the application window. When we try to rearrange the panel, all the other panels will be resized automatically to fit in the window. A workspace that we created in Adobe Applications will be stored in XML files in the preferences folder. We can use this Workspace on the other computer also.
Customizing Workspace We can access the default or custom workspace with a single click inside the new workspace bar. It occupies the right side of the Tools panel. We can customize the bar's width by dragging the vertical divider between the tool and the workspace bars. 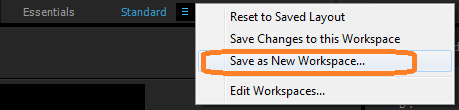
After moving the Tools panel from its position, the Workspace menu replaces the workspace bar. 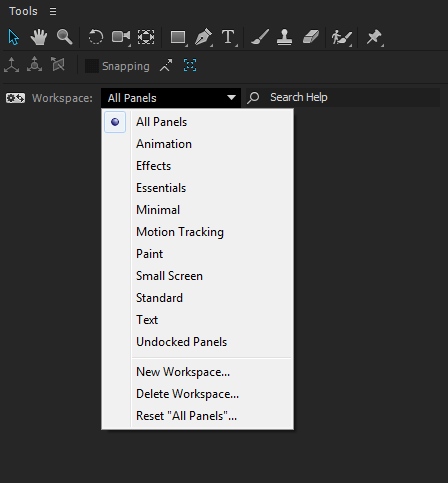
Edit Workspace Step 1: Click on the Windows menu. Step 2: Choose Workspace. Step 3: Click on the chevron menu or Edit Workspaces. 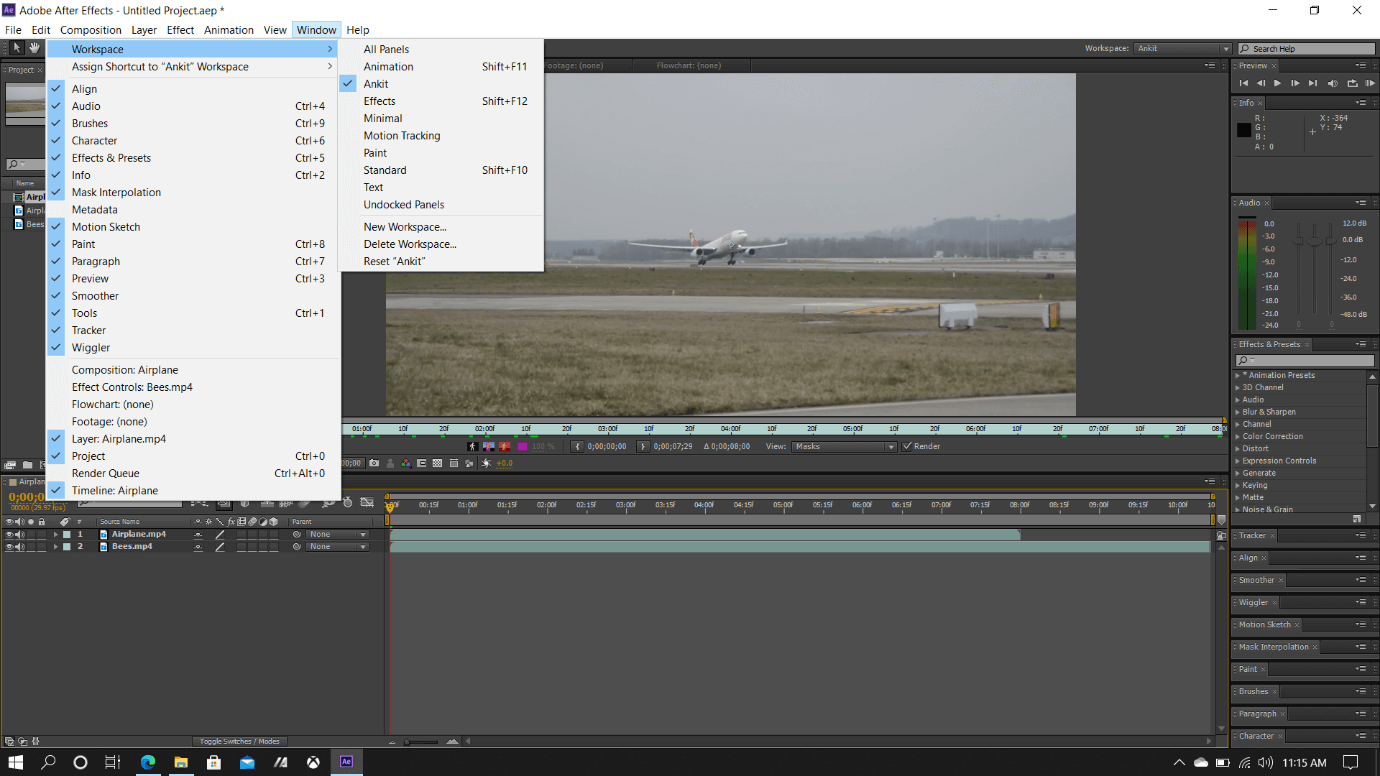
Choose a workspace Step 1: Click on Window Step 2: Select Workspace and choose the desired Workspace. Step 3: Go to the workspace menu and select a workspace. 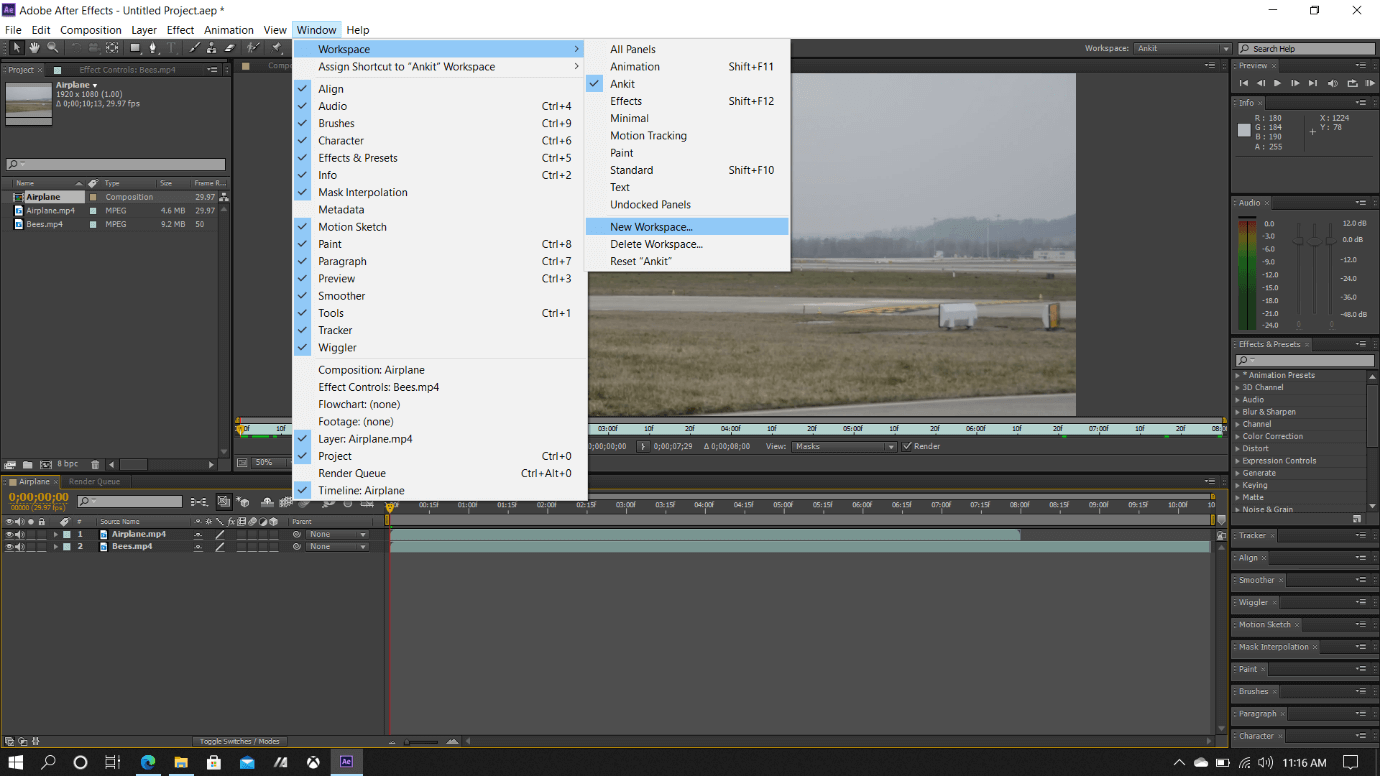
Save, reset, or delete workspaces Custom workspace: The application tracks our changes when we customize the Workspace storing the most recent layout. Save a custom workspace if you want a specific layout more permanently. Step 1: Arrange all the frames and panels as you want to see on your Workspace. Step 2: Click on the Windows menu, then choose the Workspace. Step 3: Go to the sub-menu and choose New Workspace. 
Step 4: Assign a name to your Workspace and click OK on the appeared dialogue box. 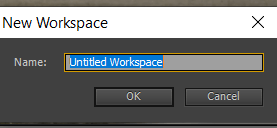
Reset a workspace: The current Workspace should be reset to return to its original saved layout of panels. Step 1: Go to the Windows menu. Step 2: Click on the Workspace and choose Reset workspace name. 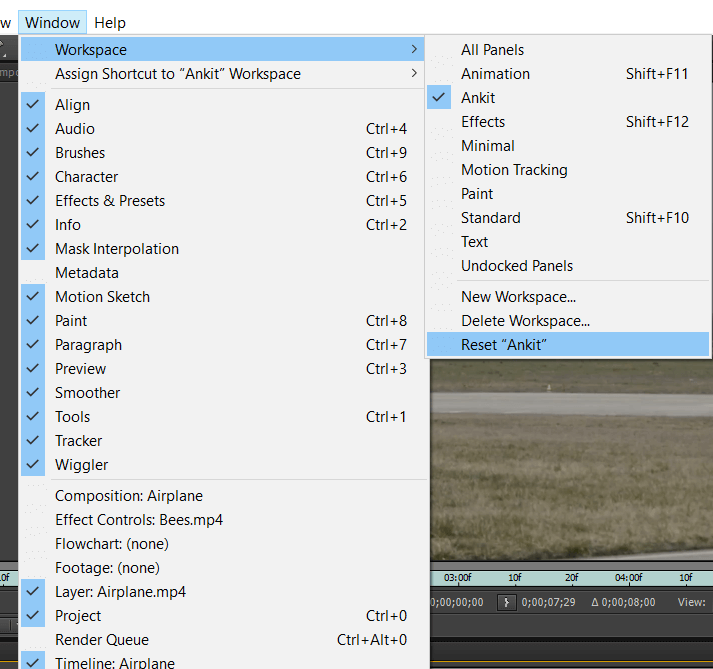
Delete a Workspace Step 1: Go to the Windows menu and click on the Workspace. Step 2: Select the Delete Workspace. Step 3: Now, select the Workspace you want to delete on the appeared dialogue box and click the OK button. 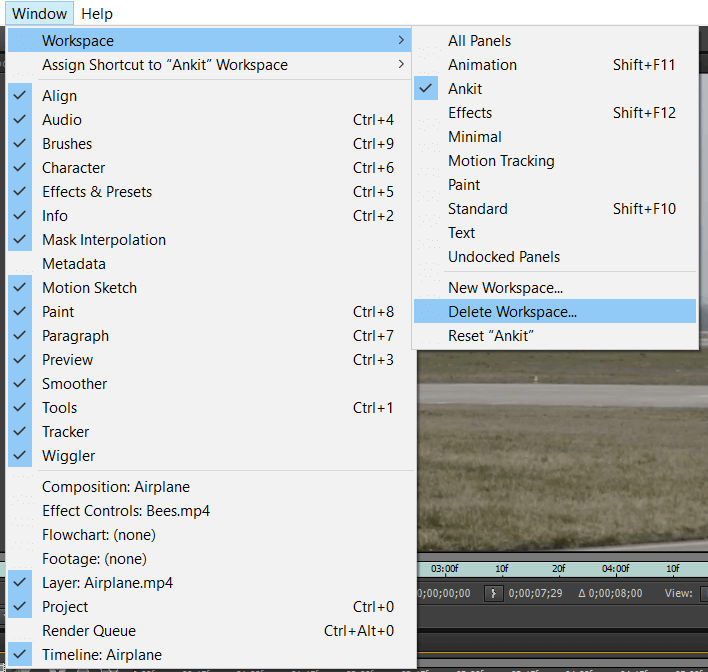
Dock, group, or float panelsWe can dock and move panels together into or out of groups. We undock them, so it floats above the application window. When we drag a panel, the drop zone will be highlighted. It determines the panel's starting point and the location where it gets docked or grouped with other panels. Docking zones: The zone exists along the edges of a panel, group, or window. When we dock any panel, it places it's adjacent to the existing group and resizes all groups to accommodate the new panel. Grouping zones: It exists in the middle of a panel or group and along the panels' tab area. Dropping a panel on a grouping zone, stack it with all the other panels. Dock or group panels Step 1: Choose the Window menu panel that you want to dock or group if it is not visible. Step 2: You can do any of the following methods:
The application will be docked or grouped in the panel, according to the type of drop zone. Undocking panel in the floating window When we try to undock any panel in a floating window, we can add some panels to the window and changes it similarly to the application window. The floating window can be used as a secondary monitor, or it can be used to create Workspace like the Workspace in the earlier versions of Adobe applications. Step 1: Click on the panel that you want to undock or choose Undock Panel/Frame from the panel menu. The Undock Frame undocks the panel group. Step 2: Hold down the Ctrl/Command button, then drag the panel or group from its current location. The panel group appears in a new floating window. Step 3: Group or drag the panel outside the application window. And drag the panel to the Windows taskbar if the application window is maximized. 
Restore or Maximize the panel groups Go to the active panel's tab to maximize or restore the selected panel. We can also press the ' key with the mouse pointer over that panel group to maximize or restore the panel group. Step 1: Position the pointer between two-panel groups to resize either horizontally or vertically. The pointer will transform to Or We can position the pointer at the intersection between three or more panel groups to resize in both directions at once. The pointer changes to . Step 2: Drag while holding the mouse button to resize the panel groups. Open, close, and show panels and windowsSometimes a panel is out of sight while it is still open, so we can choose a panel from the windows menu to open it and brings it to the front of its group. When we close any panel group in the application window, all the other groups will be resized to use the newly available space.
ViewersIt is a panel that contains multiple compositions, footage items, layers, or multiple views of one such item. When we lock the viewer, it prevents the currently displayed item from being replaced when we open or select any new item.
Activating a ToolA tool panel is shown as a toolbar across the top of the application window or a dockable, normal panel. Step 1: Hold down the mouse button while clicking for the tool when the button has a small triangle at its lower-right corner. Click on the tool you want to activate after that. Step 2: Another way to do it is that you can use the keyboard shortcut. Step 3: Repeatedly press the keyboard shortcut to cycle through hidden tools within a tool category. Step 4: Hold down the key for the desired tool to momentarily activate a tool. Step 5: Hold down the spacebar and the middle mouse button to momentarily activate the Hand tool. Scroll or zoom with the mouse wheelWe can use the mouse wheel for the zooming to the timeline, layers, composition, and Footage panels. We can also use the mouse wheel to scroll in the Timeline, Project, Render Queue, Flowchart, Effect Controls, Effect & Presets panels, and Metadata. 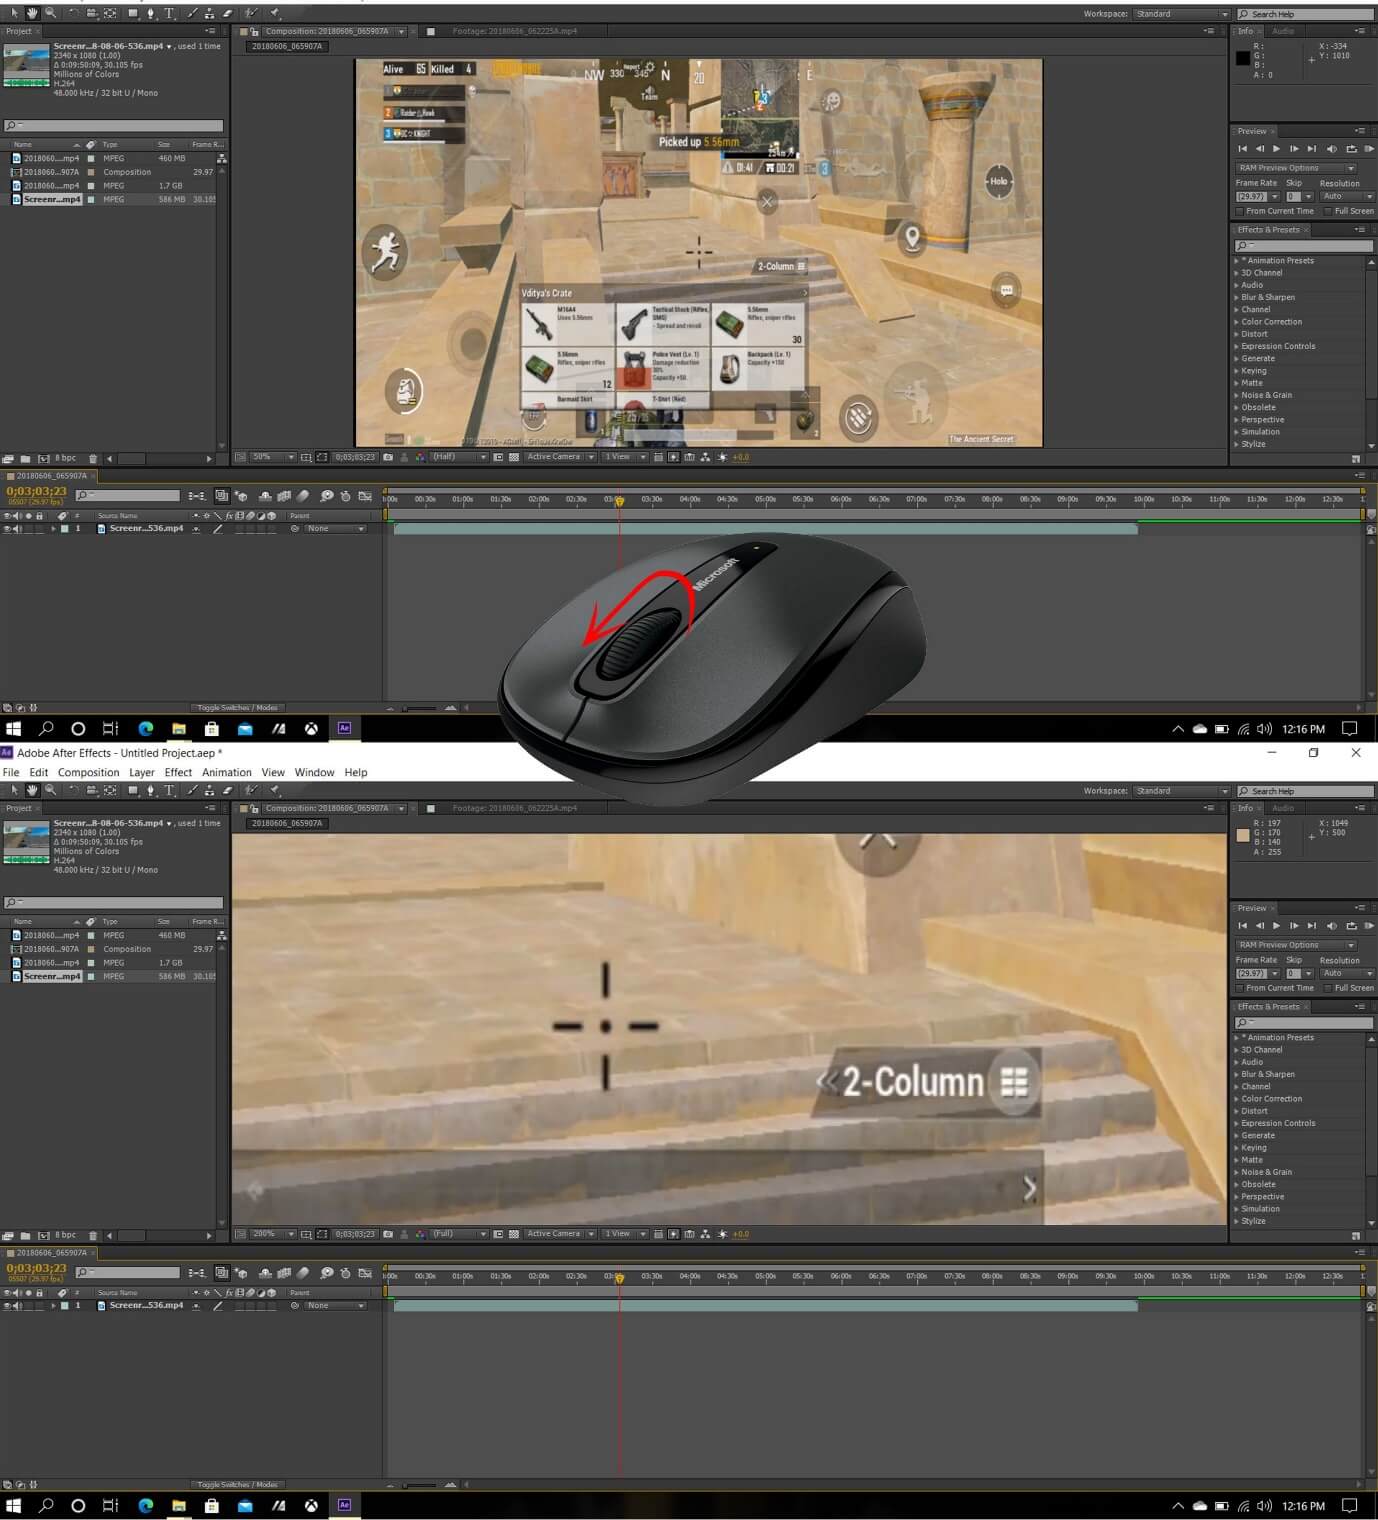
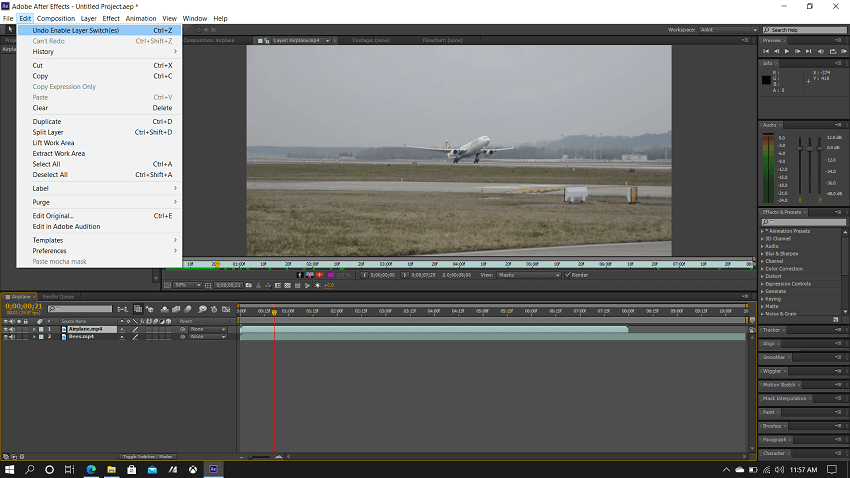
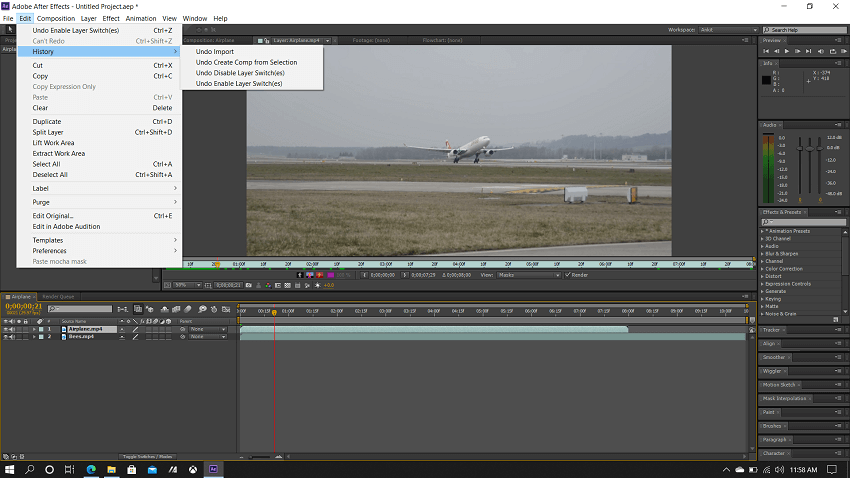
Undo ChangesOnly those actions can be undone that alter the project data. Such as- we can undo a change in the property value, but we cannot undo any changes in the window's view.
Next TopicKeyboard shortcuts in After Effects
|
 For Videos Join Our Youtube Channel: Join Now
Feedback
- Send your Feedback to [email protected]
Help Others, Please Share


