| |

Designing a Business ModelIn this section, we will learn how to design a business model in Talend Open Studio for data integration. Before going further on this topic, we will understand what business model is? Business ModelIt is a graphical representation of data integration projects, which helps the IT operation members to learn these expressed needs and change them into the technical process (jobs). It is a non-technical view of a business workflow need. The business model has both the systems and the methods, which are already operating in the company and the ones that will be needed in the future. Designing a business model is known as one of the best exercises that the company can adopt at the starting point of the data integration project because it helps to lower the cost, search, and resolve the project's flaws. We can change the business model during and after the implementation of the project if needed. The business model will have the strategic system or processes which are already running in our organization. We can also symbolize these systems, processes, and needs with the help of multiple shapes, creating the connections among them and can be described with the help of repository attributes, and the formatting tools. We can use the multiple tools in the design workspace window of the Talend studio's product data integration. Follow the below process to use the multiple tools:
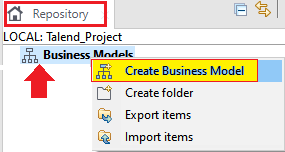
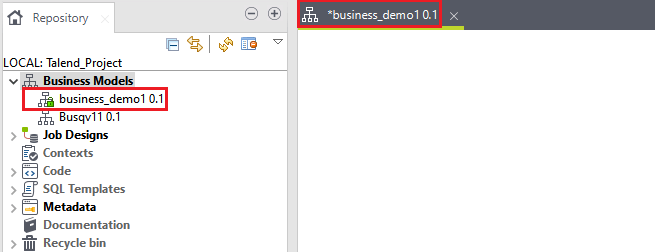
Create and Open a Business ModelFor creating and designing a business model, Talend open Studio provides multiple shapes and connectors. Open a Business ModelTo open the business model, we will double-click the name of the business model, then select the business model, which opens on the design workspace window. Create a Business ModelFollow the below process to create a business model:
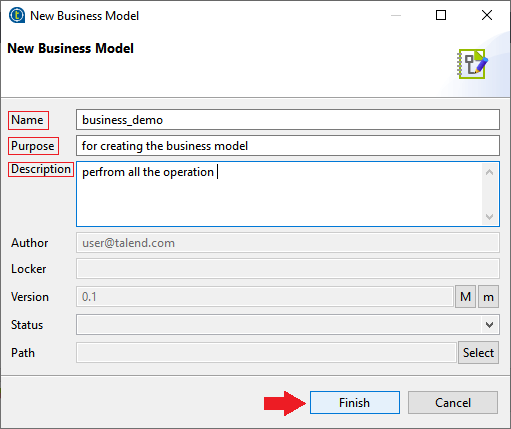
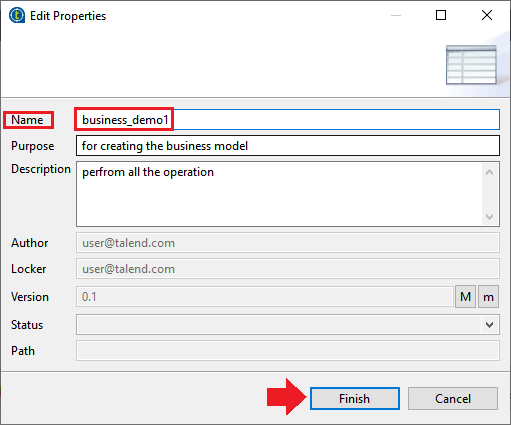
To display all the existing business models, we can expand/collapse the business model section. The business model properties are as follows: Name: This field is used to display the business model name; if we enter any prohibited character, one message will come up. Purpose: This field is used to have useful information related to the business model. Description: We can write the business model details in the description field. Author: This field is a read-only field, which shows the current user login by default. Locker: It is used to display the login of the user by default, who owns the lock on the current job. It becomes empty when we are creating a Business Model, and has the data, only when we are editing the properties of an existing Business Model. Version: Version is a read-only field, where we can manually increment the version with the help of M and m buttons. Status: A list from where we select the status of the business model, we are creating. Path: It displays the list of the folder where we created our business model. After filling all the necessary fields, the Modeler will open on the empty design workspace window where we can create as many models as we want, and open them all. The following panels are used to make the Modeler as we can see in the below image:
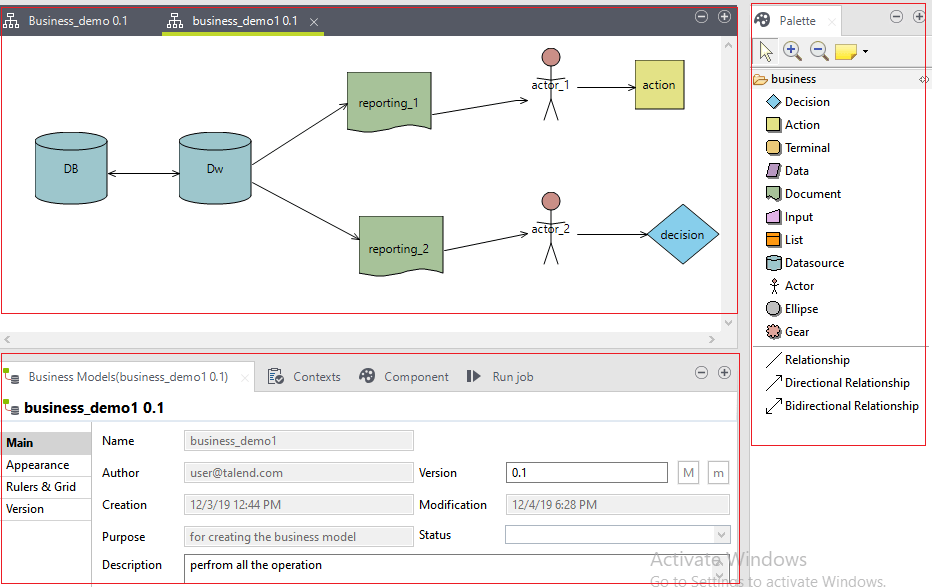
Modeling a Business ModelThe Palette panel allows the graphical representation of objects, which interact within the business model. 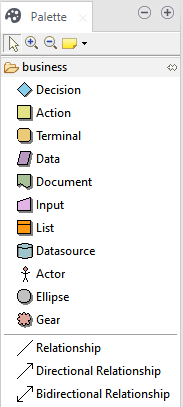
The objects are displayed in the palette panel as a shape that can be used in the model. We can use the palette to drop the selected shapes on the design workspace and connect them. Note: We must click the business model folder to show the library of the shapes on the Palette.ShapesWe can select the shapes by double-clicking it, or drag it from the Palette panel and drop it in the modeling area of the design workspace window. For the appearance of the quick access toolbar, keep your mouse cursor still on the modeling area for some seconds as we can see in the below image: 
The above shapes include the following: Action: The action can be symbolized with the square shape, which is used to display any transformation, translation, or formatting. Terminal: The terminal shape denoted by the rounded corner square space, which is used to display the output terminal type. Document: This is used to insert a document object that can be any document and used as the input or output for processing the data. Database: This is used to insert the database object that can hold the input/output data to be processed. List: It is used to form a list with the extracted data, and it can be defined to hold a particular type of data. Data: It can be symbolized with a parallelogram shape, which is used to display the data type. Input: It is used to insert an input object where data could be passed manually by the user. Decision: It is denoted by the diamond shape, and used to display the If conditions. Actor: It is used for the individuals in decision making and technical processes. Ellipse: It is used to insert an ellipse shape. Gear: It is used to display the manual program, which is replaced by the Talend jobs. The below shape has a blue-edged input box, which allows us to add a label to the shape; we can also give the name, which helps us to identify the role of the shape in the model. The two arrows used to create a connection with the other shapes. 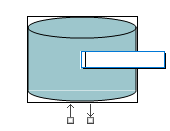
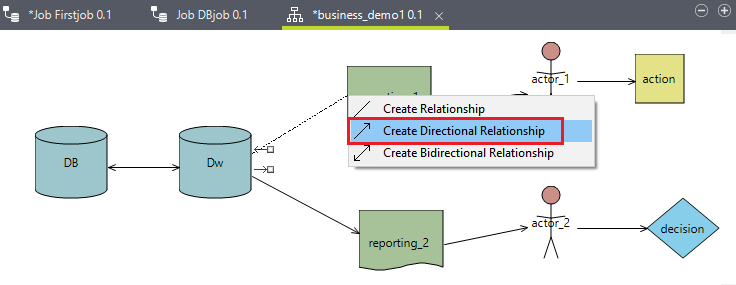
Connecting ShapesIf we want to show the relationship between a source shape and a target shape. To join the shapes in our design workspace, there are two possible ways which are as follows:

Then pull a link from one shape to other shapes to draw a connection between them in the design workspace window.
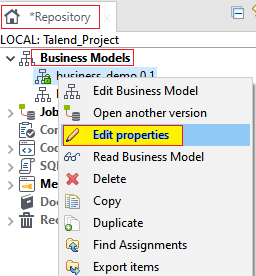
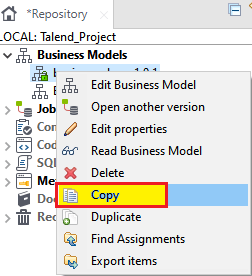
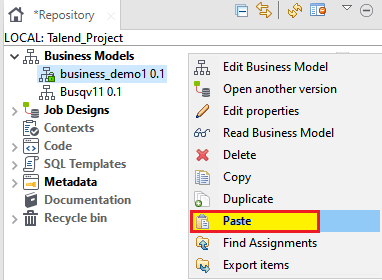
Editing a business modelWe can rename, copy, paste, moving, and delete a business model. Let see how we can edit a business model. Rename a Business ModelTo rename a business model, follow the below process:
Note: If the business model is open, it will be the read-only mode in the Edit Properties dialog box, so we will not be able to edit them.
Copy and Paste a Business ModelFollow the below process to copy and paste a business model:
Move a Business ModelFollow the below process to move a business model.
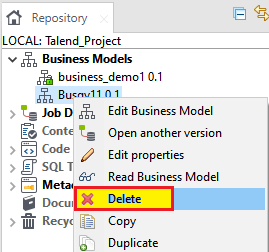
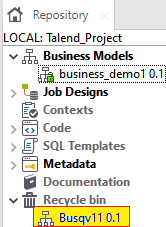
Delete a business ModelTo delete a business Model, follow the below steps.
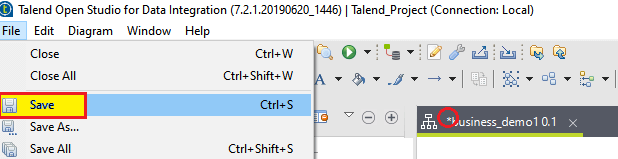
Save a Business ModelTo save a business model, follow the below process:
Next TopicDesign a Job
|
 For Videos Join Our Youtube Channel: Join Now
Feedback
- Send your Feedback to [email protected]
Help Others, Please Share


