tMap Component
In this chapter, we will learn how to map the multiple components with the help of tMap.
To understand the working of mapping components, we will perform multiple operations using the tMap component.
First, we will create the customer.txt and department.txt files into our local system.
And we are using the joining operations on two files customer.txt, department.txt, and getting the dept_name from the department.txt file.
Create a Job:
To create a job in a Talend studio, follow the below process:
- First, we will open our Talend Studio by double-clicking on the icon.
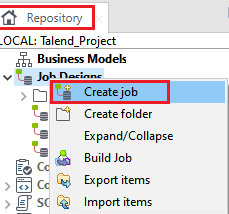
- Once the Talend studio opens, go to the Repository Panel.
- Then right-click on the Job Design, and select the Create Job option, as we can see in the below screenshot:
Repository → Job Designs → Create job
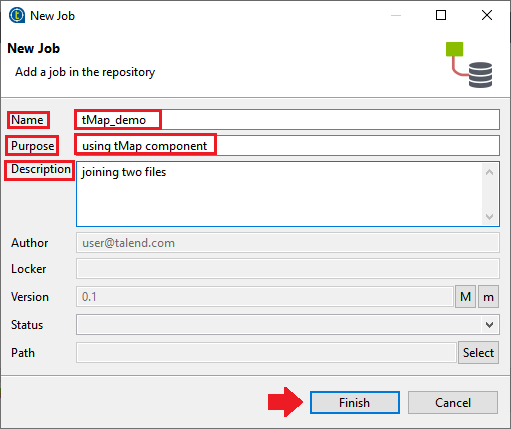
- [New Job] window will open, where fill all the necessary details like Name, Purpose, and Description.
- And click on the Finish button as we can observe in the below screenshot:
Now, we will be going to add the components for further process.
Adding the Components
To add the components in our job, follow the below process.
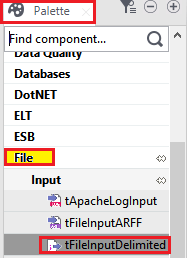
- Go to the Palette panel, then go to the File option, and select the tFileInputDelimited component as we can see in the below image:
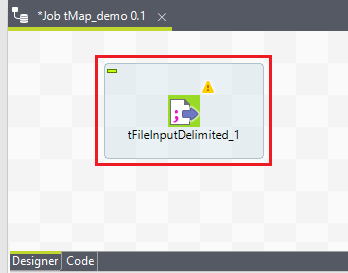
- Drag the selected component from the Palette panel, and drop it to the Design Workspace Window as we can observe in the below image:
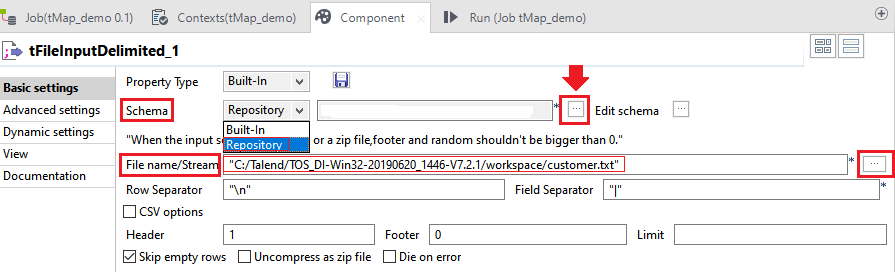
- After that, double click on the tFileInpuDelimited_1 component where we will add the customer.txt file in the File name/ Stream field by click on the [...] button.
Then, we will add the metadata of the particular text file.
Centralized the metadata in a job
For centralized the metadata in our job, follow the below process:
- Go to the Schema field and select the Repository option in the given drop-down list.
- Then, click on the [...] button to add the metadata, as we can see in the below screenshot:
- Once we click on the [...] button, the Repository Content window will open, where we will follow the below path:
Metadata → file delimited → customer_metadata0.1 → metadata
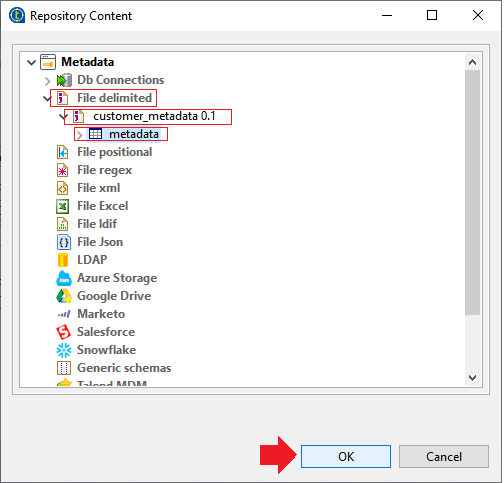
- And, click on the OK button, as we can see in the above image.
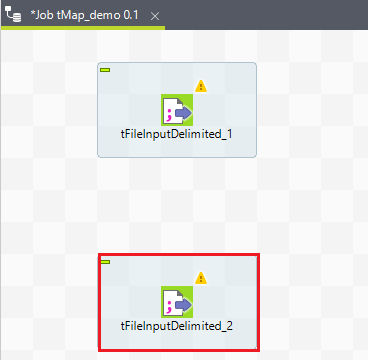
- After that, we will add one more component for another input file department.txt.
- For this, we will follow the same process as we did in the customer.txt file.
- After, adding the second component tFileInputdelemited_2, our Design workspace window will look like this in the below image:
Adding the tMap Component
Once we are done with adding the components for the particular files, we are ready to add the tMap component.
Follow the below steps to add the tMap component in the design workspace window:
- Go to the Palette panel and type tMap in the search box.
- Then, drag the tMap component from the Palette, and drop it to the Design workspace window as we can see in the below image:
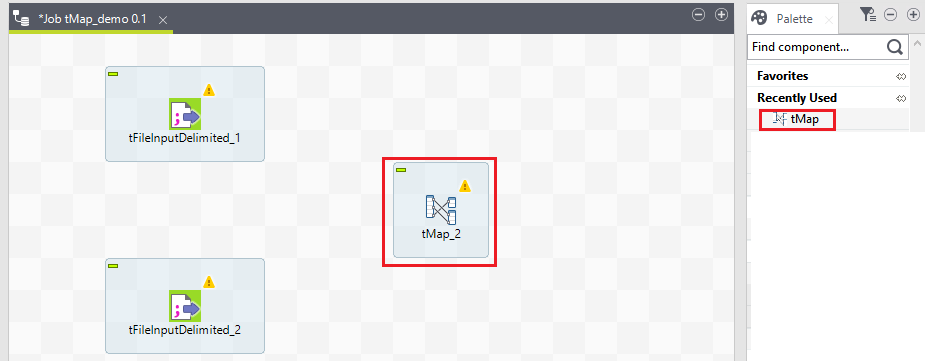
Now, we are successfully adding the tMap component to the design workspace window.
After adding the components, we will connect the components.
Connect the components
For connecting the file delimited input components to tMap components, follow the below process:
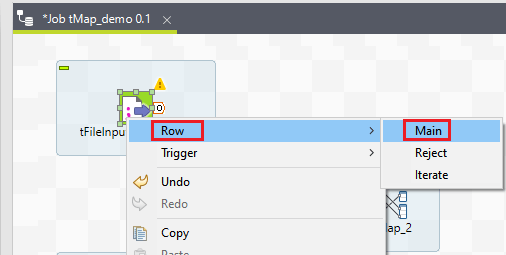
- In the design workspace window, Right-click on the tFileInputDelimeted_1 component, and select Row, then select Main as we can see in the below image:
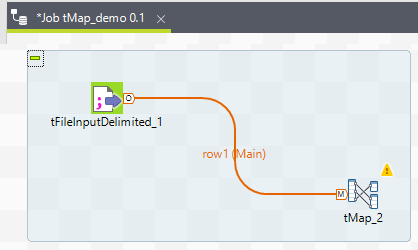
- And, connect to the tMap_2 component as we can observe in the below image:
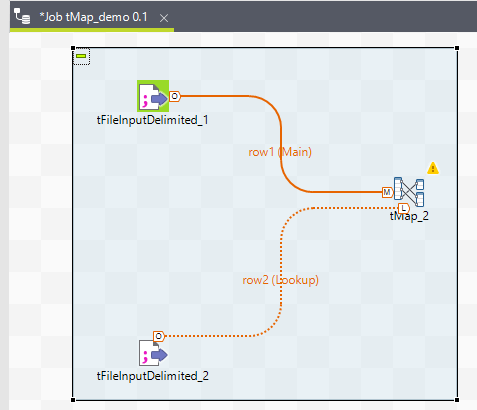
After that, we will connect the second component, which is tFileInputDelimeted_2 to the tMap_2 component.
For connecting the tFileInputDelimeted_2 to the tMap_2 component, follow the same process as we did it for tFileInputDelimeted_1 component.
Once we connect the tFileInputDelimeted_2 to tMap_2, our design workspace window will look like as shown in the below image:
After successfully connecting the components, we will add one Output component.
Adding the Output component
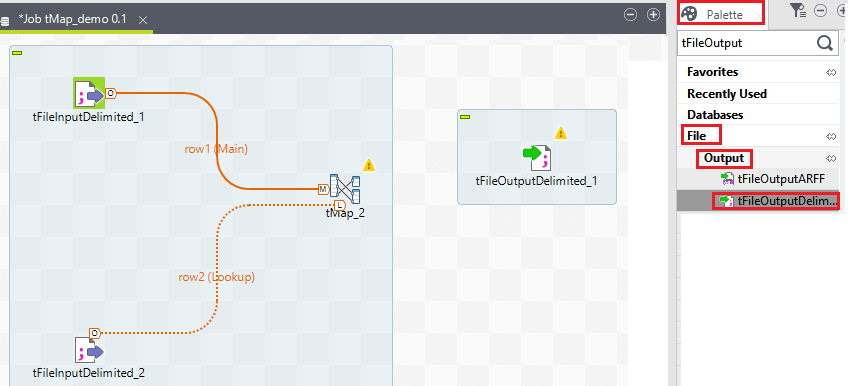
To add the output component, follow the below path:
Palette pane → File → output → tFileOutputDelimited_1
- Drag the selected the tFileOutputDelimited_1 component and drop it to the design workspace window as we can see in the below image:
- Then, connect the tMap_2 to the tFileOutputDelmited_1.
To connect both components, follow the below steps:
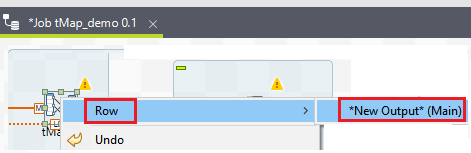
- Right-click on the tMap_2 component, then go to Row and select New Output (Main) option in the pop-up menu as we can see in the below image:
- Once we clicked on the New Output, tMap_2 output window will open. We have to give a new output name, so we provide it as final_output as we can see in the below image:
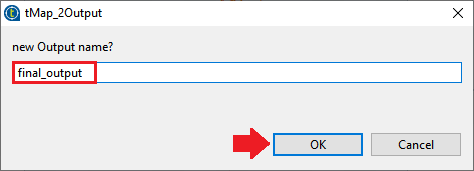
After that, click on the OK button.
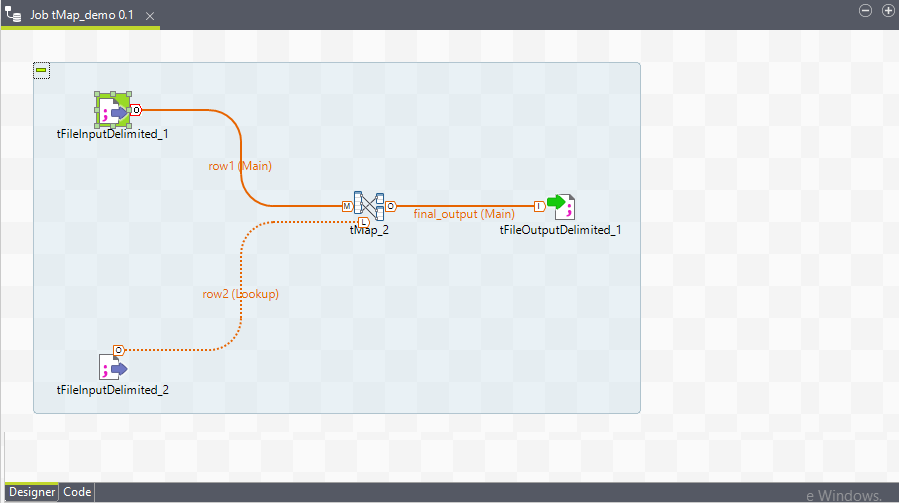
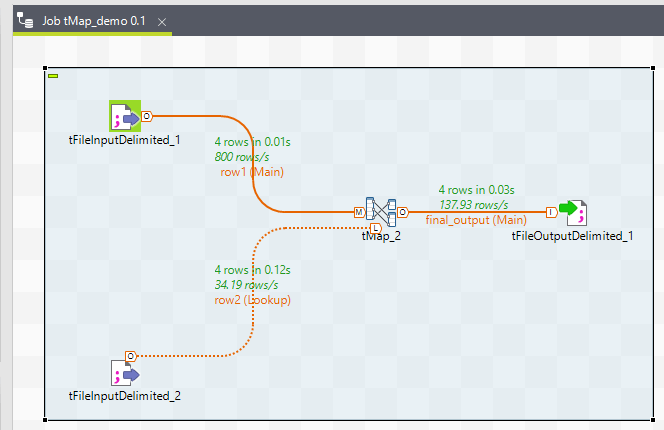
Once we add and connects all the components together, our design workspace window will look like this in the below image:
Now, we will perform some action on the tMap_2 component.
To perform some action on the tMap component, follow the below process:
- Double-click on the tMap_2 component.
- The [Map Editor] window will open after double-clicking on the tMap component as we can see in the below image:
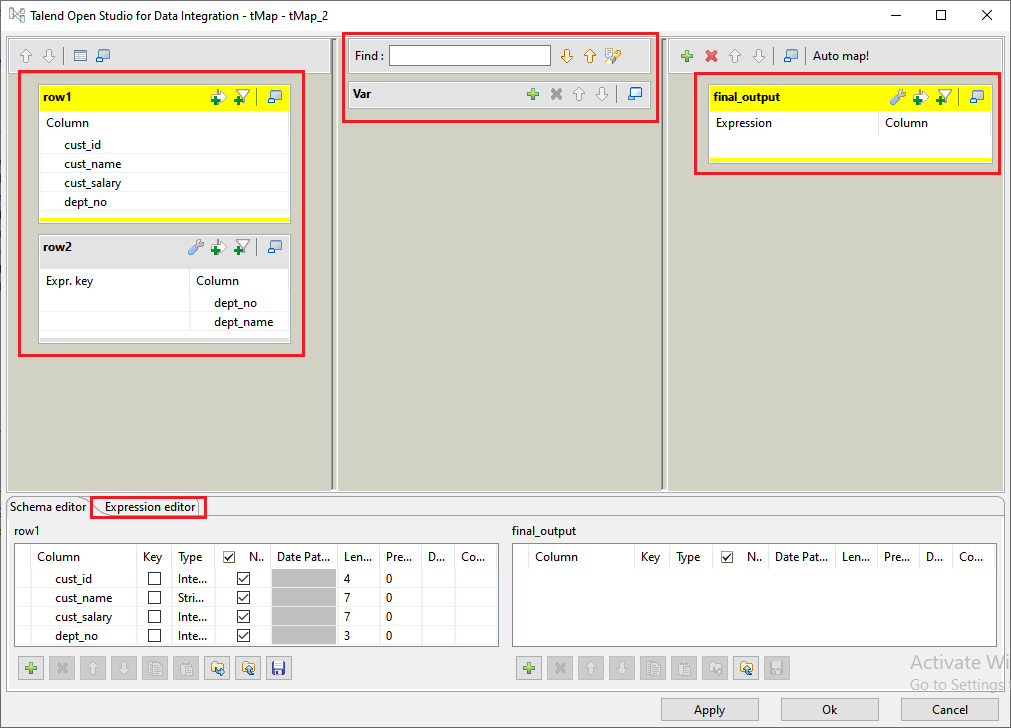
The Map Editor is an all-in-one tool that offers us to define all the parameters needed to map, transform, and route our data flows to the graphical interface.
We can minimize and restore all the presented tables with the help of window icons in the Map Editor.
The Map editor is a combination of the various panel, which is as follows:
- Input panel
- Variable panel
- Search panel
- Output panel
Input panel
It is the top left panel on the map editor, and the input panel is a representation of all (main and lookup) incoming data flow, and the data are collected in the multiple columns of the input tables.
And also, see that the table name is reflecting the main or lookup Row from the job design on the design workspace window.

Variable panel
It is the central panel in the map editor. The variable panel allows the centralization of unnecessary information through the mapping to a variable. It will enable us to carry out the transformations.

Search panel
It is above the variable panel in the map editor.
In the search panel, we can search in the editor for the columns or the expressions which contain the text we enter in the find field.

Output panel
It is present on the top right corner of the editor. The output panel is used to map data and fields from the input table and variables to the suitable output rows.
Note: Both bottom panels are the Input and Output schemas description.
And there are two editors present in the mapping editor, which are as follows:
- Schema editor
- Expression editor
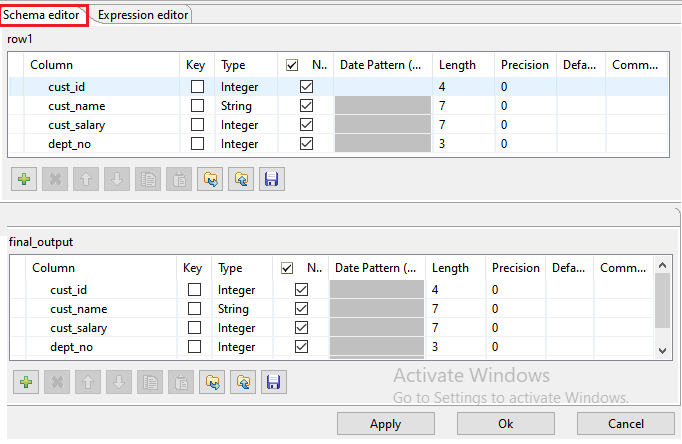
Schema Editor
In the schema editor, we can see the schema view of all the columns of the input and output tables in their respective panels as we can see in the below image:
>Expression Editor
It is the edit tool for all the expression keys of input/output data, variable expressions, or filtering conditions.
The table name of input/output in the map editor reflects the name of the incoming and outgoing flows (row connections).
tMap Operation
The following are the types of tMap operation:
- Data transformation on any type of fields
- Data multiplexing and de-multiplexing
- Field filtering using constraints
- Fields concatenation and interchange
- Data rejecting
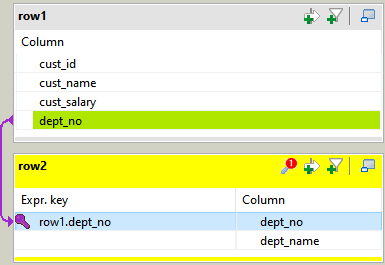
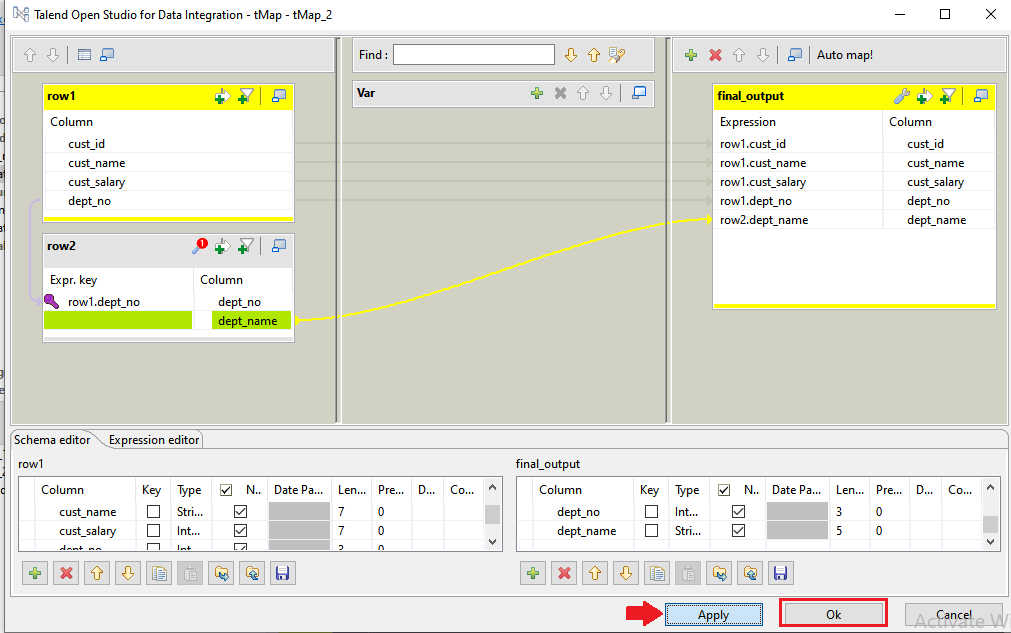
After that, we will join row1 and row2 and operated it to the output delimited file.
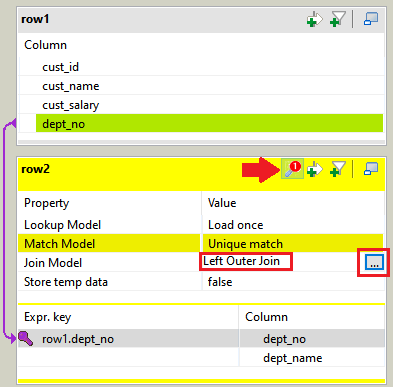
For this, select the dept_no from row1 and drag it to row2 as we can see in the below image:
And click on tMap setting button, then click on the Left Outer Join button as we can see in the below screenshot:
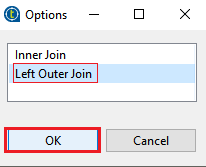
After that, in the Options window, select the Left Outer Join option, and click on the OK button as we can observe in the below screenshot:
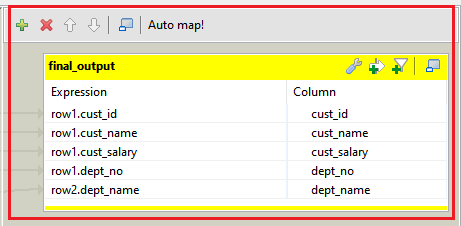
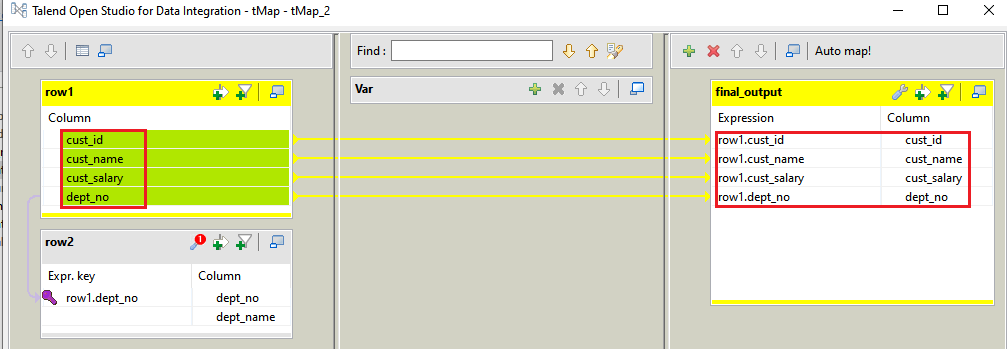
Then, we will select row1 and drag it to the output panel as we can see in the below image:
Now, we will drag the dept_name from row2 to the output panel, which is as shown below:
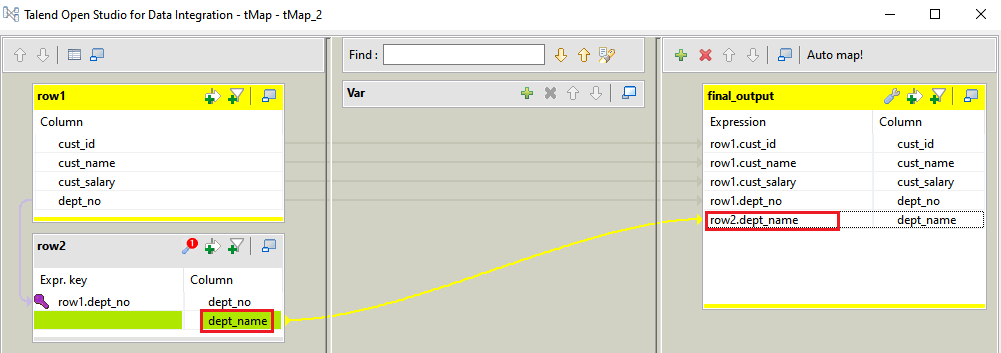
So, we have all the columns of row1 and row2, which are mapped into the output panel.
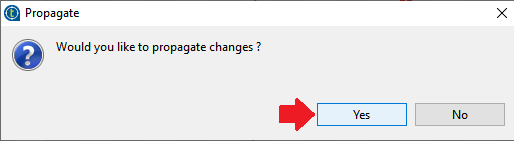
After that, click on the Apply button, then click on the OK button, as we can see in the below image:
And, click on the Yes button to allow the changes as we can see in the below screenshot:
After that, double click on the tFileOutputDelimited_1 file, and click on the Edit Schema.
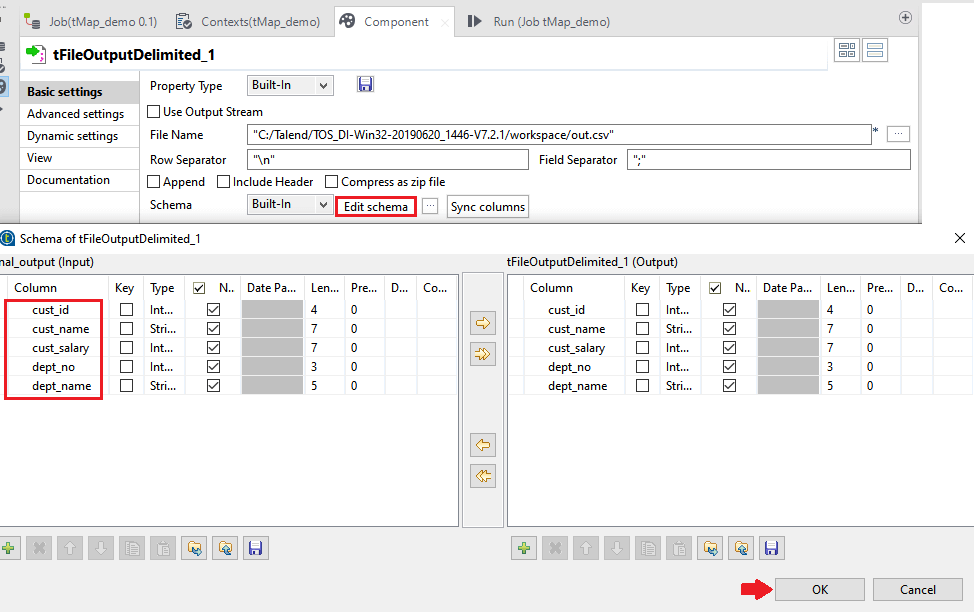
- In the above image, as we can see that all the columns are mapped together from Row1 to Row2, and click on the Ok button.
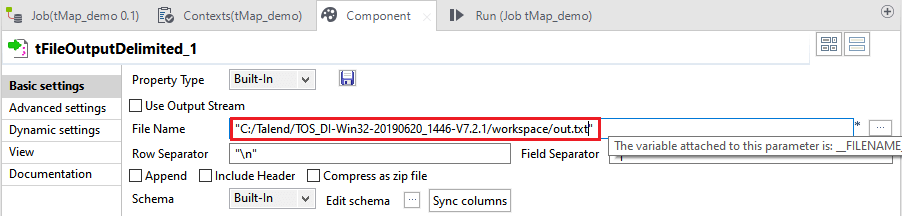
- And, we can change the file extension like .txt, in the File Name column.
After that, click on the ,Run button to start the execution of the tMap_demo job.
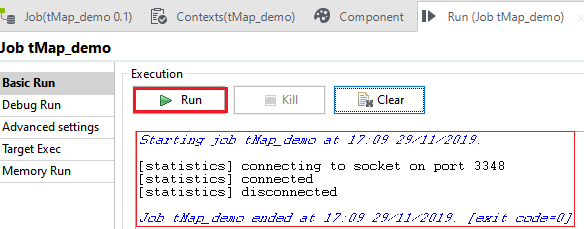
And, the result will show like this in the design workspace window:
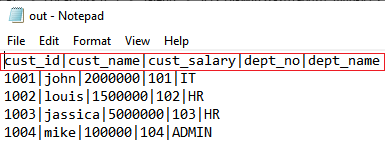
The output will show in the out.txt file as we can see in the below screenshot:
| 
 For Videos Join Our Youtube Channel: Join Now


