Vert.x Java
An open-source polyglot platform or toolkit is referred to as Vert.x in Java. The Vert.x platform runs on JVM(Java Virtual Machine). We can say that it is an alternative to the JEE. It comes with a different approach in the market to solve the issues such as developing networked and highly concurrent applications. It shares common functionalities among all the supported languages like Java, Ruby, Kotlin, Scala, and JavaScript. Vert.x is a toolkit, so we can embed it into our standalone Java application. We can use it by instantiating the object of Vert.x and calling the method on it. In toolkit mode, our code control vert.x. It also acts as a platform, so we can set up it using the command line and tell the components to it which want to run. InstallationThe installation of Vert.x is quite simple. It is distributed in a zip file having a bunch of Jar files. We simply unzip the file and add all the JAR files to the classpath of our Java application. After adding all the JAR files, we are ready to use Vert.x in our application. We can download the zip file from Maven Central or from the Bintray. Let's start with a new vert.x web project, but before that, we have to make sure that our system has the following things:
In order to create the first web project using Vert.x, we should have to follow the following steps: 1) We go to the https://start.vertx.io/ for creating a new project. We see the screen like as: 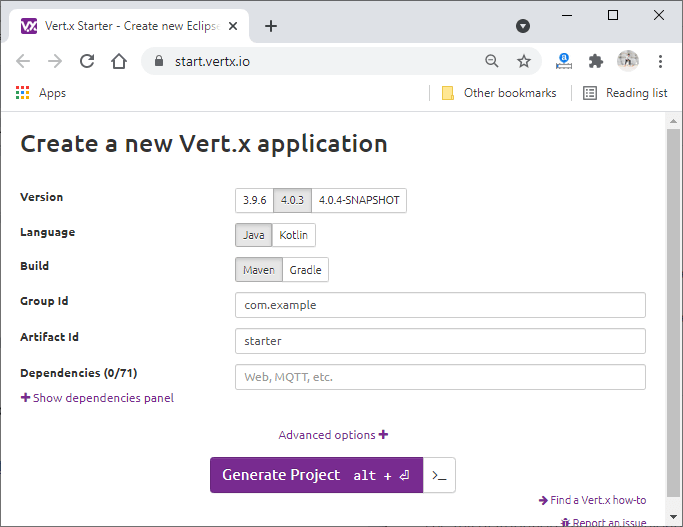
2) We choose the version of the Vert.x, which we want to use in our application. We choose language, either Java or Kotlin, as per our interest. We also choose the build from Maven and Gradle. In our case, we use Maven. We fill the Group Id and Artifact Id fields. We also add the Vert.x Web as a dependency. After adding the dependency, we click on the Generate Project button to create the project. 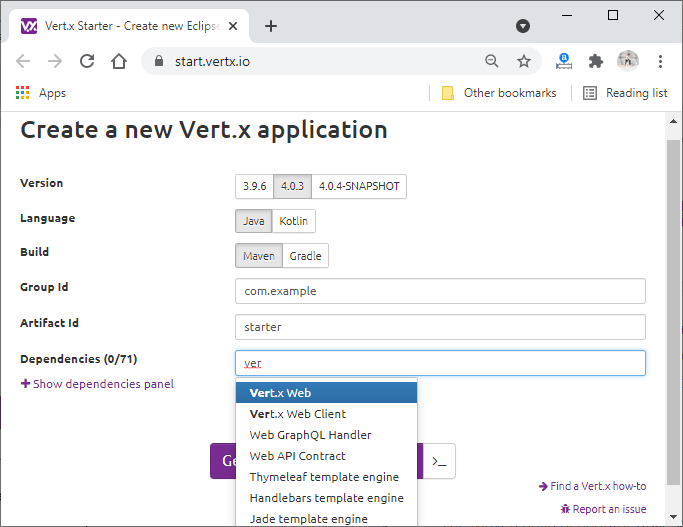
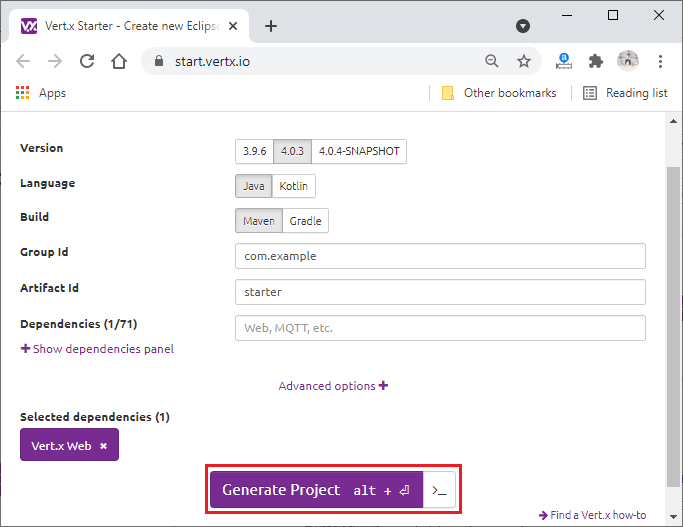
3) When we click on the Generate Project button, it downloads the zip file on our computer. We unzip it into a folder of our choice. 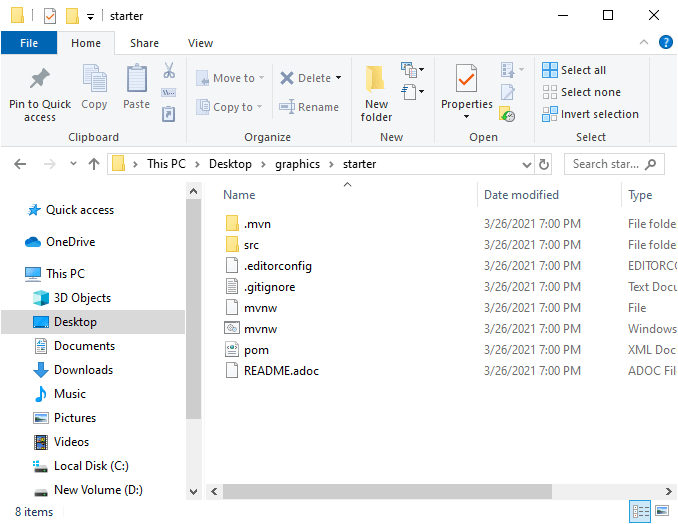
The generated folder contains the maven build descriptor, i.e., pom.xml. The pom.xml is configured to build and run our application. It contains a sample test and verticle using JUnit 5. For enforcing code style, it also contains an editor configuration. At last, for ignoring files, it contains a Git configuration. 4) Now, we will open that Vert.x project in any of the IDE or editor of our choice and navigate to the following path: 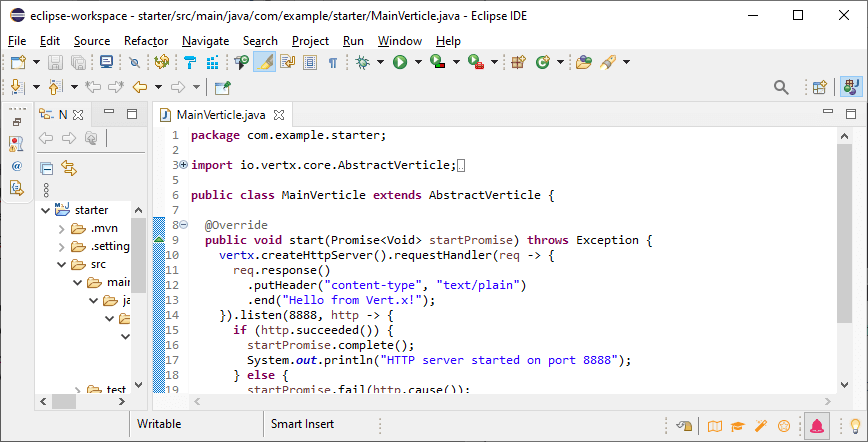
The MainVerticle.java class contains a sample verticle that starts an HTTP server. We modify that class to greet whoever performs requests to our server. We change the code as given below: The above code will create a vert.x web router and start an HTTP server on port 8888. It returns a JSON object on each request. The JSON object contains the query parameter names, the address of the request, and a greeting message. 5) Now, we run our Vert.x project, and before running the project, we have to make sure that the Maven is installed in our system. We open the terminal and run the following command to check whether the Maven is installed in our system or not. 
Now, we run our Vert.x application using Maven. We navigate to our project folder and run the following command: 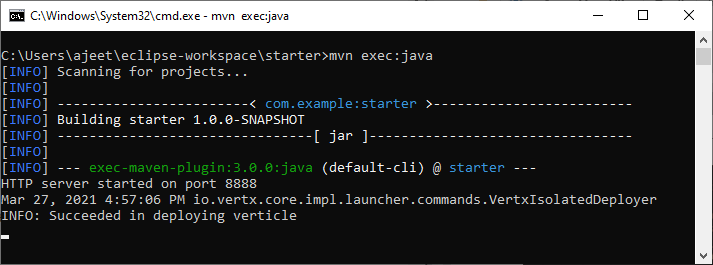
The above command starts the server at port 8888. Now, we are ready to send a request using that server. 6) ow, our server is running on port 8888. We try to send requests on that server. We first send a request without passing query parameter, and it sends the response having an unknown name like as: 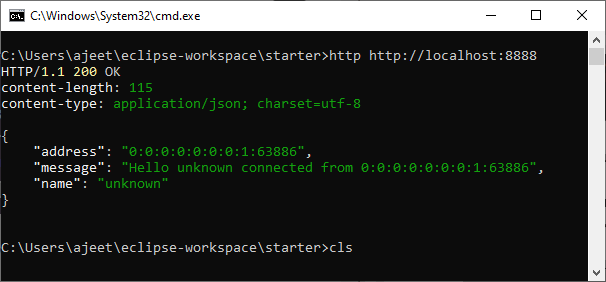
Now, we send another request bypassing the query parameter name, and based on that query parameter, it returns the JSON response like as: 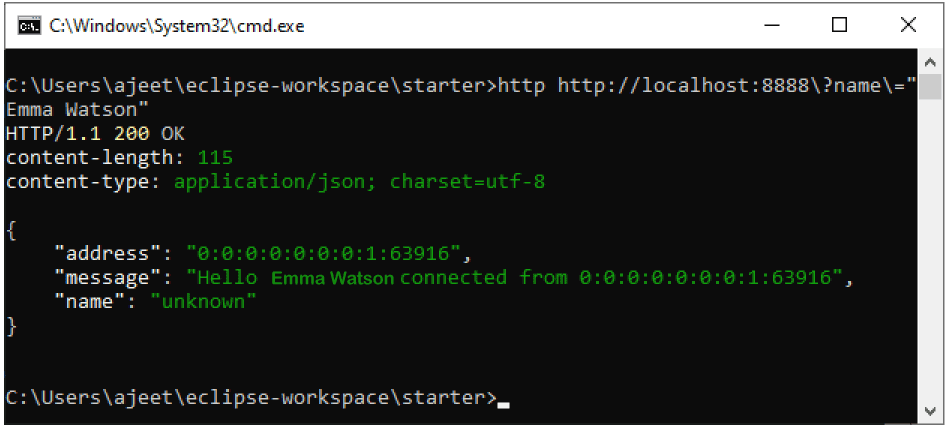
Next TopicBouncy Number in Java
|
 For Videos Join Our Youtube Channel: Join Now
Feedback
- Send your Feedback to [email protected]
Help Others, Please Share


