| |

EDATE Function in Microsoft ExcelIn Microsoft Excel, the "EDATE" function is termed to be the date as well as the time function, that can be used for the purpose of adding a given number of months into a particular date and it will also provide us with the date in a numerical format of a date, respectively. The "EDATE" Function in Excel is also known as Excel Add Month to Date. Besides all this, the respective "EDATE" function's arguments primarily take date and the integers, with date as the start_date. The number of months is an integer which can be used to add to the given start date, and the output returned by this function is also a "date value." Therefore, we can easily make use of this function as: =EDATE (start_date, months).
= EDATE ("10/15/20",-4), which will result in: 8/15/20 List out the key takeaways related to the EDATE function In Microsoft Excel.The various Keytakeaways which are associated with the EDATE function in Microsoft Excel are as follows:
What do we mean by the term EDATE Function in Microsoft Excel?It was well known that the respective EDATE function in Microsoft Excel is termed to be the built-in function that falls under the DATE and TIME functions. EDATE in Excel is purposely used for getting a date on the same day of the month, which means that getting of "x" months in the past or future respectively. Moreover, the EDATE function basically returns out the date's serial number, as well as the indicated number of months before or after the given start date, in contrary to this, the EDATE function in Microsoft Excel also calculates out the due dates, expiration dates, as well as the dates of maturity effectively. EDATE Formula in Microsoft ExcelIn Microsoft Excel, before working with the EDATE formula or function, we are required to understand the syntax of this formula as well: Syntax: 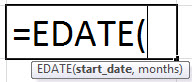
The syntax for the EDATE formula in Microsoft Excel is as follows: It was well known that the respective "EDATE" in Microsoft Excel has two arguments. And both of them are required when,
What are the various advantages of using the EDATE function in Microsoft Excel?The various advantages of using the EDATE function in Microsoft Excel are as follows:
What are the disadvantages of using the EDATE function in Microsoft Excel?The various disadvantages or limitations that are associated with the use of the EDATE function in Microsoft Excel are as follows:
How can we make use of the EDATE Function in Microsoft Excel?The respective "EDATE" function in Microsoft Excel is a Worksheet (WS) function. As a Worksheet function (WS), EDATE in Microsoft Excel can be easily entered as a part of the formula in a selected worksheet cell. We may refer to a couple of examples discussed below to get better insights into this. Use of EDATE Function in Microsoft Excel WorksheetTo better understand the EDATE function in Microsoft Excel, we will consider the various examples below. Each example covers a different use case implemented using the EDATE Excel function. # Example 1: Use of EDATE function in Excel For this example, let us assume that we have taken a Washing Machine on EMI for six months, and contrary to that, the respective EMI will be deducted on the 05th of every month. Therefore, we must create an EMI chart with the same monthly date.
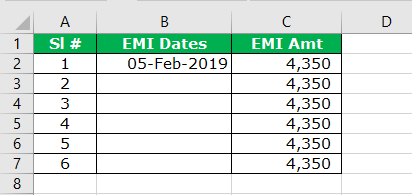
And now, for the next five rows, we must have the dates as 05th March 2019, 05th April 2019, and so on for the next five months, respectively. So the steps which are required to achieve the above example are mentioned below: Step 1: First, we must open the EDATE function in our selected cell, which is none other than cell B2. 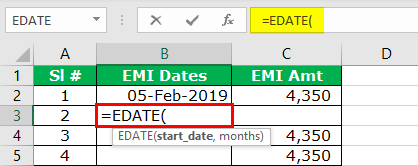
Step 2: The start_date is termed our above month, i.e., B2 cell month. 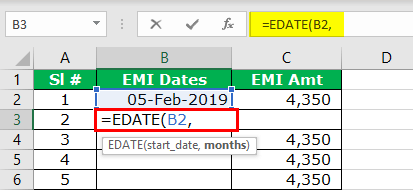
Step 3: Now, in this step, we must think about how many months we need to add, i.e., one month, so for this, we need to supply the argument as 1. 
Step 4: Yes, we have the next month's change but not the date here. So, for this, we must effectively fill down the formula to the remaining cells to have all the month's dates as the 5th as well. # Example 2: As in the below-mentioned table, we have written out various dates in the column labeled as date, and to which we are required to add the number of months mentioned in the Months to add a column; so here in this, with the help of the EDATE function, we are about to find out the finalized dates in column D. 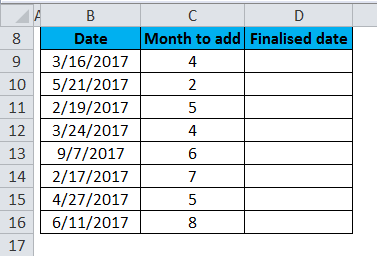
So before applying the EDATE Function, if the column D cells are in a general format, then in that case we are required to convert the date format, as mm-dd-yy format. Moreover, the date needs to be represented as an incorrect date format. Otherwise, it will appear in a general format, and an EDATE function output will appear as numbers. 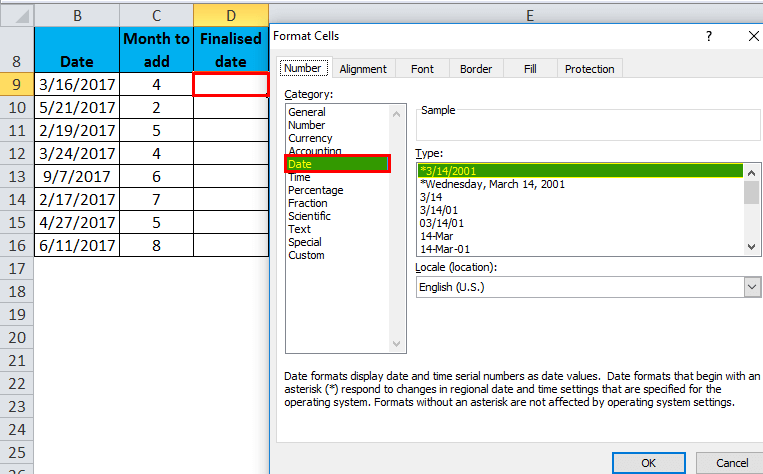
Now after that, we need to apply the EDATE function in cell "D9.". 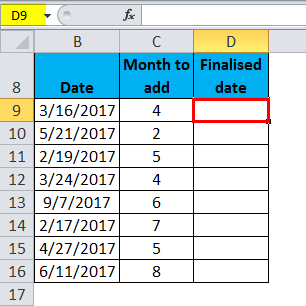
And then we need to select the cell "D9" where an EDATE function needs to be applied; after that, click on the insert function button (fx), which is efficiently present under the formula toolbar, and by doing so, a dialog box will get appear on our screen where we will be typing the keyword "EDATE" in the search for a function box, EDATE function will be appearing in the Select a function box. 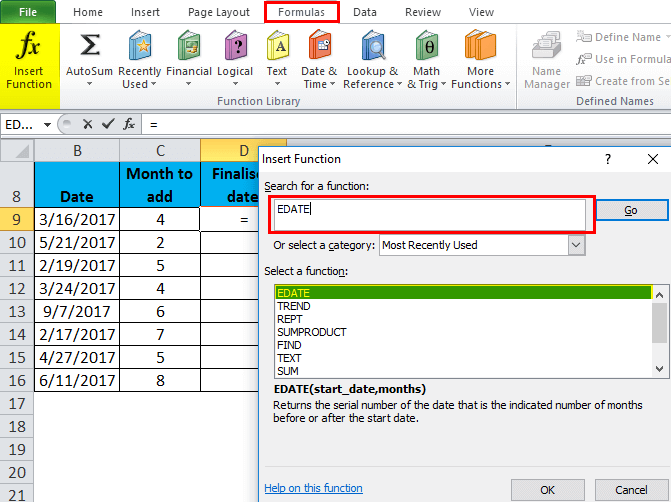
We will be then Double-clicking on an EDATE function so that a dialog box appears where arguments for the EDATE function need to be entered out, i.e., =EDATE(start_date, months) 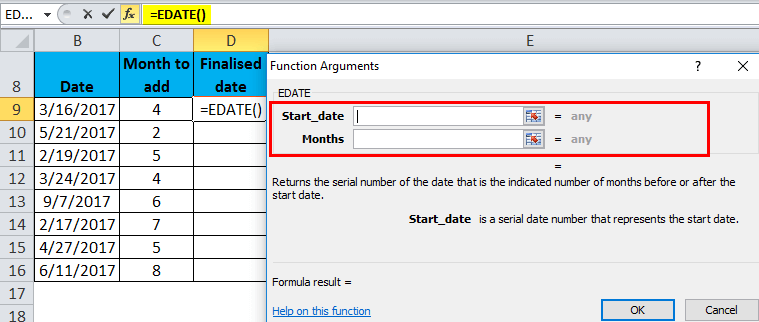
In which, Start_date: is termed to be the date, reference cell, or date in number format; either is entered to get the desired output. Here, we have mentioned the reference cell, which is none other than cell "B9." Months: In this, we entered here as a reference cell, that is "C9," or we can also add 4, which is the number of months to add: =EDATE (B9,C9) 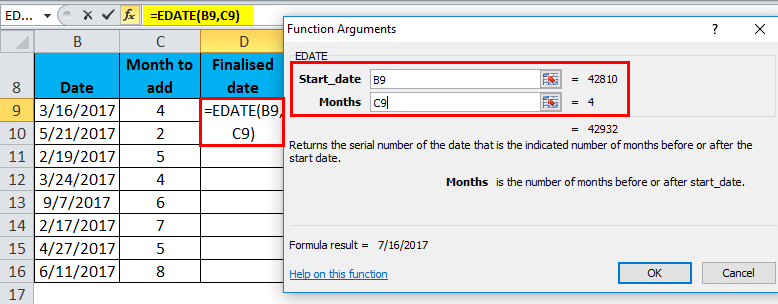
After filling in both arguments, we must click the "OK" option to proceed. 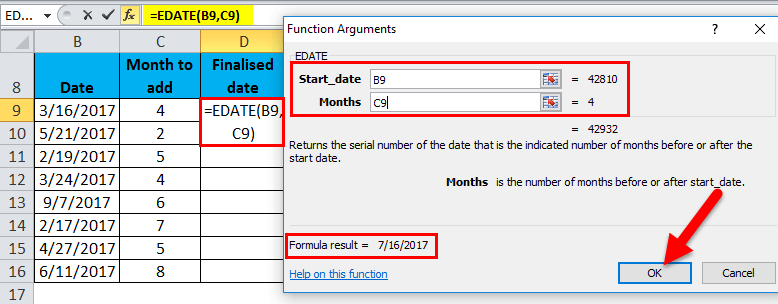
=EDATE(B9, C9), this will return the finalized date value as of 7/16/2017 in cell D9. 
And to get the finalized date for the complete dataset, we must click inside cell D9 to see whether the cell has been selected or not, after that we need to select the cells till D16. Once it get selected, the column range will also be selected, and we will press Ctrl + D shortcut button to apply the EDATE Formula to the whole range. 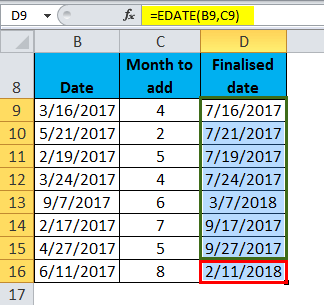
# Example 2: In this example, we have mentioned the table, in which we have written out the various dates in the column known as "date," to which we are required to subtract the number of months as it was mentioned in the Months to subtract column. While taking the "EDATE function," in consideration we are required to out find the finalized dates in column K. 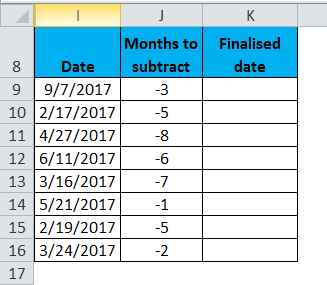
And before applying the EDATE function, if column K cells are present in the general format, then firstly we will be converting it into the date format that is: mm-dd-yy format. Otherwise, it will appear in a general format, and an output of the date function will appear as numbers as wells. 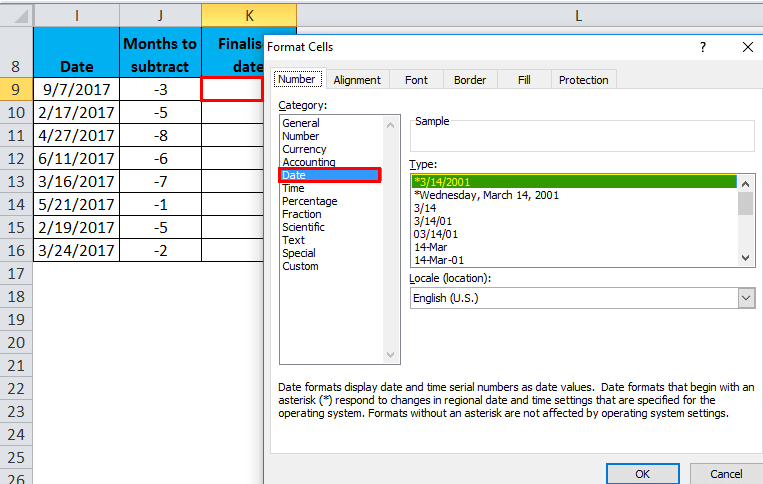
After performing the above step, we must apply the "EDATE function" in cell "K9," respectively. 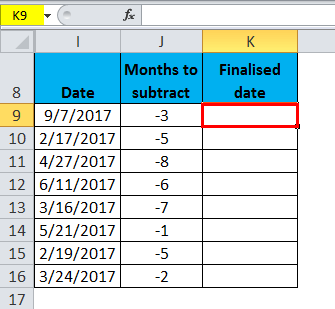
Now, after that, we need to select the respective cell "K9" in which an EDATE function needs to be applied; then we will click on the insert function button (fx) under the formula toolbar, and by doing so, a dialog box will get appears on our screen. We will then type the keyword "EDATE" in the search for a function box. 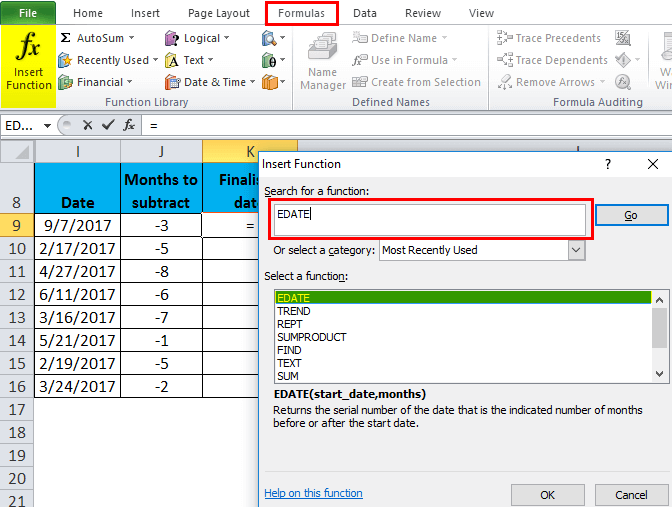
After performing the above step, we will now Double on an "EDATE function," and by doing so, a dialog box will appear on our screen in which we need to fill in arguments or can be entered for the EDATE function, i.e., =EDATE(start_date, months). 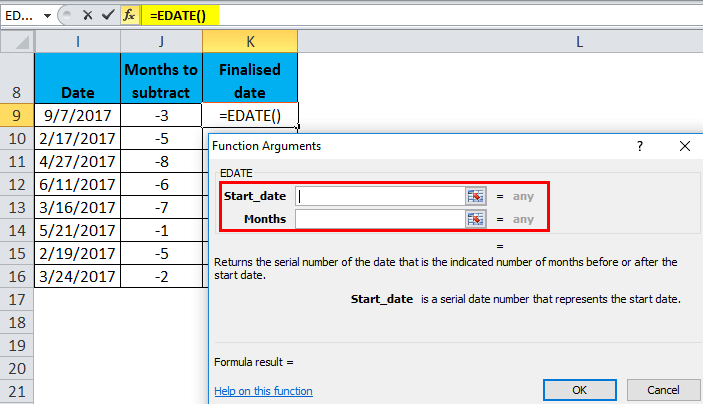
=EDATE (I9, J9) 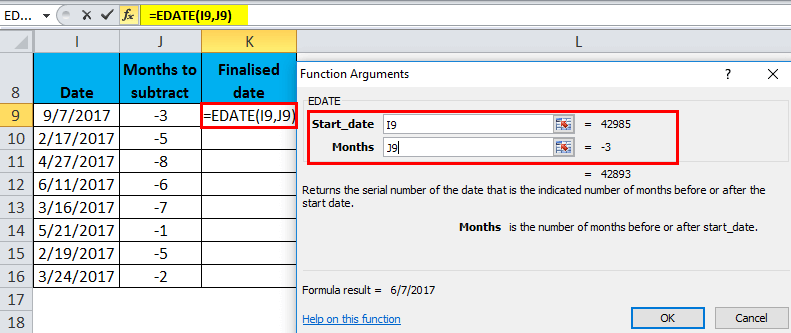
After entering arguments in both columns, we must click the "OK" option to proceed. 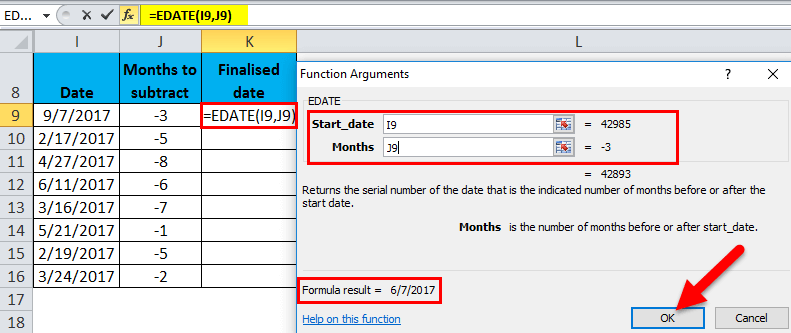
=EDATE (I9, J9) means it will be returning the finalized date value as of 6/7/17 in cell that is none other than cell K9. 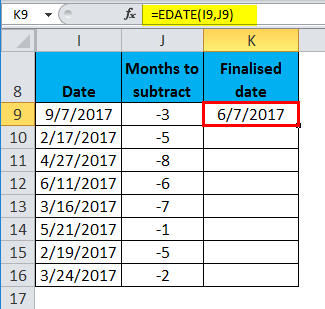
And now to get the finalized date for the complete dataset, we will click inside cell K9 to see the cell selected, and then we will be selecting the cells until K16. After selecting the column range, we will select the desired cell and then click on our keyboard's Ctrl + D shortcut button to apply the EDATE Formula in Microsoft Excel to the whole range. 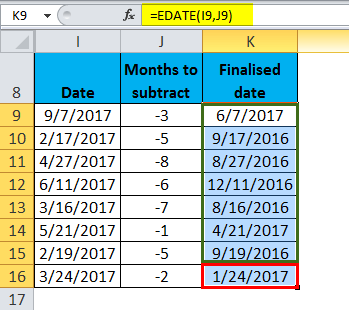
How to Add Months to Date by making use of the EDATE Function in Microsoft Excel?We can easily add months to data by just making use of the EDATE Function, but this is restricted to be used for some special cases only, which are as follows:
Now we will be getting their better insight with the help of the examples: Example #3: For different Results in the Case of February Suppose that we have taken the loan, and for that respective loan, the EMI due is on the 30th of every month. The first will be on 30th October 2018, and EMI is for six months, so let us apply the EDATE function to arrive at all the month's due dates effectively. 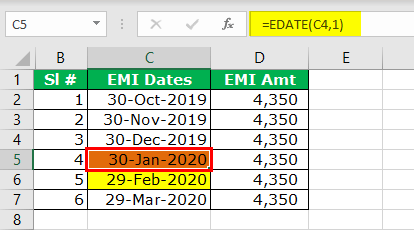
And if we go through the above function, the first thing is when it ends the year 2018 in Dec... After that, it automatically jumps to the next year, which means 2019. And the second thing is in February 2019, which is considered to be a non-leap year. So, it will be having only 28 days. So, for this, the above formula has returned the due date as 28th February 2019. #Example 4: Special Due Date for Leap Year To consider the above case, we will be taking an example of a year that has a leap year. And in case of a leap, the year formula will return on 29th February, not the 28th February, respectively. 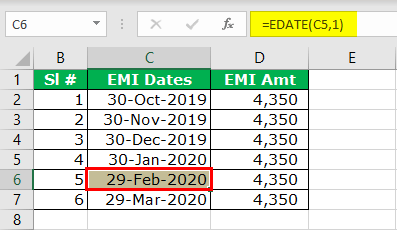
# Example 5: To Get Previous Months with a Negative Number From the above example, we have learned how to get next month's date from the current date easily. What if we get the previous months from the current date? Let us assume that we have the starting date as 05th September 2018, and we must go back for six months. 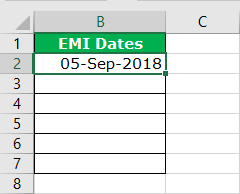
So, to achieve the above task, we need to apply the EDATE function, but in the number of months to add mention -1 as the argument, as depicted below: 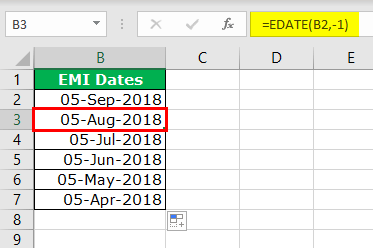
List out the things that need to be remembered by an individual while working with the EDATE Function?The important things which are required to be remembered an individual while workings with the EDATE function in Microsoft Excel are as follows:
|
 For Videos Join Our Youtube Channel: Join Now
Feedback
- Send your Feedback to [email protected]
Help Others, Please Share


