How To Write Test Cases In JavaTest Cases are the conditions that are to be tested when the software is created. Before writing test cases in Java, we need to understand what test cases are. This section will cover a brief introduction of Test cases and then how we can write test cases in Java. What are Test CasesTest Cases are the set of conditions that are tested by a software tester for the developed application. The tester checks and evaluates if the built software is fulfilling all the requirements of the customer. If any bug or error is found, the tester informs the development team. The need to build test cases and perform testing is to verify that all the customer's needs are fulfilled, and no bugs are present in the software. For example: For a login module, the tester would make certain following test cases:
With these, there can be as per test cases a tester can think of, and when all the test cases are passed successfully, then only the built software is handed to the customer. To know more about Test Cases, visit https://www.javatpoint.com/test-case. How to Create Test Cases in JavaJava is an object-oriented programming language, and building a Java project means creating lots of classes, each having certain methods. To build a good project/application, we need to test the project and check whether the application is fulfilling all the requirements. In Java, classes and methods play a vital role, and therefore we need to test the classes and methods, which together known as a Unit, and there comes the need to perform the Unit testing for them. So, for performing unit testing in Java, there are several testing frameworks. One such famous framework is JUnit which is a framework for performing unit testing. In order to perform Junit testing, we need to create the test cases and test the project against each test case and determine the result. To understand how to create test cases, let's create a simple class and examine it. Let's create a class DemoClass in Eclipse where we have performed a simple addition method by following the below steps: 1) Open Eclipse IDE and create a new Maven Project by clicking on File> New > Other… and then Select a wizard dialog box will open up. Under Wizards, you will see the Maven repository, click on the dropdown, click on Maven Project, and then click on Next. A snapshot is shown below: 
2) Select 'Create a simple project', or you can also make the archetype selection also. Here, we have done a simple project, so we have selected the 'Create a simple project' option and then click on Next, as you can see in the below snapshot: 
3) Now, you can see New Maven Project dialog box will open where we have to provide the Group Id and Artifact Id by following: Group Id: It is the unique name that helps in identifying one project group from other. It follows the Java naming rule convention, and so it must be provided as com.example.javatpoint or any other. Artifact Id: It is the unique name that is given to the project we are going to create. So, for our project, we have provided the following Group Id and Artifact Id (i.e., the project name), as you can see in the below snapshot: 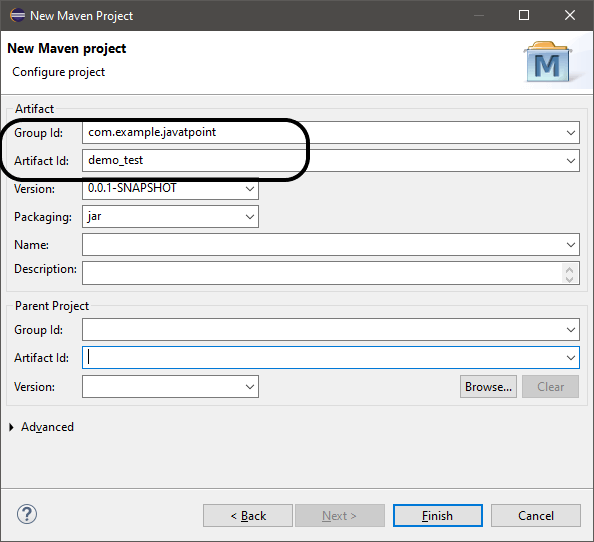
4) Click on Finish, and our Maven project will get created with certain files where the main File is the xml File that carries all the details of the created project. 5) Within the project name, you will see certain repositories, make a right-click on src/main/java repository, click on New > Class, and create a Java Class. Here, we have created java, where we have implemented a simple method of adding two numbers. The code is as follows: The code snippet is shown below: 
6) Now, we have implemented a class, and it's time to test it, and for that, we need to use Junit. So, move to the src/test/java folder and make a right-click on it. Click on New > Junit Test Case. 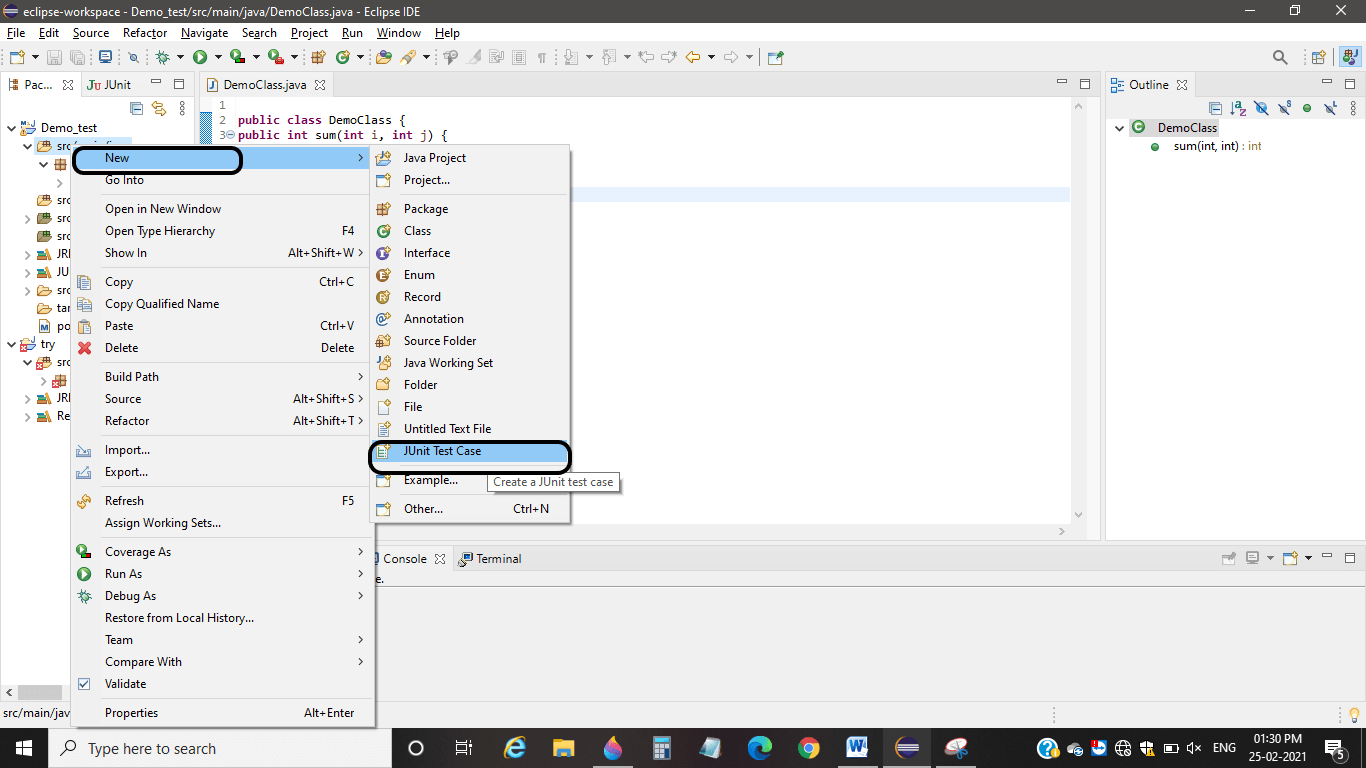
And create a JUnit test case following the naming rule conventions. 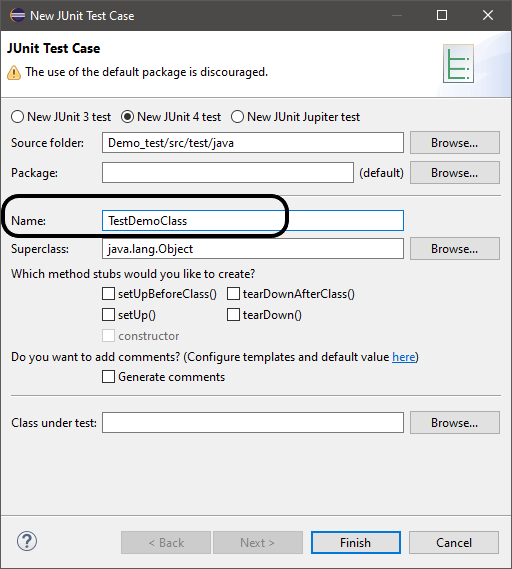
Then click on Finish. The JUnit test case will be created. Here, we have created the JUnit test case as TestDemoClass.java, and we got the following output screen covering the below code: The code snippet is shown below: 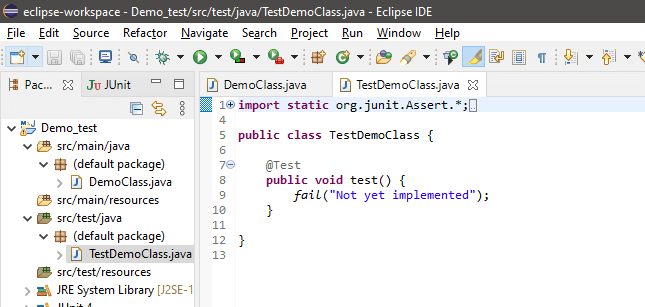
Here, we have used the New Junit 4 test. To test a class or method, we need to use the testing annotations, and here we have @Test annotation before the test () method. Note: We have taken a sample project that can be tested manually, but when doing a big project, it may consist of numerous classes with numerous methods. To check and test all those manually might not be flexible, and change in one class will definitely affect the other classes. Thus, there comes the role of automation testing, i.e., Junit testing.7) Create an object of DemoClass within the TestDemoClass and we need to test the sum method and for that we have created the following test case code: The code snippet is shown below: 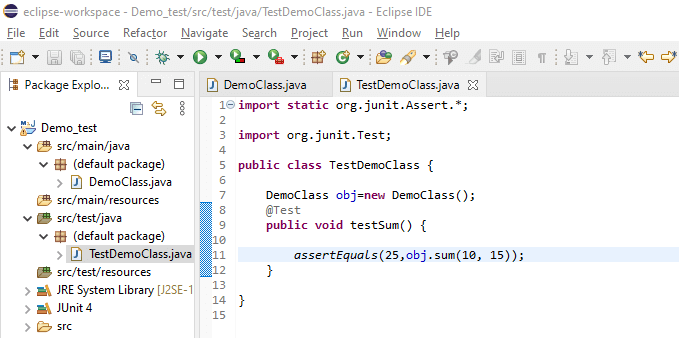
8) The use of the assertEquals(expectedVal, calculatedVal) method is used for determining the status of a test case, whether failed or passed. To run/execute a test case, right-click on the code, then Run As > Junit Test. 
9) We have experimented with the following test cases: Test Case 1: We have created a test case where we have tested whether on providing two values, we get the respective sum or not. If not, the test case will be failed, but for the above values, we got the following output: 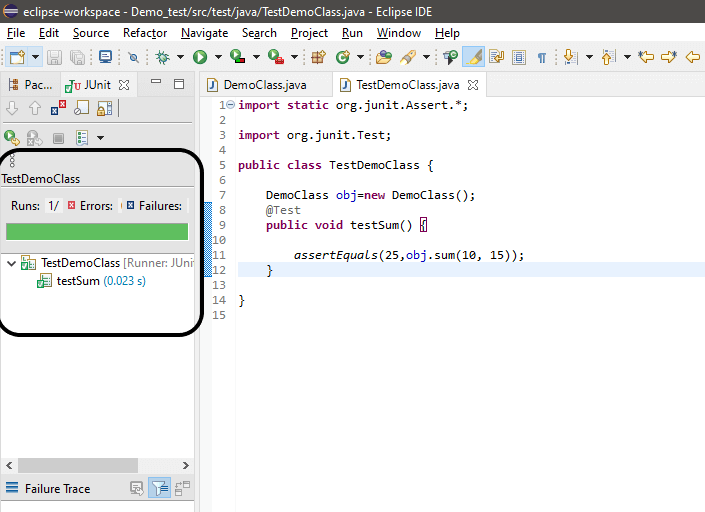
Hence, our test case passed successfully, which is indicated by the green symbol. Test Case 2: If we pass the same code for the calculated parameters (10, 15) but the expected value as 100 and have the following values to test, we get our test case failed. The code is as: The code snippet is shown below: 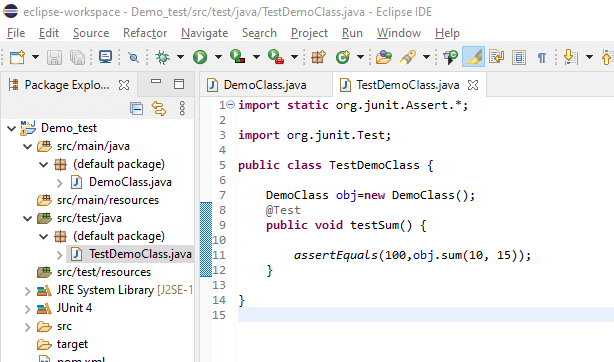
So, we got our test case failed, which means our code is correct, and it is indicated by the Red signal, as you can see in the below snippet: 
Test Case 3: If we pass a negative and a positive value for the calculated parameters as (-5, 8), and expected parameter value as 3, we get our test case passed successfully, as you can see in the below snippet: 
However, if we pass (5, -8) as calculated value and expected value as 3, the test case would fail definitely. Test Case 4: If we pass both negative values for the calculated parameter as (-10,-15) and expected parameter value as -25, we get our test case passed, as you can see in the below snippet: 
However, if we pass the expected value as 25, the test case will definitely fail. Let's see in the below snippet: 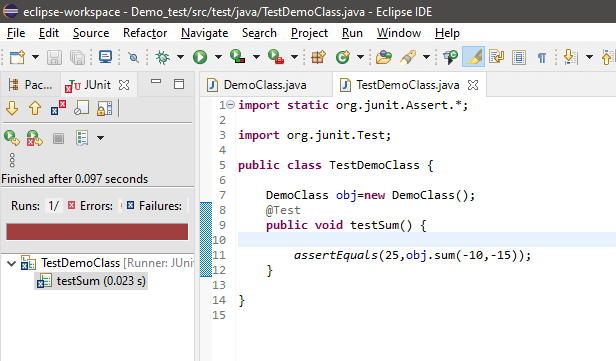
In this way, we can think of and create the test cases as per our thinking, judging, and testing ability. Apart from the example explained above, a software tester works with very large applications to test them and create certain test cases and test them. To record all the test cases, they make use of the excel sheet and examine whether their created test cases meet the customer requirements or are having some bugs. A software tester creates and writes the test cases by thinking self as a normal user, and so examine the application/software.
Next TopicJava 32-Bit Download For Windows 10
|
 For Videos Join Our Youtube Channel: Join Now
Feedback
- Send your Feedback to [email protected]
Help Others, Please Share


