| |

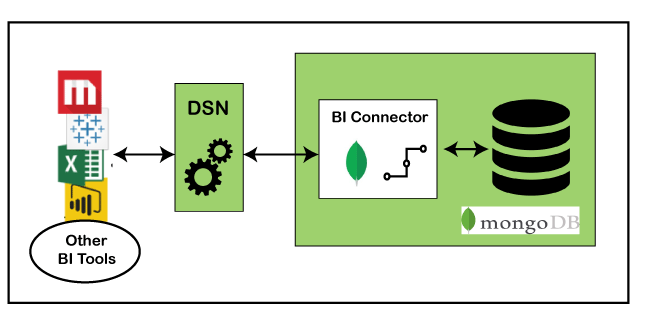
MongoDB BI connectorThe MongoDB Business Intelligence connector allows us to create queries with SQL. Using the existing relational BI tools such as Tableau, MicroStrategy, and Qlik, we can visualize and report on our MongoDB Enterprise data. Between a mongod or mongos reporting tool and instance, the BI connector acts as a layer that is used to translate the queries and data. It stores no SQL data and serves to bridge our MongoDB cluster with BI tools. Components of the BI System
Below are the few essential points that will describe the possible configuration for a BI system.
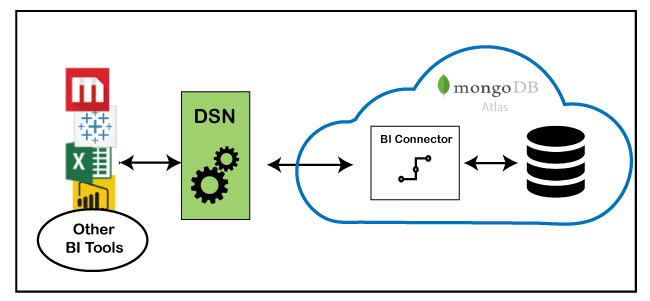
Installing BI ConnectorWe can install and host the MongoDB BI connector in MongoDB Atlas. Installation on WindowsStep 1: First, you have to download the MongoDB connector for BI from https://www.mongodb.com/download-center/bi-connector 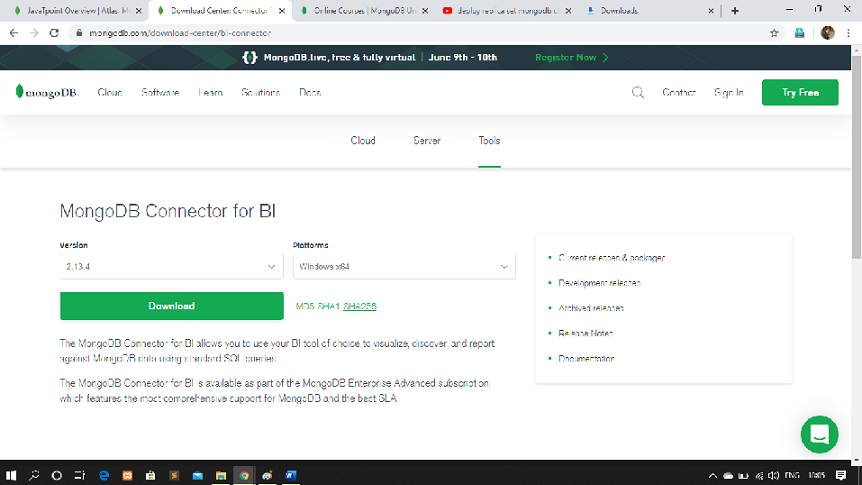
Step 2: Now, Run the downloaded .msi file of MongoDB BI connector. 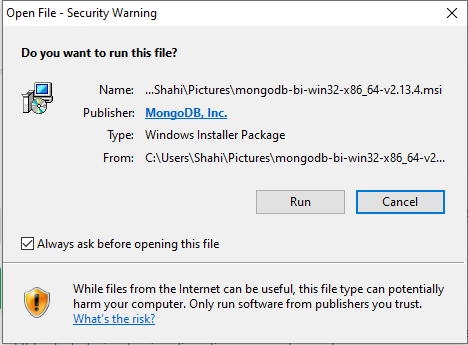
Step 3: Follow the installation prompt to install the files. 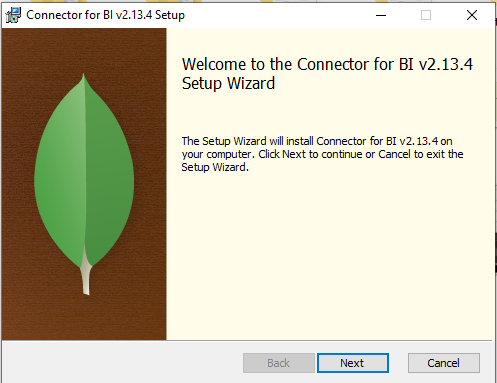
You can now run the BI connector. We will use the mongosqld program that is used to connect our BI tool with a MongoDB instance. It requires a data schema that maps our MongoDB collections and databases. It generates a data schema and holds in the memory You have to run mongosqld as a hosted service with MongoDB Atlas/ command line/ or system service. After the BI connector is installed and running, you can begin using it with your preferred BI tool Creating a System DSNA system DSN is a saved configuration that defines a database connection to be used by an ODBC driver. You have to follow the steps given below to set-up the DSN for the BI connector's mongosqld process. You can configure a wide range of SQL clients and BI tools when you create the DSN to use the DSN and import data from MongoDB. Step 1: Install the BI connector and configure it to establish a connection to your replica set. Step 2: Now, download and install the Visual C++ Step 3: you have to download and install the MongoDB ODBC Driver for BI Connector. Step 4: After the successful installation, start the Microsoft ODBC Data Source program. Step 5: Now, select the System DSN tab in the ODBC data source program. Step 6: After that, click on the Add button on the current window. 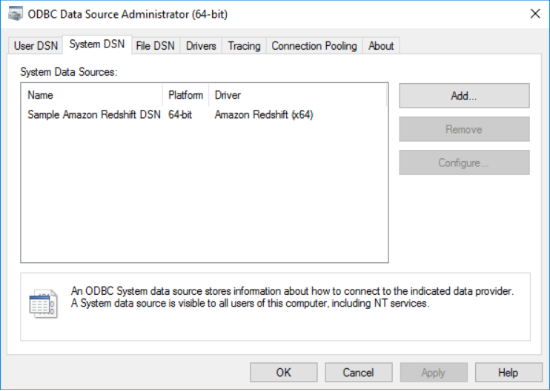
Step 7: From the available list of drivers, select a MongoDB ODBC driver. Step 8: Now, it will ask you to fill some details, then fill in all the necessary information about the form field. Step 9: If you have authentication enabled, then fill in the authentication form on the next window. 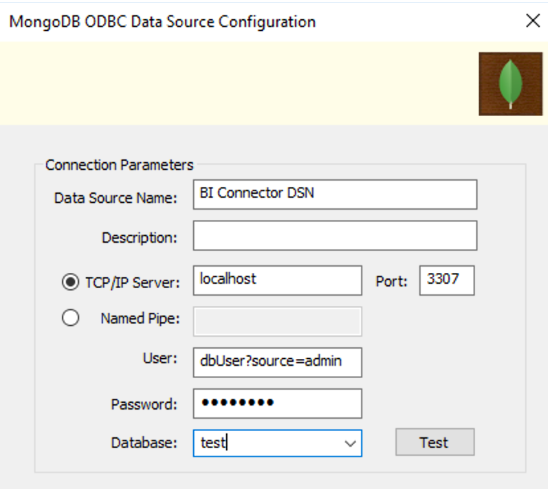
Step 10: If you have TLS/SSL is enabled, then you have to fill the TLS/SSL form field. 
Step 11: Finally, click on the Test button to test the ODBC connection. Connecting BI Tools with the connectorWe will now learn to connect some of the Business Intelligence tools with the BI connector. We can connect using any of the BI tools given below. MicroStrategyStep 1: First of all, you have to create a 64-bit system Data Source Name Step 2: Install the MongoDB ODBC driver for window/mac Step 3: Download and install the desktop application for Microstrategy from https://www.microstrategy.com/us/get-started/desktop Step 4: After the successful installation, Run Microstrategy Desktop application by double-clicking on the icon. Step 5: Now, on the Home window of the Microstrategy application, select the New Dossier from the file menu to create a new dossier. Step 6: Now you have to add data by clicking the New Data button in the Datasets panel Step 7: After that, to add the database, click on the database icon in the Data Sources window. 
Step 8: Then, from the pop-up window, click on the Select Tables and then on the Next button. Step 9: Now, you can add a data source by clicking on the plus icon on the upper left corner of the window. 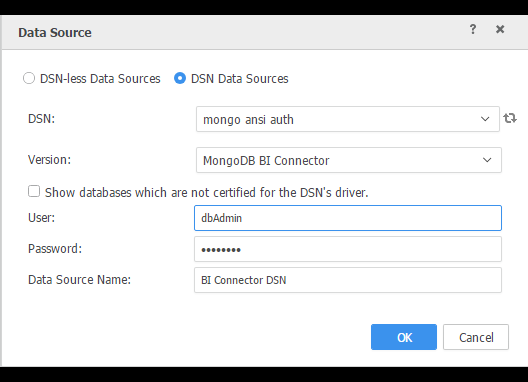
Step 10: Click on the DSN Data Sources radio button and then your DSN from the DSN drop-down menu. Step 11: Now, from the Version drop-down menu, select the MongoDB BI Connector. Step 12: After that, you need to enter your mongosqld username & password and give the data source a name then clicks on OK. Step 13: Now, you can see in the Data Source panel your newly created data source. You can now select the database you want to work with. Step 14: You can drag the collections you'd like to work with on the right-side panel and click on the Finish button. Step 15: You can now build the visualization that suits your need and select the data access mode. Connecting to Tableau DesktopStep 1: Install the Tableau desktop version 10.3 or later after downloading. Step 2: Now, run the Atlas deployment and the mongosqld instance with authentication enabled. Step 3: After this, run the Windows installer package after downloading the MongoDB ODBC driver for the BI Connector and. Step 4: Now, you need a DSN configured to connect Tableau to the BI Connector securely. Step 5: Start Microsoft ODBC Data Sources program Step 6: Select the System DSN tab Step 7: Click on the Add button 
Step 8: Now, select the MongoDB ODBC driver from the list of available drivers and fill in the necessary form fields. Step 9: After that, you need to fill the authentication form fields. Step 10: Now, test the connection of ODBC by clicking on the test button. Step 11: Run the Tableau Desktop application. Step 12: Now connect using Tableau, in the left-side navigation under to a server à more à Click ODBC Step 13: From the ODBC dialogue box, select your DSN from the drop-down and click Connect. Step 14: Now, once the connection test completes, Sign in to it. Connecting to PowerBI desktopPower BI is a collection of the app, services, and connectors that work together to convert our independent source of data into interactive insights. It will be an Excel collection of cloud/on-premises hybrid data warehouses or spreadsheets. You can connect to your data sources easily using Power BI. Step 1: Go to https://powerbi.microsoft.com/en-us/get-started/ and sign up for Power BI. Then download the desktop application of Power BI. Step 2: After the successful installation of the Power BI desktop, start it. Step 3: Now, on the home page, you will find the Get Data option on the toolbar. Click on it. 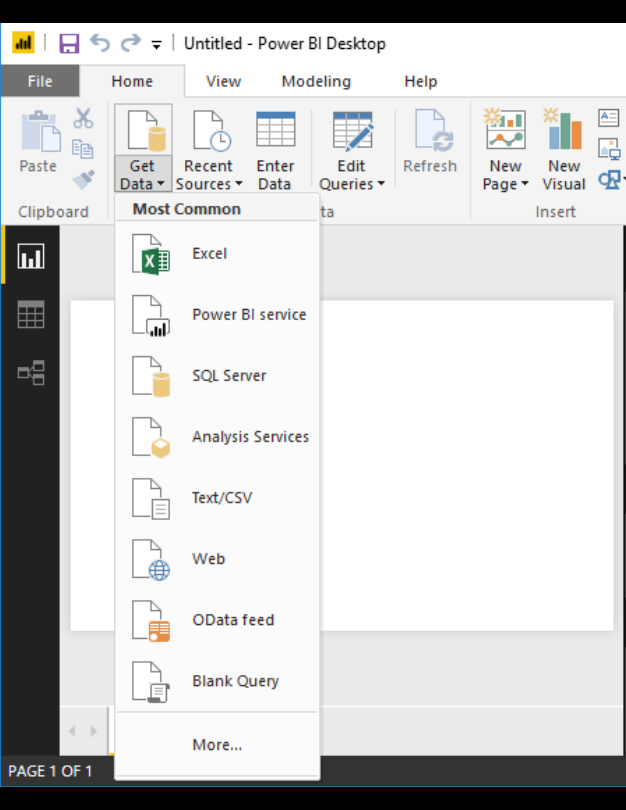
Step 4: Then click on More options. Step 5: After that, a list will appear, you can select the ODBC from the list of data sources and click on connect. 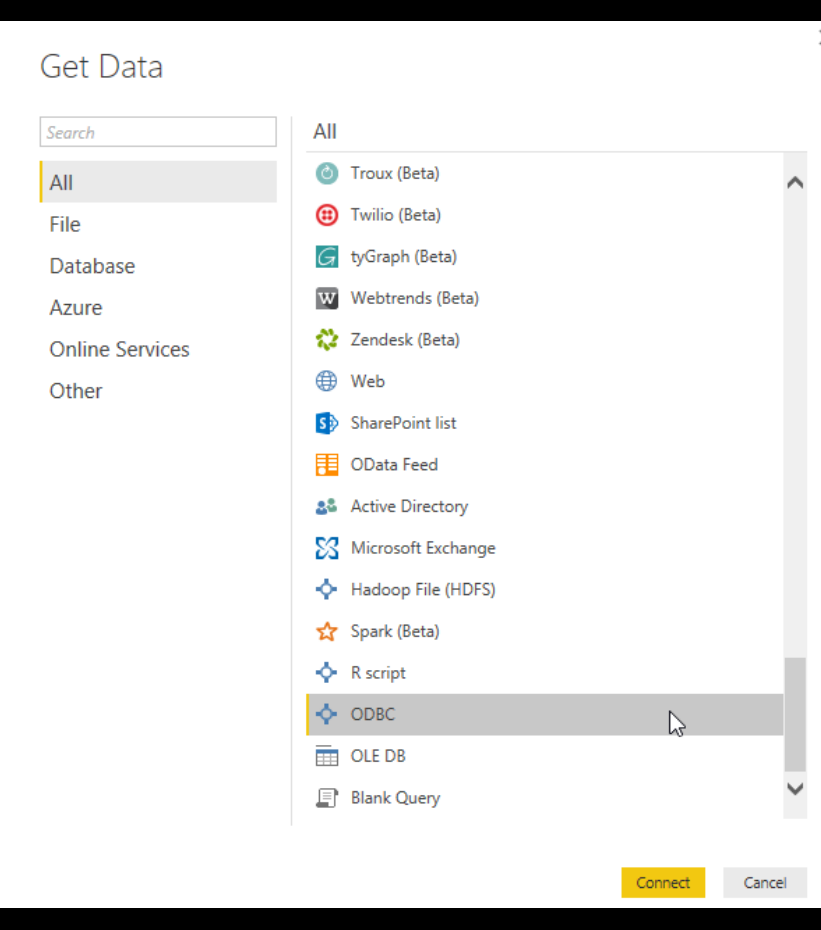
Step 6: Now, you have to select the ODBC data source name from the list and click on the OK button. 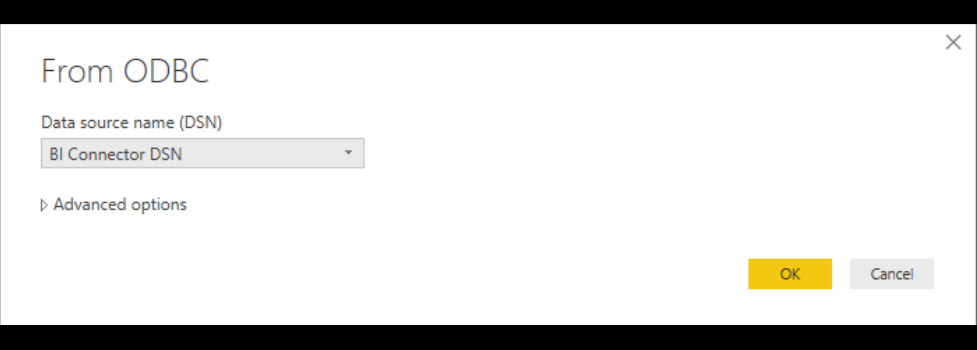
Step 7: Now you have the list of databases on the Power BI Navigator. Select the collection and database you want to work with. 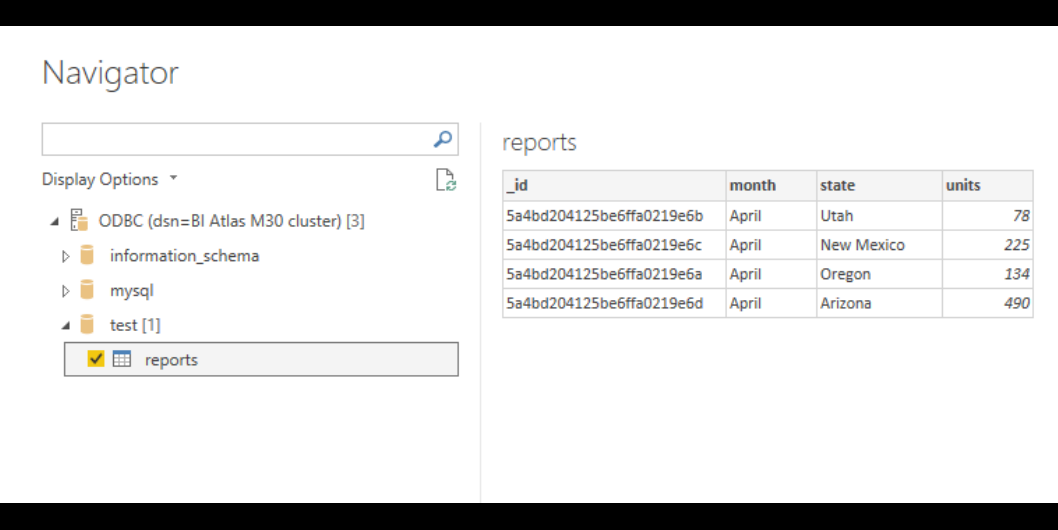
Step 8: Finally, click on load when your selection is complete. Step 9: Now, you can begin working with Power BI. Connecting to Qlik SenseQlik sense is a sophisticated AI, scalable multi-cloud architecture and analytic engine used to empower everyone in any organization to make the better decision daily and creating a truly data-driven enterprise. Step 1: Download and install the desktop version of Qlik sense from https://www.qlik.com/us/trial/download-qlik-sense-desktop. Step 2: After the successful installation, start the application. Step 3: Click on Create a New App button. Step 4: Fill in a name for your application and open it. Step 5: Click on the Add Data button. Step 6: Now, from the list of data sources, select ODBC. Step 7: In the Create New Connection window, select the ODBC data source you created in Step 3. 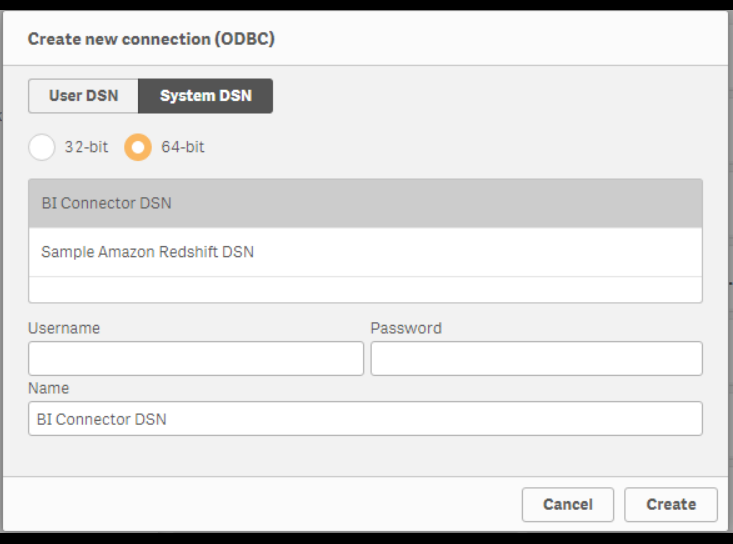
Step 8: All the databases and tables that are listed in your schema file should appear in your app's overview. Connecting to Microsoft ExcelStep 1: Make sure you have running mongosqld instance. Step 2: Start Microsoft Excel if you already have in your PC, or you can download it from Microsoft. Step 3: Now, select the Data tab to open the Data toolbar. Step 4: On the left side of the toolbar, click on the Get External Data. Step 5: Now, click on from other Sources. 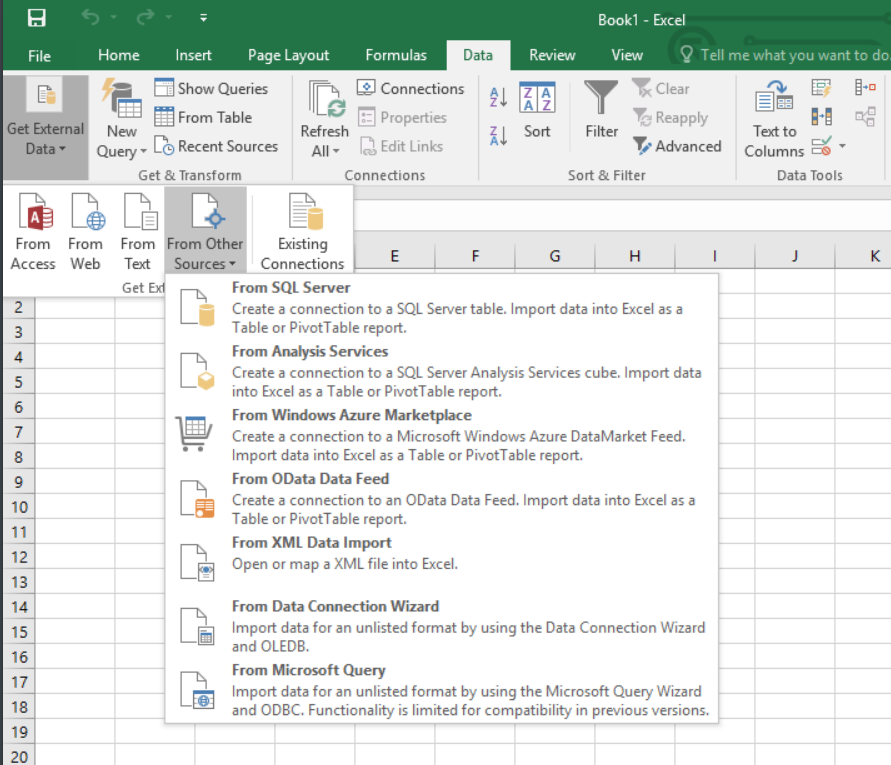
Step 6: After that, select the From Data Connection Wizard option. Step 7: Now, select the ODBC DSN from the list of data sources option and click Next. 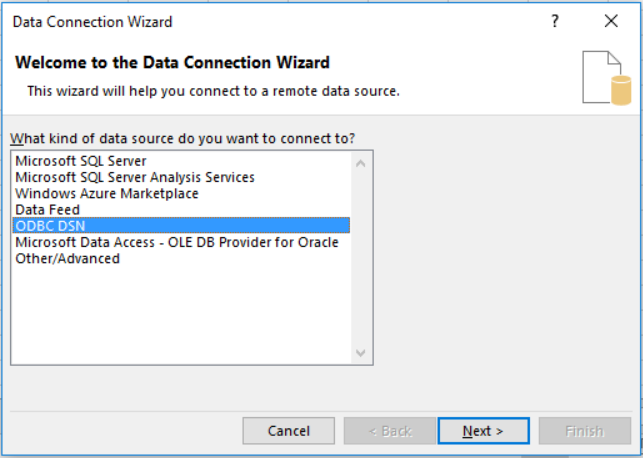
Step 8: Select your DSN that is used to connect to your BI Connector instance and Click Next. 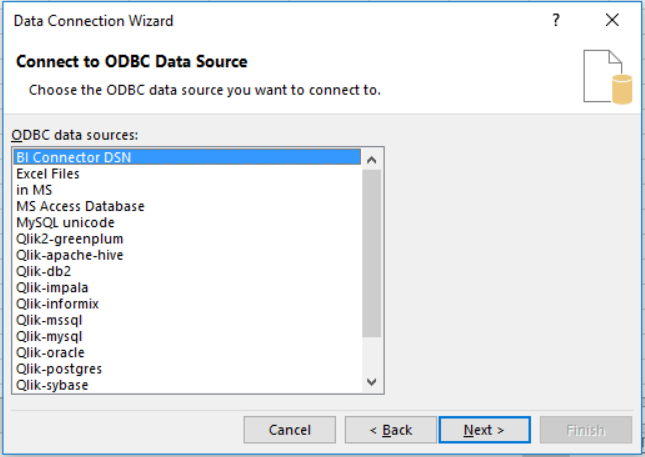
Step 9: When you click on Next, a drop-down menu will appear, then select a database and collection from the list. Click on next when you are finished 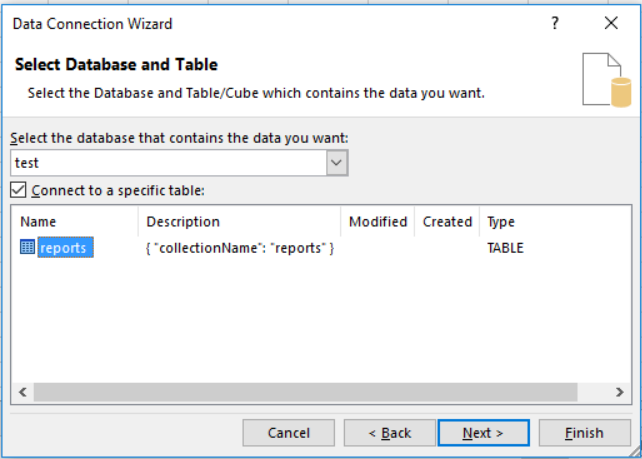
Step 10: Now, click on the finish after selecting the data connection file. Step 11: Finally Click on OK on the final dialogue window where you can specify the format for your worksheet
Next TopicMongoDB Command
|
 For Videos Join Our Youtube Channel: Join Now
Feedback
- Send your Feedback to [email protected]
Help Others, Please Share


