| |

Create Microsoft FORMS in SharePointMicrosoft forms allow you to create, add, and view forms result in your SharePoint Online page. It is mainly used to provide the best way to store ideas and feedback. There are the following two methods to create the Microsoft FORMS in SharePoint - Method 1 - Using the Web partStep 1: Go to the Home page of your site, click on the +New, select page from the drop-down menu. Step 2: Enter the name of the page that you want to create. Step 3: Hover the mouse in the existing page, you will see a line with circled +, as shown below: 
Step 4: Click on the Circled + to see the list of web parts. Click on the Microsoft Forms, or you can directly type Microsoft Forms in the search box. 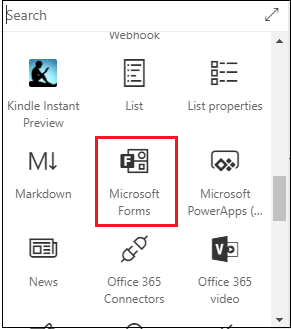
Step 5: The following window appears on the screen. To create a new form, click on the New form. 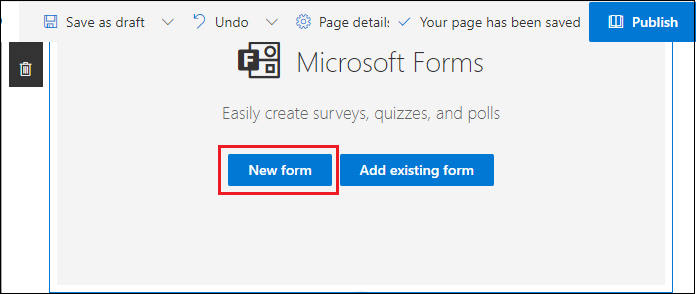
Step 6: You will see a Microsoft Forms window at the right pane. Enterthe name for the New form, and click on the Create. 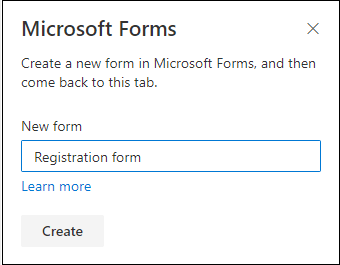
Step 7: The below screenshot shows that a Registration form's layout is created, to enter the text in registration form click on the + Add new. 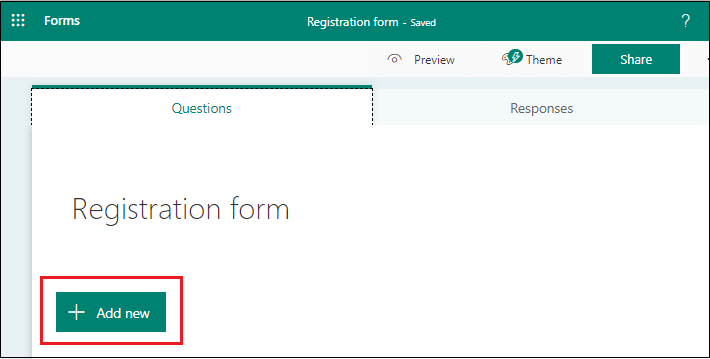
Step 8: Once you click on the + Add new, some Recommended from Microsoft Forms templates appear on the screen. Select the templates according to your requirement and click on the Add selected, as shown in the below screenshot. 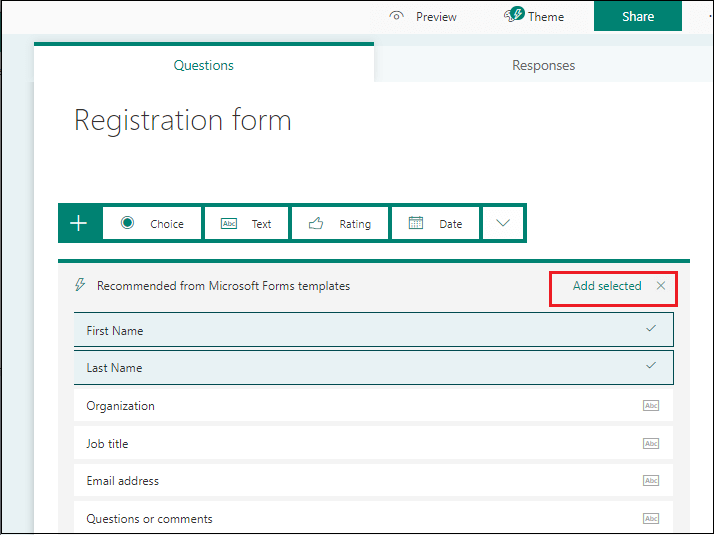
Step 9: To add template according to your requirement, click on the + Add new, the following tab appears, in which click on the Text. 
Step 10: Enter the text, according to your requirements. Once your form is completed, click on the Preview at the top of the screen. Add the ThemeSharePoint form theme is used to make your form more attractive. To change the theme, click on Theme at the top of the screen. A list of themes appears on the screen. Select theme according to your requirement and click on the Preview. 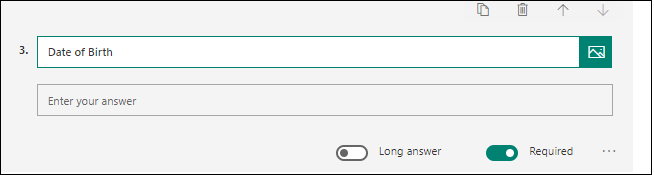
The below screenshot shows that Theme is added in the form. 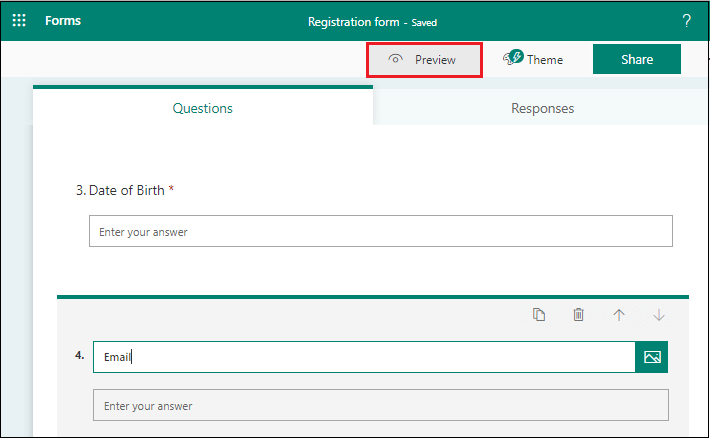
Method 2 - Using Microsoft FormsThere are the following steps to create a form using Office 365. Step 1: Type and copy-paste the www.offfice.com in any browser. A home page of Office 365 appears on the screen. Click on the All apps. 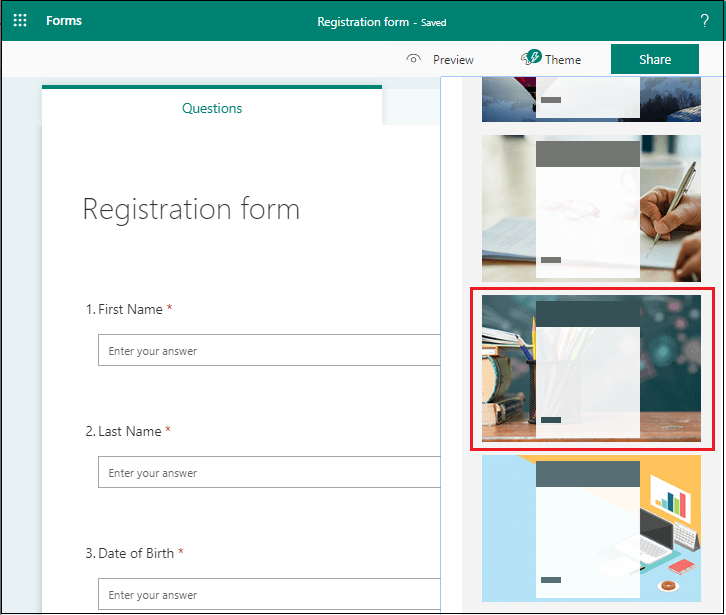
Step 2: All Apps window appears on the screen, in which click on the Forms. 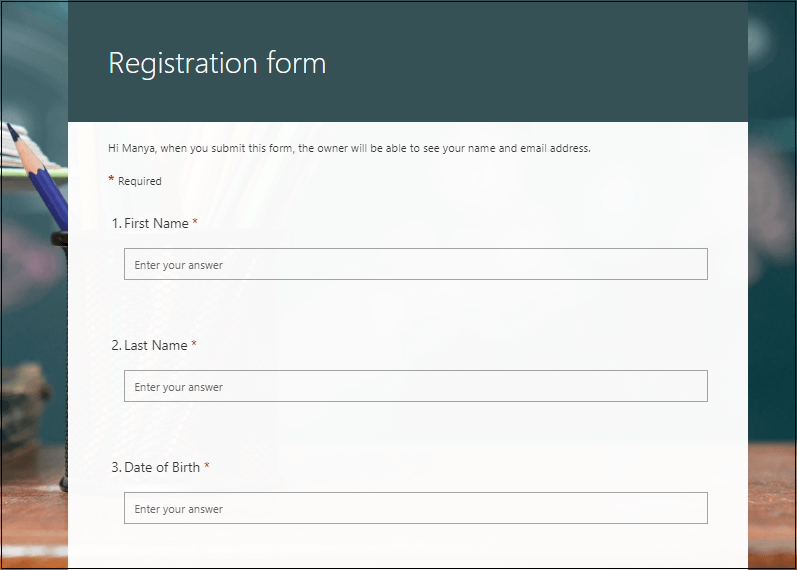
Step 3: My forms window appears with the two options: New Form and New Quiz. Select option according to your requirement. Note: In our case, we have selected Quiz.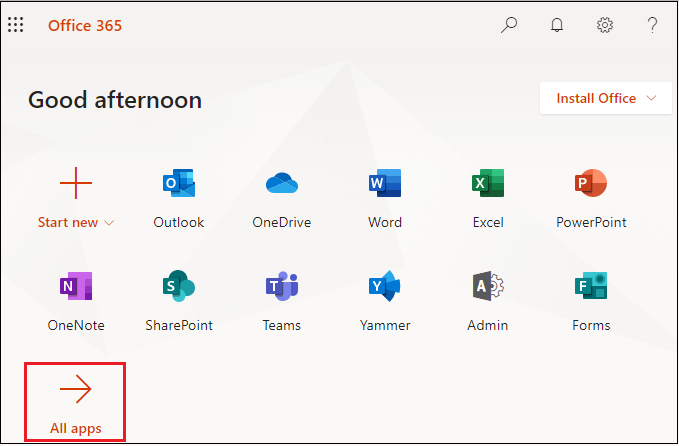
Step 4: The following page appears on the screen, in which enter the title and description for your quiz. Click on the + Add new. 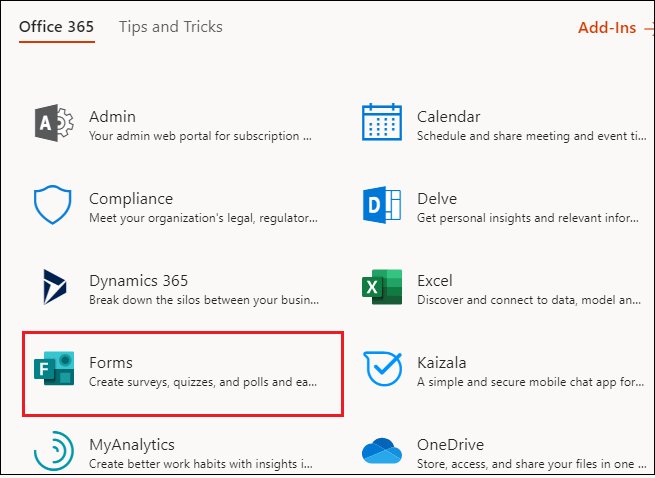
Step 5: Once you click on the +Add new, the following tab appears, to create the quiz, click on the Choice. 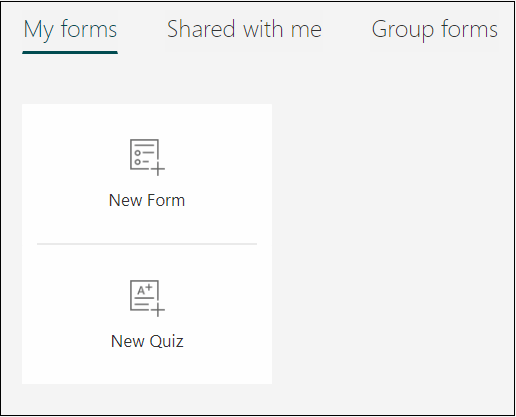
Step 6: Enter the question with the required options. 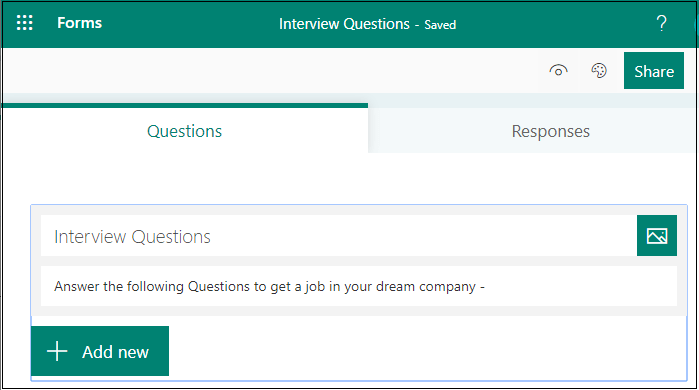
For the correct answer - Place the cursor on the correct answer. Three icons appear on the screen, in which click on thecorrect answericon, as shown in the below screenshot. 
For the incorrect answer - Place the cursor on the incorrect answer. Three icons appear on the screen, click on theDisplay a message to respondents who select this answericon, as shown in the below screenshot. 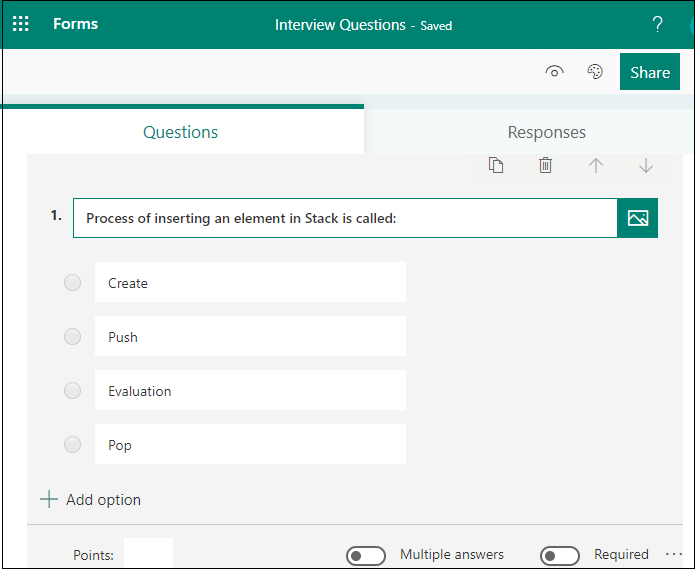
Add the message like “Correct answer is Push.” 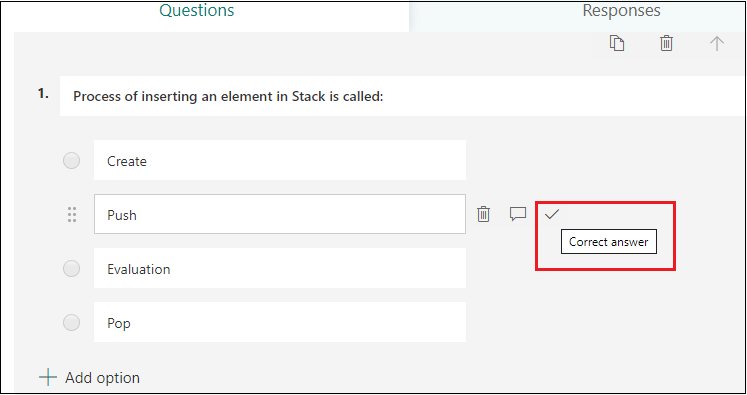
Similarly, add this text to all incorrect answers. Step 7: Once you add all questions in the quiz, click on the Preview at the top of the screen. 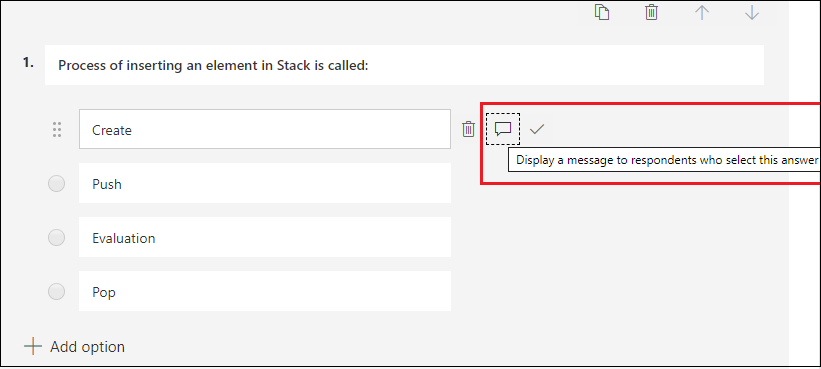
Now, you can solve the quiz. 
After completing the quiz, click submit at the bottom of the screen. 
After clicking on the Submit, the following Thanks page appears on the screen. To check your result, click on the View result, as shown in the below screenshot. 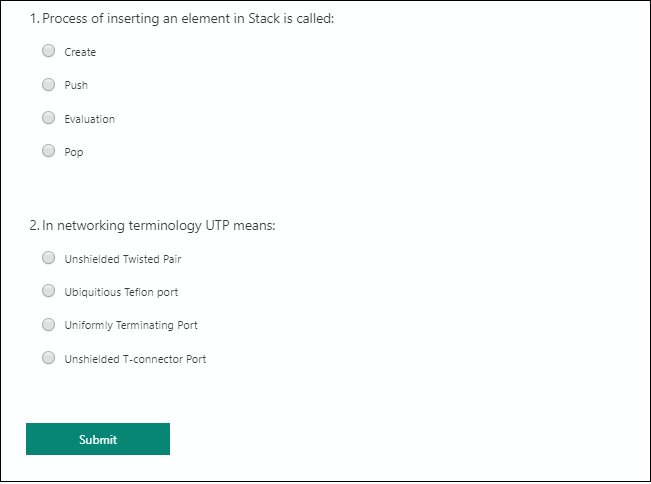
The below screenshot shows the result of your quiz. 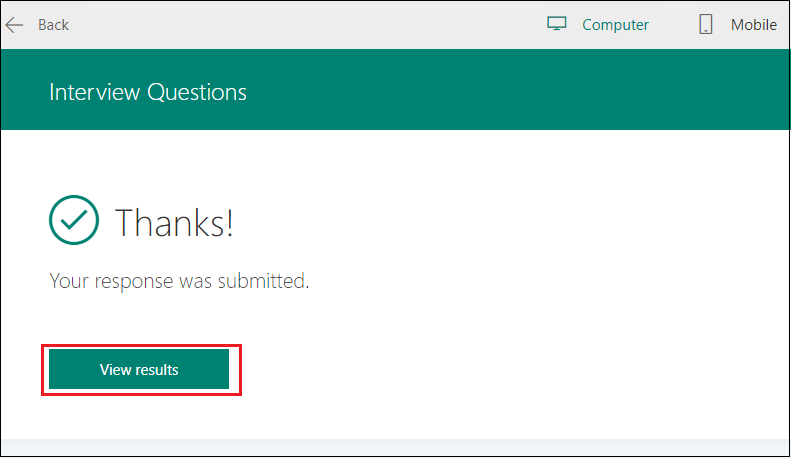
To see how quiz looks like in a mobile interface, click on the Mobile icon at the top of the screen. 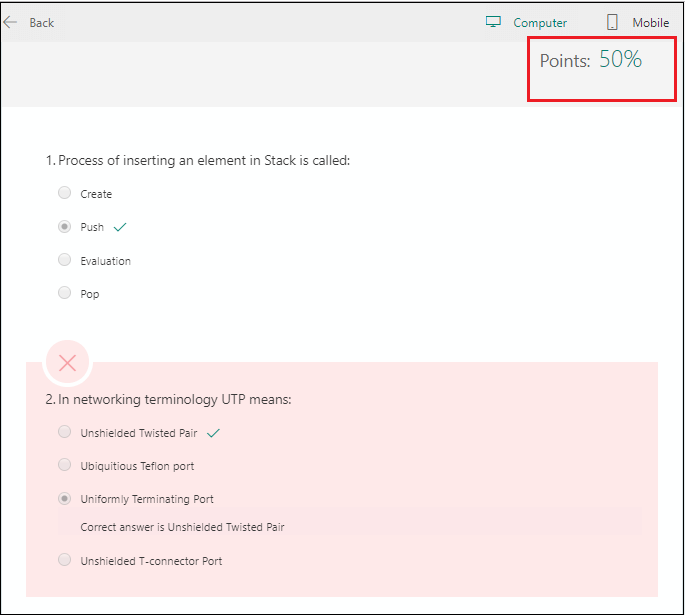
Change the Theme of quizTo change the theme, go to the quiz page and click on theThemeat the top right corner of the screen. A list of pre-defined themes appears on the screen. Click on the+icon to add the new Theme. 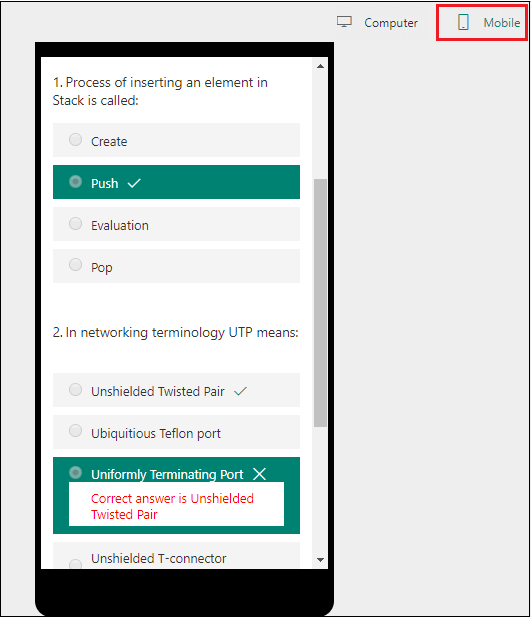
The following window appears on the screen, enter the name of the image in the search box, click on the Search. A list of images appears on the screen, select image according to your requirement, and click onAdd. 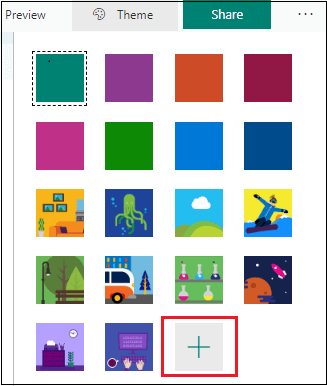
The following screenshot shows that theme is added to the quiz. 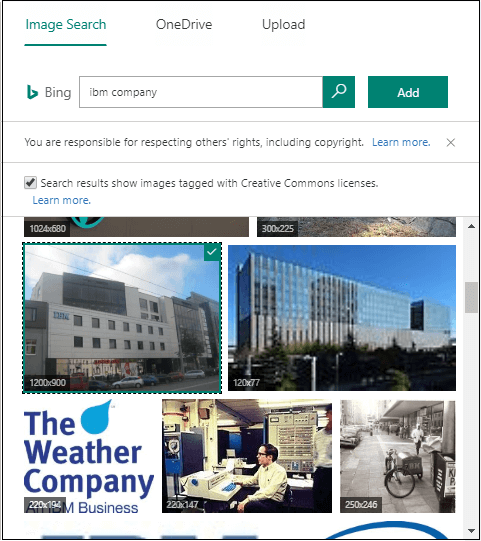
Share the Quiz/FormThere are the following ways to share the quiz - 1. Using link If you do not have the email address of the people whom you want to send the form or quiz, then the link is the best way to send the quiz/form. Step 1: Open the form or quiz that you want to share. Step 2: Click on the Share at the top right corner of the screen. 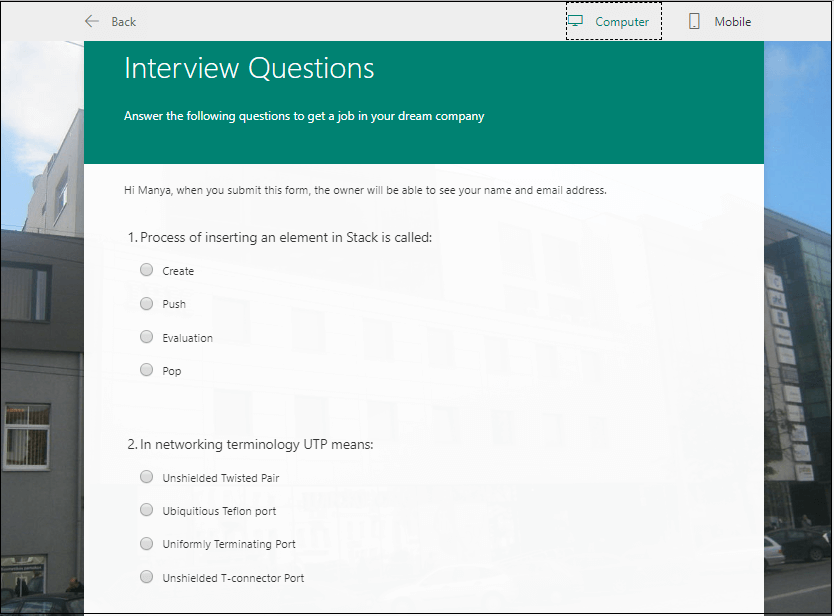
Step 3: By default, only people within the organization can submit their responses to the form or quiz. If you want to allow everyone to submit their responses, then click on the Anyone with the link can respond from the drop-down menu. Click on the link and then click on Copy, followed by the text box that displays a quiz URL. 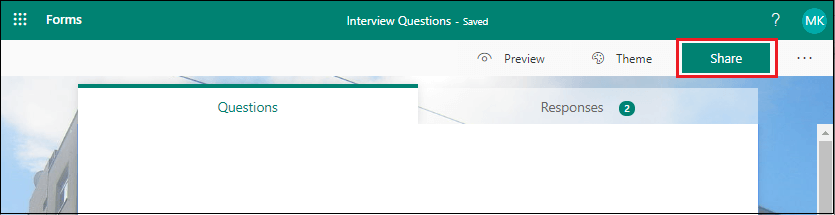
Now, you can copy-paste this link where you want to access it. 
2. Using QR code To send the form or quiz using QR code, click on the QR button to view a QR code. 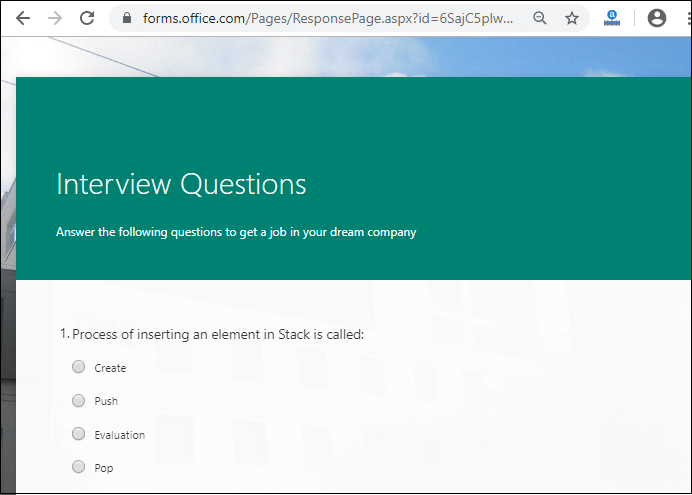
Click on the Download and paste this link where you can access it with a QR code scanner, such as a mobile device. 3. Using Embed in a webpage Click on the Embed button. Click on the Copy. 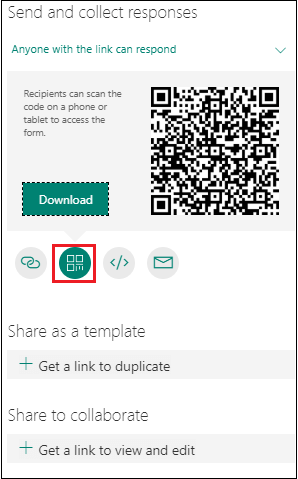
Type or paste this code into the web page to embed your form within the document. Click on the add a web part where you want to add it. 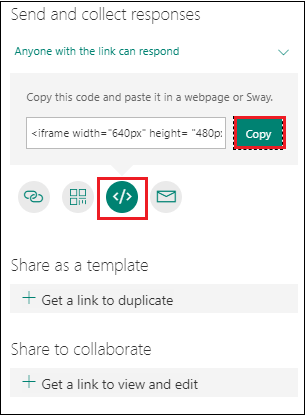
Once you click on the Microsoft Forms, the following window appears on the screen. Click on the Add existing form. 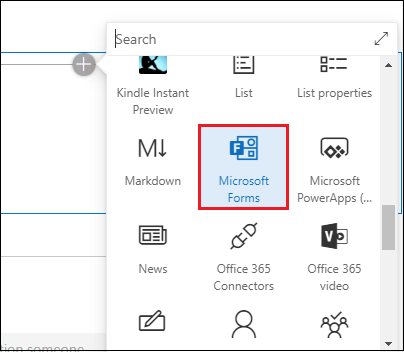
Paste the page URL in the right pane. Select collect responses and click on the OK. 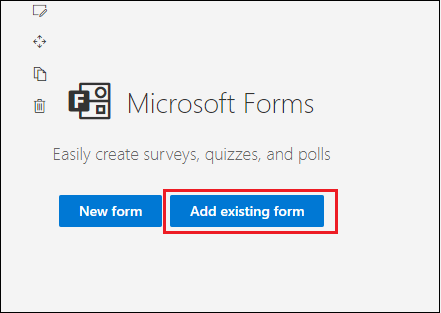
The below screenshot shows that the quiz is added on the web page. 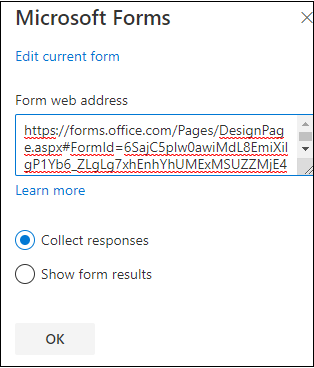
4. Using email Click on the email button. 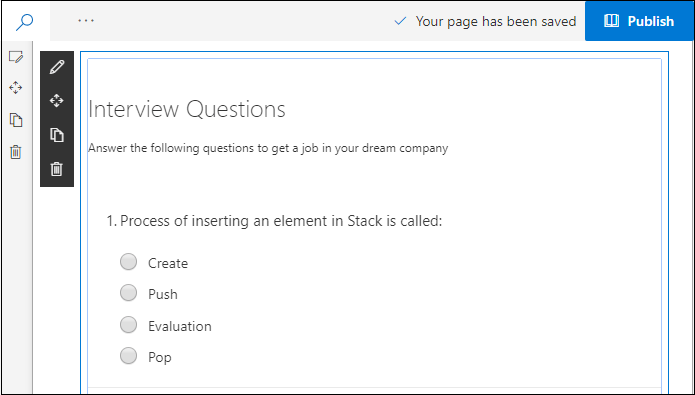
The default email editing appears, enter the email address of the people who viewed your form and click on the Send. 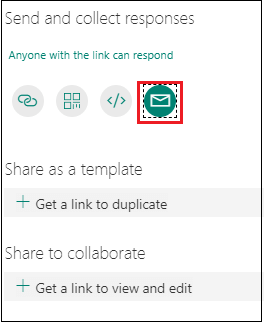
View ResponsesAfter sharing the quiz, you can also view the responses. To view the response, go to the quiz page and click on the response at the top of the screen. 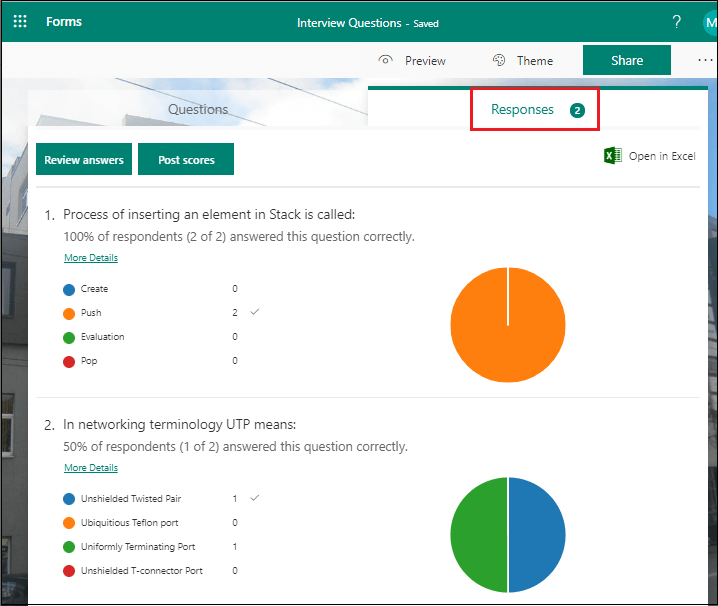
Analyze quiz results in ExcelTo analyze quiz results in Excel, click on the Open in Excel option. 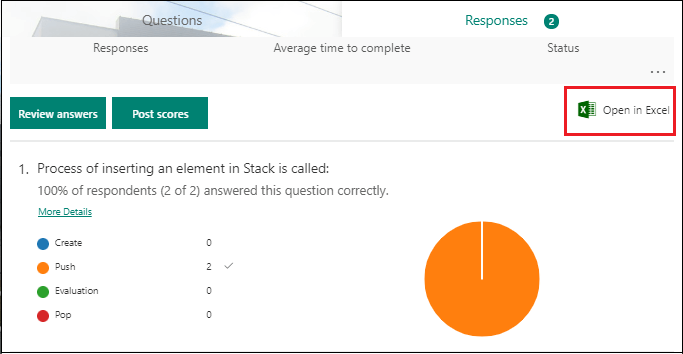
The below screenshot shows that the quiz result is analyzed in excel form. 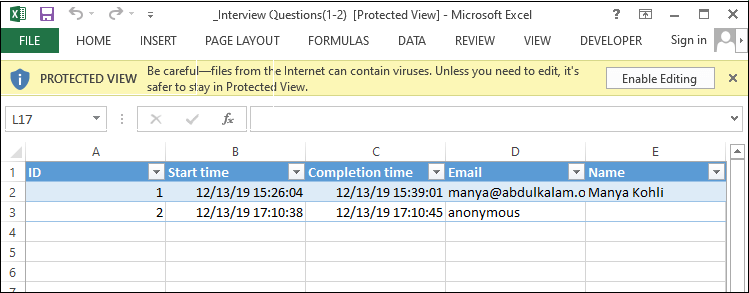
Next TopicSharePoint Workflow
|
 For Videos Join Our Youtube Channel: Join Now
Feedback
- Send your Feedback to [email protected]
Help Others, Please Share


